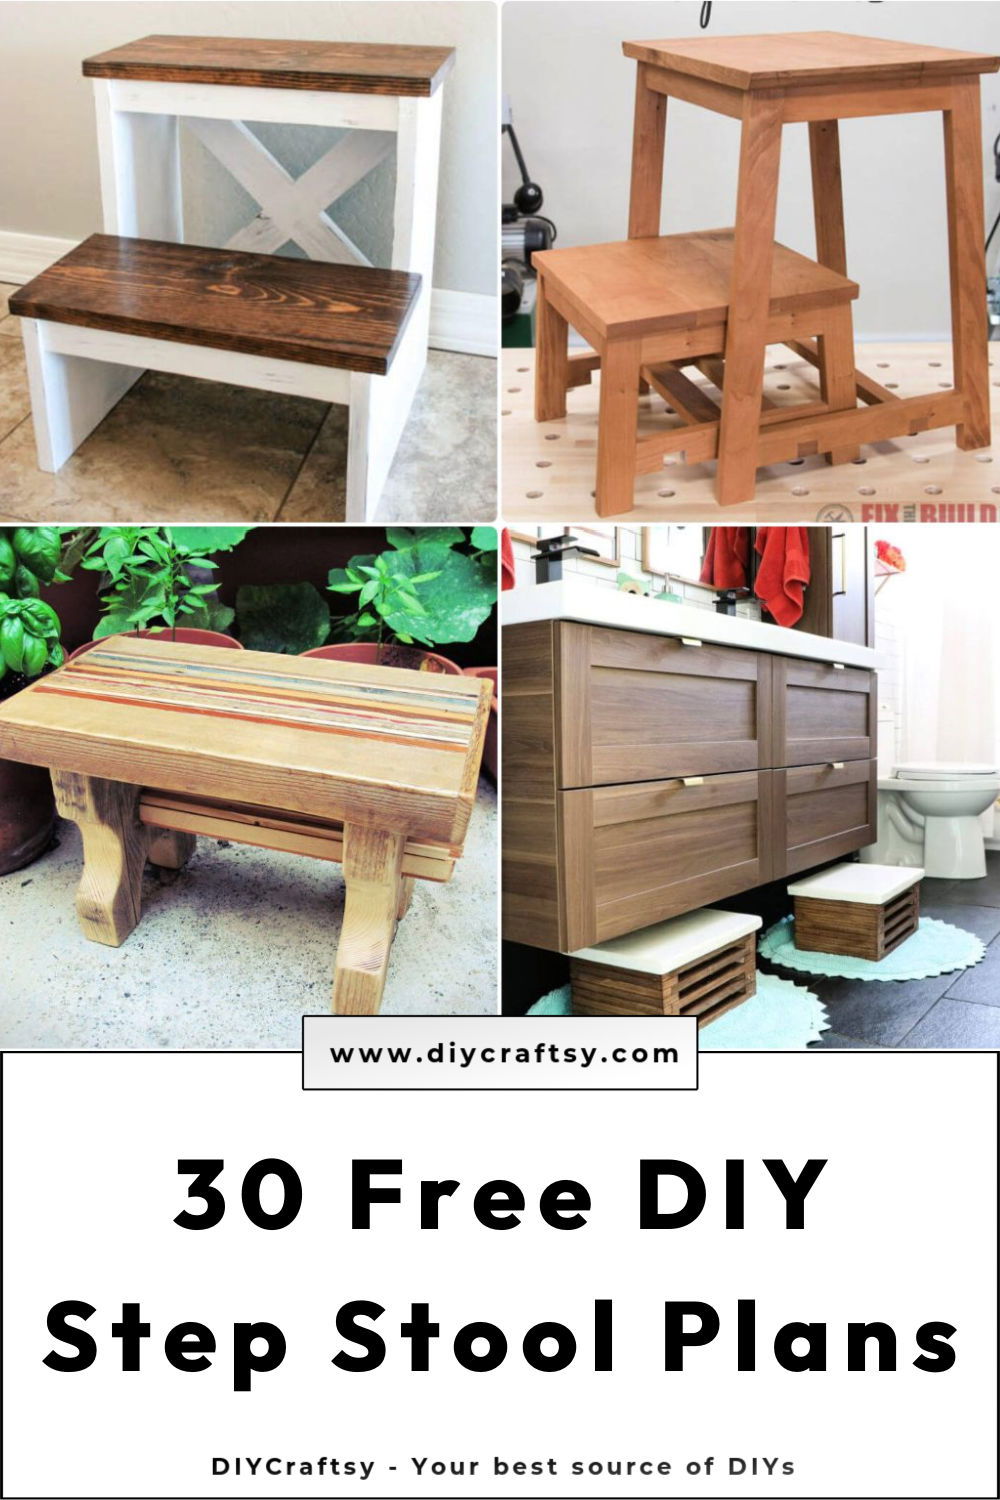
Let's build a sturdy DIY step stool for reaching new heights. Discover 30 free DIY step stool plans for all your needs. From selecting colors and finishes to adding patterns and textures, you can make your step stool unique to you. Safety precautions are also important when building a step stool, so we provide tips on personal protective equipment, workspace safety, and more.
Looking to take your DIY skills to the next level? Explore advanced techniques like joinery techniques, wood finishing, decorative carving, and adding inlays to your step stool. To keep your creation looking its best, don't forget maintenance tips such as regular inspection, cleaning, and protecting the finish.
Have questions? Check out our FAQs for answers on wood selection, stability, tools needed, eco-friendly options, and more. Start crafting your perfect step stool today!
How to Make a Step Stool - Step by Step Guide
Learn how to make a step stool with this step-by-step guide below:
Materials and Tools
Before starting, ensure you have all necessary materials and tools. You will need:
- Cherry hardwood or any preferred wood
- Yellow PVA glue
- Dowels (3/8 inch)
- Figure 8 fasteners for attaching the tops
- Oil-based wiping varnish for the finish
- Tools: Table saw, Jointer, Planer, Clamps, Miter saw, Dado blade set, Dowel jig, Drill (with drill and Forstner bits), Pocket hole jig, Sander
Step by Step Instructions
Step 1: Preparing the Wood
If using rough lumber, start by cutting your boards to a rough size to make it easier to remove any twists. Use a jointer to face joint one side, then plane them to a uniform thickness, around 3/4 inch. If not using rough lumber, ensure your wood is already surfaced and ready.
Step 2: Making the Stool Tops
a. Cut the wood into sections for the tops of the stools.
b. Use the jointer to create a straight edge on your boards, ensuring they're at a 90-degree angle to the planed face.
c. Glue the boards together to form each top, clamping them until the glue dries.
Step 3: Forming Stool Bases
a. Plane your remaining boards to ensure they're smooth and uniform.
b. Rip the boards to width for the legs and rails, as per your design.
c. Cut the legs and rails, adding a 5-degree splay to the leg ends for a stable base.
d. Assemble by cutting dados for the stretchers on the lower rails, ensuring tight fits.
Step 4: Assembly and Joinery
a. Employ a dowel joint technique for robust side assemblies. Alternatively, pocket screws can be used, especially if you plan to paint the stools.
b. Repeat doweling for all four side assemblies, ensuring each joint aligns properly.
Step 5: Constructing Aprons
a. For the apron connections, drill holes for the dowels at the ends of the aprons, then use dowel center points to transfer these marks to the sides for precise alignment.
b. Glue and clamp the aprons to the side, using right-angle blocks to maintain squareness.
Step 6: Attaching the Tops
a. Once the bases are assembled and the tops are sized and finished, use figure 8 fasteners to attach the tops to the bases. This allows for wood expansion and contraction while keeping the tops secure.
Step 7: Finishing Touches
a. Sand through 220 grit before finishing.
b. Apply four to five coats of oil-based wiping varnish for a rich finish that enhances the wood grain.
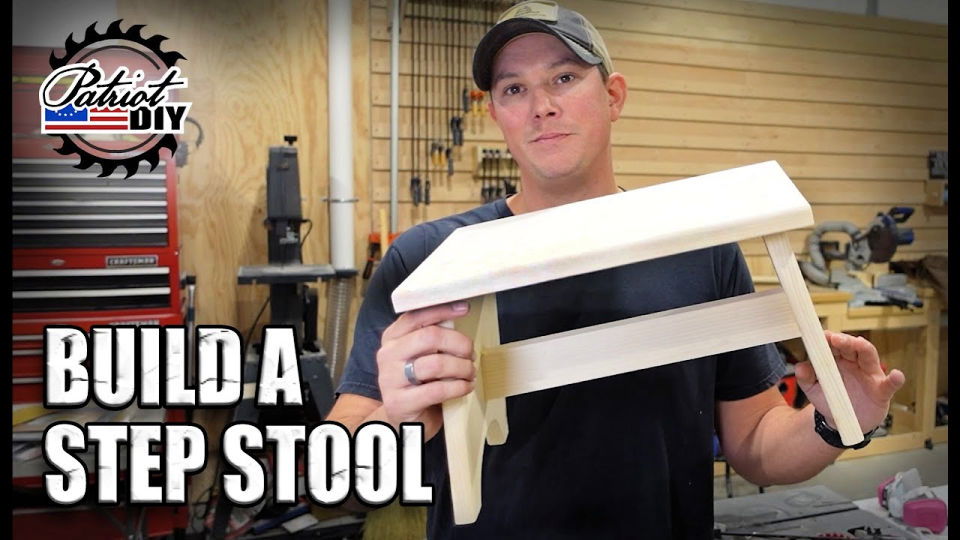
Video Tutorial
For a step-by-step video tutorial, watch this YouTube video.
It pairs well with this written guide, providing a visual view of the techniques discussed in a clear and easy-to-understand manner, ensuring that the approach to building a DIY nesting step stool is as accessible as possible.
Design Customization for Your DIY Step Stool
Making a step stool that is both functional and stylish can be a rewarding DIY project. Here's how you can add a personal touch to your step stool:
Choose Your Style
Start by deciding on the overall look you want to achieve. Do you prefer a modern, minimalist design, or are you drawn to a rustic, vintage aesthetic? Your choice will guide the rest of your customization process.
Selecting Colors and Finishes
Bold colors can make your step stool stand out, while neutral tones can help it blend in with your existing decor. Consider using non-toxic paints and varnishes for safety, especially if children will be using the stool.
Adding Patterns and Designs
For a unique touch, add patterns or designs to your step stool. This could be as simple as painting stripes or polka dots, or as intricate as a hand-painted mural. Use stencils or freehand techniques depending on your skill level.
Personalizing with Decals and Stickers
If painting isn't your forte, opt for decals or stickers. They come in various designs and are easy to apply. Plus, they're removable, so you can change them as your tastes evolve.
Incorporating Textures
Mixing textures can add depth to your step stool. Consider adding a soft cushion on the top for comfort, or non-slip pads on the feet for safety and stability.
Functional Add-Ons
Think about practical additions like storage compartments or folding mechanisms. These can make your step stool more versatile and space-efficient.
By following these tips, you'll make a step stool that reflects your personal style and is practical. Make something you'll be proud to display and use.
Safety Precautions for Building a DIY Step Stool
Ensuring safety is paramount when undertaking any DIY project, including the construction of a step stool. Here's how you can stay safe and prevent accidents:
Personal Protective Equipment (PPE)
Always wear the appropriate PPE:
- Safety goggles to protect your eyes from dust and debris.
- Work gloves to safeguard your hands from splinters and cuts.
- Ear protection if you're using loud power tools.
Workspace Safety
Keep your workspace organized and free of hazards:
- Ensure a clean and clutter-free area to avoid tripping.
- Use non-slip mats to stabilize your footing.
- Keep tools and materials within reach but out of the way.
Tool Safety
Handle tools with care and respect:
- Always use tools as intended and follow the manufacturer's guidelines.
- Inspect tools before use to ensure they are in good condition.
- When not in use, keep sharp tools covered and securely stored.
Material Handling
Be mindful when handling materials:
- Lift heavy wood panels with your legs, not your back, to prevent strain.
- If cutting materials, do so in a well-ventilated area to avoid inhaling sawdust.
First Aid
Be prepared for any minor injuries:
- Keep a first aid kit nearby with essentials like bandages and antiseptic.
- Know basic first aid procedures for cuts or abrasions.
By following safety guidelines, you'll make DIY safer and more enjoyable.
Advanced Techniques for Your DIY Step Stool
Enhancing your DIY step stool with advanced techniques can not only improve its functionality but also its aesthetic appeal. Here are some methods to consider:
Joinery Techniques
Strong joints are the cornerstone of durable furniture. Explore joinery methods like:
- Dovetail joints for the corners, known for their resistance to being pulled apart.
- Mortise and tenon joints for a classic, strong connection between the stool's legs and steps.
Wood Finishing
A beautiful finish can protect your stool and make it shine:
- Apply a sand sealer before staining to ensure an even finish.
- Consider oil finishes for a natural look or polyurethane for more durability.
Decorative Carving
If you have the tools and skills, decorative carving can add a personal touch:
- Simple geometric patterns can make a modern look.
- More intricate floral designs can give a classic, elegant feel.
Adding Inlays
Inlays are a great way to incorporate different materials:
- Use contrasting wood or metal strips to make eye-catching patterns.
- Mother-of-pearl or stone can add a luxurious element to your design.
By using these techniques, your stool will show off your woodworking skills while being practical. Enjoy the process and the satisfaction of making something unique.
Maintenance Tips for Your DIY Step Stool
Keeping your DIY step stool in top condition ensures it remains safe and beautiful for years to come. Here's how to maintain your creation effectively:
Regular Inspection
Check your step stool regularly for any signs of wear or damage. Look for:
- Loose screws or nails that need tightening or replacing.
- Cracks or splits in the wood that may require filling or sanding.
Cleaning and Care
Keep your step stool clean and well-maintained:
- Wipe it down with a damp cloth to remove dust and dirt.
- Avoid using harsh chemicals that can damage the finish.
Protecting the Finish
The finish on your step stool not only adds beauty but also protection:
- Reapply a sealant or varnish annually to protect the wood from moisture and wear.
- If painted, touch up any chipped or peeling paint as needed.
Storing Properly
When not in use, store your step stool in a suitable environment:
- Keep it in a dry, indoor area to prevent warping or rotting.
- Avoid placing heavy objects on top that could deform the steps.
Addressing Issues Promptly
If you notice any problems, address them immediately to prevent further damage:
- Tighten any loose parts as soon as they're noticed.
- Sand and refinish any areas that have become rough or unsightly.
By following maintenance tips, you'll keep your DIY step stool reliable and attractive.
FAQs About DIY Step Stools
What is the best wood to use for a DIY step stool?
The best wood for a DIY step stool is one that is sturdy and durable, such as pine, oak, or maple. These woods can support weight well and are long-lasting.
How do I ensure my step stool is stable?
To ensure stability, make sure all legs are even and the top is level. Use strong joinery techniques and consider adding cross braces between the legs.
Can I make a folding step stool?
Yes, you can make a folding step stool by incorporating hinges and a locking mechanism to ensure it stays open when in use and folds away for easy storage.
What tools do I need to build a step stool?
Basic tools you'll need include a saw, drill, screws, sandpaper, and possibly a hammer. Advanced tools like a router can be used for decorative edges.
How can I customize my step stool?
Customize your step stool with paint, stains, or decals. Add personal touches like your initials or patterns that match your home decor.
What safety precautions should I take when building a step stool?
Wear protective gear such as safety goggles and gloves. Work in a well-ventilated area and keep your workspace tidy to prevent accidents.
How do I protect my step stool from water damage?
Apply a waterproof sealant or varnish to protect the wood from moisture. This is especially important if the stool will be used in areas like the bathroom or kitchen.
How can I make my step stool eco-friendly?
Use sustainably sourced wood or reclaimed materials. Choose water-based paints and finishes that are less harmful to the environment.
What is the ideal height for a step stool?
The ideal height depends on its use. For reaching high shelves, a taller stool is needed. For children, a shorter stool is safer and more practical.
How do I fix a wobbly step stool?
Tighten any loose screws or joints. If the legs are uneven, trim them to the same length. Add felt pads under the legs to balance the stool on uneven floors.
By answering FAQs, craft a safe, custom step stool. Take your time & enjoy making it.
30 Free DIY Step Stool Plans
Discover 30 free DIY step stool plans for your next project. Build a sturdy and stylish step stool with these easy-to-follow instructions.
1. DIY Kid's Step Stool
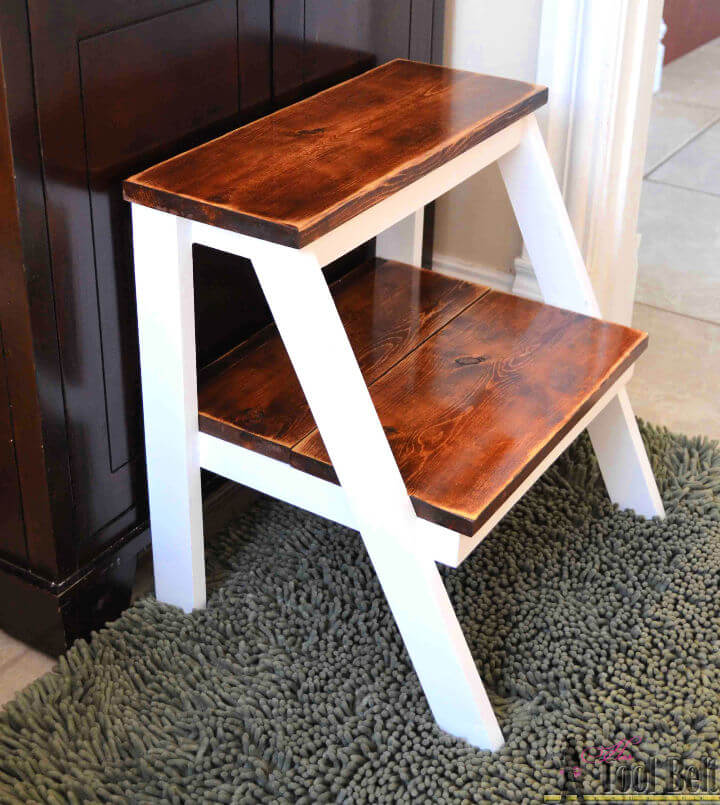
Enhance the practicality of your bathroom with a sturdy, DIY kid's step stool, ideal for those who are short or have children. This handy creation can be crafted using a single 1" x 8" x 8' board, 1 1/4" pocket screws, and wood glue.
Starting with cutting the wood pieces as per the diagram, assembling the stool involves securing the stairs and their supports using screws and wood glue. Finishing touches include sanding, painting, and staining for a distressed look.
The total wood cost is approximately $8.91. A great addition to any home, this step stool ensures comfort and safety while aiding in reaching high places. hertoolbelt
2. How to Build a Stepstool
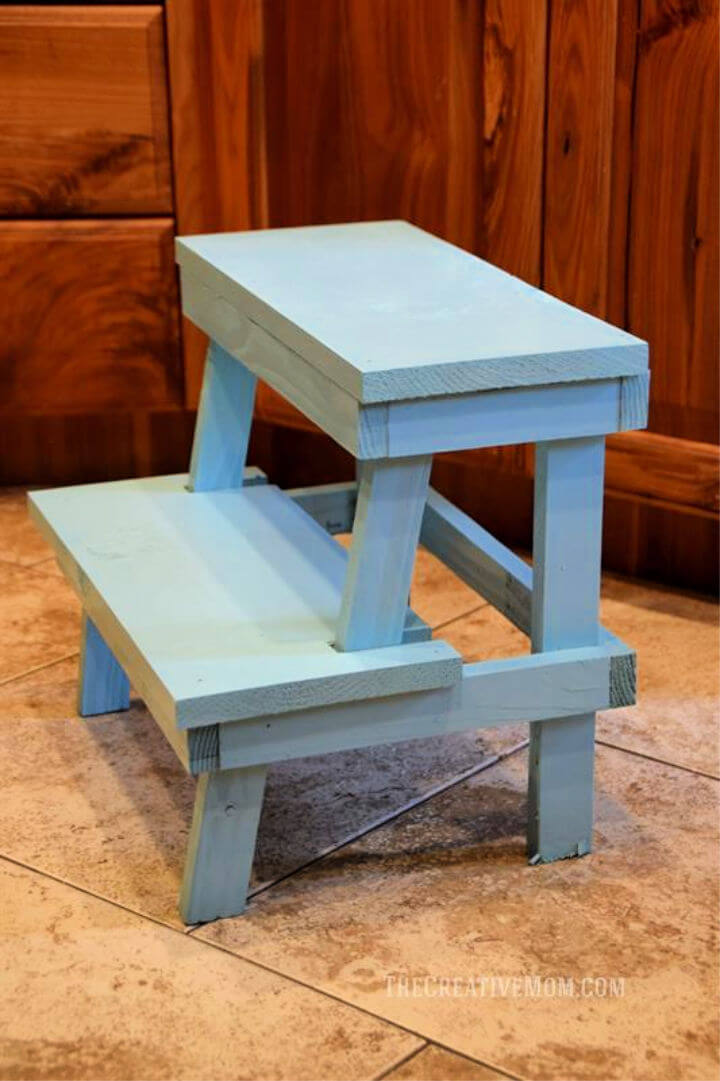
Elevate your home with a simple, functional, and adorable DIY step stool! Made with lightweight material, it can conveniently be used anywhere - from reaching high kitchen shelves to helping the little ones get to the sink. Fashioned with just a few materials like 1x2s, 1x8 boards, pocket hole screws, wood glue, and basic tools, this stepstool proves that simplicity can make a big impact.
Follow the outlined steps, beginning with building step frames, progressing to adding front and back legs, attaching the frames, and concluding with attaching and finishing the steps.
With its quick and easy build, this stepstool serves a great purpose and adds charm to any space. Embrace the joy of making something useful with your own hands and transform the spaces you inhabit! buildsomething
3. Making a Step Stool Under $15
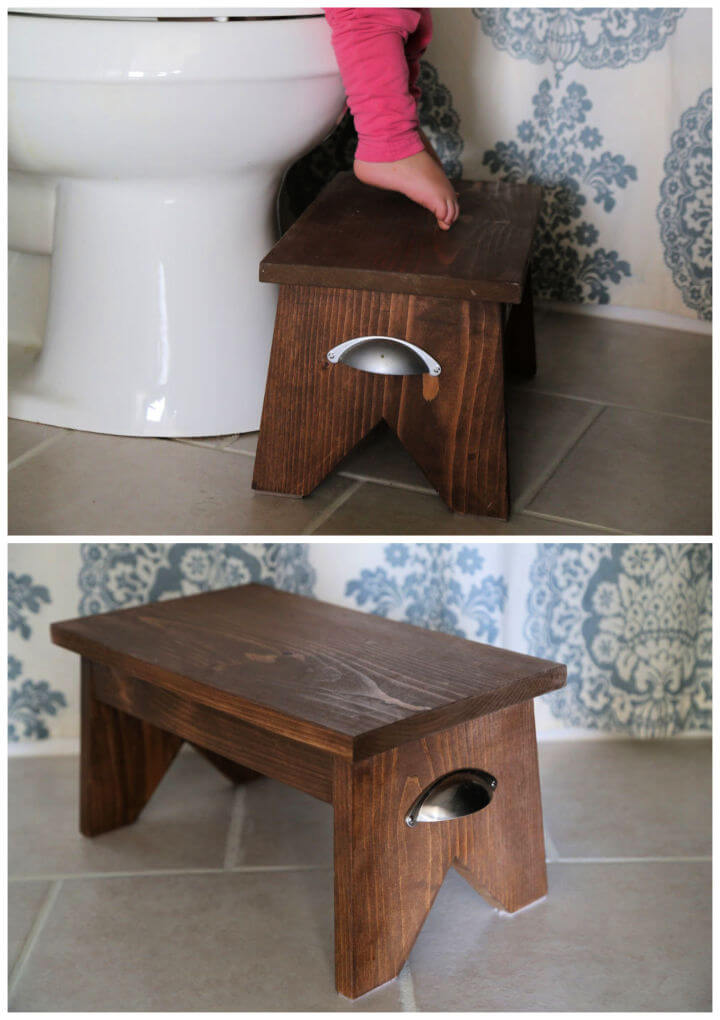
Step into comfort and reach new heights with a sturdy DIY wood step stool. This simple yet robust design, featuring angled legs for added stability and durability, is an easy build from solid wood. For about $15, you can craft this piece using 1x10s and 1x3s, designed to last for years.
Tailor it to your liking with paint or stain for that personal touch. The construction process is so straightforward it could be done in a few minutes after making the necessary cuts.
This practical, economical tool isn't just perfect for reaching those high cupboards; it's also an invaluable aid for the little ones in your family, providing the much-needed height boost. Whether for your bathroom or kitchen, make your home more accessible today with this wooden step stool plan. ana white
4. Simple Step Stool Out of 2x4's
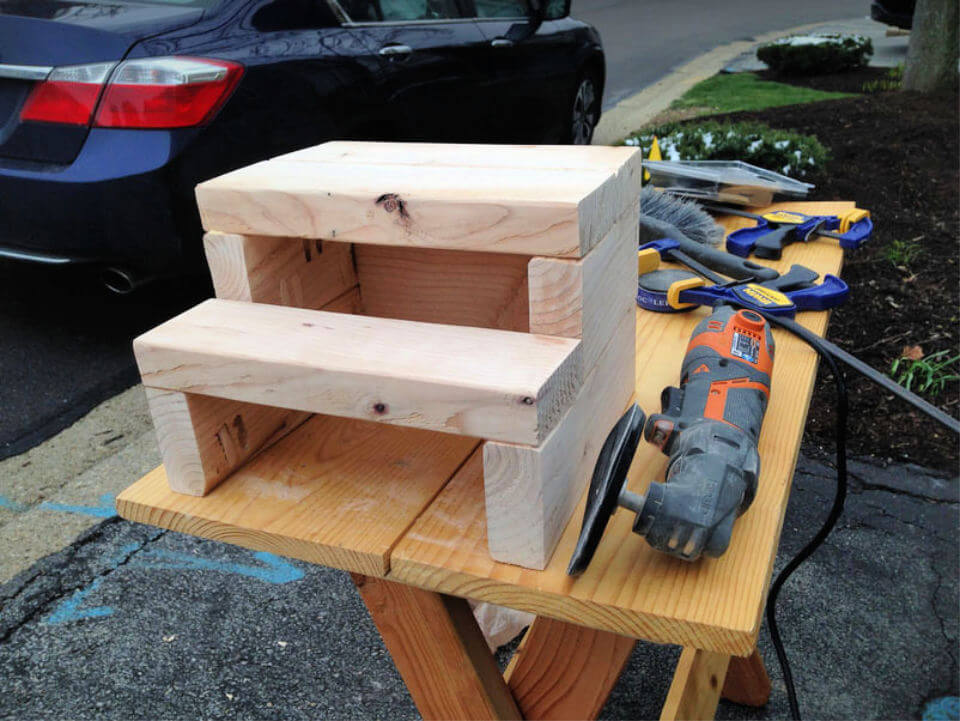
Boost your crafting game with this straightforward guide to constructing a practical DIY step stool from humble 2x4s. This stool is a versatile addition to any household, perfect for little ones reaching for the sink or those struggling with high shelves. With a shopping list including a single 2x4, wood glue, filler, and various screws, the project is a budget-friendly venture.
According to the cut list, you only need a drill and a saw to fashion the wood. The end product stands 8.5 inches tall, 12 inches wide, and 10.5 inches deep, perfect for numerous uses around the home.
Follow the step-by-step instructions emphasizing pre-drilling, countersinking screws, and ample measurement. Put a unique touch on your stool with a finish of your choice, whether blending with your cabinets or popping with vibrant color. Make this doable, cost-effective stool today, and appreciate tomorrow's increased reach. morelikehome
5. DIY Step Stool With Storage
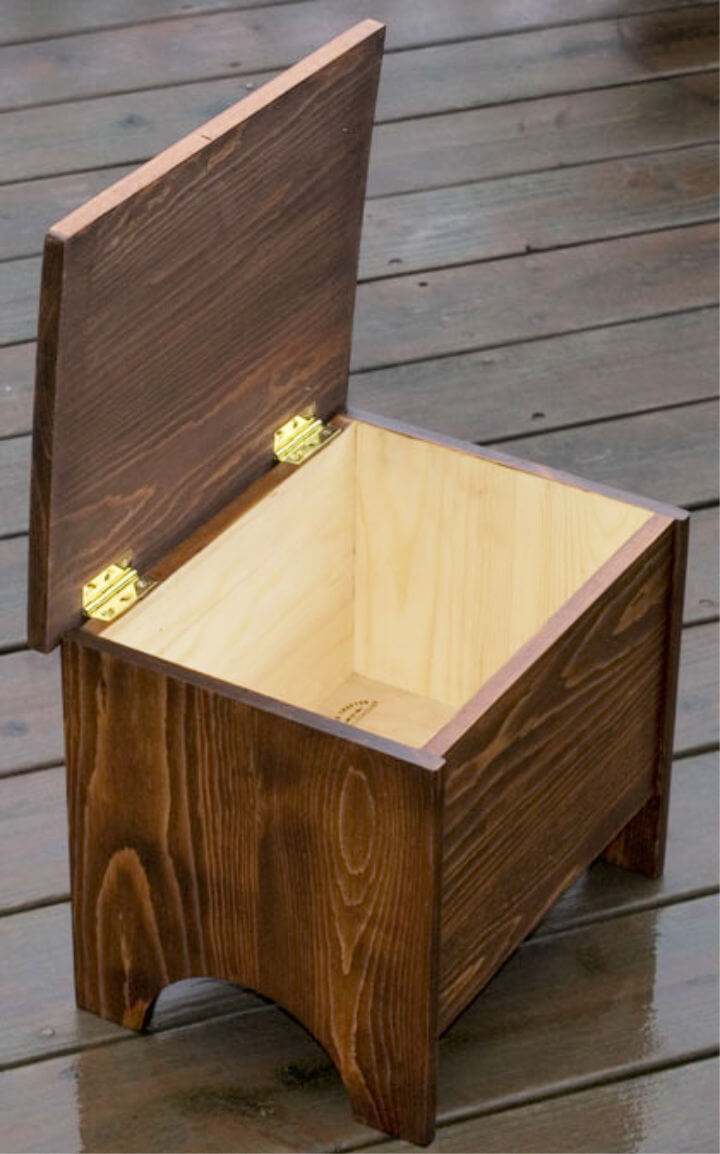
Unlock your inner carpenter and build your own robust and stylish storage box with this engaging DIY project, utilizing a biscuit joiner, plywood, and a handful of other essential tools. Begin by marking the alignment for the biscuits and cut your panels accordingly. The step-by-step guide leads you through the assembly process, gluing and clamping the pieces, ensuring a flat surface.
The magic happens when you run the panels through a planer, smooth them out, and cut them to size for a custom finish. Using a biscuit joiner, make slots at the end of each panel, then cut a groove for your plywood. Following this, router round-over bits give a subtle, rounded edge, and the box's legs are cut to precision.
The top is cut wider and deeper than the box to fit perfectly with the help of hinges. Once assembled, everything is sanded smooth, and you can apply your choice of stain for a personalized touch. This bespoke storage box project epitomizes creative carpentry at its finest. runnerduck
6. How to Build a Step Stool
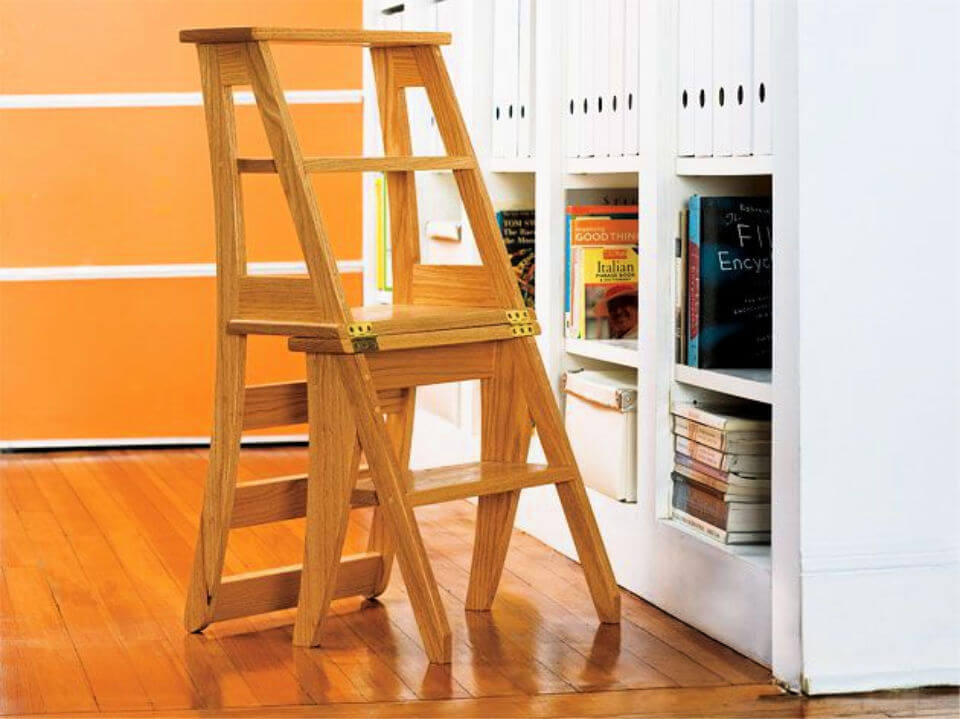
Revamp your living space with a distinctive piece of furniture- a DIY step stool. This unique build combines a step stool and a chair, adding function and charm to any room. Constructed from sturdy red oak, this project is simple yet innovative. Hinged at the intermediate step, the chair transforms when the top pivots to the floor, making the intermediate step a seat and the rear legs the chair back.
Armed with essential tools such as a jigsaw, router, drill/driver, and sander, you can shape the wood and assemble the parts. The additional use of screws and wood glue ensures the stability and longevity of the piece.
This project can be executed precisely and easily thanks to the downloadable animated walk-through and printable plans. This Franklin-inspired creation creatively enhances your home décor while paying homage to a historical figure. popularmechanics
7. DIY Step Stool from Scrap Wood
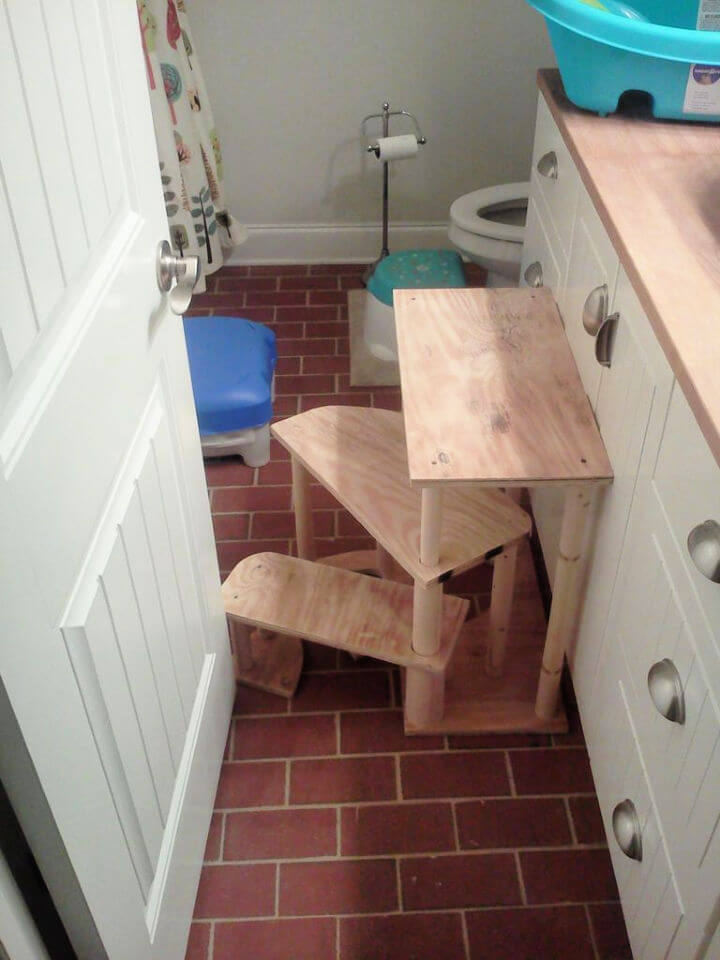
Build a practical and charming DIY spiral step stool using scrap wood with this step-by-step guide! Specially designed to be narrow and toddler-proof, it's the perfect addition to compact spaces like bathrooms. The building process includes the following:
- Making sturdy legs.
- Preparing tiered and bottom parts.
- Careful assembly for optimal balance.
With a unique tiered design, this stool is functional and visually captivating. Spruce up your stool with a favorite paint color, turning it into an intriguing decor piece for any room. Get started on this project to build a useful, one-of-a-kind piece that fits your little one's adventures! instructables
8. Free Vintage Step Stool Plan
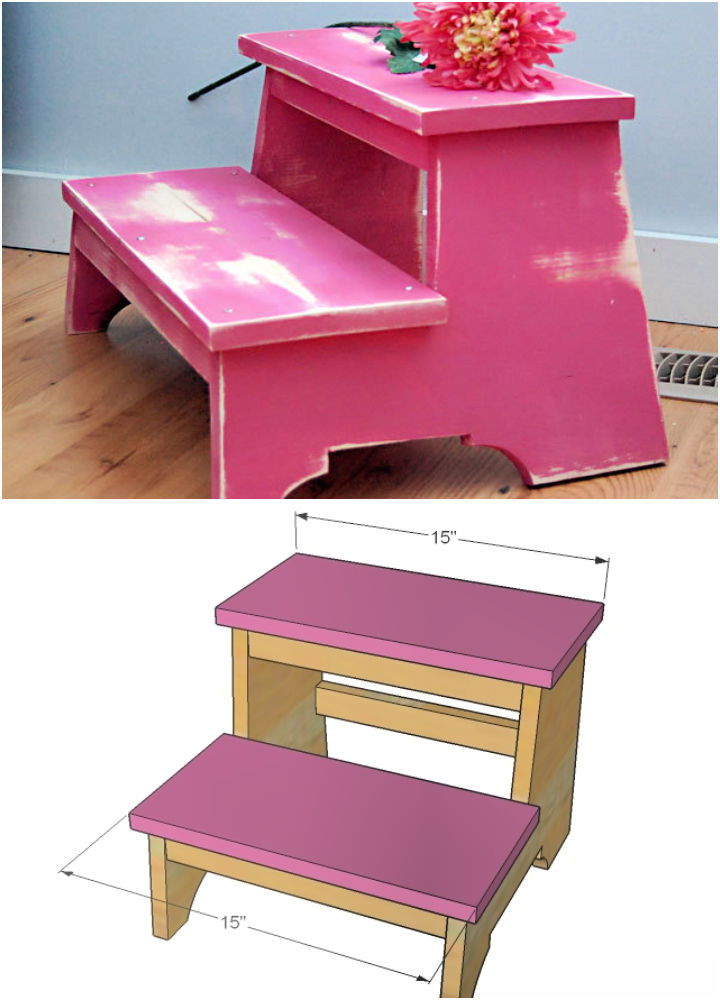
Explore the joy of woodworking with our detailed DIY step stool plans, ensuring a successful project every time. Embrace the rustic charm of yesteryears with this DIY vintage-inspired step stool. This functional project takes on an endearing, well-loved aesthetic, with deliberate uneven cuts and visible screws for that antique touch. Well-suited for novices, the project calls for everyday materials like 1x12 and 1x2 wood, screws, wood glue, and paint.
This stool is built in four easy steps - shaping the sides, attaching the bottom supports, adding the top supports, and applying your chosen paint for the finishing touch. The stool is decorative and practical, helping little ones reach sinks, beds, and more. So, turn up your sleeves and start building this charming and handy piece today! ana white
9. Build Your Own Step Stool
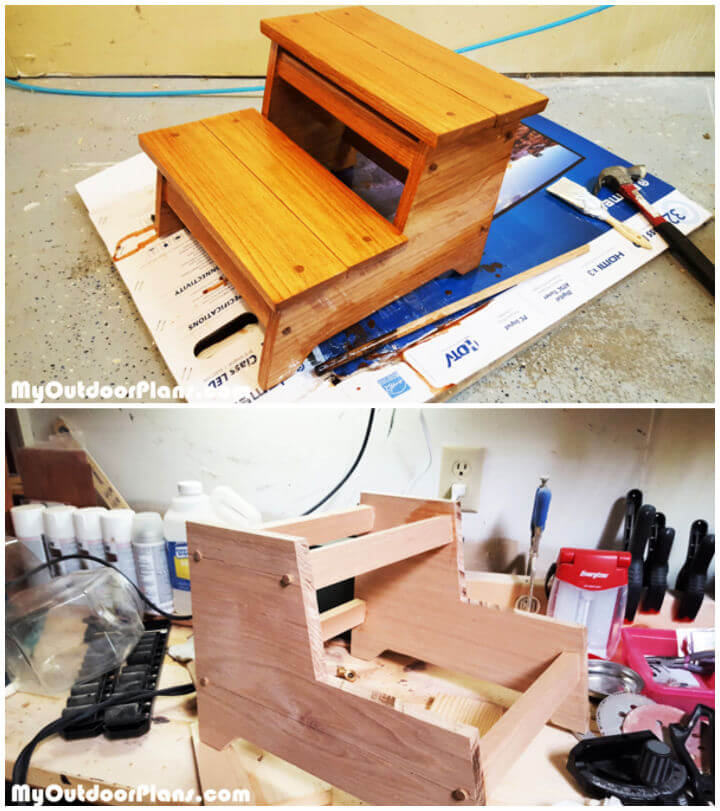
Dive into the wonderful world of woodworking by building this DIY step stool. This hands-on project introduces the intricacies of making a functional item from scratch. Using high-quality lumber such as pine, cedar, or redwood, coupled with detailed instructions, precise measurements, and informative diagrams, this endeavor promises an engaging journey.
The entire process is straightforward and to be finished in a day. Ultimately, this woodworking project helps build a handy step stool for your home or workspace and nurtures creativity and hands-on skills. Start your woodworking journey today and make your space more functional and stylish! myoutdoorplans
10. DIY Reclaimed Wood Step Stools
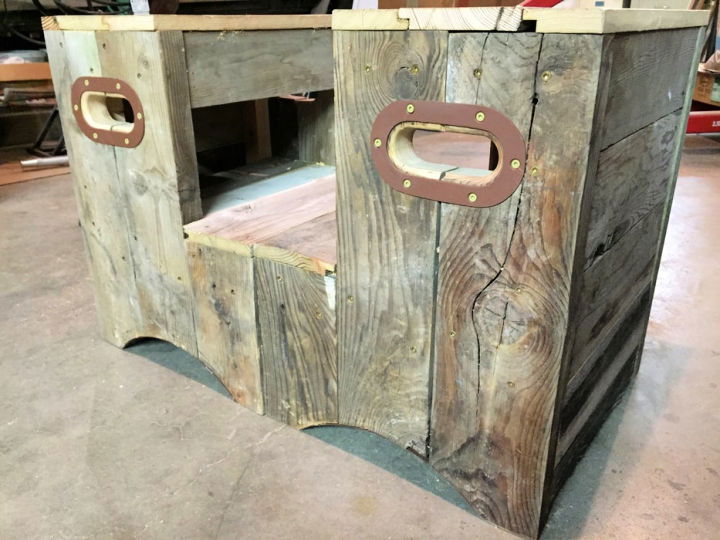
Handcraft robust, this DIY multifunctional step stool using reclaimed materials is perfect for many tasks around your home or workshop. These heavy-duty stools, weighing approximately 36 lbs, are made from leftover shiplap boards, blending durability and aesthetics.
Despite its weight, this stool serves various functions, from a mini portable workbench to a support system for long items; its sturdiness is key to its versatility. The construction steps are easy to follow, and while they may not be exhaustive, they should provide sufficient guidance for most.
This stool is unique in design and functionality, differing from typical step stool designs elsewhere. Harness the beauty of repurposing materials, and transform scraps into something useful but also reliable and distinctive in design. instructables
11. Make a Step Stool Chair for Kids'

Experience the joy of making a charming DIY kids' step stool chair, a delightful addition to any child's room and a potential family heirloom. This woodworking project, although requiring some familiarity with tools, offers a rewarding end product, ideal for little ones to sit, read, or gain a little height for those out-of-reach places.
With supplies like a common board, square dowel, miter saw, circular saw, paint, and a printable template, this project is a fun, hands-on way to foster creativity and functionality.
The finished chair will provide years of enjoyment, making it a valuable investment of time and effort. Seize this chance to work with your hands and build something unique and cherished for your little ones. lovelyindeed
12. Wooden Step Stool That Doubles As a Chair
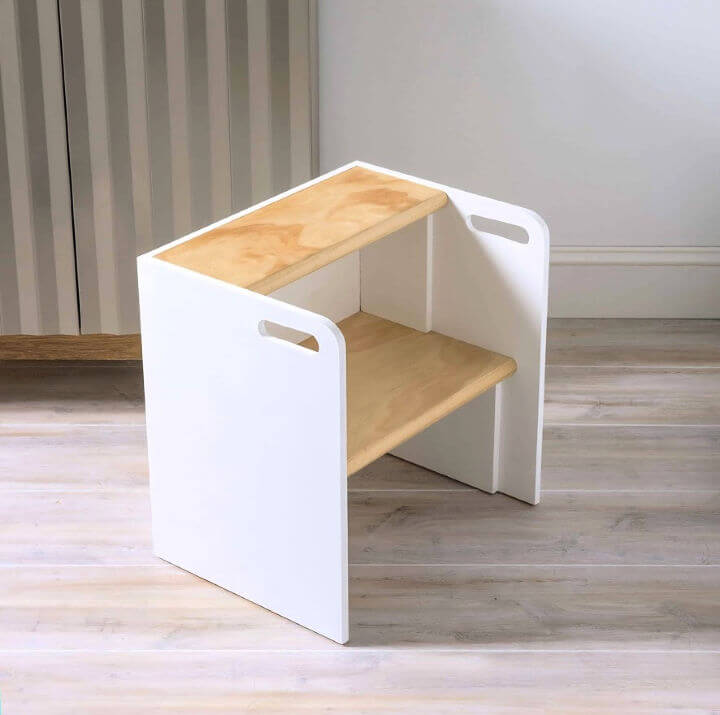
Set your foot into your home's transformation with this hands-on guide on building a versatile DIY wooden step stool that can also be doubled as a chair. With minimal carpentry skills and a sprinkle of creativity, make a piece that seamlessly fits into any room, from aiding you in reaching high kitchen shelves to becoming a playful reading chair in a child's room.
Made from ½" thick MDF and a 1" thick interior stair tread equipped with a touch of paint, you'll love how easily this project blends style with functionality. This wooden step stool chair will not only cater to your DIY cravings but will also serve as a versatile piece in your home, accommodating both adult and children's needs.
All for an estimated cost of $20 and an active project time of just 3 hours, it's a small acquisition for a big return. It's not just carpentry; it's an adventure in creativity and practical design. Transform your space today! diycandy
Related DIY Projects for Bathroom
Discover a range of exciting DIY projects for your bathroom. Get inspired and transform your space with these creative ideas and tips.
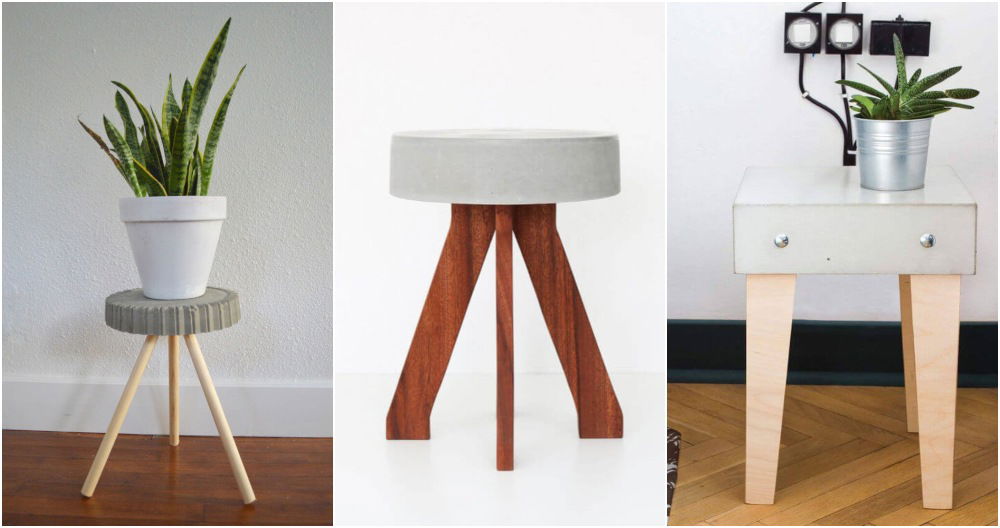
- DIY Concrete Stools: Add a modern touch to your home with these long-lasting DIY concrete stool ideas, perfect for indoor and outdoor use.
- Bathroom Projects: Transform your bathroom with these unbelievable DIY bathroom projects designed to help you achieve a fresh and functional space.
- Floating Bathroom Vanity: Maximize floor space and style with these elegant DIY floating bathroom vanity ideas you can make yourself.
- Bathroom Storage Ideas: Keep your bathroom clutter-free with these unique DIY bathroom storage ideas you must try, suitable for various spaces and styles.
13. DIY Small Step Stool for the Bathroom
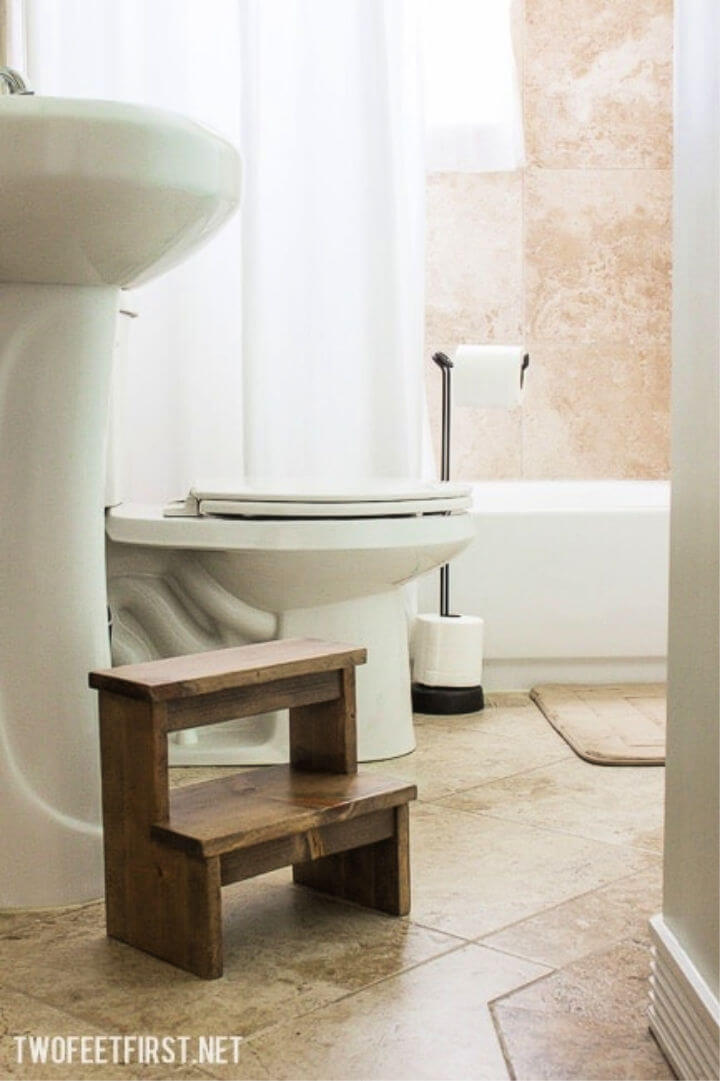
With our DIY step stool plans, you can craft a unique, handmade addition to your furniture collection. Boost your child's independence safely and creatively with this step-by-step guide on crafting a handy DIY wooden step stool. Designed for their tiny steps, this homemade stool allows them to navigate spaces like the kitchen or bathroom easily.
Constructed from a 1" x10" x4ft board, a 1" x2" x5ft board, 1.25" screws, and a hint of tender love, this project is an affordable and effective way to meet their growing curiosity.
Detailed instructions will take you through every cut, pocket hole, and sanding stroke to the finished stain and polycrylic coating for water damage protection. Get started and celebrate your child's journey towards self-reliance today with this step stool tutorial! twofeetfirst
14. Rustic DIY X Back Step Stool
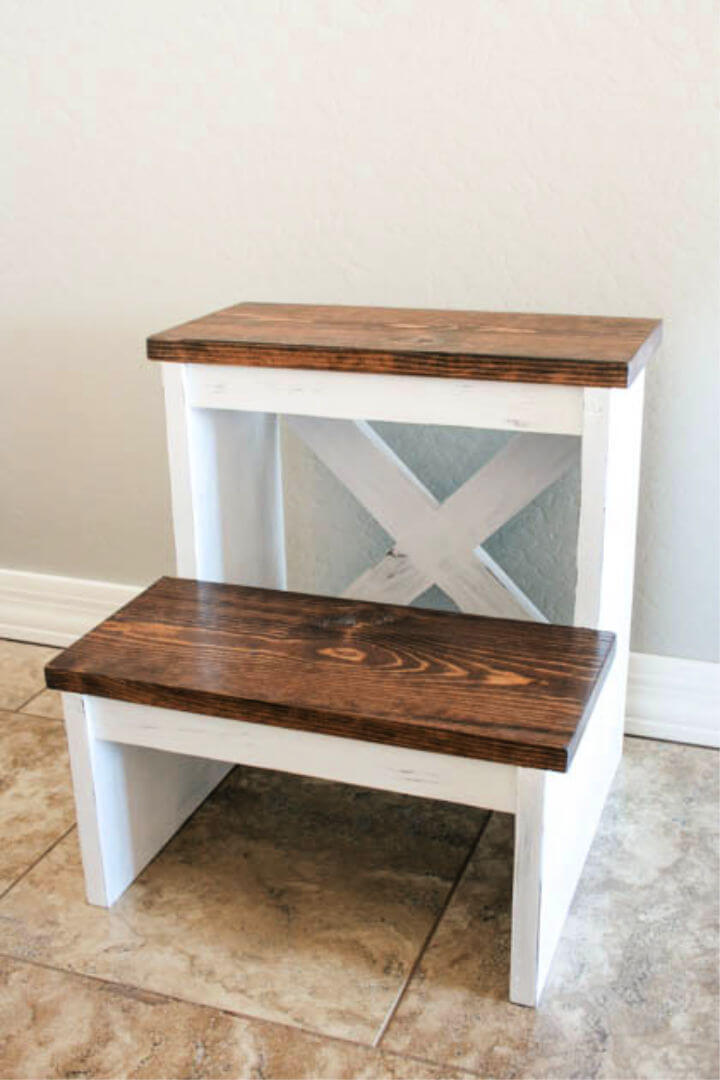
Unleash your inner craftsman with a single 1x8x8' board challenge! By meticulously utilizing every inch of the board, you can build a highly practical and portable step stool, perfect for young ones in your home. This functional and sturdy construction begins with a table, and miter saw, ripping and cutting the board into the necessary parts.
Assembly is a breeze with drilled pocket holes, wood glue, and pocket screws. An "X" back adds style and extra strength. The finishing touch comes from a two-tone distressed look created by Minwax stain and homemade chalk paint.
This cleverly built step stool enables your little one to reach higher shelves and supports adults, combining utility and aesthetics in one project. Dive into this hands-on project and make your day-to-day life a bit easier! addicted2diy
15. Easy Small Step Stool - One Board Project
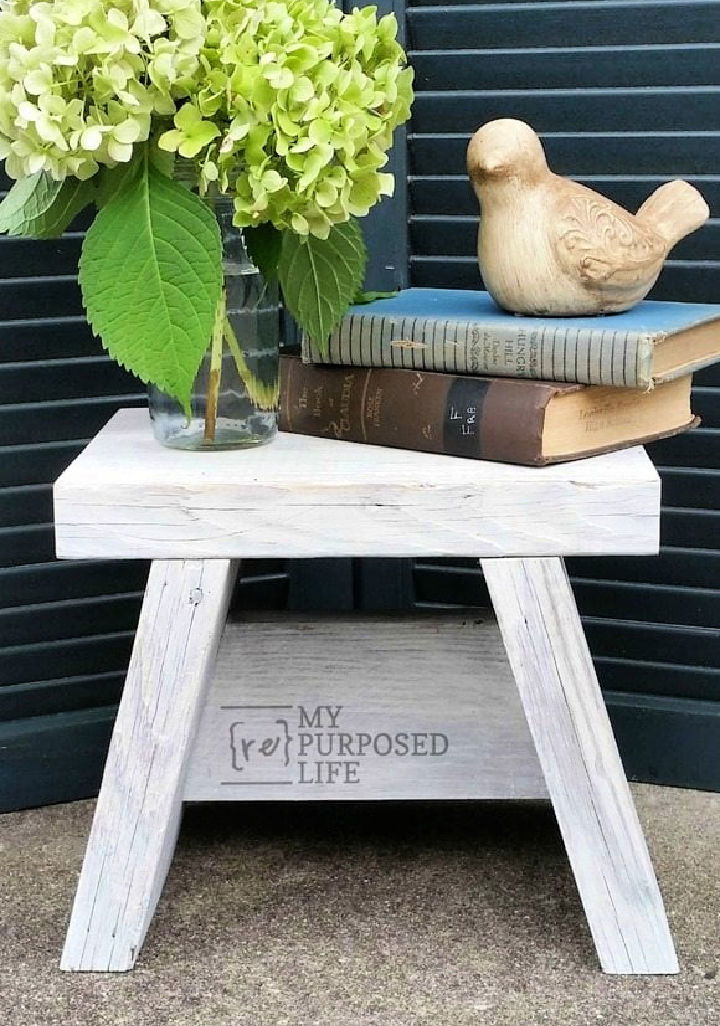
Embrace crafting with this intriguing DIY small step stool project using a single reclaimed board. This handy stool is perfect for those hard-to-reach kitchen cupboards, an extra boost for a closet, or even as a unique 'time out' spot for kids. This project promises fun and functionality and is built from a 2x10 by 6' wood.
The build process is straightforward, involving precise cuts and secure assembly using wood glue and screws. Embellish with paint or stain to suit your aesthetic preferences.
This step stool serves practical purposes around the house while showcasing the beauty of upcycling and your craftsmanship. Take the power tool challenge and roll up your sleeves to build this useful step stool today! myrepurposedlife
16. Wooden Step Stool With White Concrete Top
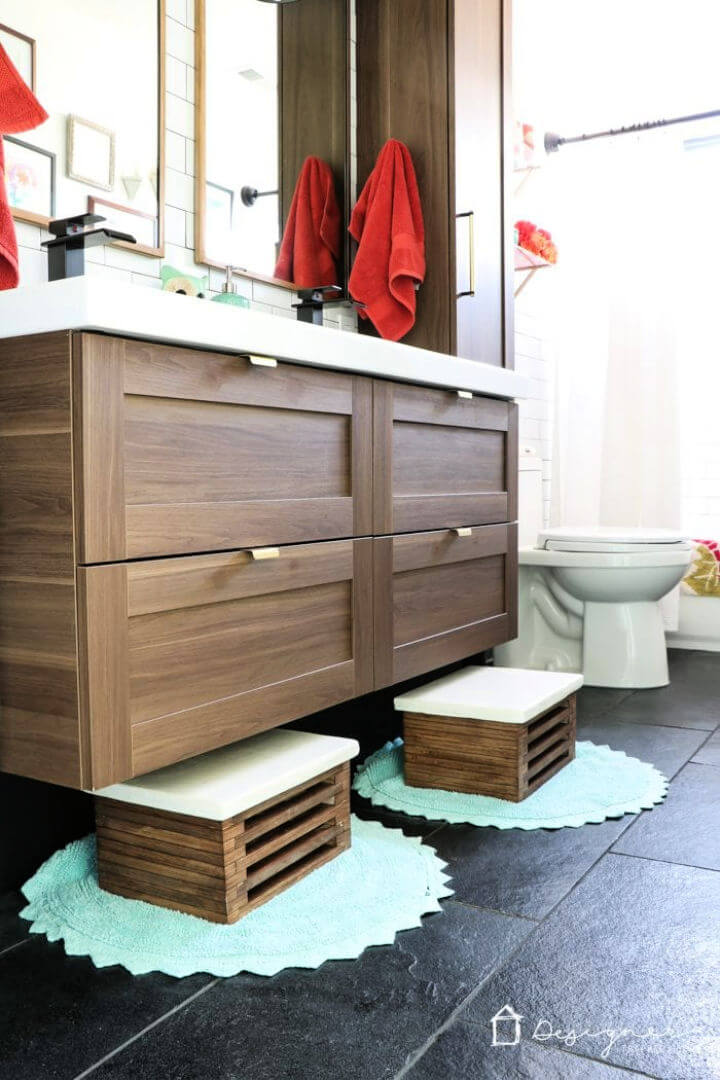
Express your creativity with this DIY wooden step stool tutorial! Perfectly sized to aid little ones in reaching bathroom sinks, these DIY step stools are a fusion of practicality and style, featuring a modern aesthetic and white concrete top. Composed of walnut design edge plywood and OSB, these stools can effortlessly slide under a floating vanity.
Building this stool involves using an orbital sander, table saw, and potentially a miter saw, among other tools. In addition to step-by-step instructions, this guide includes diagrams for a more visual understanding and a detailed video tutorial. This project serves a purpose and elevates your bathroom's look, fitting in seamlessly with any modern decor. Happy crafting! designertrapped
17. DIY Step Stool for Children
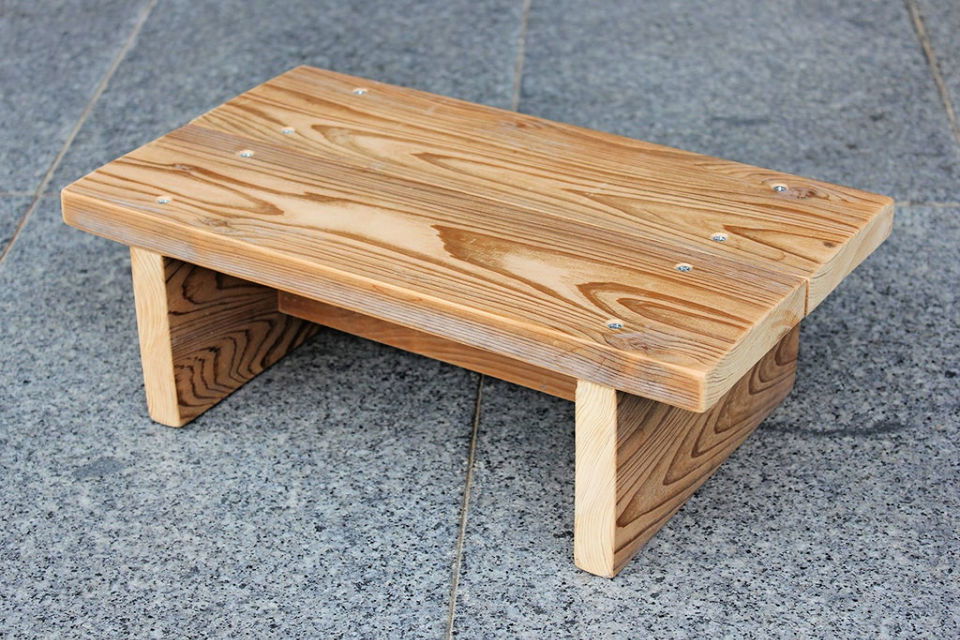
A DIY simple step stool for a child is the perfect way to boost their independence - one sturdy step at a time! Made from a single piece of 1" x 5" reclaimed lumber and 12 wood screws, this stool is strong enough for adults and provides a height boost for your little ones. To add versatility, you can opt for 1" x 6" or 2" x 6" lumber to make it slightly taller.
The essential tools for this project include a table saw, an electric orbital sander, a power drill, a Phillips screwdriver, and a countersink drill bit. Don't forget; this stool can be crafted using a handheld circular saw or a hand saw and sandpaper wrapped around a wood block as alternatives.
Kickstart your DIY journey today and build this practical piece that adds a rustic touch to your home decor while ensuring safety and accessibility for your child. instructables
18. DIY Versatile Flip-flop Step Stool
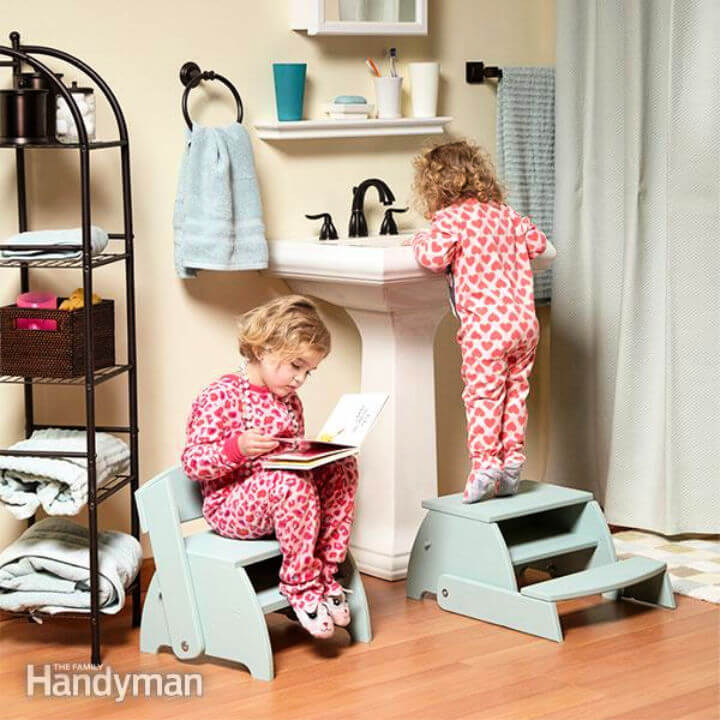
Make a durable, personalized piece with our DIY step stool plans, designed for both functionality and aesthetic appeal. Introduce an essential addition to your home, especially for families with kids, with a versatile DIY flip-flop stool. This multipurpose stool, effortlessly transforming from a chair to a step stool, brings a touch of functionality and convenience into your living space. When the back is up, it is an ideal chair for kids.
With the backdown, it doubles as a step stool for reaching faucets, shelves, or cabinets that are just slightly out of reach. Built for a budget of $51-$100 and completed in a day, this beginner-friendly project involves measuring, cutting, assembling, and installing parts.
Aside from its practical uses, the flip-flop stool also promotes safety for children who need that extra boost. Whether for the bathroom or the kitchen, this versatile piece solves height-related challenges in any home. familyhandyman
19. Free Striped Wooden Stool Plan
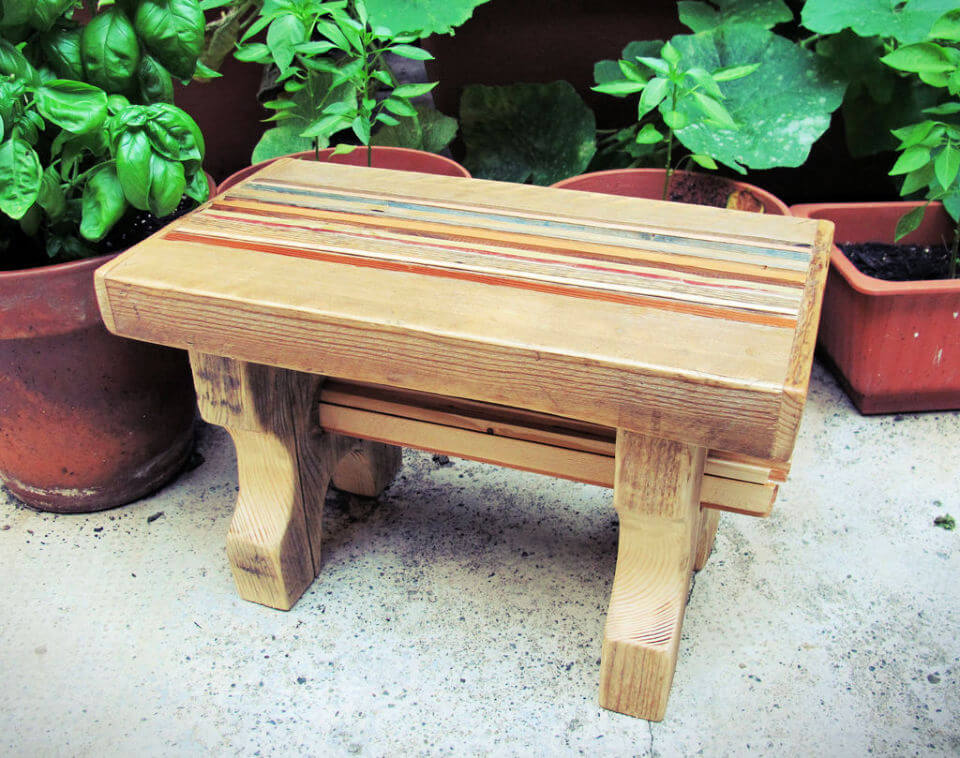
Add a dynamic touch to your home with a self-made wooden stool featuring colorful stripes! This piece of furniture breathes life into any room, showcasing a unique fusion of natural wood texture and vibrant color. Starting with wood stripes, choose boards that complement your décor. Then, select an eye-catching palette of hues.
A simple assembly process involving glue and careful insertion results in a beautiful, colorful, striped surface. Add sturdy legs and a comfortable bar for support, finishing with some polish for a refined look. You'll have a personalized, stylish stool, perfect for any modern home setting. Give it a try today! instructables
20. DIY Step Stool Using Scrap Wood
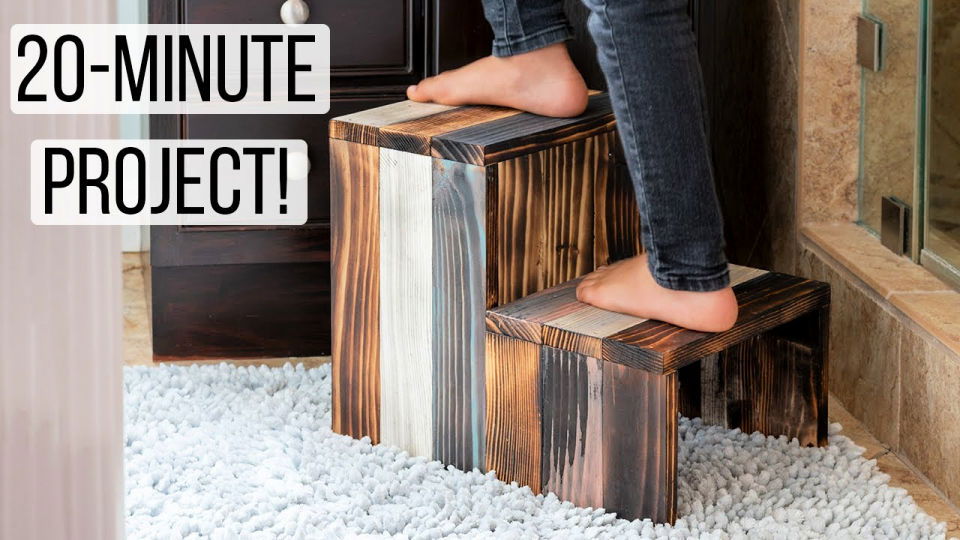
Make room in your home with a one-of-a-kind DIY step stool crafted from scrap wood, easy enough for any DIYer! This functional wooden step stool is easy-to-build using your leftover lumber! The step stool design is simple yet practical, perfect for reaching high shelves or as a boost for little ones.
This concise tutorial guides you through crafting, starting with materials like sanding sponges, a tack cloth, a BZ4500HS heat shrink torch, a Bernzomatic propane tank, and other essential woodworking tools.
With a cost-effective approach that repurposes scrap wood, you make something valuable and contribute to environmental sustainability. Start constructing your step stool today and add a handy, homemade touch to your household!
21. How to Make a Plywood Step Stool
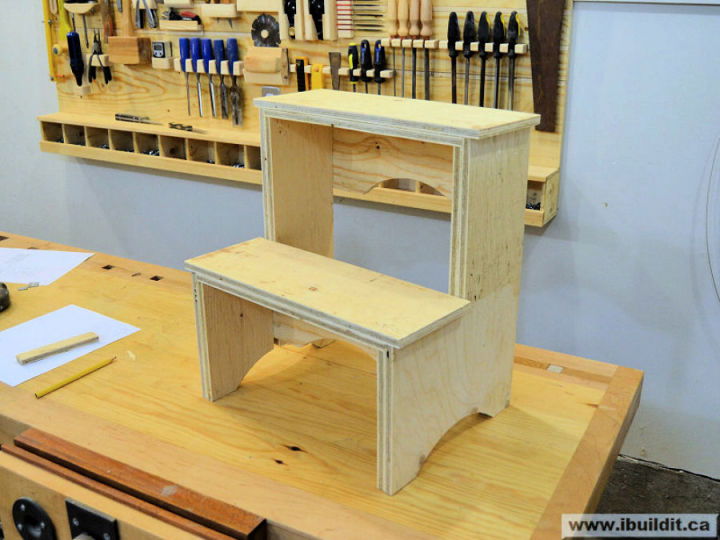
Ready to build something you can stand on? Step up your DIY game with this plywood step stool! You can build a functional step stool from scratch using leftover 1/2" plywood to add convenience and safety to your workspace or household. This project requires minimal supplies, including plywood, glue, and brads, and is an excellent way to put spare materials to good use.
The step-by-step guide covers all aspects, including making semi-circular cutouts with an 11" light fixture for a decorative touch. Once assembled, a single coat of polyurethane is suggested for protection and to maintain its clean appearance.
The design also considers stability, adding additional plywood feet to prevent tipping. Enhance your reach and elevate your DIY skills with this versatile step stool project! ibuildit
22. Building a Wooden Step Stool
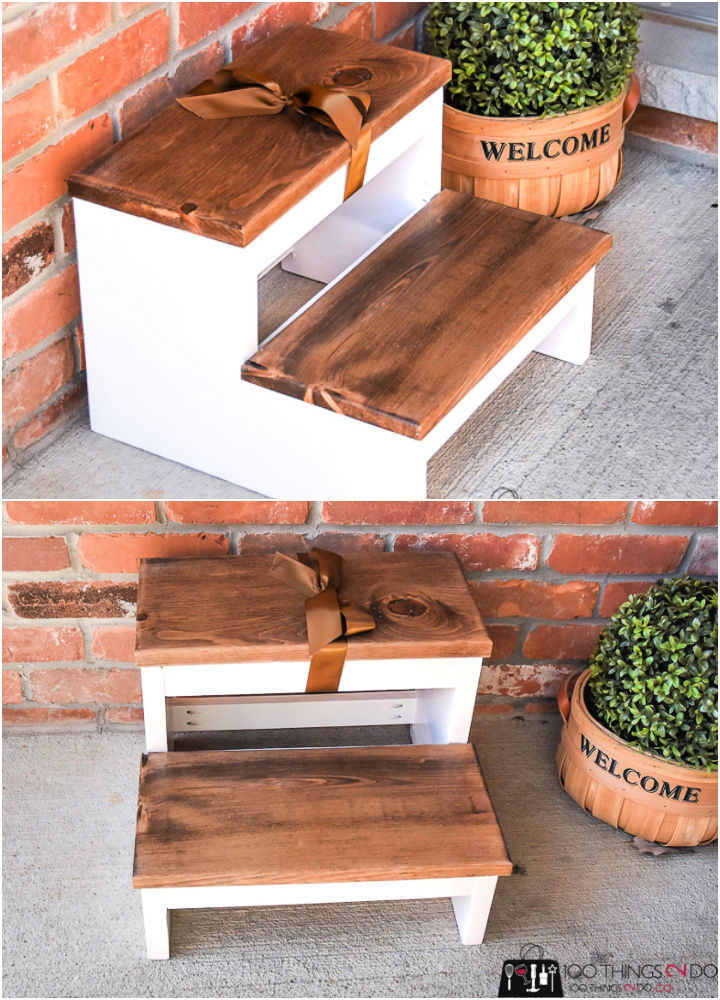
Our DIY step stool plans are perfect for beginners, with easy-to-follow instructions and minimal materials required. Spring into action and craft your durable, stylish DIY step stool using scrap wood. Leverage rough pine and plywood from your old projects and transform them into a practical household tools. Cut, sand, assemble, and finish to your liking, employing a unique two-tone look using paint and stain for added visual appeal.
The broad steps, made from 1" x 12" rough pine, offer an ample surface for footing, ensuring safety and stability. Equip your home with this simple yet striking step stool, perfect for reaching those high cupboards or shelves.
This project ensures a sturdy structure capable of supporting an adult's weight. Enjoy crafting with this cost-effective solution, utilizing your leftover supplies. You can boost your home functionality and decor with a minimal investment of one hour and no extra costs. Give it a shot! 100things2do
23. Make a Child's Step Stool
Embark on a DIY journey with this simple, engaging woodworking project - building a step stool! This venture allows you to try your hand at woodworking, and while it's simple to construct, it also offers an excellent opportunity to hone new skills.
You'll have your step stool ready in no time by utilizing essential materials such as wooden dowels, wood glue, and an assortment of tools like a miter saw, table saw, and an orbital sander.
The fun doesn't end with the building; this project has an element of creativity, as you can change the design to fit your needs or aesthetic preferences. This step stool is not just practical; it can also be a decorative reflection of your craftsmanship and taste. So grab your tools, get the build plans, and start making yours today!
24. DIY Step Stool With 3-in-1 Nesting Feature
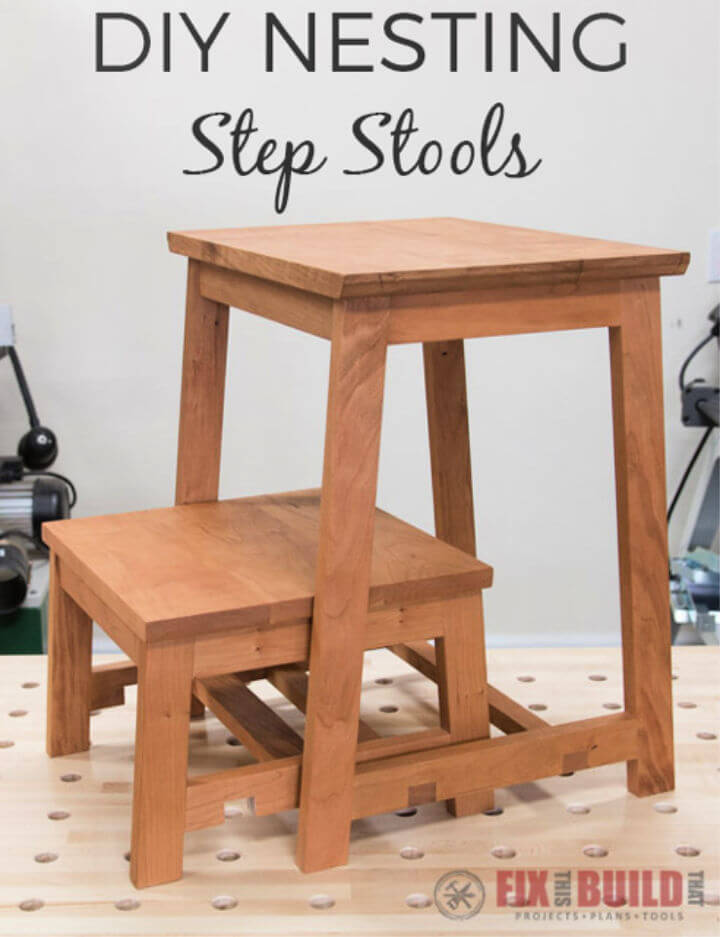
Discover our comprehensive DIY step stool plans and add a functional, stylish piece to your home's decor. Improve your kitchen functionality with a DIY step stool featuring a unique 3-in-1 nesting attribute. This versatile tool helps access hard-to-reach kitchen cabinets and ensures children no longer need to climb onto counters. To construct this functional kitchen accessory, you'll need tools like a table saw, miter saw, pocket hole jig, and several others.
Essential materials include hardwood, dowels, and pocket hole screws. Follow a clear guide to build the step stool tops, assemble the base, and attach the stool top. The result: a compact two-tiered step stool that occupies just the space of a single kitchen stool. This project promises enhanced kitchen convenience and space optimization for families of any size. fixthisbuildthat
25. DIY Folding Step Stool
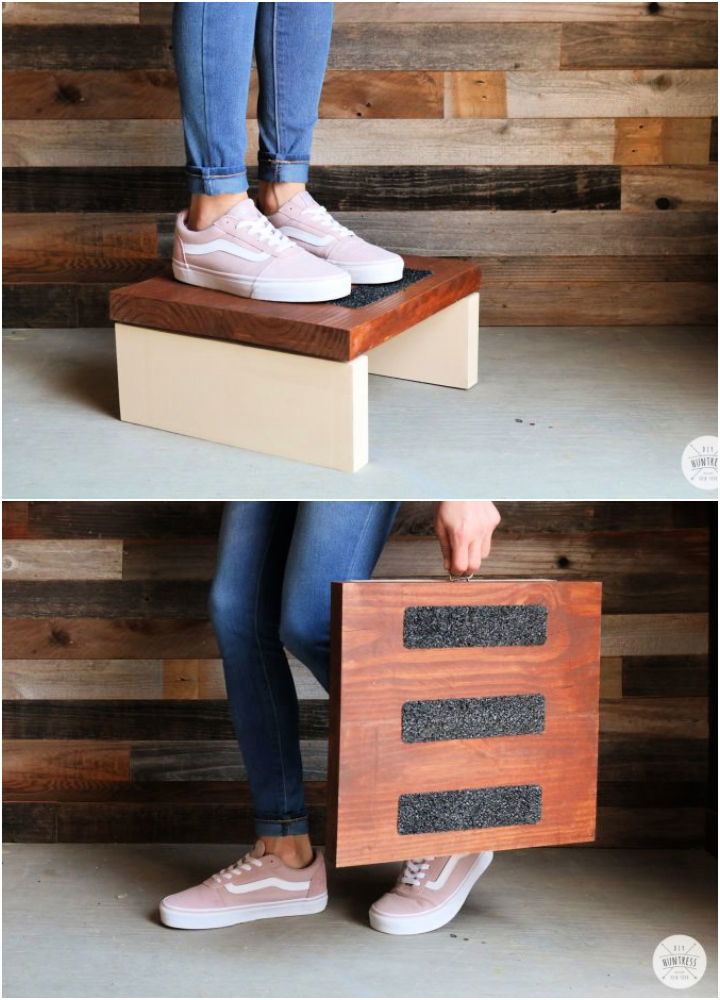
Turn your surplus scrap wood into a practical and handy DIY folding step stool! This project requires a miter saw, table saw, sander, pocket hole jig, and drill. The main materials include a scrap 2 x 8 board, scrap 2 x 6 board, T-Rex Extreme Tread Tape, and butt hinges, among others.
You can complete this project swiftly with clear steps, from cutting your wood pieces to measuring and attaching leg pieces. The final touch, applying T-Rex Extreme Tread Tape, ensures your stool is non-slip and safe.
This simple project helps you reach those top shelves and saves space as it can be folded away when unused. Transform your leftover wood into a functional piece today! diyhuntress
26. Modern Farmhouse Style Step Stool
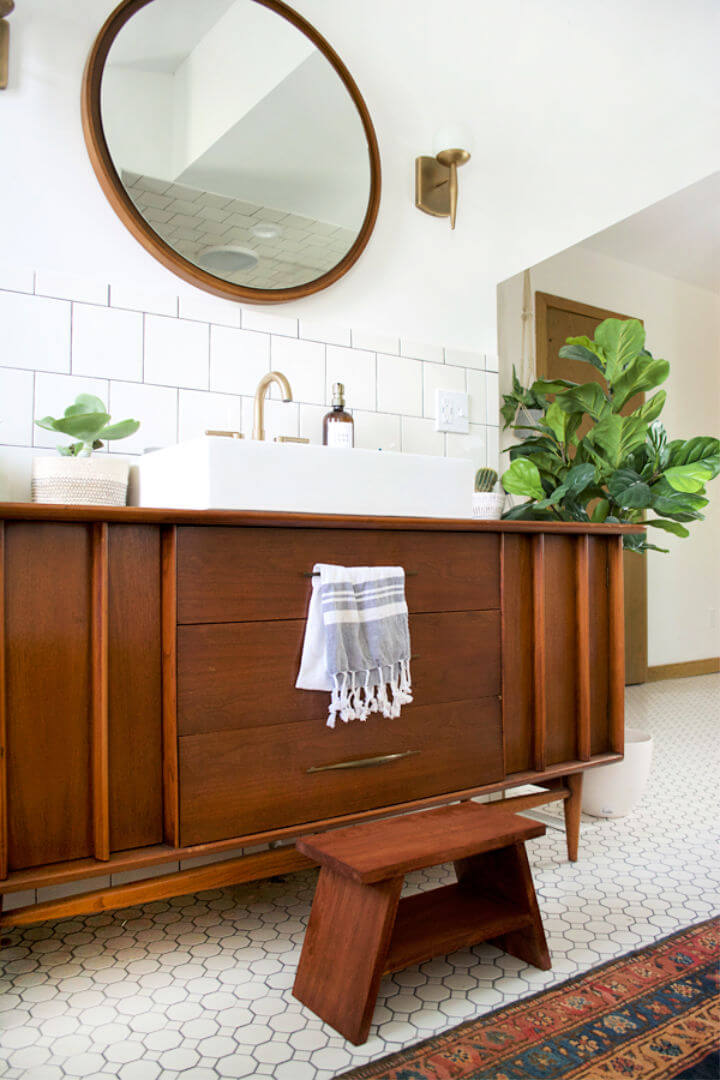
Experience the thrill of woodworking with this guide to building a DIY modern step stool! Using the game-changing Kreg Jig R3 kit, this guide outlines the creation of a practical and stylish household necessity. Armed with the Kreg Jig, a clamp, some Kreg screws, and a 1x4x8 pine board, you'll learn to master the art of woodworking.
The guide provides comprehensive steps from woodcutting to staining, ensuring the final product is beautiful and functional. The Kreg Jig's easy use is spotlighted, making drilling and making pocket holes effortless. Perfect your woodworking skills and build a handy step stool for your home today. brepurposed
27. How to Make a Step Stool
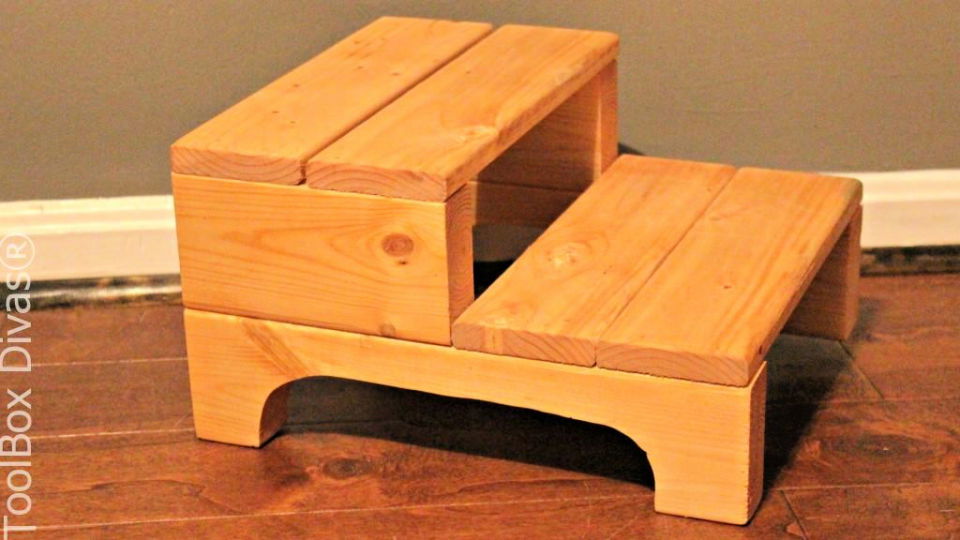
Take a DIY approach and build your step stool - it's easier! Ideal for those needing that extra reach or for kids to access those higher places, this step stool is a practical and fun project. Build a functional addition to any room with basic supplies like 2x4 and 1x4 wood pieces, 4" spax screws, rapid-fuse wood glue, sandpaper, and your preferred stain or paint.
This project is an excellent way to hone your skills with basic power tools. The guide provides clear and easy-to-follow instructions. This project doesn't just yield a useful step stool.
It also provides an engaging and creative experience, teaching valuable woodworking skills and offering a sense of accomplishment once completed. With a little exertion and ingenuity, you can transform simple materials into a valuable and stylish piece for your home! toolboxdivas
28. DIY Step Stool from Scrap Wood

Burst in the convenience with a hand-crafted DIY wooden step stool. Perfect for those hard-to-reach kitchen cabinets, this wooden step stool will become an essential household companion. The stool is sturdy and durable and made from a simple 2 x 6 @ 6' lumber piece, with essential tools like a saw, drill, and Kreg Jig.
Follow the step-by-step guide, where you will start by building two sides for the stool and gradually add the top and bottom steps, making sure to secure with wood glue and 2 1/2" pocket hole screws for added stability.
Finally, sand and finish it to match your style; you can opt for a gray-brown hue achieved with Minwax Special Walnut and Classic Gray. Remember to seal it with polyurethane for long-lasting protection, especially if it's placed in the kitchen. Start building your convenience today with this wooden step stool! bitterrootdiy
29. Make Your Own Kitchen Step Stool
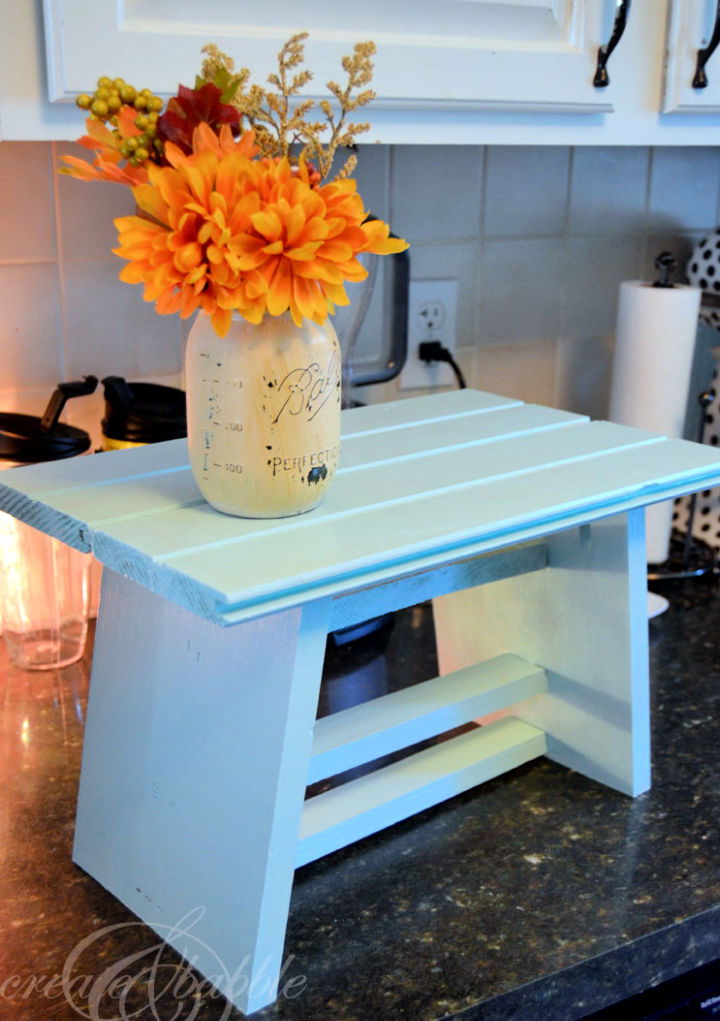
Discover the joy of self-reliance with this easy DIY kitchen step stool project. It won't cost a penny, built from scrap pieces of wood, making it an affordable and practical addition to your kitchen. With the help of a Ryobi compound sliding miter saw and a kreg jig, you can build a sturdy and reliable step stool that allows for effortless access to the highest shelves, a valuable asset, especially for those on the petite side.
With this DIY guide and practical instructions, you can assemble and paint your step stool, enhancing your kitchen functionality and adding a touch of personalized decor. This easy-to-build step stool is the perfect solution to empower you to reach new heights in your kitchen! createandbabble
30. DIY Kid's Wood Step Stool
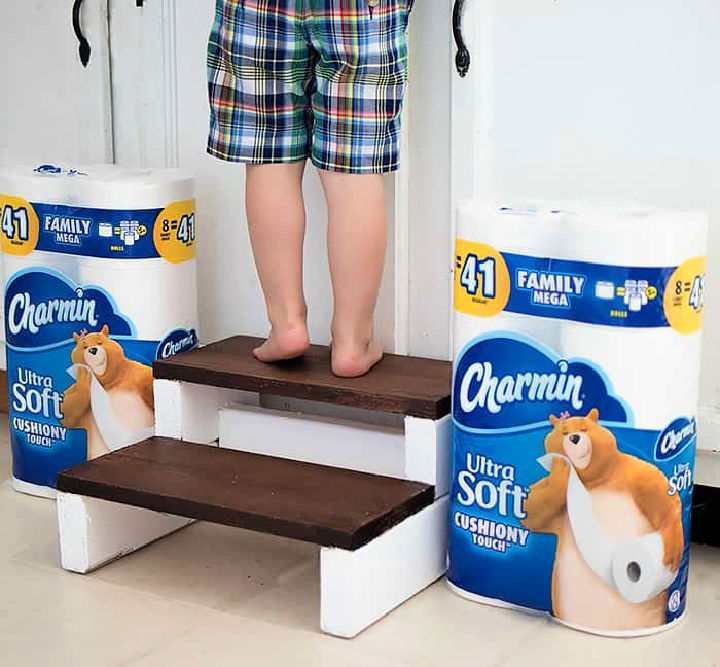
Familiarize your little ones with independence with this easy-to-build kid's wood step stool DIY project. This sturdy wooden step stool helps children reach the sink or toilet and seamlessly fits with your home decor without resorting to flashy plastic alternatives.
Simple materials such as 2 x 4 x 8 wood, a nail gun or hammer, wood glue, paint or stain, and felt form the backbone of this easy-to-build accessory. Follow the provided cutting and assembly guidelines, finishing with a paint or stain of your liking.
This stool promotes your child's self-reliance and adds a charming touch to your bathroom aesthetics. Start this budget-friendly project today for a noticeable transformation. gina michele
31. Free Sturdy Utility Step Stool Plans
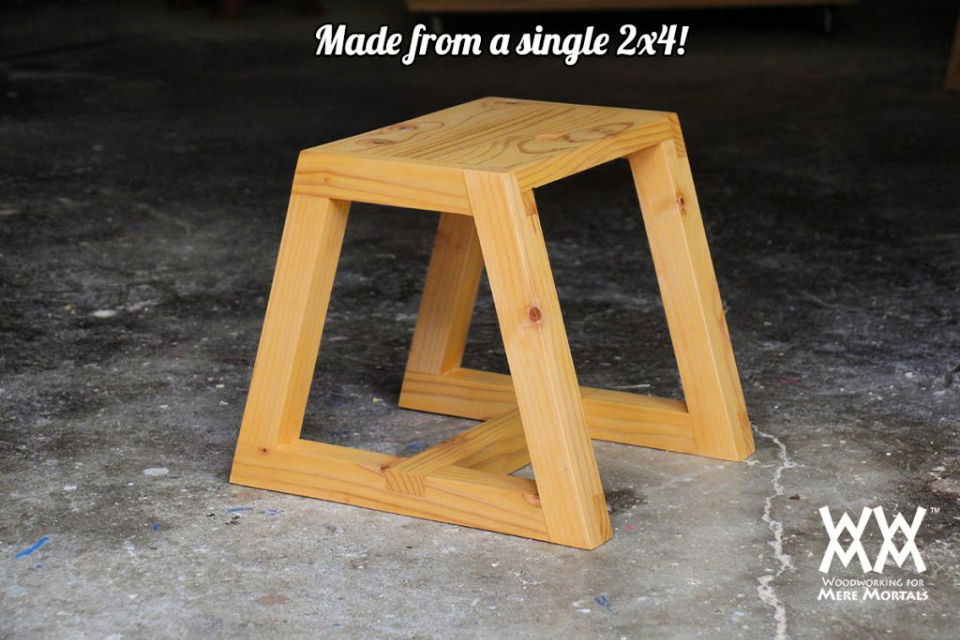
Looking for a creative woodworking project that's also profitable? Try this DIY utility stool made from a single 8-foot 2x4. It's a unique piece showcasing half-lap joints, giving it a distinct handmade feel that consumers will surely appreciate.
This kind of craftsmanship can add value and fetch higher selling prices, potentially earning you around $25 per stool at a craft fair. This project is a woodworking exercise and a chance to turn a hobby into a rewarding income source.
Perfect for selling at craft fairs or online, you can make it uniquely yours with the right modifications. Building this utility stool is an excellent way to enjoy woodworking while making a high-value product. woodworking
32. Step Stool Makeover With Mod Podge
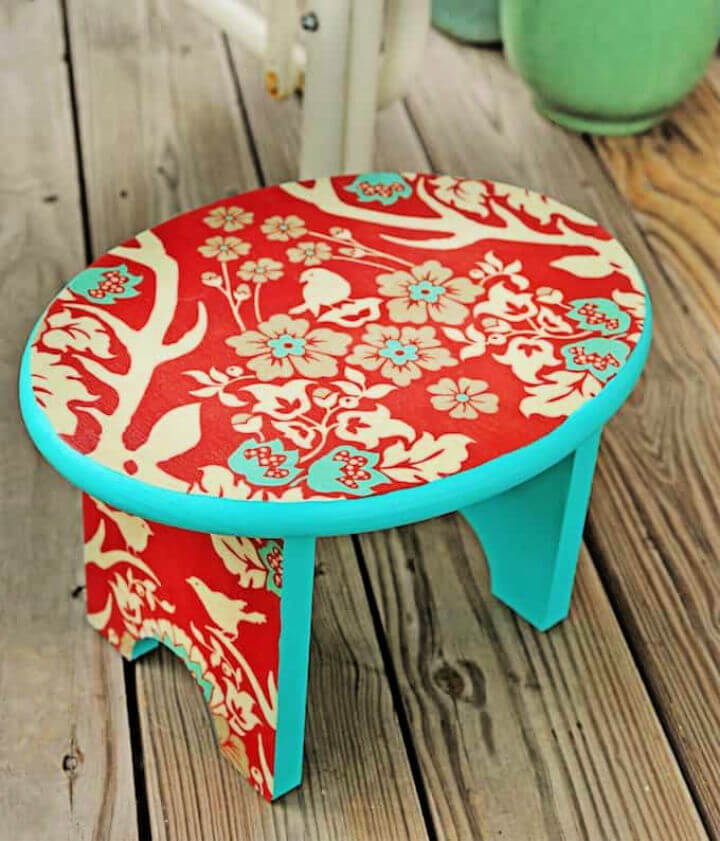
Get the joy of reaching new heights with your custom-made DIY step stool! Combining functionality with style, this fun project breathes new life into a simple wooden stool by enhancing it with colorful fabric.
With a brief list of materials, including a wooden stool, Mod Podge, acrylic paint, and your choice of fabric, this step-by-step guide makes it easy to bring your vision to life. In just a few easy steps, you'll build a handy customized stool that adds a pop of color to your space.
This project is more than just a step stool – it's a testament to your creativity and ingenuity, helping you reach new heights. Don't compromise on style or functionality. Blend them in this unique step stool project to transform a simple need into a chance for personal expression! modpodgerocks
Related DIY Projects to Try
Get hands-on with these DIY home projects - woodworking, furniture, decor, and upgrades to give your space a much-needed facelift!
- DIY Jewelry Box: Organize and display your accessories with these free DIY jewelry box plans, perfect for making a personalized storage solution.
- DIY Cutting Board: Craft the perfect kitchen accessory with these clever DIY cutting board ideas, designed for both function and style.
- Epoxy Resin Tables: Make stunning and one-of-a-kind furniture pieces with these awesome DIY epoxy resin table ideas, perfect for a variety of décor styles.
- End Table Plans: Enhance your living space with these lovely DIY end table plans and ideas, suitable for various styles and skill levels.
- DIY Bookshelf: Showcase your favorite reads with these awe-inspiring DIY bookshelf plans and ideas, designed to help you build the perfect storage solution.
- DIY Aquarium Stands: Display your aquatic pets in style with these sturdy DIY aquarium stand plans, catering to various tank sizes.
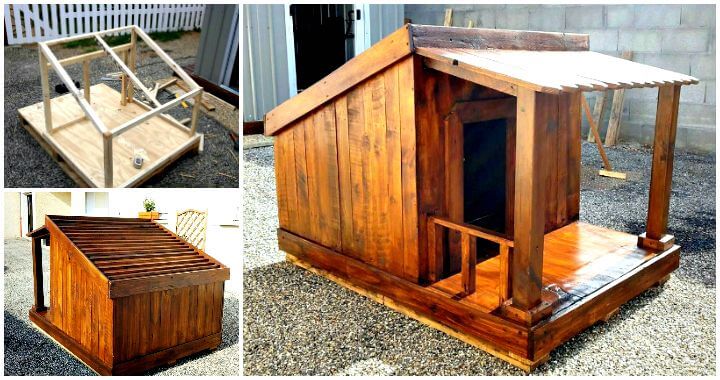
- Pallet Dog House: Provide a cozy shelter for your furry friend with this step-by-step plan for building a pallet dog house.
- Outdoor Storage Bench: Keep your outdoor space organized with these impressive DIY outdoor storage bench plans, designed for functionality and style.
- Nightstand Plans: Build functional and stylish bedside storage with these easy-to-follow mind-boggling DIY nightstand plans you can effortlessly build.
- DIY Bathroom Vanity: Customize your bathroom space with these free plans to build a cheap DIY bathroom vanity from scratch, perfect for any budget and style.
Conclusion:
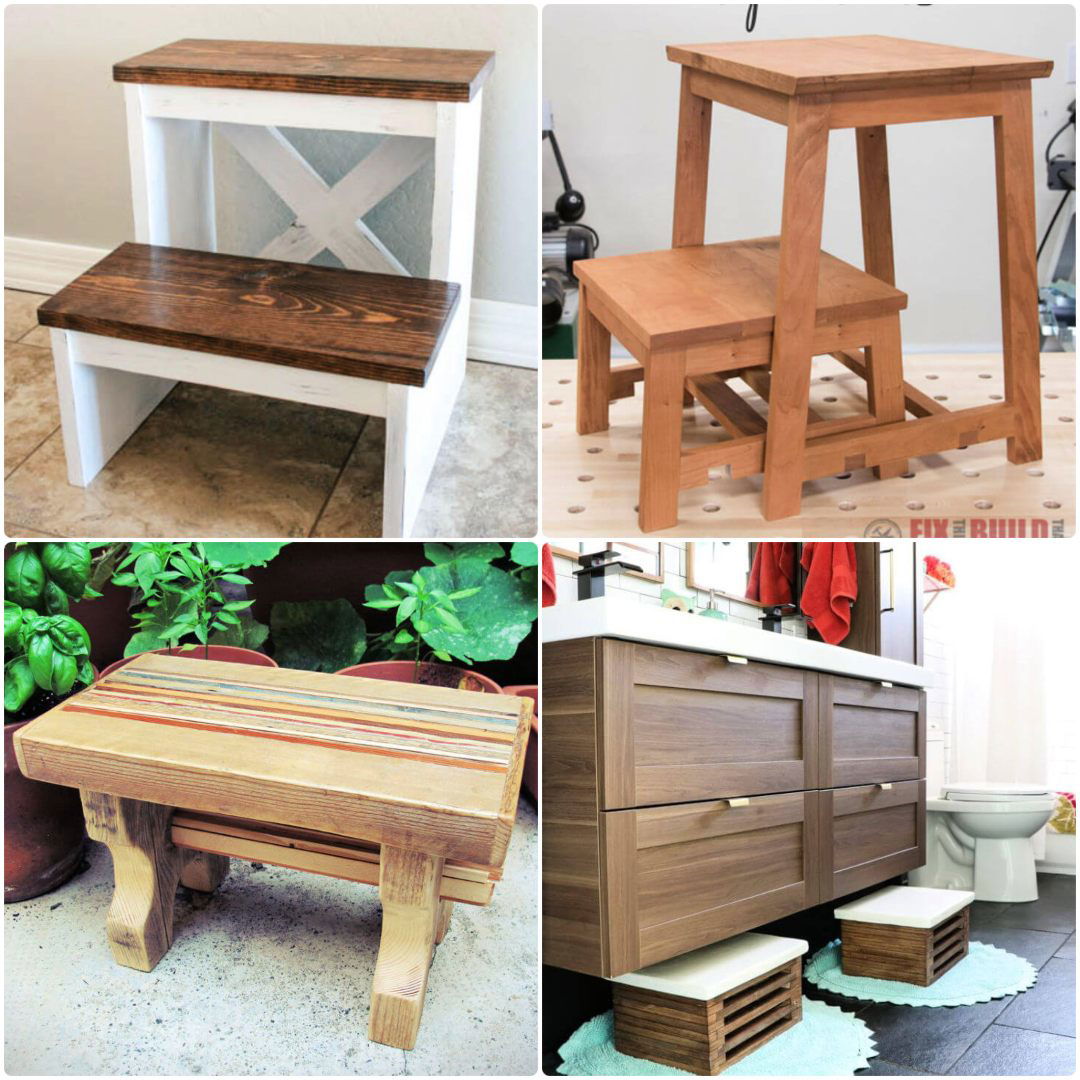
Wrapping up 30 free DIY step stool plans offers a plethora of design options, safety tips, advanced techniques, and maintenance advice to make a personalized and functional piece. From choosing styles and colors to incorporating textures and add-ons, this guide ensures your project is both stylish and safe. Explore customization possibilities and unleash your creativity with these helpful tips.


