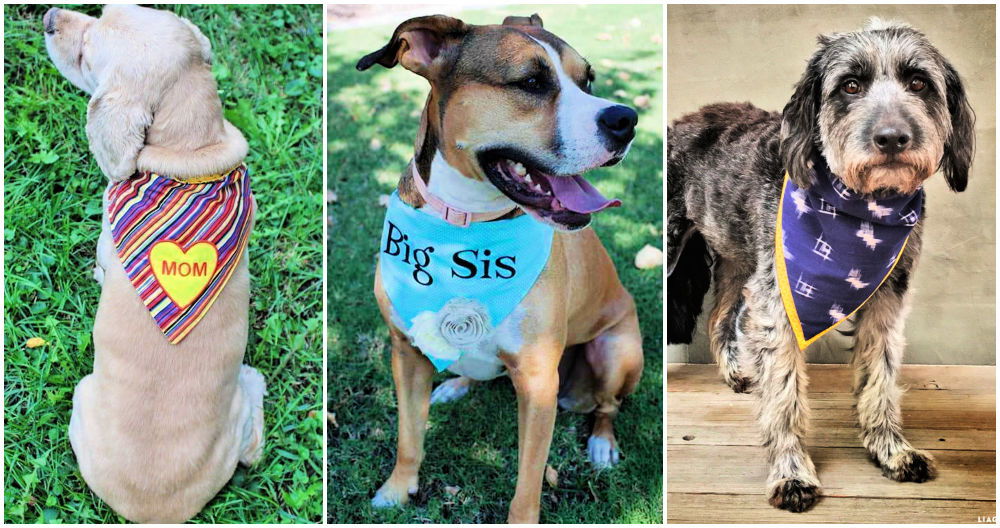
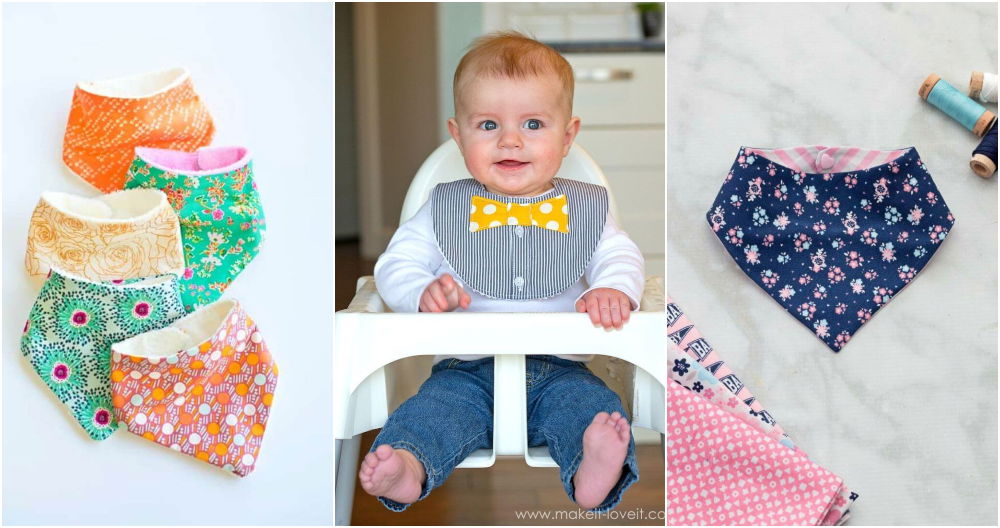
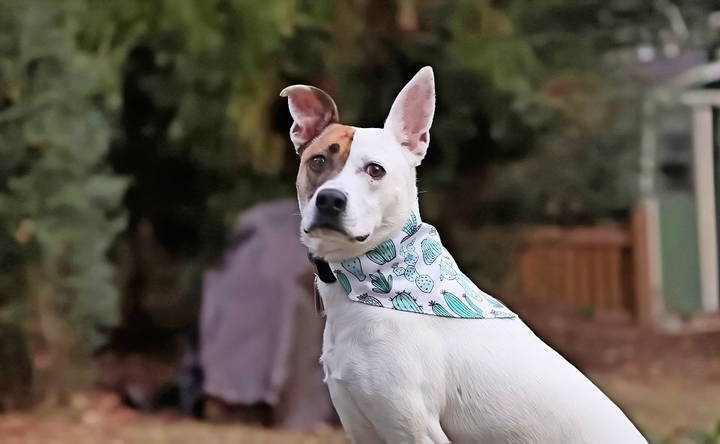
Making dog bandanas is an enjoyable way to express my creativity. I remember the first bandana I made for my dog, Max. With simple materials and a free dog bandana sewing pattern, I transformed a piece of fabric into something special for him. Watching Max prance around in his new accessory filled me with joy. It was a small project, but it made a big difference in our playtime.
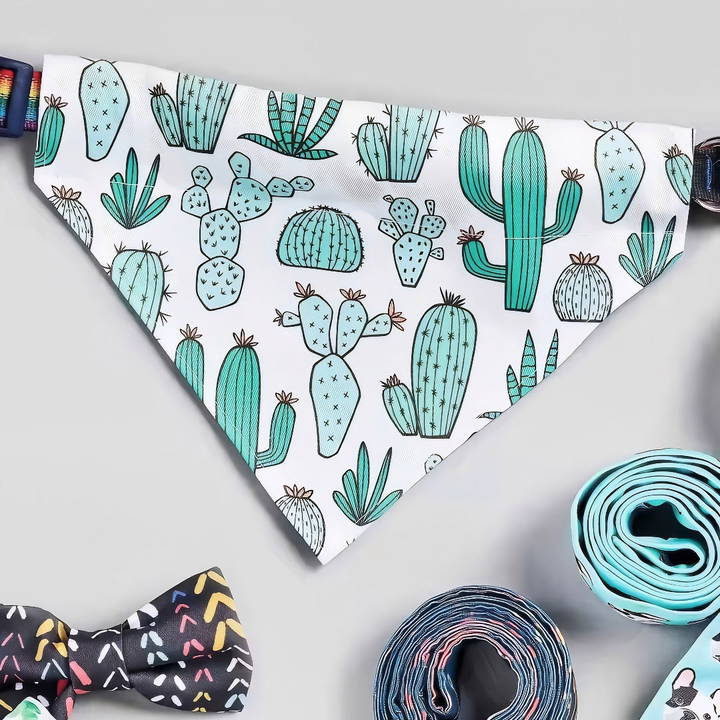
Using a dog bandana sewing pattern is easy, even for someone like me who is not a professional. I simply followed step-by-step instructions and was surprised at how quickly I could finish. With a few stitches, a little fabric, and some time, I made unique designs that Max loved.
This fun activity also gave me an opportunity to bond with him. Now, I encourage you to get started with these simple patterns; I'm sure they will help you, too!
Materials You'll Need and Why
- Fat Quarter of Fabric: A fat quarter is a quarter-yard cut of fabric that measures approximately 18" x 21". It's a perfect size for small projects like a pet bandana. I chose a fabric with a quirky print that reflects Buster's playful personality.
- Spoonflower's Free Bandana Template: This template is a lifesaver. It provides various sizes, which allows you to select the perfect fit for your pet. The template outlines make cutting the fabric a breeze.
- Sewing Machine: For stitching the fabric neatly and securely. If you don't have a sewing machine, hand sewing can work too, though it'll take a bit more time.
- Rotary Blade or Fabric Shears: To cut the fabric smoothly and precisely. I used fabric shears as I find them easier to handle.
- Thread: To match or contrast with your fabric. I went with a contrasting color to add an extra pop to the bandana.
- Pins: For securing the fabric before sewing, ensuring accuracy and preventing any fabric slippage.
Step by Step Instructions
Learn how to make a dog bandana with our step-by-step instructions. Discover tips on preparing, sewing, and adding the finishing touches for the perfect pet accessory.
Preparing the Bandana
- Cutting Out the Template: The first step was cutting out the bandana template. This process helped me understand the size and shape I was aiming for. I measured Buster's current collar to choose the correct template size. Accurate measurement is crucial here to ensure the bandana fits comfortably over the collar.
- Cutting the Fabric: Once I selected the template, I folded my chosen fabric in half and laid the template on top. Using my fabric shears, I cut around the template carefully. A tip here: always better to cut slightly outside the template line—you can always trim excess fabric, but you can't add it back if you cut too much!
Sewing the Bandana
- Folding and Pressing the Edges: I folded down the edges of each side of the bandana about a quarter inch and pressed it with an iron. Then, I folded it under another quarter inch and pressed again. This double fold makes a neat hem that prevents fraying.
- Top Stitching: Using my sewing machine, I top-stitched around the entire bandana. This step secured the hem and added a professional finish to the edges. The contrasting thread color I chose stood out beautifully against the fabric.
- Making the Collar Pocket: The next step was to fold over the top of the bandana, aligning the edges with the top corners of the triangle portion. I pinned this in place before stitching across the long edge, making a pocket for Buster's collar to slide through.
Finishing Touches
Finally, the bandana was complete! I was thrilled with the outcome, and Buster seemed to appreciate his new accessory's comfort and style. Slipping the bandana onto his collar was straightforward, and the fit was perfect, thanks to the accurate measurements at the beginning.
Customization Ideas for DIY Dog Bandanas
Making a DIY dog bandana is not just about crafting a piece of fabric to adorn your pet; it's an opportunity to express your dog's unique personality and style. Here are some customization ideas that can make each bandana special:
- Choose a Theme Start by selecting a theme that reflects your dog's character or the current season. For example, a nautical theme for summer, a floral pattern for spring, or a festive design for holidays.
- Add Personal Touches Personalize the bandana by adding your dog's name with fabric paint or iron-on letters. You can also sew on patches or badges that represent something special about your dog or your family.
- Play with Shapes: Who says a bandana has to be triangular? Experiment with different shapes, like a bow tie or a kerchief-style bandana. Just ensure it's comfortable for your dog to wear.
- Incorporate Fun Elements Attach small bells or tassels for a bit of fun. Just make sure they are securely fastened and don't pose a choking hazard.
- Use Safe and Comfortable Materials: Always choose materials that are safe and comfortable for your dog. Avoid anything that could irritate their skin or that they might be tempted to chew off.
- Consider Reversible Designs Make the bandana reversible with a different pattern on each side. This way, you get two styles in one, and it's a simple way to change up your dog's look.
- Include Practical Features If your dog spends a lot of time outdoors, consider adding reflective fabric or tape for visibility at night. You could also add a small pocket to hold a GPS tracker or identification.
By following these tips, you can make a bandana that's as unique as your furry friend. Remember, the key is to have fun with the process and make something that you and your dog will love.
Size and Fit Guide for DIY Dog Bandanas
Ensuring the right size and fit for your dog's bandana is crucial for their comfort and safety. Here's a simple guide to help you measure and make a bandana that fits your dog perfectly:
Measuring Your Dog's Neck
- Use a soft measuring tape.
- Place the tape around the widest part of your dog's neck where the bandana will sit.
- Add two inches to the measurement for a comfortable fit.
Making a Sizing Chart
- Extra Small (XS): Generally fits neck sizes 8-11 inches (20-28 cm).
- Small (S): Ideal for neck sizes 12-15 inches (30-38 cm).
- Medium (M): Suitable for neck sizes 16-19 inches (40-48 cm).
- Large (L): Fits neck sizes 20-23 inches (50-58 cm).
- Extra Large (XL): Best for neck sizes 24-27 inches (60-68 cm).
Adjusting for Different Breeds
- Smaller breeds like Chihuahuas may need an XS or S, while larger breeds like Labradors may require an L or XL.
- Consider the fur thickness and whether your dog has a broad or slender neck.
Ensuring Comfort
- The bandana should not be too tight; you should be able to fit two fingers between the bandana and your dog's neck.
- It should be easy to tie and untie without putting pressure on your dog's neck.
Safety Tips
- Always supervise your dog when they're wearing a bandana.
- If your dog seems uncomfortable or tries to remove it, adjust the fit or remove the bandana.
By following these guidelines, you'll make a bandana that's not only stylish but also safe and comfortable for your beloved pet.
Maintenance and Care Tips for DIY Dog Bandanas
Taking care of your DIY dog bandana is important to ensure it stays clean, looks good, and lasts longer. Here are some simple maintenance and care tips:
Washing Your Bandana
- Hand Wash: Gently hand wash the bandana in cold water with a mild detergent. It's the safest way to preserve colors and fabric integrity.
- Machine Wash: If you prefer machine washing, use a gentle cycle and place the bandana in a mesh laundry bag to prevent fraying.
Drying the Bandana
- Air Dry: Lay the bandana flat or hang it up to air dry. Avoid direct sunlight, which can fade the colors.
- Tumble Dry: If necessary, use a low heat setting on your dryer, but be aware that high heat can shrink the fabric.
Ironing
- If the bandana is wrinkled after washing, use a warm iron on the appropriate fabric setting. Iron on the reverse side to protect any prints or embellishments.
Storing Your Bandana
- Store the bandana in a cool, dry place away from direct sunlight.
- Fold it neatly or roll it up to prevent creases and save space.
Dealing with Stains
- Treat stains immediately by dabbing them with a cloth soaked in cold water and detergent.
- Avoid using bleach, as it can damage the fabric and alter the colors.
Regular Checks
- Regularly inspect the bandana for any signs of wear and tear, especially around the edges and any added decorations.
- Repair any small tears or loose threads to prevent further damage.
By following these care tips, your DIY dog bandana will remain a vibrant and stylish accessory for your furry friend.
Troubleshooting Common Issues with DIY Dog Bandanas
When crafting a DIY dog bandana, you might encounter a few hiccups along the way. Here's a troubleshooting guide to help you overcome common issues:
The Bandana Keeps Slipping Off
- Solution: Ensure you've measured your dog's neck accurately. The bandana should be snug but not too tight. If it's slipping, try making the ties longer for a more secure knot.
Fabric Fraying After Washing
- Solution: Use a zigzag stitch or a serger on the edges before the first wash. If you don't have a serger, use fray check sealant or fold the edges and sew a hem.
Bandana is Too Stiff
- Solution: Some fabrics stiffen after washing. Use fabric softener during the wash cycle, or iron the bandana on a low setting to restore softness.
The Colors Fade Quickly
- Solution: Always wash the bandana in cold water and avoid direct sunlight when drying. Choose high-quality fabric with colorfast dyes for better longevity.
The Bandana is Too Tight or Too Loose
- Solution: Re-measure your dog's neck and adjust the pattern accordingly. Remember to add extra space for comfort and ease of tying.
Decorations Come Off
- Solution: Secure any added decorations with strong thread or fabric glue. Avoid decorations that can easily be chewed off or pose a choking hazard.
Bandana Looks Wrinkled
- Solution: Iron the bandana on the appropriate setting for the fabric type. Store it flat or rolled up to prevent new wrinkles from forming.
Fix these common issues to ensure your DIY dog bandana looks great and stays in place. Practice makes perfect, so don't get discouraged. Keep trying, and you'll soon be making bandanas like a pro!
Safety Considerations for DIY Dog Bandanas
When making and using DIY dog bandanas, safety is paramount. Here's a guide to ensure that your furry friend's fashion is both stylish and safe:
Choose the Right Material
- Opt for soft, breathable fabrics like cotton or linen that won't irritate your dog's skin.
- Avoid materials that can fray easily or that your dog might chew.
Proper Sizing
- Ensure the bandana is the correct size. It should be loose enough to fit two fingers between the bandana and your dog's neck but not so loose that it can catch on objects.
Secure Fastening
- Use snap buttons or Velcro for a secure and easy-to-remove fastening method.
- Avoid long ties that can become a strangulation hazard or that your dog can chew on.
Avoid Harmful Decorations
- Do not add small items like beads or buttons that can be choking hazards if they come loose.
- Ensure any decorations are securely attached and non-toxic.
Check for Allergies
- Be aware of any fabric or dye allergies your dog may have and choose hypoallergenic options if necessary.
Regular Inspection
- Regularly check the bandana for signs of wear and tear.
- Replace the bandana if it starts to fray or if any parts come loose.
Supervision is Key
- Always supervise your dog when they're wearing a bandana, especially for the first few times.
- Remove the bandana if your dog is uncomfortable or trying to remove it themselves.
Training Your Dog
- If your dog is not used to wearing accessories, gradually introduce the bandana and reward them for wearing it.
- Ensure they associate the bandana with positive experiences.
By following these safety considerations, you can make a fun and safe accessory for your dog.
FAQs About Free Dog Bandana Pattern
Discover answers to frequently asked questions about free dog bandana patterns, including materials, sizes, and easy-to-follow instructions.
Measure around your dog’s neck where their collar sits. Use this measurement to select the bandana size that fits best. Most patterns offer different sizes, and you can adjust the bandana size by where you tie the knot.
Yes, you can! If you don’t have a sewing machine, you can hand-sew the bandana using a needle and thread. The process will be the same, but it might take a little longer.
While most patterns require some sewing, you can make a no-sew bandana by using fabric glue or hemming tape to secure the edges. However, these might not be as durable as sewn bandanas.
Make sure the bandana is not too tight around your dog’s neck. It should be snug enough so it doesn’t slip off but loose enough to be comfortable. Always supervise your dog when they’re wearing a bandana to ensure safety.
Personalizing your dog's bandana can be a fun way to showcase their unique style. You can add their name, initials, or even a cute graphic by using fabric paint, iron-on transfers, or embroidery. If you're using paint or transfers, make sure they are non-toxic and safe for pets. Always allow any personalizations to dry or set completely before letting your dog wear the bandana.
Final Thoughts
In conclusion, making bandanas for my dog brought us both joy and fun experiences. With just a bit of fabric and a sewing pattern, I maked something personal and useful. I hope you feel inspired to try this activity. You'll find that it's a rewarding way to spend time with your furry friend!


