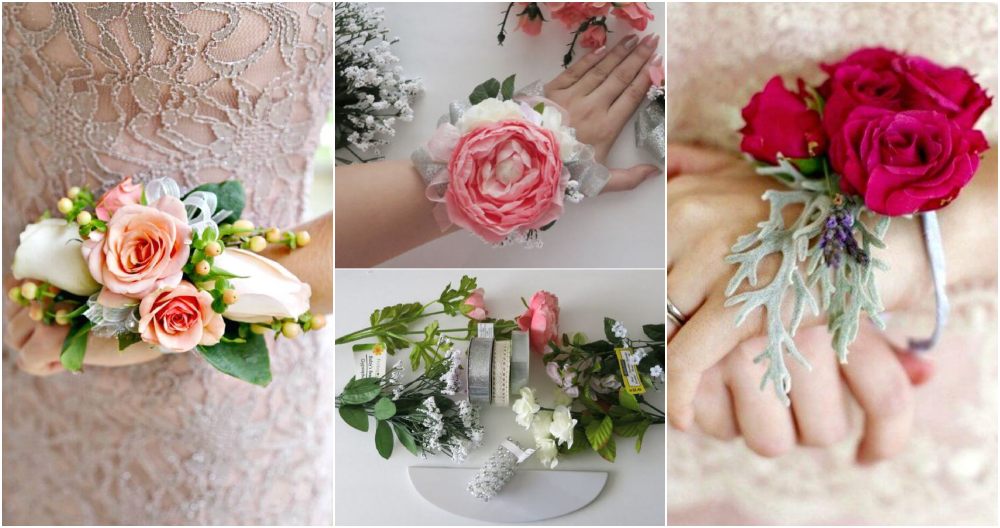
Planning your wedding on a budget doesn't mean you have to sacrifice style or creativity. With these cheap DIY wedding centerpieces, you can add a personal touch to your big day without breaking the bank. These low-cost wedding table decorations offer a fantastic way to decorate your venue tastefully while staying within your budget. From simple floral arrangements to elegant candle setups, the possibilities are endless and budget-friendly.
Making simple wedding centerpieces can be both fun and rewarding. You can reuse materials you already have or find affordable items at local stores. Not only will you save money, but you’ll also make a unique atmosphere that reflects your personality and style.
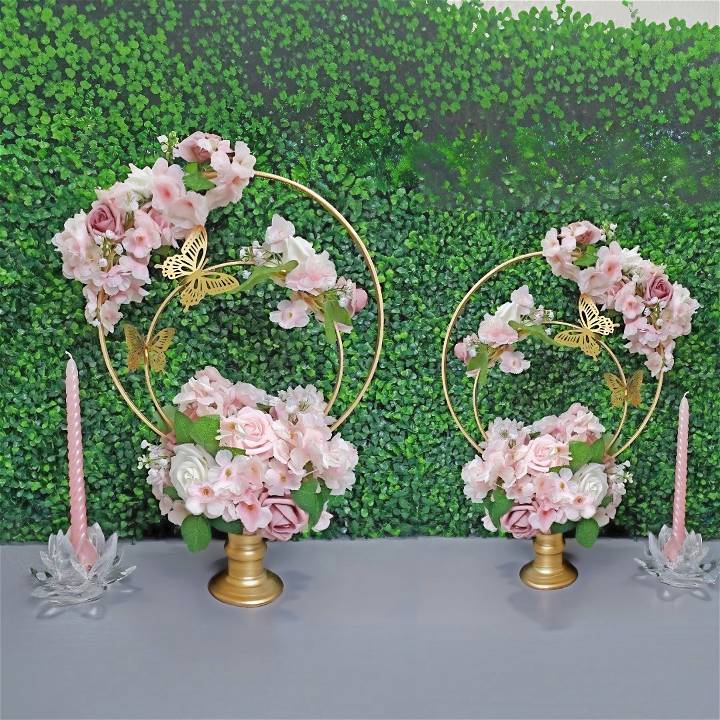
With our guide on cheap DIY wedding centerpieces, you can make stunning, budget-friendly centerpieces. Save money and add a personal touch!
Materials You Need:
- Two Bamboo Hoops: I chose these for their sturdy yet delicate appearance.
- Dollar Tree Candle Holder: This would act as the base of my centerpiece.
- Rust-Oleum Metallic Gold Spray Paint: To give the hoops and candle holder a luxurious golden sheen.
- Floral Foam: Essential for inserting and holding the flowers in place.
- Foam Cutter or Knife: This is used to shape the foam with precision.
- Hot Glue Gun and Glue Sticks: Needed to assemble and secure all the parts together.
- Assorted Flowers and Greenery: I selected a mix to achieve a lush, romantic look.
Why These Materials?
Choosing the right materials was crucial for ensuring the centerpieces not only looked beautiful but were also cost-effective and easy to assemble. The bamboo hoops and Dollar Tree candle holder provided a sturdy yet inexpensive foundation. The gold spray paint transformed these simple elements into something more refined and wedding-appropriate. The floral foam, easily manipulable with a foam cutter or knife, allowed me to customize the arrangements, and the hot glue ensured everything stayed in its rightful place.
Step by Step Instructions
Learn to make stunning floral arrangements with our step-by-step instructions. From the base to the finishing touches, perfect your craft seamlessly.
1. Preparing the Base
First, I took my bamboo hoops and candle holder and spray painted them with Rust-Oleum Metallic Gold Spray Paint. A pro tip here is to do this outside or in a well-ventilated area. Once painted, I left them to dry, turning them occasionally to ensure an even coat.
2. Shaping the Floral Foam
While the hoops and holder dried, I focused on preparing the floral foam. I used an extra hoop to mark the center on the foam, pressing down to make an imprint. Then, carefully, I cut out the marked area with a foam cutter. This step is pivotal; a clean cut ensures the hoop sits snugly and securely. Doing this outside is advisable to avoid mess from the foam.
3. Assembling the Base
Once all components dried and the foam was cut, it was time to put everything together. I placed the candle holder at the base and glued the first hoop into the foam, ensuring it was centered and straight. The second, larger hoop followed, with both hoops being glued at strategic points to ensure stability.
4. Decorating with Flair
Decorating was the most enjoyable part. I started by cutting skewers into smaller parts to use as stems for my flowers. Attaching flowers to only one side of the larger hoop maked a visually appealing asymmetry.
I then focused on the floral foam section. Here, wisteria garlands, roses, and additional greenery were arranged and inserted into the foam. This step required patience and an artistic eye to ensure the arrangement looked lush and balanced. Gluing the flowers in place was optional, but I found it provided additional stability to the design.
5. The Finishing Touches
Finally, to add a personal touch and a bit of whimsy, I incorporated small 3D butterflies throughout the centerpiece. Their delicate presence amongst the flowers added depth and interest.
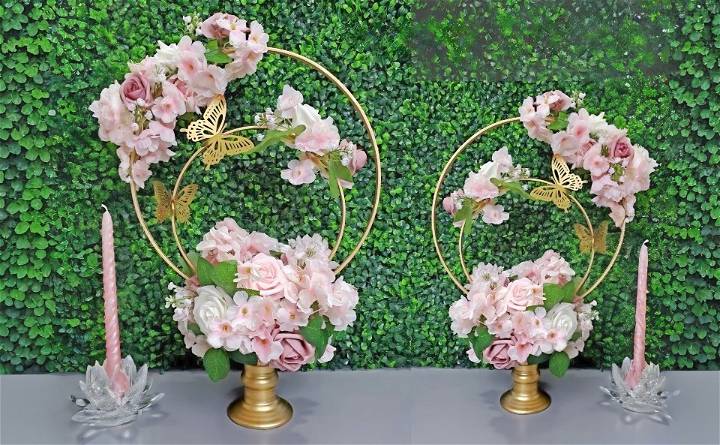
The stunning, custom wedding centerpiece looked pricier than it was, shining on tables and catching everyone's eye. Golden tones, lush flowers, and butterflies maked a romantic, elegant theme.
Personalization Tips for DIY Wedding Centerpieces
Making a DIY wedding centerpiece gives you the opportunity to add a personal touch to your special day. Here are some tips to help you personalize your centerpieces:
- Reflect Your Story: Think about the moments that define your relationship. Did you meet at a beach? Consider incorporating sand or shells. Love hiking? Use elements from nature like pine cones or stones.
- Color Coordination: Use your wedding colors as a base for your centerpiece. This will ensure consistency and harmony with the overall wedding theme.
- Incorporate Hobbies: If you have shared hobbies or interests, let them inspire your centerpiece. For example, if you both love reading, stack vintage books as part of the arrangement.
- Add Photos: Personalize your centerpieces by including photos of you and your partner at different stages of your relationship. Use small frames or make a photo garland.
- Monograms: Use your initials as a decorative element. You can make monogrammed stickers or tags to add to vases or candles.
- Cultural Elements: Celebrate your heritage by adding cultural elements to your centerpieces. This could be anything from traditional fabrics to specific flowers.
- Seasonal Touches: If your wedding is during a particular season, use seasonal flowers or decorations. For example, autumn weddings could feature pumpkins or colorful leaves.
- Lighting: Soft lighting can add a romantic atmosphere. Consider using fairy lights or candles to bring warmth to the table.
- Handwritten Notes: Write personal notes or favorite quotes and place them in the centerpiece. This adds an intimate and unique touch.
- Interactive Elements: Engage your guests by making the centerpiece interactive. This could be a small game or puzzle that reflects your interests.
The key to personalization is in the details that represent you as a couple. Please keep it simple, meaningful, and true to your story. Your guests will appreciate the thoughtfulness and creativity that went into making your wedding uniquely yours.
Seasonal Variations for DIY Wedding Centerpieces
When planning your DIY wedding centerpieces, considering the season can add a special touch that resonates with the time of year. Here’s how you can tailor your centerpieces to each season using simple and clear language:
Spring
Spring is a time of renewal and blossoms. Use fresh flowers like tulips, daffodils, or peonies. Incorporate pastel colors and light fabrics like chiffon or silk to reflect the softness of the season.
Summer
Summer centerpieces should capture the vibrancy of the season. Opt for bright flowers such as sunflowers or gerberas. Consider adding sea shells or sand in glass vases for a beachy vibe, and use citrus fruits for a pop of color and freshness.
Autumn
Autumn’s palette is warm and earthy. Use dried leaves, branches, and berries for a rustic look. Pumpkins or gourds can serve as unique vases or accents. Incorporate candles to add warmth as the days get cooler.
Winter
Winter centerpieces can be magical with sparkling elements like crystals or silver ornaments. Use evergreen sprigs, pinecones, and holly berries for a natural look. White flowers and frosted glass can mimic the beauty of snow.
Match your DIY wedding centerpieces to the season for beauty, affordability, and simplicity that reflects natural elegance.
Troubleshooting Common Issues with DIY Wedding Centerpieces
When crafting your own wedding centerpieces, you might encounter a few hiccups along the way. Here’s a guide to solving some common problems, presented in a straightforward and easy-to-understand manner:
Flowers Wilt Quickly
- Solution: Keep flowers in water as long as possible before the event and consider using floral foam to keep them hydrated. Choose hardier flowers like orchids or succulents that last longer.
Centerpieces Look Sparse
- Solution: Add volume with inexpensive fillers like baby’s breath or greenery. Use mirrors as a base to make an illusion of fullness.
Decorations Keep Falling Over
- Solution: Ensure the base of your centerpiece is heavy enough to support the decorations. Use a low center of gravity for stability, and secure items with floral wire or glue.
Difficulty Transporting Centerpieces
- Solution: Design your centerpieces to be easily assembled on-site. Use modular components that can be packed separately and put together at the venue.
Centerpieces Don’t Match the Venue
- Solution: Visit the venue beforehand and take note of the tables and surroundings. Choose colors and styles that complement the venue’s aesthetic.
Running Out of Time
- Solution: Start early and do a few trial runs. Consider simpler designs if time is limited, and don’t hesitate to ask for help to speed up the process.
Budget Constraints
- Solution: Be resourceful with materials. Shop at dollar stores, use seasonal items and repurpose decorations from friends' or family weddings.
Plan ahead and stay flexible to make your DIY wedding centerpieces beautiful and stress-free. They don't need to be perfect, just special to you.
Maintenance and Setup for DIY Wedding Centerpieces
When it comes to DIY wedding centerpieces, proper maintenance and setup are crucial to ensure they look their best on your big day. Here’s a guide to help you manage this process smoothly:
Preparation
Before the wedding, assemble a small toolkit that includes scissors, tape, and any other items you might need for last-minute adjustments. Make sure you have extra materials on hand in case of any mishaps.
Transportation
If you’re transporting the centerpieces to the venue, pack them carefully in boxes with plenty of padding to prevent damage. It’s often best to transport elements separately and assemble them on-site.
Assembly
Assign a trusted friend or family member to oversee the setup of the centerpieces at the venue. Provide them with clear instructions and a diagram if necessary.
Hydration
For floral centerpieces, keep the flowers in water for as long as possible before the event. If you’re using floral foam, make sure it’s fully saturated.
Temperature Control
Be mindful of the temperature at the venue. Avoid placing centerpieces in direct sunlight or near heat sources, as this can cause flowers to wilt and candles to melt.
Safety
If you’re using candles, ensure they are securely placed to prevent any fire hazards. Consider using LED candles as a safer alternative.
Cleanup
Plan for the cleanup process in advance. Decide whether you’ll be giving the centerpieces away to guests, donating them, or disposing of them responsibly.
By following these tips, you can ensure that your DIY wedding centerpieces are set up efficiently and maintained throughout the event, leaving you free to enjoy your special day.
FAQs About DIY Wedding Centerpieces
Discover essential faqs about DIY wedding centerpieces to make stunning, personalized decor for your special day. tips, tricks, and inspiration inside!
Absolutely! Non-floral elements like candles, lanterns, wooden accents, or books can add dimension and interest to your centerpieces. For a rustic theme, consider using wood slices as a base for your arrangements. If you’re going for a more modern vibe, geometric shapes or metallic accents might be the way to go.
Your wedding theme can inspire your centerpiece design. For a beach-themed wedding, use shells and driftwood. A garden party might call for vintage teacups filled with flowers. For a winter wonderland theme, think about incorporating pinecones and frosted branches into your centerpieces.
To ensure longevity, choose hardy flowers that won’t wilt easily, like succulents or orchids. If you’re using fruit, select items that won’t bruise or spoil quickly. For any candle elements, make sure they’re long-burning and placed safely to prevent any fire hazards. It’s also a good idea to assemble your centerpieces a day or two before the event to ensure they stay fresh.
To make a cohesive look, start by choosing a color scheme or theme that reflects your personal style or the season of your wedding. Use consistent materials across all centerpieces, such as the same type of vase or flower variety. Consider the height and size of your centerpieces to ensure they complement each other and don’t obstruct guests’ views.
Personalizing your centerpieces adds a special touch to your wedding decor. Incorporate elements that tell your story, such as photos, quotes, or items that represent your hobbies or interests. You could also use initials or dates that are significant to you and your partner. This not only makes your centerpieces unique but also sparks conversations among your guests.
Reflection
In conclusion, these cheap DIY wedding centerpieces for your big day can add a personal touch and save you money. With DIY wedding centerpieces, you have control over the theme and style, ensuring your wedding is unique. Remember, low-cost wedding table decorations don't have to be boring. By crafting cheap, simple wedding centerpieces, your event will be memorable and beautiful without breaking the bank.


