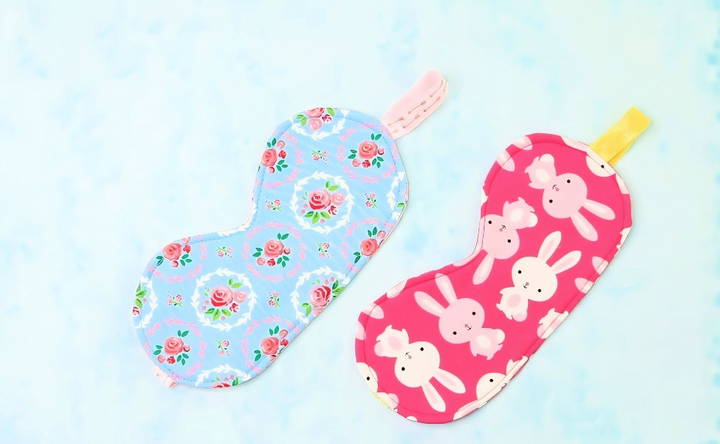
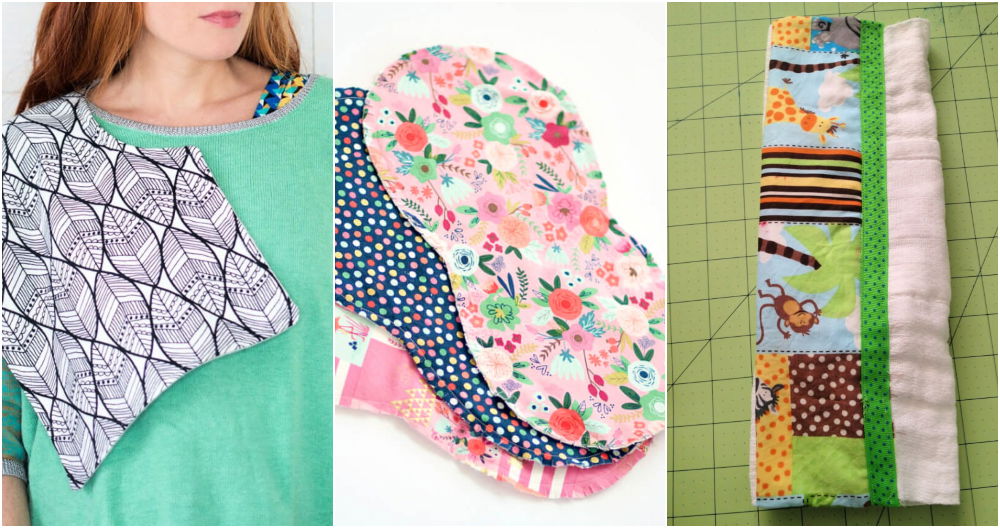
If you're looking to make your own DIY sleep mask, you've come to the right place. This guide offers a simple sleep mask pattern that anyone can follow. Making your sleep mask not only helps improve your sleep environment but also allows you to personalize your comfort. You'll enjoy crafting a mask tailored to your needs, whether you prefer soft fabrics or fun designs.

Making a DIY sleep mask can be a satisfying and enjoyable project. It requires just a few materials and some basic sewing skills. Plus, you'll find that wearing a sleep mask can block out light and promote better rest. Keep reading to explore the step-by-step instructions and helpful tips that will make your crafting experience smooth and enjoyable.
Why Make Your Own Sleep Mask?
I stumbled upon a DIY sleep mask tutorial during a period when quality sleep seemed like a luxury. The idea of crafting something customized to my preferences was appealing. Plus, the personal touch made the sleep mask feel extra special. If you're considering making your own, it's not only a fun project but also a practical solution for enhancing your sleep quality.
Materials You Will Need
To begin with, you'll need a few supplies. Each material has its purpose, ensuring your sleep mask is comfortable, functional, and durable.
- Cotton Fabric: This is for the outer layer of the mask. Cotton is breathable, soft, and gentle on the skin, ideal for resting against your face.
- Elastic (5/8 inch or 1.5cm fold over elastic recommended): The elastic keeps the mask in place while you sleep. I prefer fold-over elastic because it's soft and doesn't dig into the skin.
- Fusible Fleece: This material acts as padding, blocking out light effectively while adding a plush comfort to your mask.
Step by Step Instructions
Discover easy step-by-step instructions on how to make your own DIY sleep mask, including tips and benefits for a better night's sleep.
Step 1: Cutting the Fabric
First, download the free pattern from the Treasurie blog and print it out. Trace the pattern onto your cotton fabric and fusible fleece, then cut them out. The precision in this step is crucial for a well-fitted mask.
Step 2: Attaching the Fusible Fleece
Following the instructions on your fusible fleece, iron it onto the wrong side of your cotton fabric. This step requires attention; don't rush it. Ensuring the fleece is correctly bonded will prevent any discomfort during wear.
Step 3: Sewing the Mask
Place the right sides of the cotton fabric together and sew around the edges, leaving a gap for turning it right side out later. Remember to attach the elastic at this stage, securing it between the two layers of fabric.
Step 4: Turning and Topstitching
Carefully turn the mask right side out through the gap you left. This might be a bit fiddly, but patience pays off. Once turned, press the mask with an iron (avoiding direct contact with the elastic) and topstitch all around, closing the gap.
Tips for Success
- Clip the curves before turning: This ensures the mask will lie flat against your face.
- Be cautious with the iron: Fusible fleece and elastic can be sensitive to high heat.
- Choose your fabric wisely: Darker colors or patterns can be more effective at blocking out light.
The Difference a DIY Sleep Mask Made in My Life
Ever since making my first sleep mask, my night routine has transformed. The process of putting on the mask signals to my mind that it's time to shut down, making a mental barrier against distractions. The comfort and personalized fit make it something I look forward to using every night.
Additional Tips to Enhance Your Sleep Mask Experience
To make your sleep experience even more enriching, consider implementing the following:
- Scent: A dab of lavender essential oil on your mask can further relax and soothe you into sleep.
- Care: Hand wash your mask periodically to keep it fresh and hygienic.
- Make it a gift: DIY sleep masks make thoughtful, personalized gifts for friends and family.
Customization Ideas for Your DIY Sleep Mask
Making a sleep mask that's uniquely yours can be both fun and rewarding. Here are some ideas to help you customize your sleep mask for comfort, style, and personal expression:
Choose Your Fabric Wisely
Selecting the right fabric is crucial for comfort. Opt for soft, breathable materials like cotton or silk that feel gentle against the skin. If you're sensitive to light, consider using a darker fabric to better block out light.
Add a Personal Touch
Embroider your initials or a small design that resonates with you. This not only adds a personal touch but also makes your sleep mask uniquely identifiable.
Play with Patterns and Colors
Don't shy away from vibrant patterns or your favorite colors. A cheerful pattern or a color you love can make your sleep mask a joy to use every night.
Consider Comfort Enhancements
Think about adding an extra layer of padding for added comfort. Memory foam or a soft quilt batting can make your mask feel like a cozy pillow for your eyes.
Make It Adjustable
An adjustable strap can make a world of difference in fit. Use Velcro or adjustable sliders to ensure your sleep mask fits just right, staying in place without being too tight.
Include Aromatherapy
Incorporate a pocket where you can slip in a sachet of dried lavender or another calming herb. Aromatherapy can enhance relaxation and improve your sleep quality.
Think About Temperature
For those who prefer a cooler touch, consider a fabric that stays cool, like a bamboo blend. Alternatively, for a warming effect, flannel can be a cozy option.
Use these ideas to make a sleep mask that's functional and reflects your personality. Ensure it's comfortable and enjoyable, so you look forward to sleeping.

Advanced Techniques for Crafting a DIY Sleep Mask
When you're ready to take your DIY sleep mask to the next level, these advanced techniques can help you make a mask that's not only functional but also a step above in quality and design.
Adding a Nose Wire
A nose wire is a game-changer for those who need complete darkness to sleep. It helps to block out light that often seeps in around the nose area. Here's how to add one:
- Cut a thin piece of flexible wire to the length that covers the width of your nose.
- Encase the wire in fabric to prevent any discomfort.
- Sew it into the top seam of your sleep mask, ensuring it's centered for balance and comfort.
Making a Contoured Fit
A contoured fit can prevent your mask from pressing against your eyelids, allowing for REM sleep without disturbance. To achieve this:
- Design your pattern with a slight arch over the eyes.
- Add an extra layer of padding around the edges to make a ‘cup' for the eyes.
- Test the fit and adjust the pattern as necessary for the perfect contour.
Incorporating Cooling or Warming Elements
Depending on your preference, you can make your sleep mask cooler or warmer:
- For a cooling effect, use materials like a gel insert that can be chilled in the refrigerator before use.
- For warmth, consider a pocket where you can insert a heat-safe sachet that can be warmed up.
Using Adjustable Straps
Adjustable straps can make all the difference in fit and comfort. Here's how to make them:
- Use elastic that's soft and wide enough to be comfortable.
- Add sliders similar to bra straps for easy adjustment.
- Ensure the strap is long enough to fit all head sizes comfortably.
Use these techniques to improve your DIY sleep mask's comfort and functionality. Aim to make a mask that feels weightless, helping you sleep peacefully.
Care and Maintenance of Your DIY Sleep Mask
Taking care of your DIY sleep mask is essential to ensure it remains clean, comfortable, and effective. Here's a straightforward guide to help you maintain your sleep mask in top condition:
Regular Cleaning
- Wash your sleep mask regularly, especially if you use it every night.
- Hand wash with a mild detergent in cool water to preserve the fabric's softness and elasticity.
- Avoid bleach or harsh chemicals that can degrade the material.
Drying Tips
- Gently wring out excess water without twisting the mask, which can misshape the padding.
- Air dry by laying the mask flat on a clean towel. Avoid direct sunlight, which can fade the fabric.
Storage Solutions
- Store your sleep mask in a clean, dry place when not in use.
- Use a breathable pouch or container to protect it from dust and moisture.
Dealing with Wrinkles
- If your mask gets wrinkled, use a cool iron on the fabric side, avoiding any elastic or decorations.
- Never iron directly on silk or synthetic materials without a protective cloth.
Refreshing the Mask
- If you've added a pocket for aromatherapy, refresh the herbs or essential oils every few weeks to maintain the relaxing scent.
- Replace any sachets or inserts as needed to keep the mask feeling fresh.
Follow these steps to extend your DIY sleep mask's life and keep it fresh for your nightly routine.
FAQs About DIY Sleep Mask
Get answers to common questions about DIY sleep masks, including materials, benefits, and step-by-step instructions to make your own.
The best fabrics for a sleep mask are those that are comfortable against your skin and capable of blocking out light. Cotton and silk are popular choices because they are soft and gentle on the skin. Dark colors are preferable as they provide better darkness mimicry.
Yes, making a sleep mask is a simple project that's great for beginners. You can find step-by-step guides and free patterns online that require minimal sewing skills. Just follow the instructions carefully, and you'll be able to make a functional and personalized sleep mask.
To ensure a comfortable fit, measure the circumference of your head where the elastic will sit. The elastic should be snug enough to keep the mask in place but not so tight that it's uncomfortable. You can adjust the length of the elastic based on your measurement.
Making your own sleep mask allows you to customize it to your preferences. You can choose the fabric, pattern, and fit to suit your needs. Additionally, a DIY sleep mask can be a cost-effective and rewarding project, giving you a sense of accomplishment and a personalized item that promotes better sleep.
To keep your sleep mask in the best condition, follow these care tips:
Wash Gently: Hand wash your sleep mask in cool water with a mild detergent. Avoid harsh chemicals that can damage the fabric.
Air Dry: Lay the mask flat to air dry. Avoid wringing it out, as this can deform the batting and elastic.
Storage: Store your sleep mask in a clean, dry place when not in use to prevent dust and dirt accumulation.
Regular Maintenance: Check the elastic and fabric periodically for signs of wear and tear. Replace the elastic if it becomes loose or uncomfortable.
Final Thoughts
In conclusion, making your own DIY sleep mask can be both fun and rewarding. This sleep mask pattern offers a simple guide to crafting a stylish and comfortable accessory that promotes better sleep. Enjoy the satisfaction of a personalized night mask!


