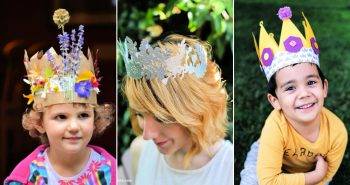
Making your own DIY crown can be a fun and rewarding project, allowing you to express your creativity in a distinctive way. With creative DIY crown ideas to choose from, there’s a wide range of styles and inspirations that can help anyone craft a unique and personal accessory right at home. These ideas are designed to cater to varying tastes and skill levels, ensuring that everyone can find a project that excites and challenges them.
Our guide not only presents a variety of 25 DIY crown ideas but also delves into the historical and cultural significance of crowns, expert tips and interviews, and sustainable material choices to consider. We provide a comprehensive step-by-step guide to assist you through the process of making your crown, alongside maintenance and storage advice to keep your creation in pristine condition. Let’s explore the possibilities and start crafting a masterpiece that stands out.
Continue reading to immerse yourself in the world of DIY crowns and uncover the perfect project for your next crafting adventure.
Historical and Cultural Significance of Crowns
Crowns have been a symbol of power and authority across various cultures and civilizations. They are not just ornamental headpieces but carry deep meanings and stories.
The Timeless Emblem of Leadership
- Crowns in Monarchy: Traditionally, crowns represent the sovereignty of a monarch. They signify the ruler’s divine right to govern.
- Crowns in Religion: In many faiths, crowns symbolize spiritual enlightenment and connection to the divine.
- Crowns in Achievements: Beyond royalty, crowns also mark victory and success, often seen in sports and pageants.
The Artistic and Cultural Journey
- Crowns in Art: Artists have depicted crowns in various forms, from paintings to sculptures, each telling a unique story.
- Crowns in Literature: Many stories and legends feature crowns, symbolizing honor, bravery, or even curse.
- Crowns in Heraldry: In family crests, crowns often represent lineage and valor.
Expert Interviews and Tips on DIY Crowns
Making a DIY crown can be a fulfilling project. Here are some expert tips to guide you:
Crafting with Purpose and Creativity
- Choose the Right Materials: Experts suggest using materials that resonate with the theme of your event.
- Design for Comfort: A crown should be as comfortable as it is beautiful. Ensure it fits well and feels good to wear.
- Personalize Your Crown: Add a personal touch. Incorporate elements that reflect your personality or the occasion.
Learning from the Masters
- Step-by-Step Guides: Follow tutorials from seasoned crafters to get the best results.
- Upcycling Tips: Experts encourage using recycled materials for an eco-friendly approach.
- Maintenance Advice: Proper care will keep your crown looking splendid for longer. Store it safely and handle it with care.
Make beautiful, meaningful DIY crowns by knowing the crown history and crafting tips. Best crowns tell a story and show the wearer’s uniqueness.
Material Insights and Sustainable Options
When making a DIY crown, the choice of materials is crucial not only for the final look but also for its environmental impact. Here’s a guide to selecting the best materials for your project that are both beautiful and kind to our planet.
Understanding Crown Materials
- Durability and Aesthetics: The longevity of your crown depends on the materials you choose. Common materials like paper, fabric, and plastic have different lifespans and visual appeals. Paper is versatile and easy to work with but may not last as long. Fabric can be durable and give a rich look, while plastic offers a wide range of colors and shapes but is less eco-friendly.
- Eco-Friendly Alternatives: Consider using recycled or biodegradable materials for your crown. Recycled paper or cardboard can be just as sturdy and paintable as new materials. Biodegradable glitter and natural elements like flowers or leaves can add a unique touch without harming the environment.
Choosing Sustainable Materials
- Recycled Paper: Look for high-quality recycled paper that can withstand shaping and gluing. It’s a great way to reduce waste and make something beautiful.
- Natural Embellishments: Use seeds, dried flowers, or leaves to decorate your crown. These materials not only look gorgeous but also connect you to nature.
- Fabric Scraps: Reuse scraps from old clothes or curtains to add texture and color to your crown. This is a fantastic way to upcycle materials that would otherwise be discarded.
Tips for Material Selection
- Test for Comfort: Make sure the materials you choose are comfortable to wear, especially if the crown will be worn for extended periods.
- Consider the Theme: Align your material choices with the theme of the event or costume. Natural materials work well for earthy themes, while shiny fabrics suit more glamorous occasions.
- Be Creative: Don’t be afraid to mix and match materials. Combining different textures and colors can result in a truly unique crown.
By thoughtfully selecting materials for your DIY crown, you not only make a stunning accessory but also contribute to a more sustainable crafting practice.
How to Make a Crown – Step by Step Guide
Making a paper crown at home is a fun and simple craft project that kids and adults alike can enjoy. It’s a perfect activity for rainy days, birthday parties, or just a creative afternoon. Follow this step-by-step guide to make your own colorful paper crown with minimal supplies and maximum creativity.
Supplies Needed:
- Multiple sheets of colored paper
- Glue
- Scissors (optional, for customization)
Step 1: Prepare Your Paper
Take multiple pieces of colored paper. For a more vibrant crown, use different colors. Fold each piece of paper in half lengthwise.
Step 2: Fold the Paper
After folding the paper in half, take the folded side and fold the corners inward, making a triangle shape at the bottom. This process is similar to making the beginning folds for a paper airplane. Ensure the folds are crisp for a neat final product.
Step 3: Repeat the Folding
Repeat the same folding process for all your papers. The uniformity in shape and size is key to connecting the pieces smoothly later on.
Step 4: Make the Crown Shape
Once all your papers are folded into a triangle shape, it’s time to form the crown. Apply glue along the edge of one of the triangle’s sides and connect it to another triangle. Repeat this process, connecting all the triangles in a chain until you reach the desired crown circumference.
Step 5: Customize Your Crown
To add a royal touch to your crown, customize it with embellishments. You can cut out diamond shapes from other colored papers or use stickers and sequins. Glue these decorations onto the crown, focusing on the tips or around the base for a regal look.
Step 6: Finalize the Crown
After decorating, connect the ends of your crown together to form a circle. Apply glue generously to ensure they stick well. Allow the crown to dry for a few minutes.
Congratulations, you’ve now made a beautiful paper crown!
Video Tutorial
For a step-by-step video tutorial on making a paper crown, watch this helpful video from DIY Kids Craft: Make a Paper Crown Tutorial.
It pairs well with a written guide, enhancing understanding of folding techniques.
Making a paper crown is a simple, enjoyable craft that allows your creativity to show. Just a few supplies and steps create a colorful, customizable crown for playtime, parties, or royal occasions. Happy crafting!
Occasion-Specific Designs
Crowns can be tailored for various occasions, adding a special touch to celebrations. Here’s how to include occasion-specific designs in your DIY crown post.
Design Ideas for Every Occasion
- Weddings: Offer elegant designs featuring pearls and lace for bridal crowns.
- Birthdays: Suggest colorful and playful crowns for birthday parties, using materials like felt and sequins.
- Festivals: Guide readers on making vibrant and bohemian-style crowns with flowers and ribbons for music festivals.
Customization Tips
- Personalize: Encourage readers to personalize their crowns to match their outfits or the event’s theme.
- Durability: Provide tips on making crowns durable so they last throughout the event.
- Comfort: Remind readers to ensure their crowns are comfortable to wear, especially for long events.
By featuring user content and special designs, you can enhance your DIY crown post for readers. Embrace creativity and unite a crafting community.
Maintenance and Storage Advice for DIY Crowns
Taking care of your DIY crown ensures it remains a cherished keepsake for years to come. Here’s how to maintain and store your crown properly.
Keeping Your Crown Pristine
- Clean Gently: After wearing your crown, clean it with a soft brush or cloth to remove any dust or debris. Avoid harsh chemicals that can damage delicate materials.
- Proper Storage: Store your crown in a cool, dry place away from direct sunlight, which can fade colors and weaken materials. Use a box or bag to protect it from being crushed.
Longevity Tips
- Avoid Moisture: Keep your crown away from moisture to prevent mold and deterioration. If your crown includes natural elements like flowers, consider drying them first.
- Refresh and Repair: Periodically check your crown for any signs of wear and make necessary repairs. This proactive approach will extend its life.
By following these simple yet effective tips, you can ensure your DIY crown remains a beautiful and lasting memento of your creativity and craftsmanship.
FAQs About DIY Crown
Get answers to all your DIY crown questions. Find out how to make your own crown at home with our comprehensive FAQ guide.
What materials are best for making a DIY crown?
Choose materials based on durability, aesthetics, and ease of use. Paper, fabric, and plastic are popular choices, but consider eco-friendly options like recycled paper or natural embellishments.
How can I make my DIY crown stand out?
Personalize your crown with unique decorations, such as beads, sequins, or even LED lights. Use colors and patterns that reflect your personality or the theme of the event.
Can I make a DIY crown if I’m not crafty?
Absolutely! There are plenty of simple tutorials available that can guide you through the process step by step. Start with a basic design and gradually try more complex ones as you gain confidence.
What’s the best way to size a DIY crown?
Measure the circumference of your head where you want the crown to sit. Add an extra inch for overlap if you’re using a closure, or make it adjustable with ribbon ties.
How do I attach decorations to my crown securely?
Use a strong adhesive like hot glue or craft glue. For heavier items, you might need to reinforce them with wire or thread sewn into the base of the crown.
Are there any quick DIY crown ideas for kids?
Yes! Kids can make paper crowns with pre-cut templates or decorate pre-made foam crowns with stickers and markers for a fun and easy craft.
How can I make a floral crown last longer?
Use fresh, high-quality flowers and keep the crown refrigerated until it’s time to wear it. Alternatively, use silk flowers for a lasting keepsake.
What are some eco-friendly alternatives for crown materials?
Look for biodegradable or recyclable materials like paper, natural fibers, or even repurposed items from around your home.
How do I store my DIY crown after wearing it?
Keep it in a cool, dry place, away from direct sunlight. Store it flat or on a head-shaped form to maintain its shape.
Can I make a DIY crown for a special occasion like a wedding?
Yes, you can make an elegant and sophisticated crown using materials like lace, pearls, and semi-precious stones to match the occasion’s formality.
The key to a successful DIY crown is creativity and having fun with the process!
25 Creative DIY Crown Ideas to Make at Home
Discover 25 unique DIY crown ideas to make at home. Get crafty and make your own beautiful crowns for any occasion!
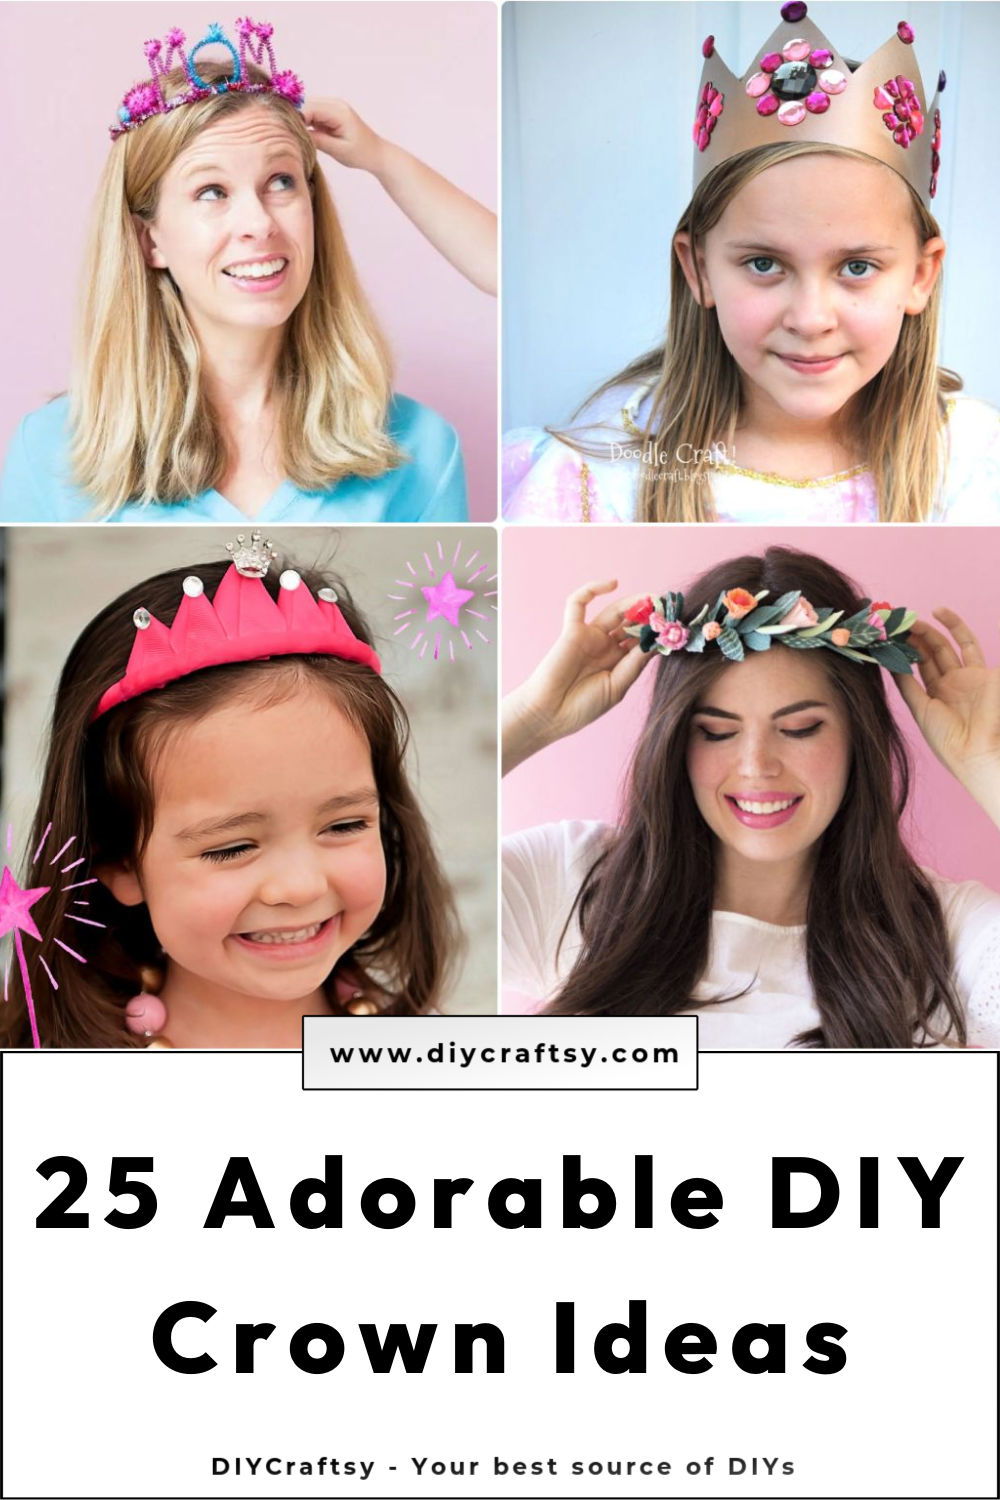
1. How to Make a Crown for Mom

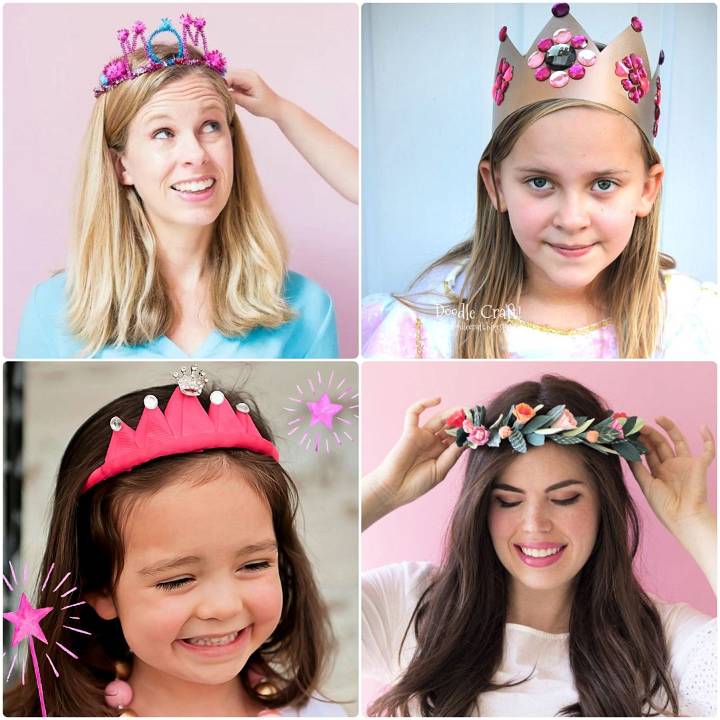
Celebrate Mother’s Day in style with this DIY Mother’s Day crown! Crafted with love and creativity, this homemade gift will make mom feel like royalty. Using chenille stems and pom-poms, children can easily make this crown that’s fit for a queen.
The process involves twisting two chenille stems to form a circle, braiding three long ones to make the base, and shaping additional chenille stems into letters to spell “MOM.” Secure the letters to the base and add a touch of flair with hot-glued pom-poms. The result is a sparkly and special crown that Mom will proudly wear on her special day. fun 365
2. Handmade Princess Crown
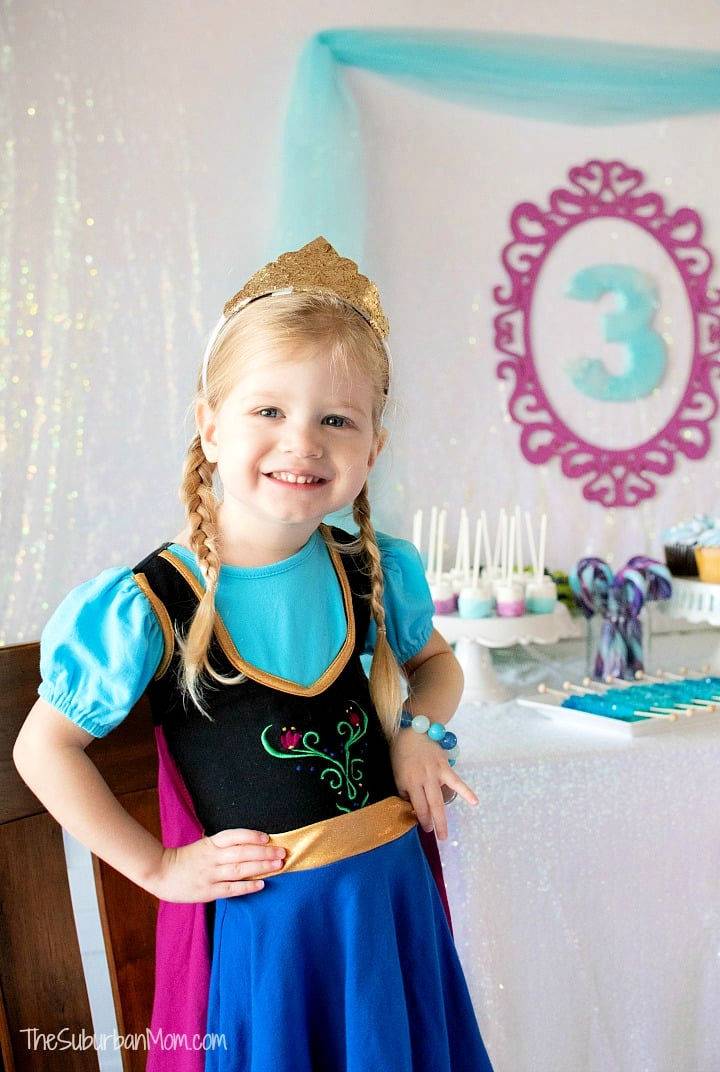
Give a regal experience to your little princess with these elegantly crafted DIY princess crowns. Durably designed for hours of imaginative play. Unlike flimsy plastic crowns, these are made to withstand hours of dress-up and play. Crafted with gold glitter ribbon, they add a touch of sparkle without leaving a trail of glitter behind.
The project is made easier with the help of a Cricut Maker, but it can also be done by hand. Simply download the crown template, cut the glitter material, and use hot glue to secure it to a soft, flexible white headband.
The tabs ensure a secure fit, so the crown stays in place during playtime. Your child will love wearing this crown for various occasions, from birthday parties to imaginative play, thanks to its durability and timeless charm. thesuburbanmom
3. Making a Pipe Cleaner Crown
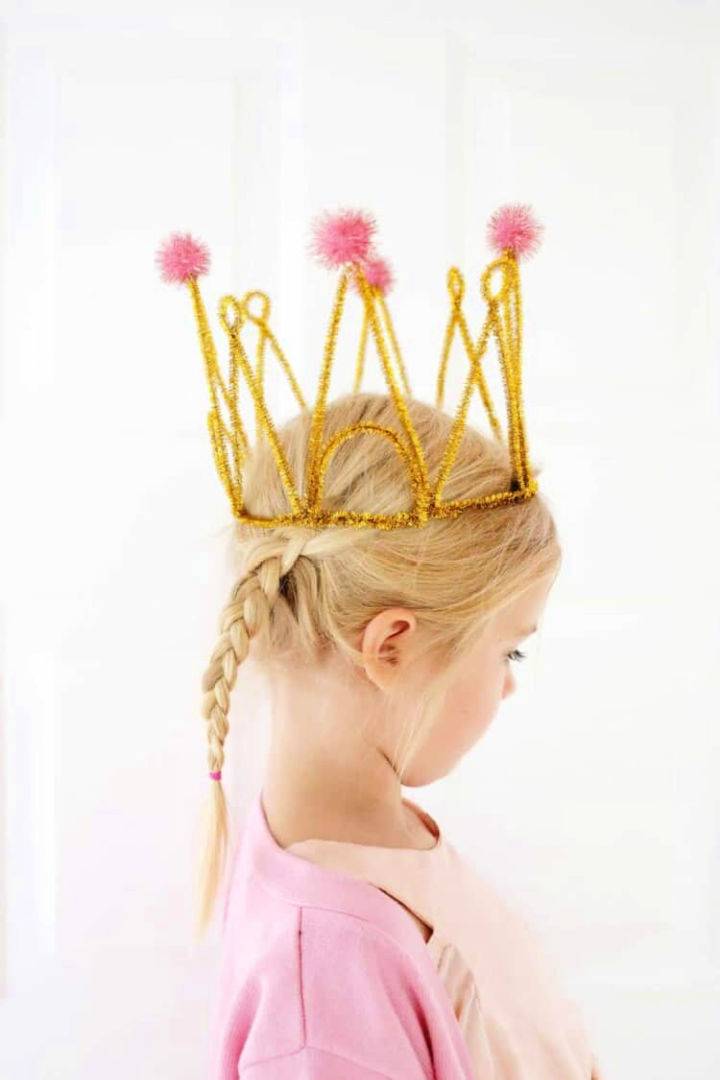
Crafting your crown? DIY pipe cleaner crown is the perfect way to sparkle and shine! Perfect for birthdays, showers, or as a photo booth prop, this crown is quick to make and requires just a few materials: pipe cleaners in your chosen color and a glue gun. Kids will love getting involved in the creative process and can even help with the project.
Pipe cleaners are versatile and affordable, making them a great addition to your craft supplies. This crown is adjustable in size and can be tailored to match any theme or event. From Halloween costumes to Disney-inspired designs, the possibilities are endless.
However, remember that pipe cleaners are not the most durable material, so it’s best to display the crown on a table or shelf to prolong its lifespan. Let your child’s imagination soar with this delightful pipe cleaner craft! childhoodmagic
4. DIY Paper Crown for Birthday Party
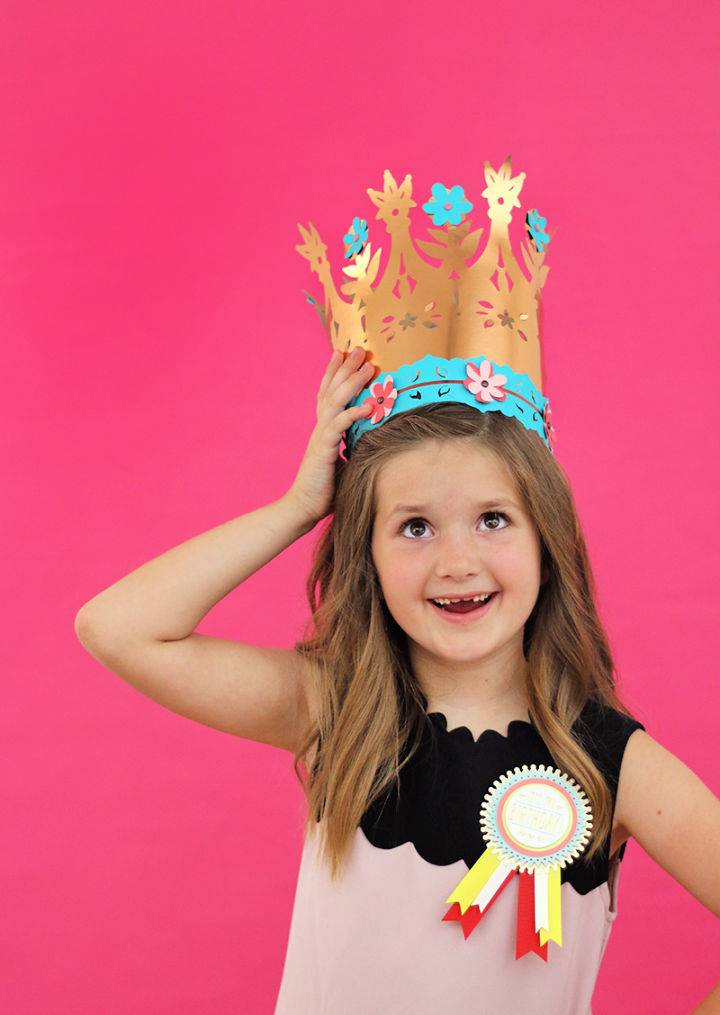
Celebrate your child’s birthday with a creative and personalized touch by making a DIY paper crown. This guide will help you make a crown using colored cardstock and basic crafting supplies. If you have an electronic cutting machine, it will simplify the process, but don’t worry if you don’t have one – you can still cut the pieces by hand using sharp scissors and a craft knife.
This guide provides downloadable templates in two sizes, allowing you to choose the dimensions that best suit your needs. After cutting out the crown and band pieces, you’ll glue them together to form a long strip. Attach the band to the last of the crown, and voila! Your base crown is complete.
Now it’s time for the fun part – decorating! Add rhinestones, glitter, or washi tape to customize the crown and make it unique for your child’s special day. Let your creativity soar and make a memorable birthday experience with this project. persialou
5. Make Your Own Silk Flower Crown
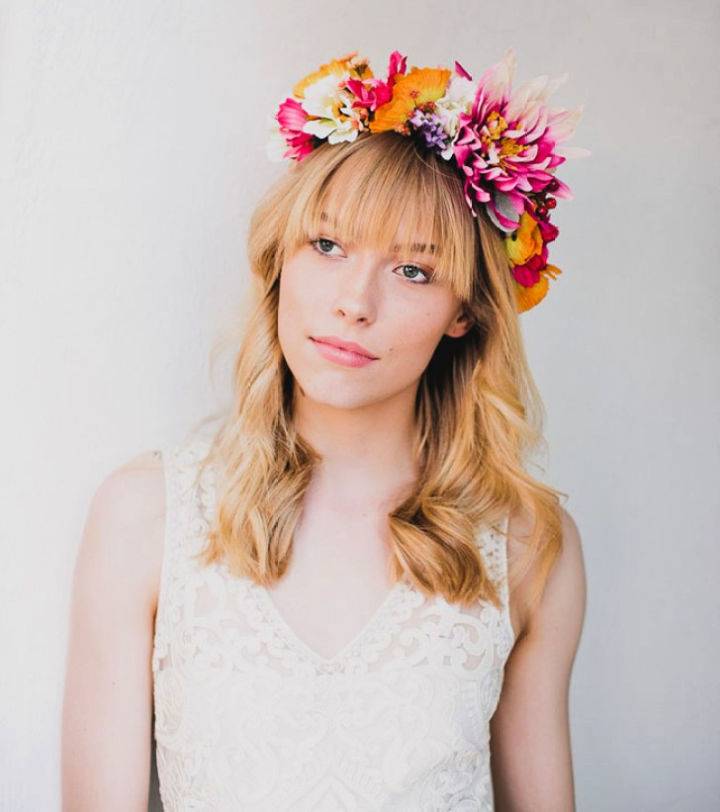
Feel like a queen of the garden with this DIY flowery crown! Make a stunning flower crown that can be enjoyed year-round using silk flowers. You can customize your crown with a variety of colors and blooms.
Gather your materials, including silk flowers, floral wire, floral tape, and scissors. Begin by shaping the wire around your head to make the base. Trim the flower heads and attach them to the wire frame using floral tape, ensuring they all face forward.
Gradually add medium-sized flowers, followed by focal flowers and filler flowers. Fill in any gaps with extra blooms for a fuller crown. Complete the look by reinforcing any loose pieces. This flower crown is perfect for a spring or summer occasion. greenweddingshoes
6. Cool Ribbon Princess Crown Headband
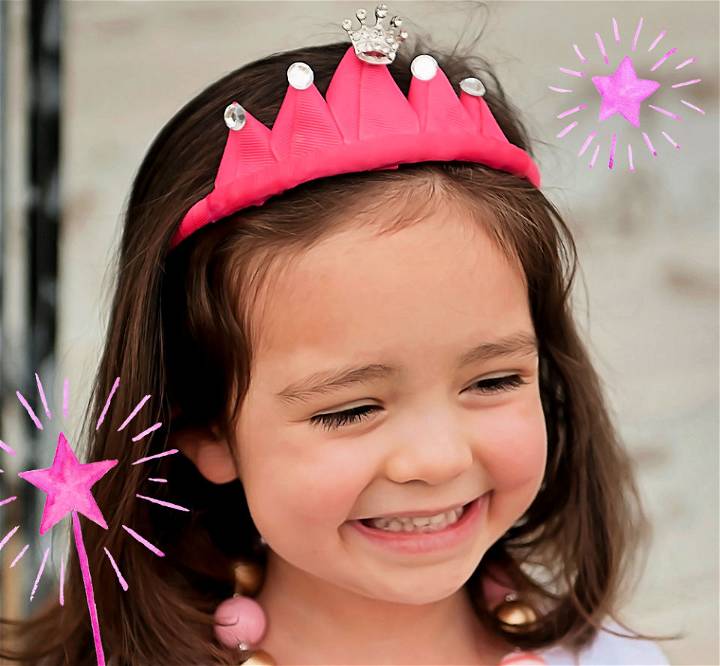
Be your royalty with a handmade DIY ribbon princess crown headband! You can make a beautiful princess-themed accessory using their grosgrain-wrapped hard headband and 7/8 ribbon. Cut and fold the ribbon to make points for the crown and secure them with hot glue.
Seal the edges with a lighter for a polished look. Attach the largest point to the center of the headband and glue the remaining points on either side. Add a strip of ribbon along the bottom edge to secure the points in place. For added flair, embellish the points with rhinestones. hairbowcompany
7. How to Make Mermaid Tiara at Home
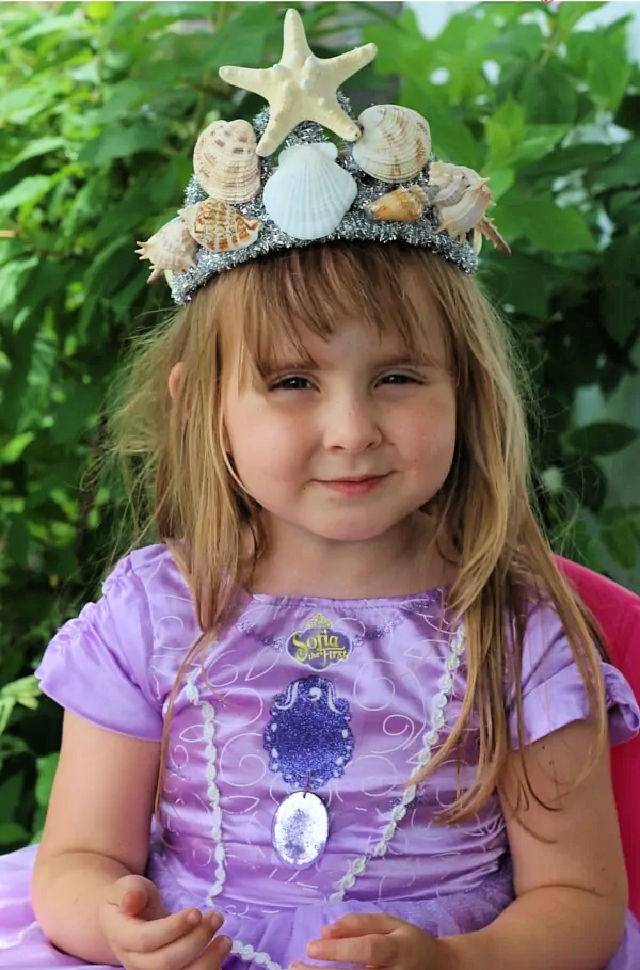
Make your mermaid dreams come true with this DIY Mermaid tiara – make a magical look in the comfort of your home! Designed to unleash your child’s creativity and fine motor skills. Using materials like sparkly pipe cleaners, hot glue sticks, and seashells, your little one can transform a plastic crown into a regal mermaid tiara fit for a queen.
The cost of the craft can be adjusted depending on the type of tiara and seashells chosen. With step-by-step instructions, your child will enjoy wrapping the tiara with pipe cleaners and attaching the seashells, allowing them to customize their masterpiece.
Whether it’s for a Halloween costume, a beach trip, or a visit to Disney, this mermaid tiara is a stunning and unique creation that your child will be proud to say they made themselves. sugarspiceandglitter
8. Easy-to-Make Flower Crown for Kids
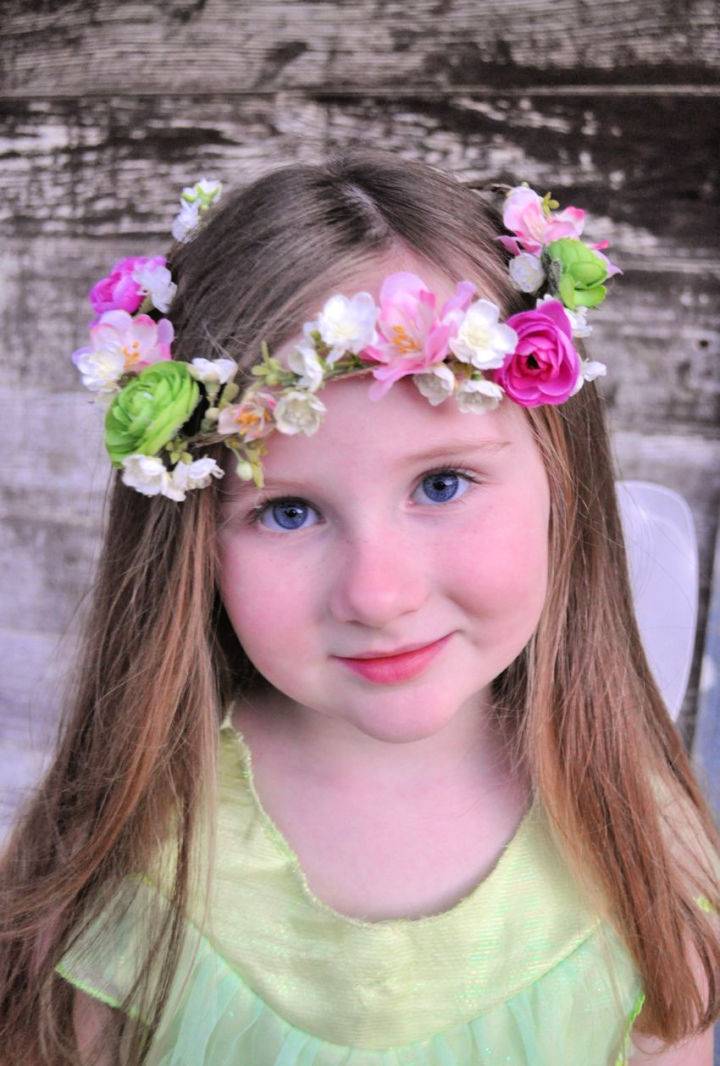
Enhance your little one’s fairy look with a DIY flower crown! Whether for a costume or a bohemian-inspired style, these flower crowns are easy to make and can be adjusted in any size and color. Gather high-quality flowers, including small ones with multiple blooms on a long strand.
Begin by wrapping twine around the desired head size, making a comfortable and natural base. Then, wrap the twine with the small flower strand, securing it with a glue gun. Next, weave the stems of other flowers into the twine crown, using a touch of glue to hold them in place.
Feel free to add as many flowers as you like, making a gorgeous final product in just minutes. The joy of seeing your little fairy princess wear the crown is priceless. Complete her enchanting look and make magical memories together! makelifelovely
9. DIY Galadriel Crown Using a Glue Gun
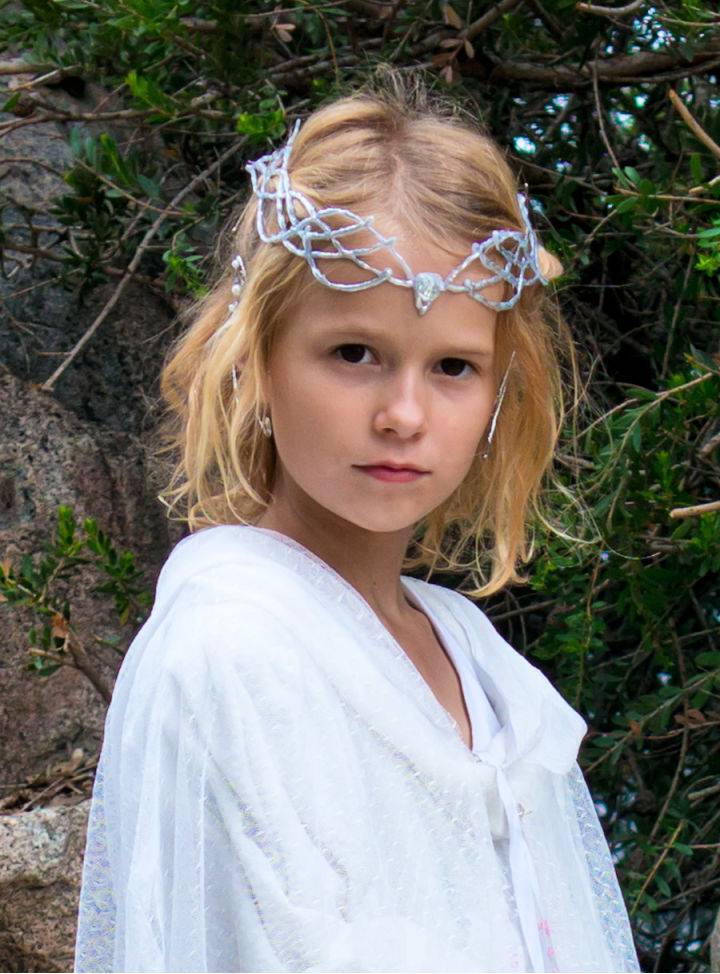
Make your masterpiece using our step-by-step guide on DIY crowns, turning ordinary materials into extraordinary accessories. Let your inner elf shine by crafting a captivating Galadriel crown with nothing but a glue gun and some sparkle! Using a glue gun and basic craft supplies, you can make an elegant crown that perfectly complements any elf costume or cosplay. This guide provides step-by-step instructions and helpful affiliate links to the necessary materials.
By using Deco Foil transfer sheets, you can achieve a beautiful silver finish for the crown. Add a jewel for extra flair, and complete the look by attaching the crown with bobby pins. Make your Galadriel costume truly enchanting with this easy and magical project. simplepracticalbeautiful
10. DIY Queen Crown for a Princess
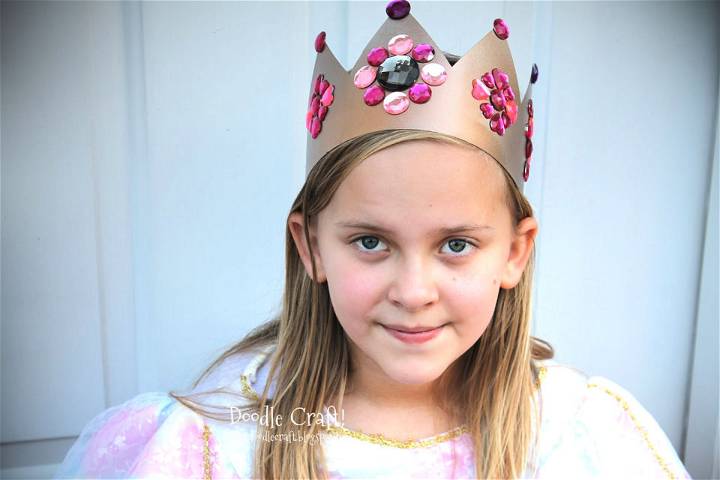
Transform your little princess into a queen with this DIY king crown project. You can make a stunning crown fit for royalty using a plastic strip, easily found at the dollar store. Simply draw uneven spikes on the strip, cut them out, and glue them together. Spray paint the crown gold for a regal touch, allowing it to dry and re-painting if needed. Add some plastic rhinestones with hot glue, and voila! Your little one will feel like a true queen. Join the fun and get crafting today! doodlecraftblog
11. Easy DIY Cardboard Paper Tiara
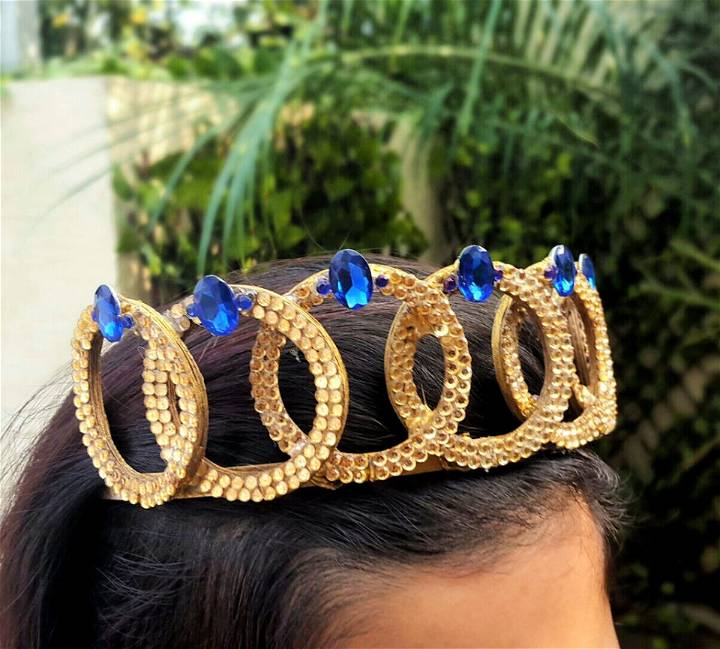
Craft your own DIY cardboard paper tiara with this step-by-step guide. Start by gathering the materials, including cardboard paper, white glue, hot glue, gold spray paint or acrylic paint, gold and dark blue iron-on stones (or any other stones), sapphire blue crystal stones, a metal hairband, and super glue.
Apply white glue to a ring and attach another ring on top, repeating the process until you have ten rings. Let the rings dry, and make a total of seven of them. Once dry, you can decorate the rings with gold and dark blue stones and sapphire blue crystal stones for added flair.
Attach the rings to a metal hairband using hot glue, and secure them with super glue for durability. Finish off the tiara by spraying or painting it with gold paint for a regal touch. Get creative and make your unique tiara fit for any special occasion. instructables
12. Make Your Own Princess Paper Crowns
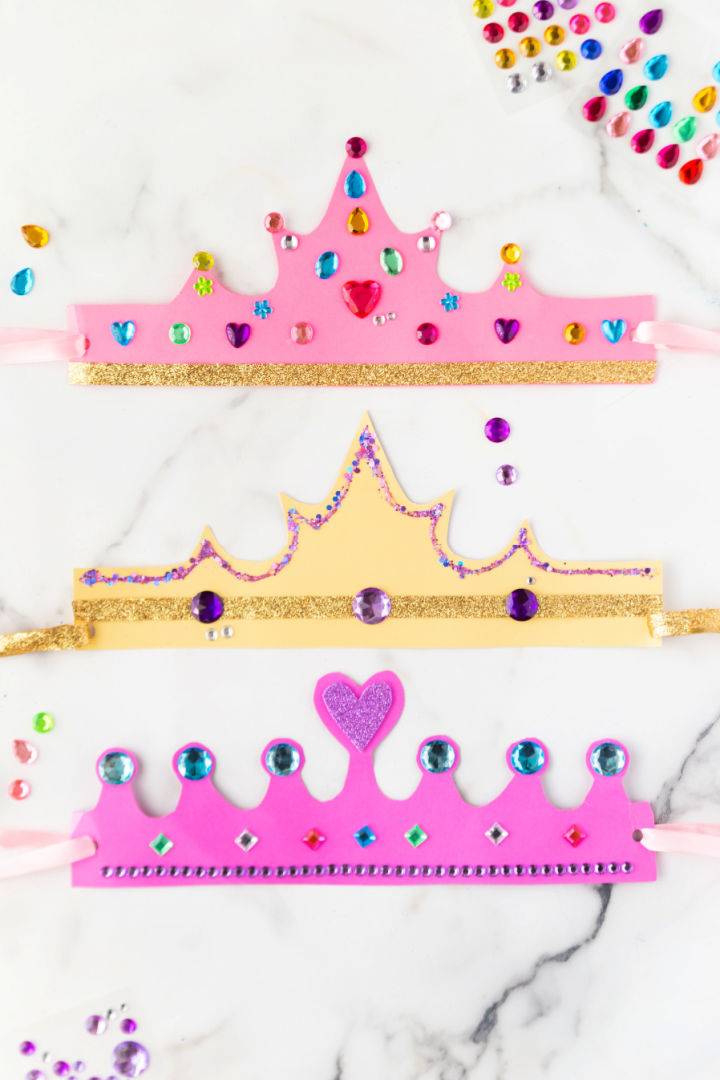
From princess parties to festive events, our guide on DIY crowns will help you make stunning headpieces with ease. Let your imagination be your crown and make it fit for a princess with DIY princess paper crowns! Perfect for a princess party or dress-up play, these crowns are easy to make and customize. Print and cut out the crown shape using the provided template on colored paper.
Let your child’s creativity shine by decorating the crowns with markers, crayons, adhesive gems, and rhinestones. Tie a long ribbon through the punched holes on the sides of the crown, and voila! The princess is ready to rule her kingdom in style.
These versatile crowns can be used for occasions like slumber parties or fun dress-up play. Get inspired and indulge in the enchantment of making your princess crowns today! madetobeamomma
13. Free Felt Tiara Sewing Pattern
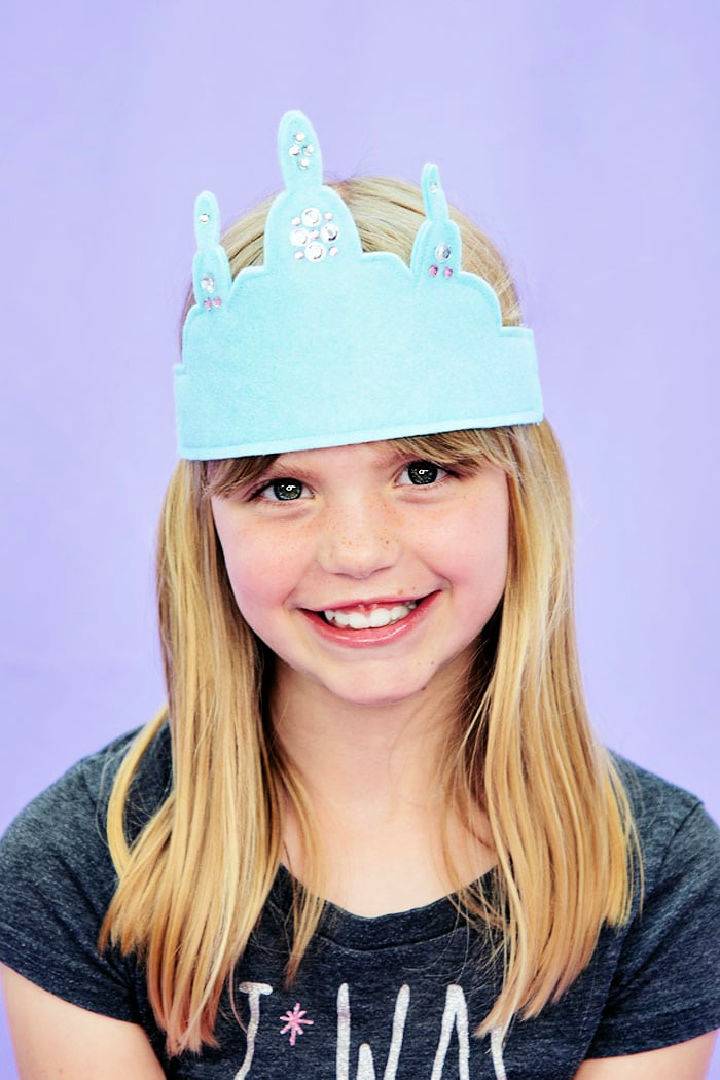
Have a magical accessory for your little one with this DIY tiara tutorial. Whether for imaginative play or a special birthday crown, this project is perfect for crafting enthusiasts of all levels. The tiara can be made from various materials like felt, craft foam, cardboard, or cardstock, giving you endless possibilities for customization.
The felt version is especially convenient as it can be easily folded flat for storage. Gather the materials, including a 12″ by 12″ piece of felt, iron-on interfacing, fold-over elastic, crystals or jewels (optional), and sewing essentials.
Cut out the crown pieces using the provided pattern, then assemble the tiara by sewing or using a glue gun. Add your desired embellishments, such as HTV, embroidery, or beads, to make it truly sparkle. Finally, attach the elastic strips to make the tiara wearable. Let your child’s inner royalty shine with this fun project! fleecefun
14. DIY Real Daisy Flower Crown
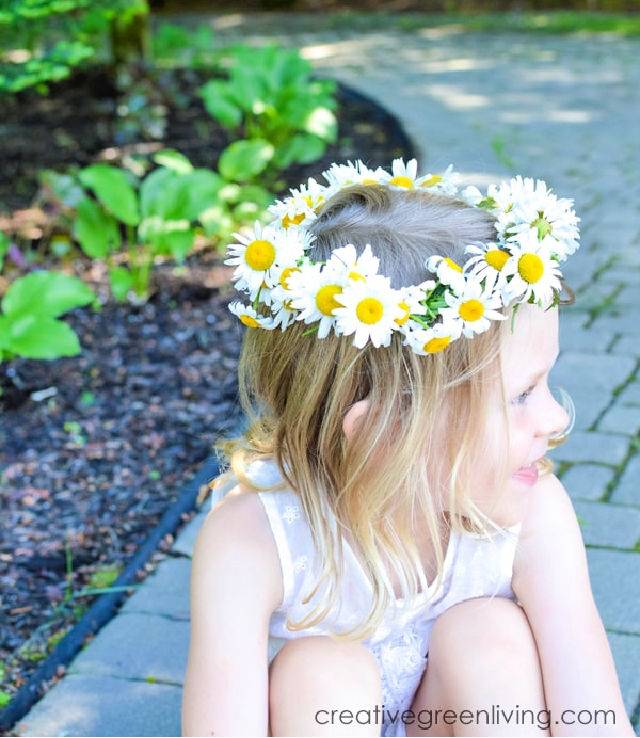
This easy DIY tutorial teaches how to make a charming daisy chain crown using real flowers. No special materials are required—just flowers! Whether you want to make a crown, necklace, or bracelet, this guideline will show you how to combine flower stems.
Choose flowers with soft, flexible stems like daisies, dandelions, or other non-endangered wildflowers. The braiding technique is simple, and you can easily teach it to kids. With longer stems, cross three flowers and start braiding by alternating the stems.
Add flowers as you go to achieve the desired length. Finish by braiding the remaining ends and tucking them in. Enjoy wearing your beautiful flower crown, and let your creativity bloom! creativegreenliving
15. How to Do Elsa Frozen Tiara
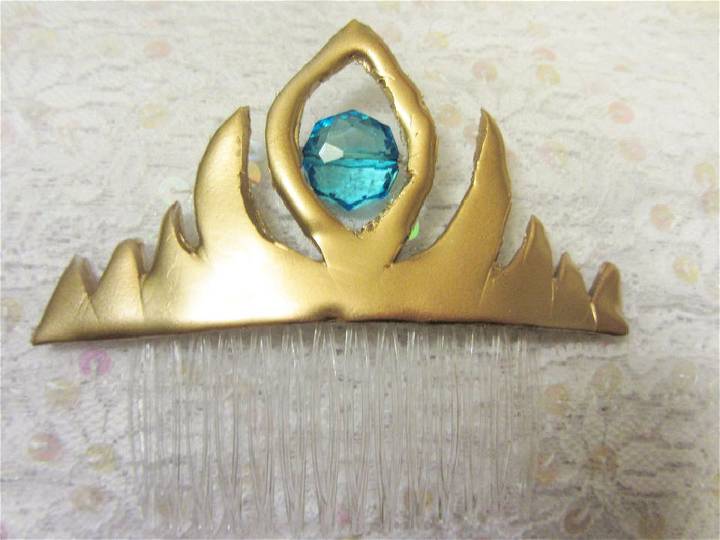
Transform yourself into an ice princess with this DIY Elsa frozen tiara! The tutorial will guide you through the simple steps to make a beautiful and fancy tiara that resembles Elsa’s. Gather your materials, including waxed paper, a glue gun, metallic gold spray paint, blue faceted aqua-colored beads, wire cutters, floral wire, a plastic hairpiece comb, scissors, and a Xacto knife.
You can choose between two options for making the tiara. Either sketches your tiara on a reference photo, ensure symmetry, or use the provided PDF template for convenience. Secure the template to waxed paper or felt, depending on your preferred version. Once you’ve completed these steps, you’ll be on your way to crafting a stunning tiara fit for an ice queen. instructables
16. Homemade Spider Crown Tutorial
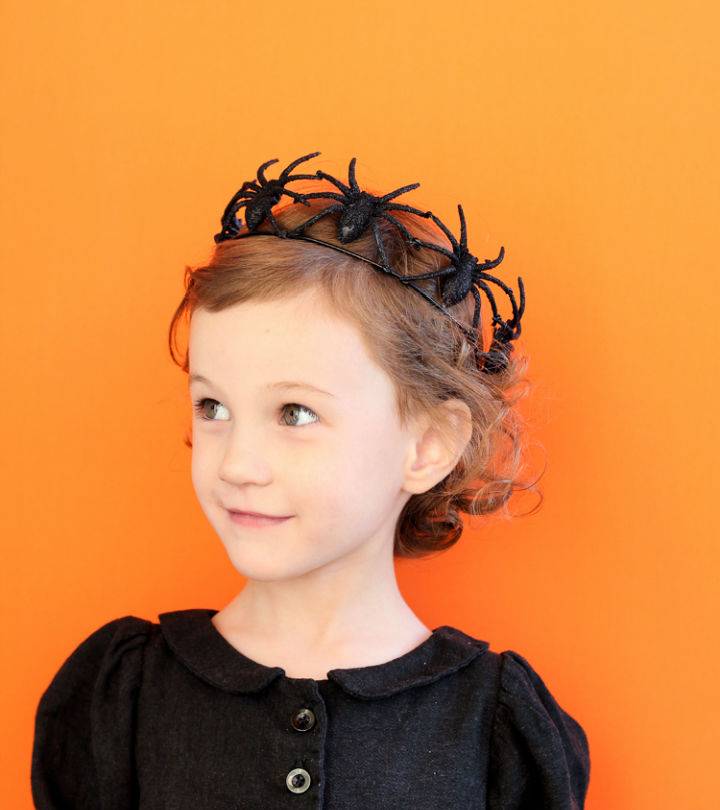
Add a touch of Halloween magic to your costume or festive attire with this DIY spider crown! This versatile accessory can complement various costume ideas or be worn to celebrate the holiday. Crafted using black 12-gauge wire, black tape, large plastic spiders, and hot black glue, this spider crown is a simple yet eye-catching project.
Make a wire crown that fits comfortably on your head, attach the spiders using hot glue, and connect their legs to strengthen the crown. Whether dressing up for a party, work, or handing out candy, this arachnid-inspired crown will make you feel like royalty. Get ready to embrace your spooky side with this fun and easy Halloween project. deliamakes
17. DIY Perler Bead Crown for Kids
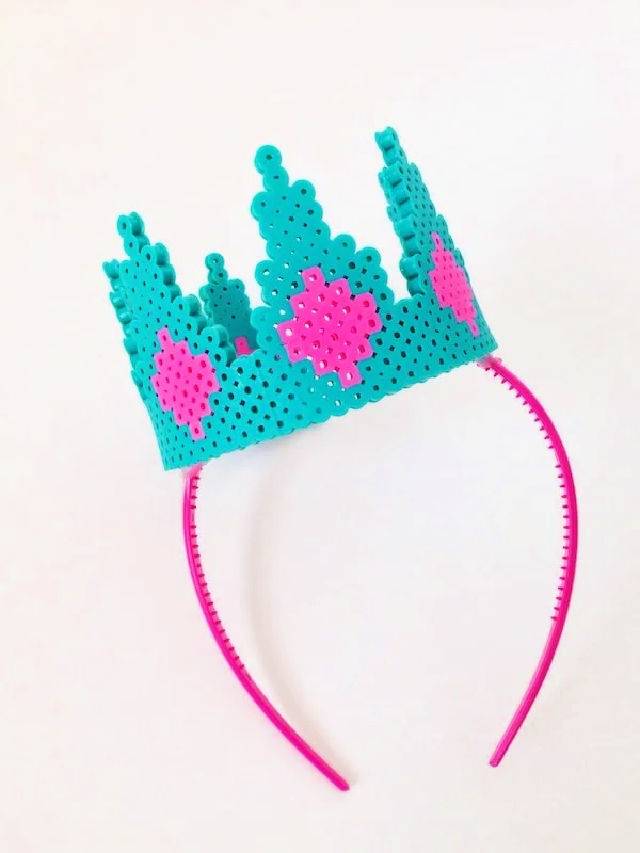
Let your imagination run wild and make a one-of-a-kind perler bead crown for your little prince or princess! Ideal for kids’ parties or dress-up, this project requires no special skills. Get creative with perler beads, a large perler bead board, parchment paper, an iron, a tin can, tape, a headband, and your favorite glue.
Design the pattern on the bead board, iron the beads to fuse them, and then shape the crown around a tin can. Secure it with tape and let it cool.
Finally, glue the crown onto a headband, and voila! You’re ready to rule the day as a majestic queen. These crowns also make fantastic party hats and princess accessories. Try this exciting craft and keep the kids entertained all summer long. diycandy
18. How to Make a Paper Flower Crown
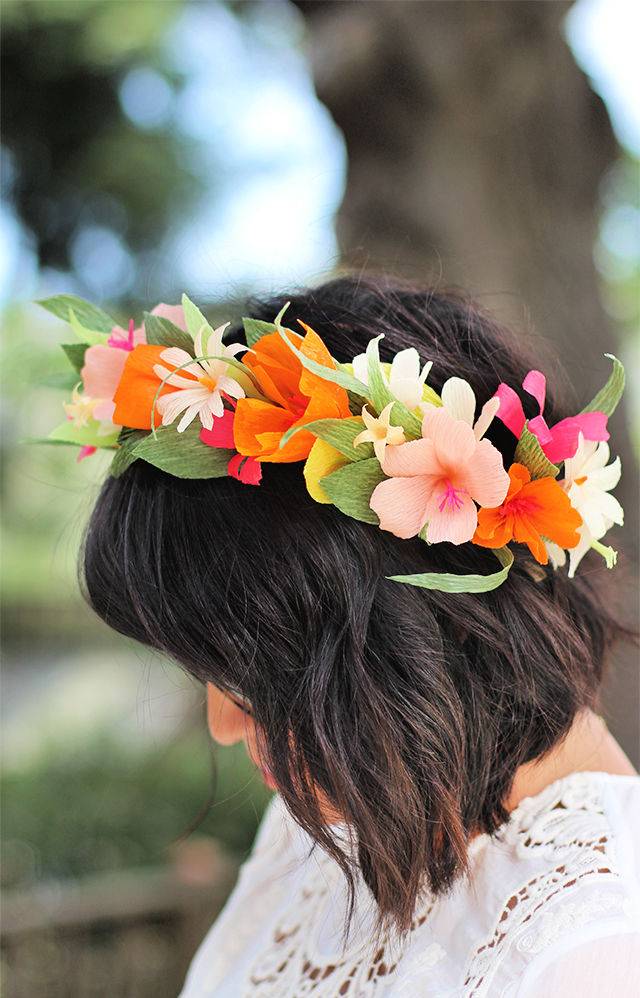
Express your creativity and make yourself a one-of-a-kind DIY paper flower crown fit for a queen! This step-by-step guide will show you how to make a larger, more dramatic version of the crown, perfect for weddings, festivals, or midsummer celebrations.
You can craft exquisite flowers, including daisies, poppies, bell flowers, and delicate leaves, using high-quality crepe paper in various colors, wire, glue, and optional beeswax. The wax coating adds a realistic touch and durability to the crown, ensuring it lasts for years.
Complete with a customizable closure, and this crepe paper flower crown is a beautiful accessory for any special occasion. Follow along with this tutorial for expert tips and tricks. Let your creativity bloom, and enjoy the enchanting spirit of Midsummer! honestlywtf
19. Making a Pipe Cleaner Tiara Crown in 10 Minutes
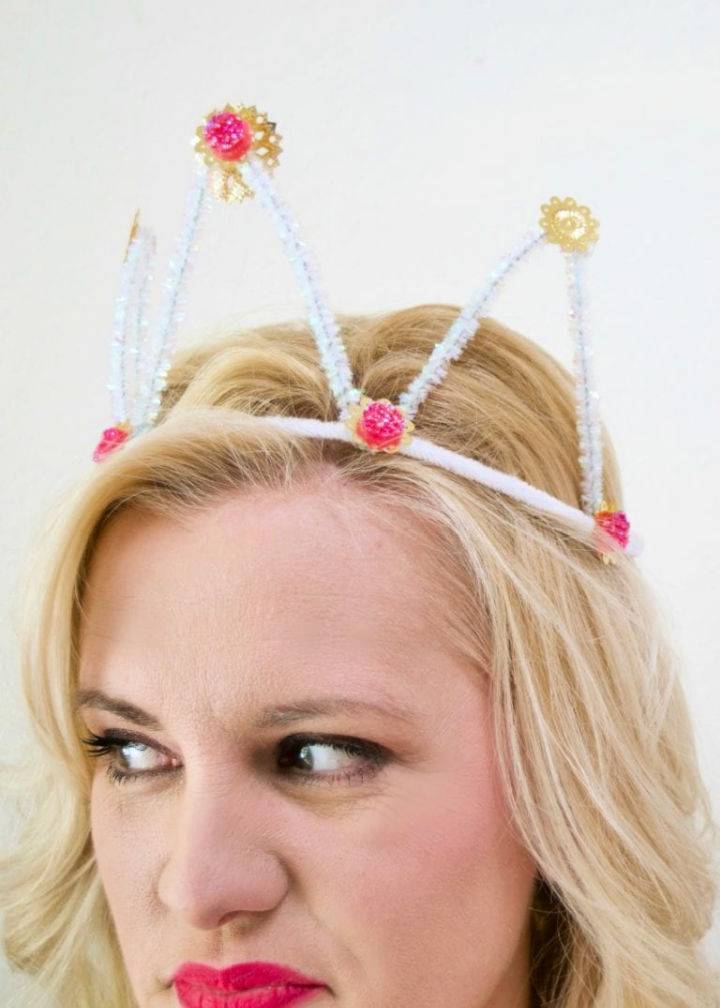
With a few simple supplies and 10 minutes, you can make your dazzling DIY pipe cleaner tiara crown! This quick and easy craft requires just a few supplies, including smooth white and sparkly pipe cleaners, a hot glue gun, scissors, sequins, and gemstones.
Start by bending the smooth pipe cleaners into a circle to form the base of the crown. Then, shape the sparkly pipe cleaners into points and fix them to the base using hot glue.
Get creative with embellishments like sequins and gemstones to add that extra touch of sparkle. Whether watching the royal wedding, planning a princess party, or simply wanting to feel regal while doing chores, this tiara crown is perfect for any occasion. jenniferperkins
20. DIY Paper Spring Floral Crown
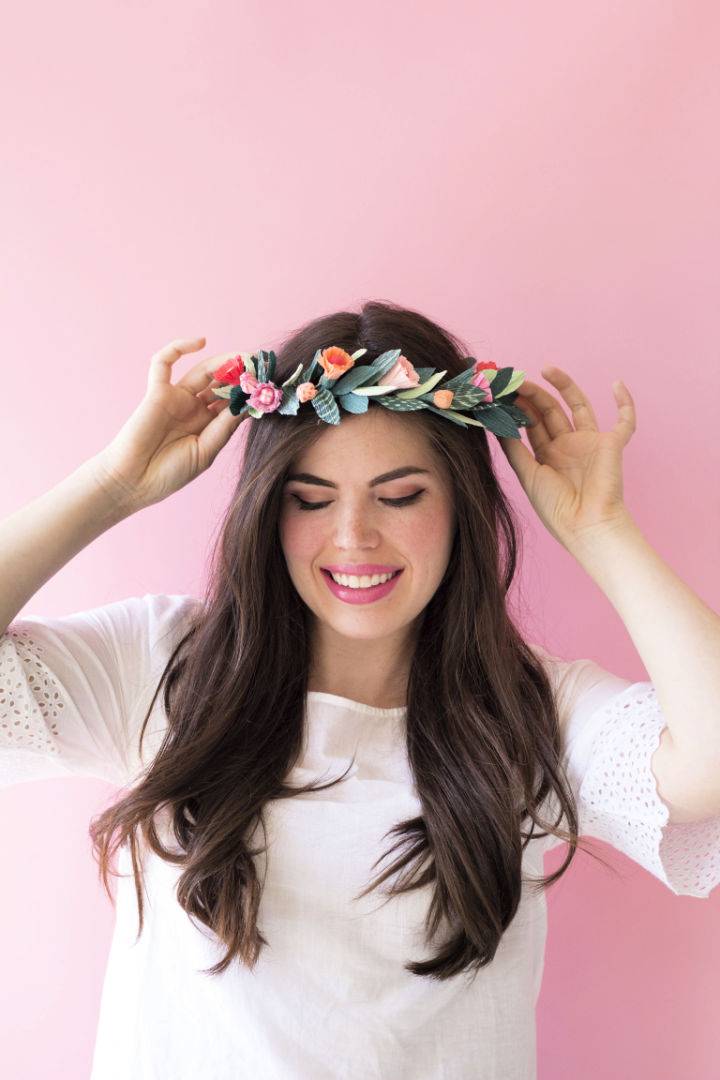
Discover the joy of making DIY crowns, a fun and creative project to add sparkle to your special occasions. Spring is in the air! Let your creativity bloom, and make a beautiful DIY paper floral crown to add sparkle! Using materials like stem wire, floral wire, crepe paper in various shades, and a hot glue gun, you can craft a stunning crown adorned with buds, flowers, and leaves.
The step-by-step instructions guide you through making the crown base, making paper floral elements, and adding them to the crown. You can paint patterns on the leaves and buds for an extra touch. Whether you’re preparing for a celebration or simply want to embrace the spirit of spring, this project will add a touch of nature’s beauty to your ensemble. larsbuilt
21. Creative Glinda Tiara
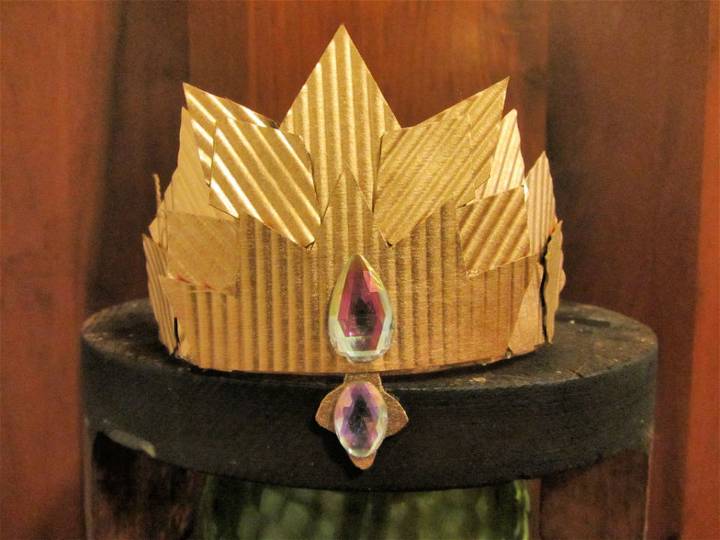
With this DIY Glinda tiara, you can make your magical kingdom! Using thin cardboard or cardstock, scissors, a pattern (downloadable PDF provided), a headband, hot glue, a paper crimper, gold metallic spray paint, iridescent rhinestones, and an optional gold ribbon, you can bring this magical accessory to life. With materials readily available at a craft store, this project costs $5-$25, depending on your existing supplies. In just 30 minutes, you’ll have a stunning tiara fit for any aspiring fairy princess. Let your inner Glinda shine! instructables
22. Simple Paper Crown Craft for Kids
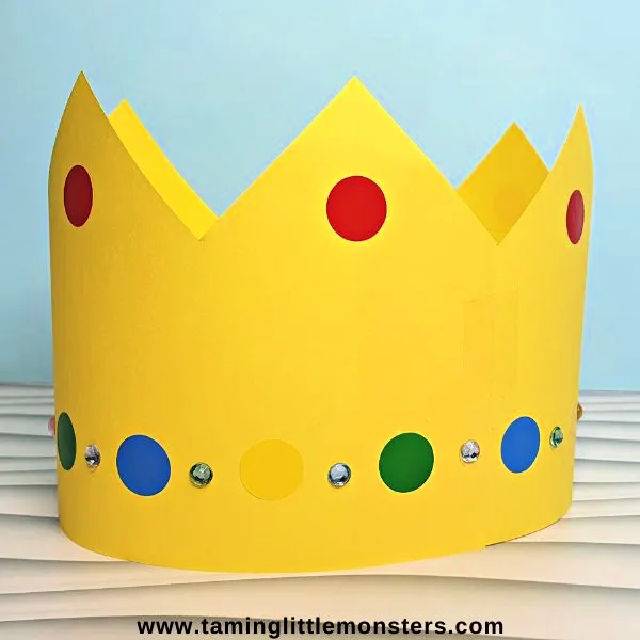
This creative DIY paper crown craft will make your little one feel royalty! Learn how to make a paper crown to bring a touch of royalty to your classroom. This engaging and creative craft project is fun and doubles as a costume prop, perfect for imaginative play. Gather your preschoolers, kindergarteners, and toddlers, and let their creativity shine as they make their crowns.
You only need some A4 colored craft paper, scissors, pencils, stickers, and sticky tape. Simply draw a zigzag down the center of the paper, cut it along the line, attach the two sides using tape, and let the decorating begin!
Kids can use stickers, jewels, or any other embellishments they desire to make their crowns unique. Finally, use tape or a stapler to transform the crown into a circle to fit the child’s head. Enjoy the process and watch your little ones become kings and queens in their imaginative world taminglittlemons
23. How to Make a Rapunzel Tiara
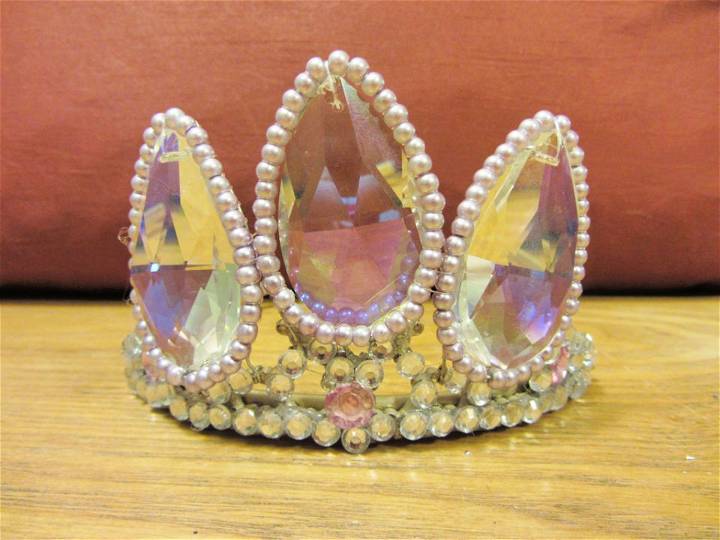
Bring your little princess’s dreams to life with a Rapunzel tiara she’ll cherish! Make it yourself with this easy DIY guide, and see your little one light up with joy. Perfect for Halloween or dress-up play, this tiara is easy to make and will cost around $30. Gather the materials from your local craft shop, including a plastic tiara, silver rhinestones, large teardrop crystals, pliers, gold spray paint, floral wire, lavender pearls, a fishing line, and a needle. Add large pink, teal, and white pearls for a more elaborate crown if you feel extra fancy! instructables
24. Make Your Own Party Tiara
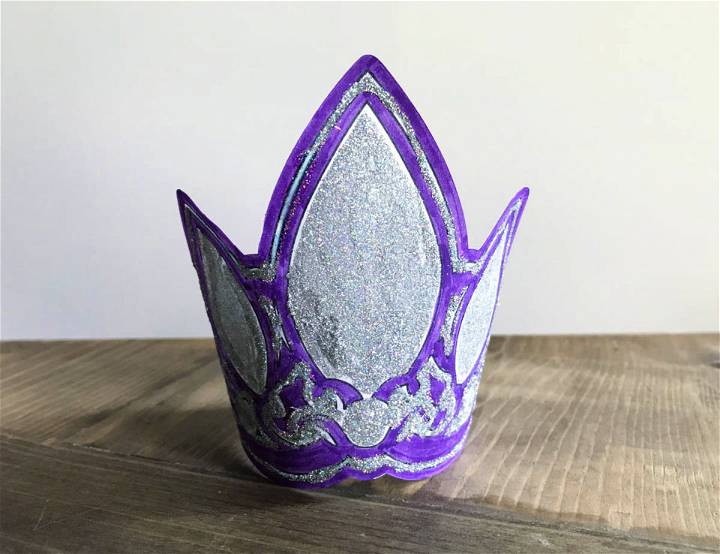
Relish a magical princess experience with this simple DIY party tiara. Perfect for your little princess’s birthday celebration or a fun activity at a princess-themed party. You can make a beautiful custom tiara with your child using a Cricut machine, markers, and glitter glue. The markers provide vibrant colors, and the glitter adds a touch of sparkle. The tiara can be secured in a circle shape using a Xyron tape runner and attached to a hair clip for easy wear. Make memories with your little ones by crafting these personalized party accessories. everydayparty
25. How to Make a Paper Crown Without Glue
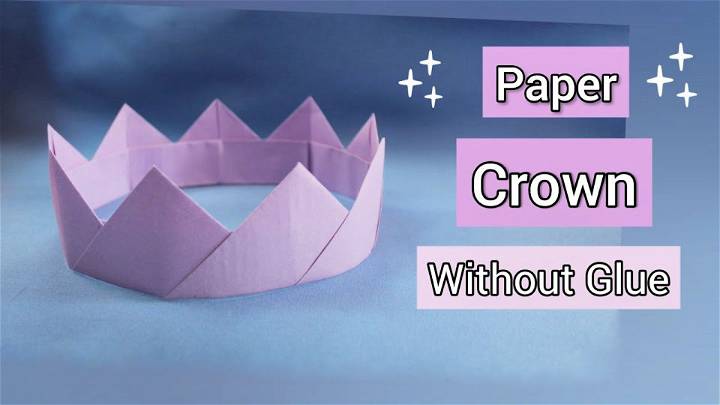
Start your royal journey without a drop of glue by crafting your DIY paper crown with ease! This step-by-step tutorial provides an easy and fun project that requires minimal materials. Whether you want to add a playful touch to a costume or want a creative activity, this tutorial is perfect for all skill levels.
Follow the instructions and make your paper crown using basic folding techniques. The video provides a visual guide, making it even easier to follow. Prepare to wear your homemade crown with pride and let your imagination shine!
Conclusion:
In conclusion, exploring the 25 creative DIY crown ideas to make at home opens up a treasure trove of crafting opportunities that blend the historical and cultural significance of crowns with modern DIY enthusiasm. Not only does it provide a step-by-step guide highlighting expert interviews, material insights, and sustainable options, but it also encourages creativity and personalization for any occasion.
Whether it’s crafting a crown for a special event, understanding the best materials to use, or seeking advice on maintenance and storage, this article caters to all your DIY crown needs. So, grab your crafting supplies, and let your creativity reign supreme as you embark on making your unique crown at home.
Related DIY Ideas to Try
Looking for inspiration for your next project? Check out these DIY ideas to try! From crafting to decorating, we’ve got you covered.
- DIY Paper Crown: Learn how to make a lovely paper crown with this easy-to-follow template.
- Homemade Corsage: Make stunning DIY corsages anyone can make with these DIY ideas.
- DIY Jewelry Ideas: Make stylish DIY jewelry pieces for a unique fashion statement.
- DIY Rings: Design homemade wire ring ideas and make beautiful DIY rings.
- Wedding Veil Ideas: Add a personal touch to your special day with affordable DIY wedding veil ideas.
- DIY Pinwheel Ideas: Discover creative DIY pinwheel ideas to add a touch of fun and color to your decor!
- Balloon Crafts: Enhance any event with eye-catching balloon decoration ideas.
- DIY Graduation Caps: A quick guide on making your own graduation caps at home. Perfect for those who want to add a personal touch to their graduation ceremony!
- Birthday Banner Ideas: Make your celebration memorable with custom and festive DIY birthday banners.
- DIY Balloon Garlands: Make stunning DIY balloon garlands for any event with these easy DIY ideas.
- Unicorn Party Ideas: Celebrate special days with magical DIY unicorn-themed decorations, food, and activities.
- Mermaid Birthday Party Ideas: Discover unique DIY mermaid birthday party ideas to make your little one’s special day unforgettable.


