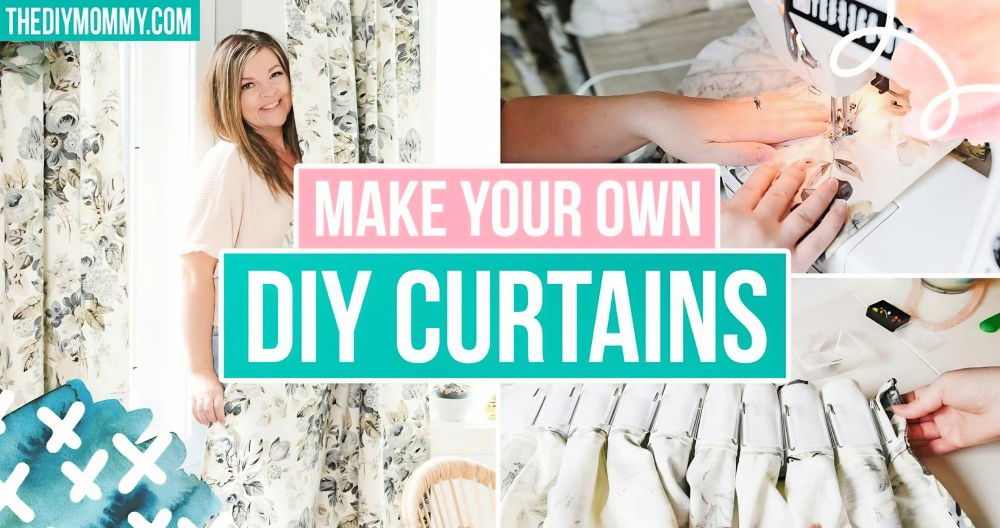
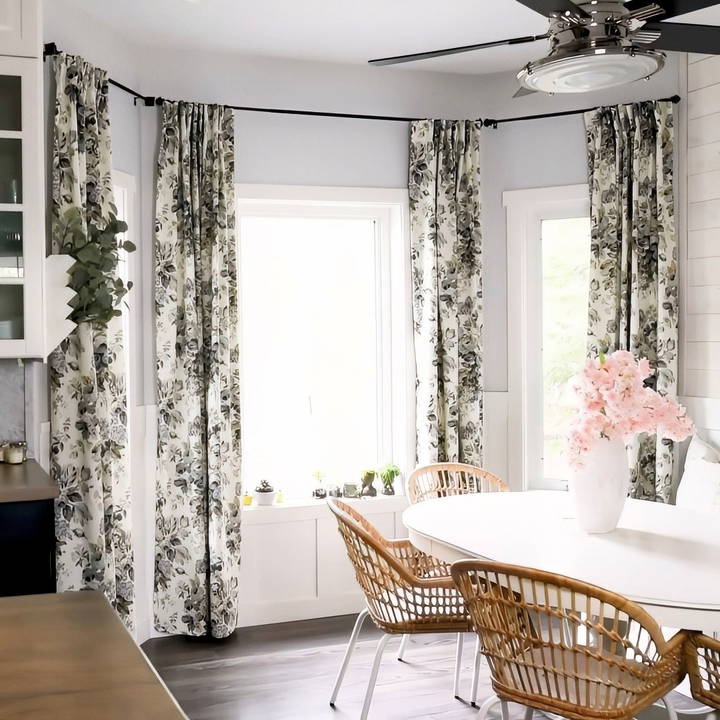
Making custom curtains can completely transform your space, giving it a professional, designer feel even if you're just starting with sewing. With a bit of time, some basic sewing skills, and the right materials, you can make stunning pleated curtains that not only match your decor but also fit your windows perfectly.
In this guide, I’ll walk you through the entire process of making beautiful curtains at home, sharing tips and tricks along the way to help you create an incredible result.
Materials You’ll Need
Before we begin, gather these essential items:
- Drapery fabric (I recommend heavy cotton or a cotton-linen blend)
- Pleater tape
- Curtain rings with hooks
- Curtain hooks for pleater tape
- Hard ruler and/or square
- Measuring tape
- Scissors
- Iron and ironing board
- Stick pins
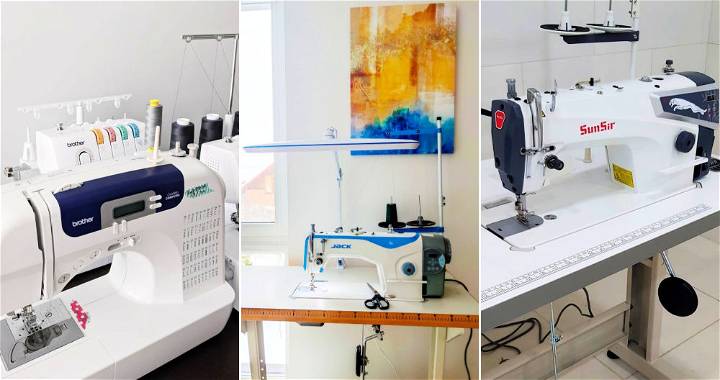
- Sewing machine
- Thread
Step by Step Instructions
Learn how to make curtains with our step-by-step guide. Follow simple instructions from measuring to hanging for perfect DIY window treatments.
Step 1: Measure Your Windows
The first step is deciding how tall and wide you want your curtains to be. Measure the height of your windows from the top where you want the curtain rod to the floor. For a more dramatic effect, I like my drapes to almost touch the floor, leaving about an inch of clearance to keep them clean.
Next, multiply the width of your window by two to account for pleating. This will give you a fuller, more luxurious look. If needed, you can sew two pieces of fabric together to get the desired width.
- Tip: For a professional look, mount your curtains close to the ceiling, which will make your room feel taller and more spacious.
Step 2: Cut the Fabric
Once you’ve figured out the dimensions, it’s time to cut your fabric. Add 7 inches to the height measurement (for hems) and cut your fabric accordingly. If you’re making wider curtains, you might need to sew pieces together.
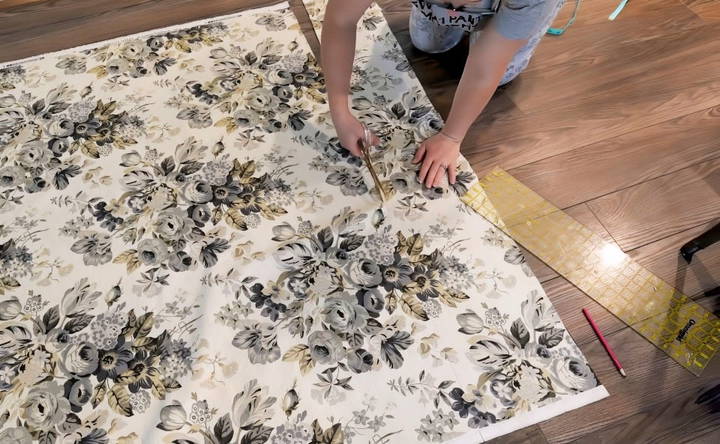
- Pro Tip: Use a hard ruler and a square to ensure you’re cutting your fabric straight. Measure three points and draw a straight line before cutting to avoid uneven edges.
Step 3: Prepare the Hems
Ironing the hems is crucial to give your curtains a clean, professional look. Start by folding the fabric’s edges under a half inch, press with an iron, and then fold it again for a nice, neat hem. Repeat this process for both the vertical edges and the bottom hem.
For the top hem, fold under half an inch, press, and then fold again, but this time by 4 inches. This will be where you attach the pleater tape later on.
- Ironing Tip: Use the cotton setting with steam to get sharp, crisp edges.
Step 4: Sew the Hems
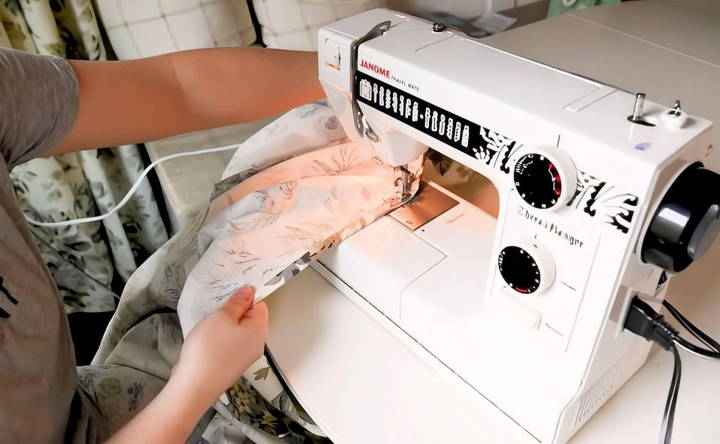
Now that your hems are pressed, it’s time to sew them. Start with the side seams. If you’re a beginner, don’t worry—this project only requires straight stitches, so it’s a great way to practice your sewing skills.
Backstitch at the beginning and end of each hem to secure the stitches, and try to keep your lines as straight as possible by following the guide on your sewing machine.
Once the sides are done, sew the top hem where you’ll later attach the pleater tape. You can either sew the bottom hem now or wait until you’ve tested the curtain’s length after hanging them.
Step 5: Attach the Pleater Tape
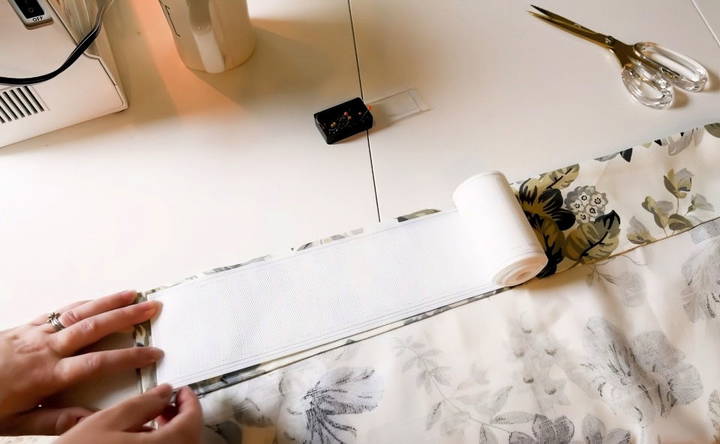
Pleater tape is what gives your curtains that sophisticated, pleated look. Fold the tape under by half an inch at the start, and then pin it to the back of your top hem. Make sure the loops on the tape are facing upward so you can easily insert the curtain hooks.
Once the tape is pinned, sew it onto the top hem, following the stitch guides on the tape. Again, backstitch at both the beginning and the end to ensure it’s secure.
Step 6: Insert the Curtain Hooks
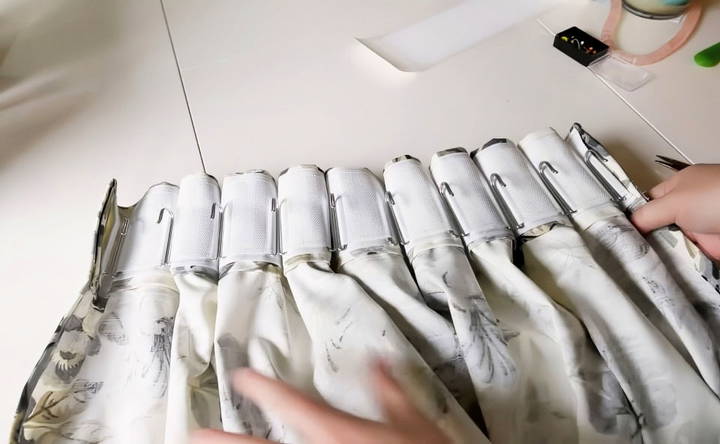
Now comes the fun part—pleating your curtains! Insert the curtain hooks into the pleater tape, spacing them out evenly. I typically leave about five loops between each hook for a fuller pleat, but you can adjust this depending on how pleated you want your curtains to look.
Step 7: Hang the Curtains
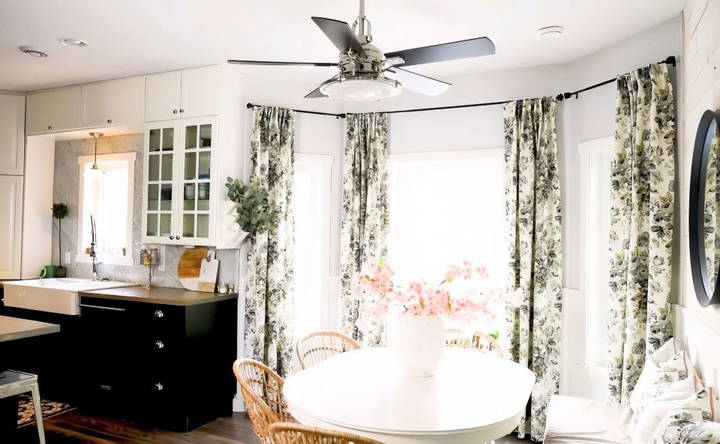
Once your hooks are in place, it’s time to hang your new curtains! I find it easiest to take the curtain rod down from the wall, slide the curtain rings onto the rod, and then reattach the rod to the wall. If you haven’t sewn the bottom hem yet, you can now adjust the length to ensure your curtains hang perfectly.
Step 8: Train the Pleats
After hanging your curtains, you might need to train the pleats to fall neatly. You can use your hands to press the pleats in place, or for a more formal look, use a steamer to gently steam the fabric, setting the pleats.
Customizing Curtains for Different Rooms
Every room in your home has a different purpose, so why should your curtains be the same? Let's dive into how to pick the perfect curtains for each space.
Living Room
- Style: Your living room is where you entertain and relax, so let your curtains reflect your personal style. Go bold with patterns, or keep it classic with neutral tones.
- Fabric: Choose fabrics that are durable and easy to clean, like cotton or linen blends.
- Light Control: Consider sheer curtains to let in natural light or thicker fabrics for more privacy and light blocking.
Bedroom
- Style: Opt for calming colors and patterns to create a peaceful atmosphere.
- Fabric: Choose blackout curtains or heavy fabrics to block out light and create a cozy, sleep-friendly environment.
- Light Control: You'll want good light control in the bedroom, so thicker fabrics are ideal.
Kitchen
- Style: Keep it simple and functional with cafe curtains or valances.
- Fabric: Opt for lightweight, easy-to-clean fabrics that can withstand moisture and spills.
- Light Control: Let in plenty of natural light with sheer or light-filtering fabrics.
Bathroom
- Style: Choose moisture-resistant fabrics like polyester or vinyl.
- Fabric: Privacy is important in the bathroom, so opt for opaque or blackout fabrics.
- Light Control: You may want to combine sheer curtains with blinds for flexibility.
Bonus Tips:
- Small Rooms: Use light colors and simple patterns to make the room feel bigger.
- Large Rooms: Go bold with patterns and darker colors to add warmth and coziness.
- High Ceilings: Hang your curtains higher than the window frame to create the illusion of taller ceilings.
- Low Ceilings: Keep curtains closer to the window frame to avoid making the room feel cramped.
There are no hard and fast rules. The most important thing is to choose curtains that you love and that make your home feel comfortable and inviting!
Creative Curtain Header Styles: Beyond the Basics
Want your curtains to be as unique as your home? Let's explore some creative header styles that'll make your windows pop!
Eye-Catching Styles:
- Grommets: These metal rings create a modern, sleek look. They're easy to open and close, making them perfect for high-traffic areas.
- Tab Tops: Fabric loops slide onto a curtain rod for a casual, relaxed feel. Choose contrasting colors or patterns for added flair.
- Pinch Pleats: These classic pleats offer a tailored, elegant look. Perfect for formal spaces or traditional decor.
- Goblet Pleats: These dramatic pleats create a luxurious, statement-making effect. They're ideal for tall windows or grand spaces.
- Ripplefold: This contemporary style features evenly spaced folds that cascade down the curtain. It offers a clean, modern look.
Unique & Unexpected:
- Rod Pocket with Ruffles: Add a touch of whimsy with a ruffled rod pocket.
- Tie-Top: Fabric ties create a playful, bohemian vibe. Use different colors or patterns for a fun, eclectic touch.
- Hidden Tabs: Create a sleek look with hidden tabs sewn on the back of the curtain.
- Macrame Hanger: Hang your curtains from a macrame hanger for a unique, handcrafted touch.
- Exposed Hardware: Use decorative rings, clips, or hooks to create a unique, eye-catching header.
Tips for Choosing:
- Fabric: The weight and drape of your fabric will influence which header styles work best.
- Style: Consider your room's overall style and choose a header that complements it.
- Functionality: How often do you open and close your curtains? Choose a style that's easy to operate.
- DIY Skills: Some header styles are easier to create than others. Choose one that suits your skill level.
Don't be afraid to experiment and try something new! With so many creative curtain header styles to choose from, you're sure to find the perfect option to elevate your window treatments.
Troubleshooting and Maintenance
Even the most carefully crafted curtains can encounter a few hiccups. Let's tackle some common issues and keep your curtains looking their best for years to come.
Common Problems & Solutions:
- Uneven Hems: This can happen if your fabric shifts while sewing. The fix is simple! Re-measure and trim the excess fabric for a straight hem.
- Puckered Seams: Too much tension on your sewing machine can cause puckering. Adjust the tension and re-sew the seam for a smooth finish.
- Mismatched Patterns: Carefully plan your pattern placement before cutting to ensure everything lines up. If it's a minor mismatch, consider adding a trim or embellishment to camouflage it.
- Faded Colors: Sunlight can fade fabrics over time. Choose curtains with UV-resistant linings or rotate them regularly to prevent uneven fading.
- Dust & Dirt: Regular cleaning will keep your curtains looking fresh. Vacuum them gently or follow the care instructions for your specific fabric.
Maintenance Tips:
- Vacuum Regularly: A quick vacuum every few weeks will prevent dust buildup and keep your curtains looking their best.
- Spot Clean Stains: Address spills and stains promptly to avoid permanent damage. Test any cleaning solutions on a hidden area first.
- Wash or Dry Clean: Follow the care instructions for your specific fabric. Some curtains can be machine-washed, while others require dry cleaning.
- Iron or Steam: Ironing or steaming can help remove wrinkles and restore the shape of your curtains.
- Protect from Sunlight: Use sheer curtains or blinds to filter sunlight and protect your curtains from fading.
When to Call a Pro:
- Extensive Repairs: If your curtains have major damage like tears or large stains, consider taking them to a professional for repair.
- Delicate Fabrics: Some fabrics, like silk or velvet, require special care. A professional cleaner can ensure they're handled properly.
- Complex Alterations: If you need to significantly alter the size or style of your curtains, a professional seamstress can help.
With a little care and attention, your curtains will stay beautiful and functional for years. Don't let minor issues discourage you - a little troubleshooting can go a long way!
FAQs About How To Make Curtains
Learn how to make curtains with our FAQs. Discover essential tips, tools, and techniques to create perfect window treatments.
When selecting fabric, consider both aesthetics and functionality. Heavy cotton or cotton-linen blends are ideal because they hang well and are durable. Also, think about the room's existing color scheme and whether you want the curtains to make a statement or blend in.
No, a basic home sewing machine is sufficient for this project. As long as it can handle heavier fabrics and sew straight seams, you should be fine.
While pleater tape simplifies the process of creating pleats, you can make pinch pleats manually. However, this requires more precise measuring and sewing skills.
Measure the width of your window and multiply it by two or even two and a half to allow for full coverage and pleating. This ensures the curtains will close properly and have a full appearance when drawn.
Backstitching secures the beginning and end of your seams, preventing them from unraveling over time. It's a simple step that adds durability to your curtains.
Yes, but it's important to pre-wash your fabric before sewing to prevent shrinkage later. Always follow the care instructions for your specific fabric type.
Using a hard ruler or square when marking and cutting your fabric helps keep lines straight. Also, pressing folds with an iron before sewing keeps the fabric in place and makes stitching easier.
Curtain rings with hooks give a professional look and make it easier to open and close the curtains. However, you can also sew a rod pocket or use clip rings as alternatives.
A regular iron will work; just be sure to press firmly to create sharp creases. If needed, you can lightly mist the fabric with water using a spray bottle before pressing.
The time can vary depending on your sewing experience. For me, each panel took about two to three hours from cutting the fabric to hanging the finished curtain.
Final Thoughts and Tips
These curtains are not only beautiful but also surprisingly easy to make, even for a beginner. The key to a professional look is in the details—crisp, straight hems, neatly spaced pleats, and well-chosen fabric. If you follow these steps, you’ll end up with custom curtains that look like they came straight from a high-end designer store.
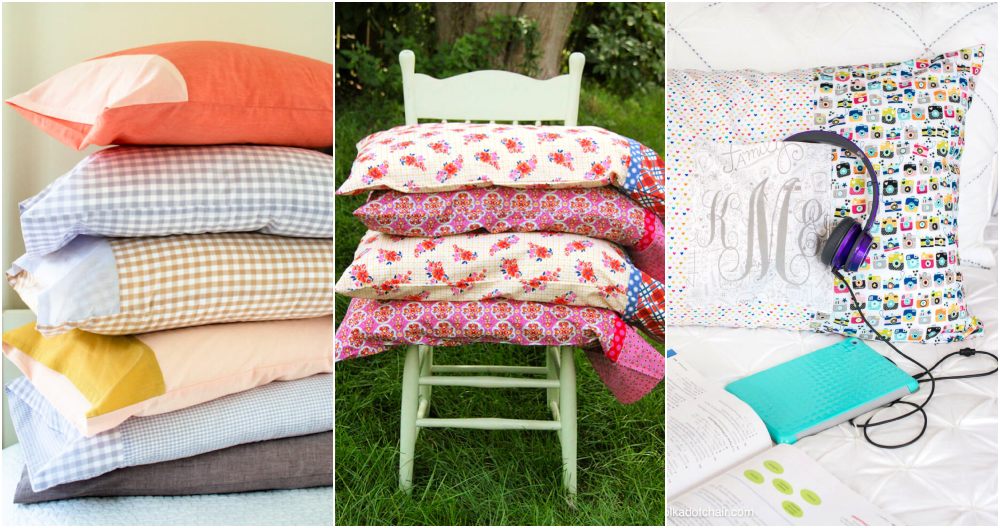
With any leftover fabric, you can even sew matching pillow covers, adding a cohesive and polished look to your space.
If you're feeling adventurous, try experimenting with different fabrics and pleat styles to suit your home decor. I hope you enjoy making your own DIY curtains and find this tutorial helpful!


