Making something by yourself not only gives you a sense of accomplishment but also allows you to customize it to suit your style and needs. Today, I'm going to walk you through learning how to make a bonnet for beginners with our easy guide. Not only was it a fun and fulfilling project, but it was also practical and stylish.
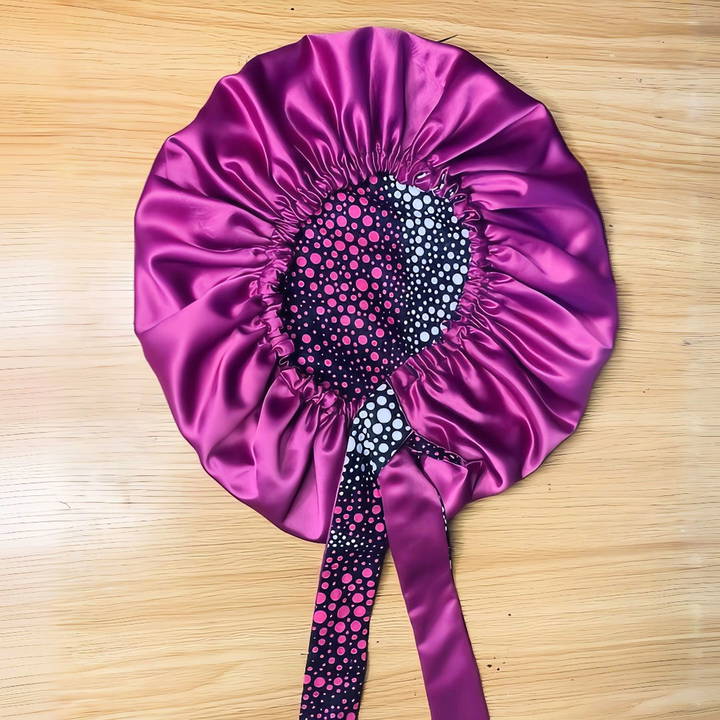
My aunt requested this DIY bonnet, and I thought it would be nice to document the process for anyone interested in making one themselves. Let's embark on this crafty adventure together!
Materials Needed for the Hair Bonnet
For this project, the materials I used are essential for achieving a high-quality, functional, and aesthetically pleasing bonnet.
Fabric
- Printed Fabric and Satin Fabric: The fabric is the main component of your bonnet, determining its appearance and feel. I needed two fabrics—one printed and one satin—to make the reversible effect. The satin is gentle on hair, helping to reduce breakage and frizz.
Tools
- Measuring Tape: Crucial for ensuring accuracy in measurement for the perfect fit.
- Pins: Used to secure the fabric in place as you work to ensure it doesn't shift.
- Sewing Machine: Needed for sewing the pieces together. It makes the task quicker and ensures durable stitches.
- Scissors: For cutting your fabric to the correct size.
Accessories
- Elastic Band (17 inches): Essential for the bonnet's ability to stretch and fit snugly on any head size.
Optional Tools
- Iron: Helps to press your fabric, making it easier to sew and giving the finished product a neater appearance.
Step by Step Instructions
Learn how to make a bonnet with our easy step-by-step guide. From fabric prep to final stitching, make a handmade bonnet effortlessly!
Step 1: Preparing Your Fabric
Learn effective techniques for preparing your fabric with tips on folding, measuring, and cutting to ensure precise and accurate sewing projects.
Folding and Measuring
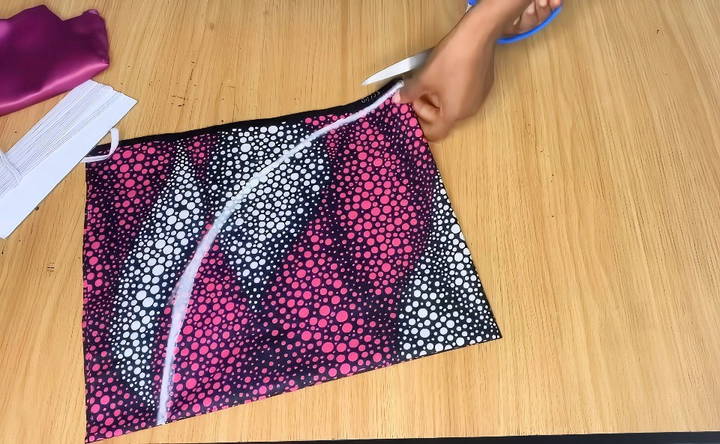
To start, I folded my fabric into four. This method allows you to cut a perfect circle with less effort and ensures symmetry. From the corner that doesn't have an open edge—where all the folds meet—I measured a radius of 12 inches. Depending on your preference or the size of the head it's intended for, you can adjust the radius.
Cutting the Fabric
After marking the circle, I cut along the lines. It's the same process for both fabrics. For the satin piece, I pinned the already-cut printed fabric onto it and used that as a guide so I didn't have to measure twice.
Step 2: Sewing the Two Fabrics
Learn the perfect technique for sewing two fabrics by aligning, making an opening, and stitching around the circle. Achieve flawless results every time!
Aligning the Fabrics
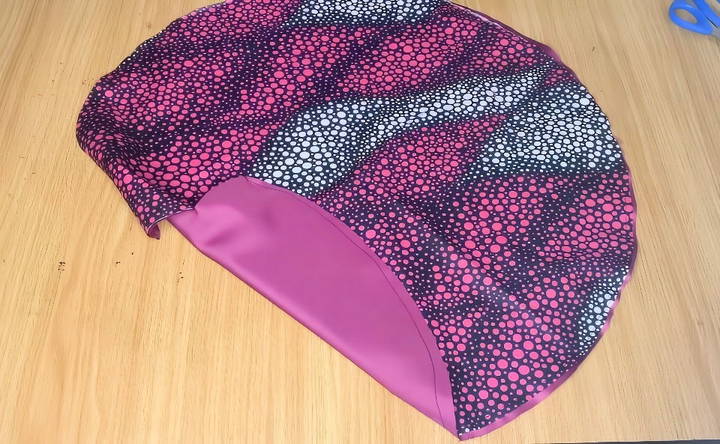
Once the circles were cut, I placed the two pieces of fabric together with their right sides facing each other. Pinning them together helps to keep them aligned as you sew.
Making an Opening
Before sewing around the edges, I left a 3.5-inch gap on one side to serve as an opening later.
Stitching Around the Circle
I then used my sewing machine to stitch all the way around the fabric circle, ensuring I didn't sew across the gap left open. This stitching secures the two pieces of fabric together.
Step 3: Turning the Fabric Right Side Out
Learn how to turn the fabric right side out, invert it seamlessly, and iron for a clean finish. Follow these steps for perfect sewing results!
Inverting the Fabric
Through the gap left, I gently turned the fabric inside out. Once inverted, I had a neat fabric-filled circle.
Ironing for a Clean Finish
This part isn't mandatory but highly recommended. I ironed the fabric to flatten any creases and ensure the edges were well-defined.
Step 4: Inserting the Elastic Band
Learn the easy steps for inserting an elastic band: sewing the casing, threading the elastic, and securing the elastic for a perfect fit.
Sewing the Casing
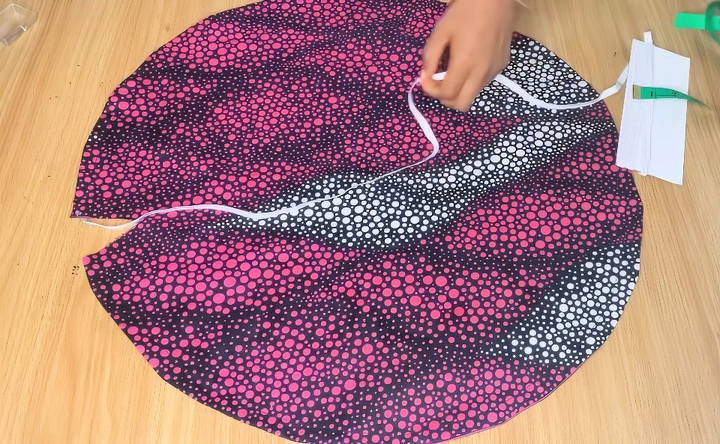
I proceeded to the sewing machine again, making a casing for the elastic. Starting from one side of the gap and stopping an inch from the other end, I sewed along, leaving that gap open.
Threading the Elastic
Cutting 17 inches of elastic, I began threading it through the casing using a safety pin attached to one end of the elastic. As you pull it through, secure the other end with a pin to prevent it from slipping inside.
Securing the Elastic
Once the elastic was completely through the fabric, I used my sewing machine to stitch down both ends of the elastic, ensuring it wasn't twisted and would stretch properly.
Step 5: Making and Attaching the Reversible Band
Learn to make and attach a reversible band with our step-by-step guide. From cutting to final stitching, master every step for a perfect finish.
Cutting the Band
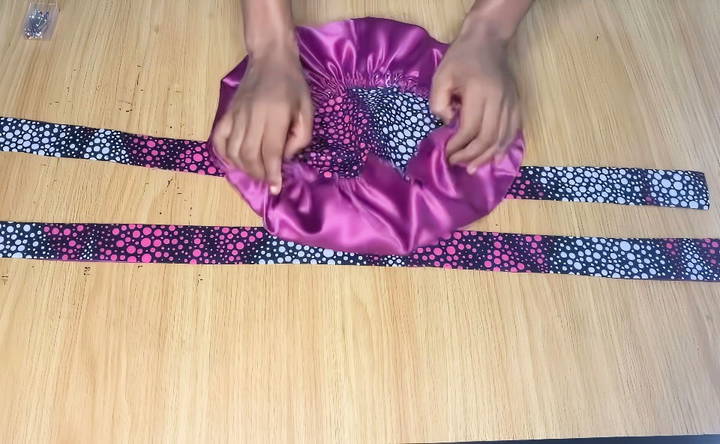
I cut two strips of each fabric (printed and satin) for the band, each 2 inches wide. The band would be the part used to tie the bonnet.
Sewing the Bands
Placing one portion of printed fabric against the satin, I stitched around three sides of the band fabric strips, leaving one side open. This open side is where I'd later turn the band inside out.
Attaching the Band to Bonnet
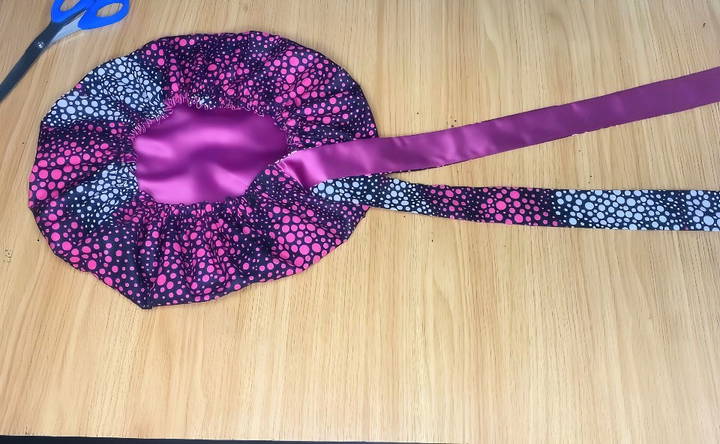
With the band turned right-side out, I folded the open edges of the bonnet's remaining gap to make a neat fold. Sliding in the band, I pinned it to secure.
Final Stitching
I sewed the band in place, attaching it firmly to the bonnet while ensuring that it was reversible by placing the band's satin side against the printed part of the bonnet and vice versa.
Customization Ideas
Customizing your bonnet can make it unique and special. Here are some easy and creative ideas to personalize your bonnet:
Fabric Choices
- Different Textures: Use fabrics like silk, cotton, or linen for different looks and feels.
- Patterns and Prints: Choose from floral, polka dots, stripes, or any pattern that you love.
Embellishments
- Ribbons and Bows: Add a ribbon or bow to the front or back of the bonnet for a cute touch.
- Lace and Trims: Sew lace or decorative trims along the edges for a vintage look.
- Buttons and Beads: Decorate with buttons or beads to add some sparkle and personality.
Embroidery
- Simple Designs: Embroider small flowers, initials, or other simple designs.
- Personal Messages: Add a personal message or name to make it a special gift.
Color Variations
- Dyeing Fabric: Dye the fabric in your favorite color or use tie-dye techniques for a unique pattern.
- Contrasting Colors: Use contrasting colors for the lining and outer fabric to make the bonnet stand out.
Seasonal Themes
- Spring and Summer: Use light, breathable fabrics and bright colors.
- Fall and Winter: Choose warmer fabrics like wool or flannel and use deeper, richer colors.
Functional Additions
- Adjustable Straps: Add adjustable straps or ties for a better fit.
- Reversible Design: Make the bonnet reversible with different fabrics on each side for two looks in one.
Eco-Friendly Options
- Recycled Materials: Use recycled or upcycled fabrics to make your bonnet eco-friendly.
- Natural Dyes: Use natural dyes made from plants or vegetables for coloring the fabric.
Themed Bonnet
- Holiday Themes: Make bonnets with holiday themes like Christmas, Easter, or Halloween.
- Character Inspired: Design bonnets inspired by favorite characters or stories.
Size Adjustments
- Custom Fit: Adjust the pattern to fit different head sizes, from babies to adults.
- Elastic Bands: Use elastic bands for a snug and comfortable fit.
Interactive Elements
- Pockets: Add small pockets to the bonnet for a fun and functional twist.
- Removable Decorations: Use Velcro or snaps to attach removable decorations that can be changed out.
By incorporating these customization ideas, you can make a bonnet that is not only functional but also a true reflection of your personal style.
Common Mistakes and How to Avoid Them
Making a bonnet can be a fun and rewarding project, but there are some common mistakes that beginners often make. Here's a guide to help you avoid these pitfalls and ensure your bonnet turns out beautifully.
Incorrect Measurements
- Mistake: Not measuring the head size accurately can lead to a bonnet that is too tight or too loose.
- Solution: Always measure the head circumference and add a little extra for seam allowances. Double-check your measurements before cutting the fabric.
Choosing the Wrong Fabric
- Mistake: Using fabric that is too stiff or too stretchy can affect the fit and look of the bonnet.
- Solution: Choose a fabric that is soft and has a bit of structure, like cotton or linen. Avoid fabrics that are too heavy or too flimsy.
Ignoring Seam Allowances
- Mistake: Forgetting to include seam allowances can result in a bonnet that is too small.
- Solution: Always add seam allowances to your pattern pieces. A standard seam allowance is about 1/4 to 1/2 inch.
Poor Stitching
- Mistake: Uneven or loose stitches can make the bonnet look unprofessional and may not hold up well.
- Solution: Use a consistent stitch length and tension. Practice on a scrap piece of fabric if you're new to sewing.
Not Pressing Seams
- Mistake: Skipping the step of pressing seams can make the bonnet look unfinished.
- Solution: Press all seams flat with an iron as you sew. This helps the bonnet lay flat and look more polished.
Incorrect Assembly
- Mistake: Assembling the pieces in the wrong order can make the construction process difficult.
- Solution: Follow the pattern instructions carefully. Lay out all pieces before sewing to ensure you understand the assembly order.
Overcomplicating the Design
- Mistake: Adding too many embellishments or complicated features can overwhelm the design.
- Solution: Keep it simple, especially if you're a beginner. Start with a basic design and add embellishments gradually.
Not Testing the Fit
- Mistake: Not trying on the bonnet during the sewing process can lead to fit issues.
- Solution: Test the fit as you go. Pin the pieces together and try it on before sewing the final seams.
Using the Wrong Thread
- Mistake: Using thread that doesn't match the fabric can make the stitches stand out in a bad way.
- Solution: Choose a thread that matches or complements your fabric. Quality thread also makes a difference in durability.
Skipping Finishing Touches
- Mistake: Not finishing the edges or adding final touches can make the bonnet look incomplete.
- Solution: Finish raw edges with a zigzag stitch or serger. Add any final touches like ribbons or bows to complete the look.
By being aware of these common mistakes and following these tips, you can make a beautiful and well-made bonnet.
FAQs About How to Make a Bonnet
Discover FAQs about how to make a bonnet, covering step-by-step guides, materials needed, and expert tips to make your perfect bonnet.
Measure your head circumference: Use a measuring tape to measure around your head where the bonnet will sit.
Cut the fabric: Fold the fabric in half and then in half again. Mark a quarter circle with a radius equal to half your head circumference plus 1 inch for seam allowance. Cut along the marked line to get a full circle when unfolded.
Pin the fabric: Place the fabric pieces right sides together and pin around the edges.
Sew the edges: Sew around the edge, leaving a small opening to turn the fabric right side out.
Turn and iron: Turn the fabric right side out through the opening and iron it flat.
Close the opening: Sew the opening closed with a hand stitch or machine stitch.
Make a casing: Fold the edge of the bonnet over by about 1 inch and sew around, leaving a small gap.
Insert the elastic or ribbon: Use a safety pin to thread the elastic or ribbon through the casing.
Secure the ends: Sew the ends of the elastic or ribbon together and close the gap in the casing.
Absolutely! You can:
Add ruffles: Sew ruffles along the edge for a decorative touch.
Use different fabrics: Mix and match fabrics for a unique look.
Embellish: Add lace, beads, or embroidery to personalize your bonnet.
To keep your bonnet in good condition, follow these steps:
Washing: Hand wash your bonnet in cold water with a mild detergent. Avoid using bleach or harsh chemicals that can damage the fabric.
Drying: Air dry your bonnet by laying it flat on a clean towel. Avoid wringing it out or using a dryer, as this can cause the fabric to lose its shape.
Ironing: If needed, iron your bonnet on a low heat setting. Use a pressing cloth to protect the fabric from direct heat.
Storage: Store your bonnet in a cool, dry place. Avoid folding it tightly to prevent creases and maintain its shape.
Conclusion
Making this reversible elastic hair bonnet with a reversible band was an enlightening experience. Though making it involved several steps, each phase was both manageable and enjoyable. Whether for yourself or as a personalized gift for someone else, this project allows for endless possibilities and creativity. By following these steps, you can have a chic, practical, and unique hair accessory. I hope you found this guide helpful and that it inspires you to start your own DIY bonnet project.


