Making your own 15 DIY graphic tees is a fun and expressive way to showcase your creativity and personal style. With a variety of techniques and tools available, anyone can design and print their unique graphic tees at home. It's not just about putting a design on a shirt; it's about making a statement, sharing a message, or simply flaunting your artistic flair. From choosing the perfect fabric to selecting the ideal printing method, this guide will walk you through all the essential steps to bring your vision to life.
In the sections that follow, we will delve into everything you need to know to start making stunning graphic tees. From material and tool reviews to step-by-step instructions on making your tee, and even troubleshooting common issues, we've got you covered. Plus, we'll explore design inspiration and sustainability practices to keep your projects both fresh and eco-friendly.
So, if you're ready to turn your ideas into wearable art, join us as we explore the exciting process of making DIY graphic tees.
Material and Tool Reviews for DIY Graphic Tees
When it comes to making DIY graphic tees, the materials and tools you choose can make a significant difference in the outcome of your project. In this section, we'll explore some of the best options available to help you produce high-quality, durable, and stylish graphic tees.
Selecting the Right Fabric
The foundation of any great graphic tee is the fabric. Here are some top choices:
- Cotton: Known for its comfort and breathability, cotton is a classic choice for t-shirts. It's ideal for most printing methods and holds color well.
- Polyester: This synthetic fabric is durable and resistant to shrinking and wrinkling. It works well for sublimation printing.
- Blends: Combining cotton and polyester can offer the best of both worlds, providing comfort and durability.
Choosing Your Printing Method
Different printing methods can affect the look and feel of your graphic tee. Here are some popular techniques:
- Screen Printing: Great for bulk orders and designs with fewer colors. It offers a professional finish and long-lasting prints.
- Heat Transfer: Perfect for intricate designs and small batches. It allows for vibrant, full-color images.
- Direct to Garment (DTG): Best for detailed and colorful designs. It prints directly onto the fabric and is softer to the touch.
Essential Tools for DIY Printing
Having the right tools can streamline your DIY process. Consider these essentials:
- Cutting Machine: A cutting machine, like a Cricut or Silhouette, can precisely cut designs out of vinyl or stencil material.
- Heat Press: For heat transfer and vinyl applications, a heat press ensures even heat distribution and adherence.
- Inkjet Printer: Necessary for making transfer papers for heat transfer printing.
Tips for Long-Lasting Designs
To ensure your graphic tees stand the test of time, follow these tips:
- Pre-wash Fabric: This prevents shrinkage after applying your design.
- Use Quality Inks: High-quality inks reduce fading and cracking.
- Follow Care Instructions: Proper washing and drying can extend the life of your printed tees.
By carefully selecting your materials and tools, and following best practices for printing and care, you can make DIY graphic tees that look great and last long. The key is to experiment and find what works best for you and your creative vision.
How to Make Graphic Tees - Step by Step Tutorial
Making custom DIY graphic tees doesn't need to be expensive or require advanced design skills. In just a few easy steps, you can design and print a unique graphic tee for free using tools like Canva and Printful. Whether you're making a t-shirt for a personal project, for fun, or to start your own line, this guide will walk you through the process from concept to finished product, all for free.
Step 1: Find Your Inspiration
Before diving into the design process, identify a theme or idea for your graphic tee. Inspiration can come from anywhere – a favorite musician, a memorable quote, or even abstract art. For this guide, our motif revolves around a scissor design inspired by creativity and sharpness in craftsmanship.
Step 2: Designing Your Graphic Tee with Canva
- Access Canva: Navigate to Canva's website and sign up for a free account if you haven't already. Canva is intuitive and doesn't require prior graphic design knowledge.
- Choose Your Template: In Canva's search bar, type 'T-Shirt' and select the appropriate template size. For this demonstration, we'll use a 14x18 size.
- Selecting a Template: Browse through the available T-Shirt templates. If you already have a specific one in mind, you can use it as a base for your design. For instance, a template featuring a wolf was used as the foundation in our project.
- Customization: Begin customizing your template. If your template includes elements you don't need, simply delete them. In the case of the scissor theme, all unrelated elements were removed to make space for the new design.
- Add Text and Images: Add relevant text or imagery to your design. Canva lets you easily manipulate the size, color, and orientation of all elements to fit your vision.
- Add Filters and Adjust Transparency: To make elements more subtle or blend them into the shirt better, adjust their transparency levels or apply various filters.
Step 3: Making a Mock-Up
- Mock-Up in Canva: Once your design is complete, use Canva's mock-up feature to see how it looks on a T-shirt. This step helps you visualize the final product and make any necessary adjustments.
Step 4: Printing Your Tee with Printful
- Signup for Printful: Go to the Printful website and make a free account.
- Upload Your Design: Choose ‘Order for myself' and select 'Explore Products.'. Navigate to 'Men's T-Shirts' (or any category that fits your preference) and upload your Canva design to the T-shirt template you choose.
- Adjust and Confirm Design: Make sure your design fits within the printable area of the T-shirt. You can adjust the size and positioning as needed.
- Select T-Shirt Options like Size and Color: Pick a color that complements your design well. For our project, a tan T-shirt was selected to match the background of the design.
- Review and Order: Check the final mock-up, review your order details, and proceed to checkout. Your custom T-shirt will be printed and shipped to you.
Video Tutorial
For a step-by-step video tutorial on making your own graphic tee for free, watch this YouTube video.
It pairs seamlessly with this written guide, visually demonstrating the steps involved in designing and printing your very own graphic T-shirt. This video is an excellent resource for those who prefer a visual walkthrough to complement the instructions provided here.
Creating a free graphic tee is manageable, fun, and rewarding. Let your creativity flow to make a personalized T-shirt that reflects your style or message.
Design Inspiration for DIY Graphic Tees
Making your own graphic tees is a fantastic way to express your individuality and unleash your creativity. With the right inspiration, you can design something truly unique that resonates with your personal style. Let's dive into some of the most exciting trends for 2024 that can spark your imagination.
Embrace the New Wave of AI-Assisted Designs
Artificial Intelligence (AI) has revolutionized the way we approach creative projects. In 2024, AI assistance is one of the top trends in graphic design, offering a wealth of possibilities for DIY enthusiasts. AI can help you:
- Generate ideas: If you're stuck for inspiration, AI can suggest a range of concepts based on your preferences.
- Experiment with colors: AI tools can propose color schemes that complement your design, taking the guesswork out of the process.
- Make variations: Quickly see how your design looks in different styles or on various tee colors.
Explore Composition-Heavy Designs
Composition is key in graphic design. This year, composition-heavy designs are making a splash, allowing for intricate and detailed artwork on tees. Think about how you can layer elements, play with space, and combine textures to make a visually compelling tee.
Incorporate Nature Reference Designs
Nature never goes out of style, and in 2024, nature reference designs are particularly trendy. Whether it's floral patterns, animal motifs, or landscape scenes, bringing a touch of the outdoors to your tees can add a serene or adventurous vibe.
Play with Vibrant Colors and Abstract Gradients
Vibrant colors are in, and they're perfect for making a bold statement on your tees. Pair them with abstract gradients for a modern look that stands out. Experiment with different color transitions and shapes to find a gradient that elevates your design.
Return to Y2K Aesthetics
The early 2000s are back with a vengeance, influencing fashion and design once again. Y2K aesthetics are characterized by bright colors, metallics, and a mix of futuristic and retro elements. Incorporate tech-inspired graphics or pop culture references from that era to capture the Y2K spirit.
By embracing these trends in your DIY tees, you can create stylish pieces that connect with current culture. Best designs reflect you, so let trends inspire while adding your touch.
Troubleshooting Common Issues in DIY Graphic Tees
Making DIY graphic tees can be a rewarding experience, but sometimes you might encounter a few hiccups along the way. Don't worry; most issues have simple fixes. Here's a guide to help you troubleshoot common problems so you can achieve the best results with your graphic tees.
Preventing Ink Bleeding
Ink bleeding can ruin the sharpness of your design. To prevent this:
- Use the Right Paper: Make sure you're using transfer paper that's compatible with your printer type.
- Set the Correct Printer Settings: Choose the highest quality setting and select the right paper type.
- Allow the Ink to Dry: After printing, give the design time to dry before handling.
Avoiding Fabric Shrinkage
Shrinkage can distort your design. To avoid this:
- Pre-Wash Your Tee: Always wash and dry your tee before applying the design.
- Use Pre-Shrunk Fabric: Opt for pre-shrunk materials if you want to skip the pre-washing step.
Ensuring Design Longevity
A great design should last. To extend the life of your graphic tee:
- Use High-Quality Materials: Invest in good-quality transfer paper and inks.
- Follow Washing Instructions: Wash your tee inside out on a gentle cycle and avoid high heat in the dryer.
Solving Design Fading
Fading designs can be disappointing. To combat this:
- Protect Your Tee: Use a UV spray to protect the design from sun damage.
- Iron on Reverse: If you need to iron the tee, do it on the reverse side to avoid direct heat on the design.
By following these tips, you'll be well on your way to making DIY graphic tees that look professional and last long. Practice makes perfect, so keep experimenting and refining your technique.
Sustainability Practices in DIY Graphic Tees
Making DIY graphic tees is not just about expressing your creativity; it's also an opportunity to make a positive impact on the environment. By adopting sustainable practices, you can contribute to a healthier planet while crafting stylish tees. Here's how you can incorporate sustainability into your DIY projects.
Choose Eco-Friendly Materials
Selecting the right materials is crucial for sustainability:
- Organic Cotton: Opt for organic cotton, which is grown without harmful chemicals and pesticides.
- Recycled Fabrics: Use recycled fabrics or repurpose old tees to reduce waste.
- Eco-Friendly Inks: Choose water-based or soy-based inks that are less harmful to the environment.
Minimize Waste
Be mindful of waste during your creative process:
- Plan Your Design: Carefully plan your design to minimize fabric and ink usage.
- Use Scraps: Save and reuse scraps for smaller projects or patchwork designs.
Energy-Efficient Techniques
Consider the energy used in making your tees:
- Cold Wash: Wash your tees in cold water to save energy.
- Air Dry: Skip the dryer and air dry your tees to reduce electricity consumption.
Support Sustainable Brands
When purchasing materials, support brands committed to sustainability:
- Research Brands: Look for brands that prioritize eco-friendly practices.
- Check Certifications: Seek out certifications like B Corp or Fair Trade to ensure ethical production standards.
By integrating these sustainable practices into your DIY graphic tee projects, you not only make unique and personal apparel but also take a step towards a more sustainable and responsible way of crafting. It's a win-win for both your wardrobe and the environment.
FAQs About DIY Graphic Tees
Making your own graphic tees is a fun and rewarding DIY project. Here are answers to some frequently asked questions that can help you get started and ensure your designs look great and last long.
What type of fabric is best for DIY graphic tees?
Cotton is the most popular choice due to its breathability and ability to hold ink well. However, polyester and blends are also good options, especially for certain printing methods like sublimation.
Can I use any printer to print designs on transfer paper?
It's best to use an InkJet printer for transfer paper. Laser printers are not suitable as they use a different technology that can affect the quality and durability of the print.
How do I prevent the design from fading after washing?
To prevent fading, wash your graphic tee inside out in cold water and air dry it. Also, using high-quality inks and transfer paper can help maintain the vibrancy of your design.
What's the difference between heat transfer and screen printing?
Heat transfer involves printing a design onto special paper and then transferring it onto the fabric using heat. Screen printing involves pushing ink through a mesh stencil directly onto the fabric. Heat transfer is better for intricate, multi-colored designs, while screen printing is ideal for larger batches and designs with fewer colors.
How can I ensure my design is centered on the tee?
Measure and mark the center of your tee with a washable fabric pen or chalk. Then align your design with these marks before applying heat or ink.
Is it necessary to wash the tee before applying a design?
Yes, pre-washing the tee can prevent shrinkage and ensure the design applies evenly and stays put.
Can I iron directly on the transferred design?
No, you should never iron directly on the design. If you must iron the tee, do so on the reverse side or place a protective cloth over the design.
What are some eco-friendly options for DIY graphic tees?
Consider using organic cotton tees, water-based inks, and recycled materials. These options are better for the environment and can still result in a high-quality finished product.
How can I make a distressed look on my graphic tee?
To make a distressed look, gently rub sandpaper over the design after it's been applied. Be careful not to overdo it, as this can damage the fabric.
What should I do if the ink bleeds during the transfer process?
If ink bleeds, it's often due to too much heat or pressure during the transfer. Make sure to follow the instructions carefully for temperature and timing, and consider doing a test print first.
Can I layer different designs on top of each other?
Layering designs is possible, but it requires careful planning and execution. Make sure each layer is fully dry or set before adding another, and be aware that too many layers can make the tee stiff and uncomfortable.
By keeping these FAQs in mind, you'll be well-equipped to start making your own unique and stylish DIY graphic tees. Remember, practice makes perfect, so don't be afraid to experiment and learn as you go!
15 DIY Graphic Tees
Discover how to make unique and stylish DIY graphic tees with our easy step-by-step guide. Perfect for expressing your creativity!
1. Beginner-friendly DIY Graphic Tees

Upgrade your wardrobe with personalized flair by making your graphic tees! Following simple steps from Studio DIY, all you need is a tee, iron-on letters, and an iron. Perfect for a fun gathering, make shirts featuring your favorite lyrics or quotes. It's an easy project anyone can enjoy. Share your creations, and let's see who can pinpoint those witty or heartfelt phrases. What's your tee going to say?
2. Make Your Own Fun Graphic Tees with Cricut's
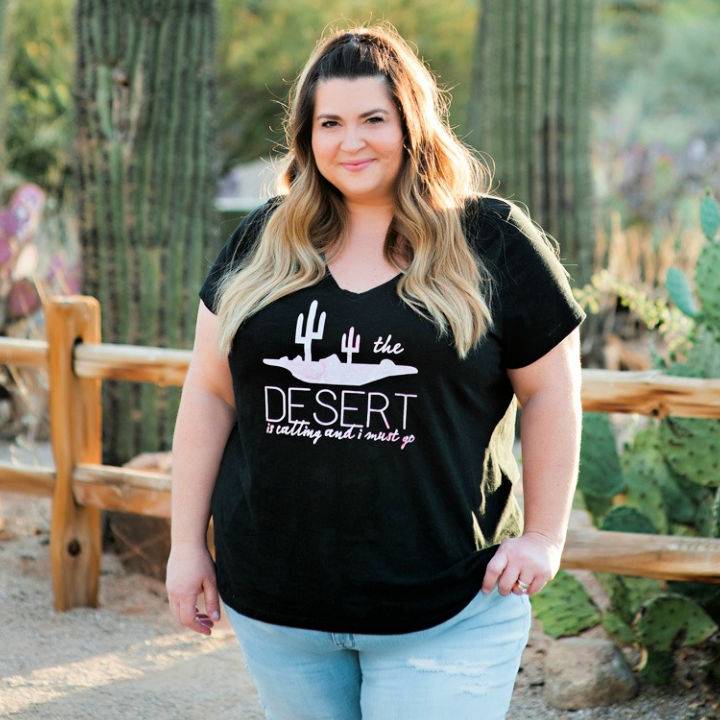
Make a statement with a unique DIY The desert is calling t-shirt using Cricut's Patterned Iron-On™. With The Crafted Sparrow's easy tutorial, transforming a plain tee takes less than 15 minutes. Choose from a wide variety of patterns and colors to reflect your style. This project is perfect for adding a personal touch to your wardrobe using the Cricut Maker or Cricut Explore Air 2 and the EasyPress™. Discover the joy of crafting your customized t-shirt today.
3. Handmade Graphic Tees with Free Printables
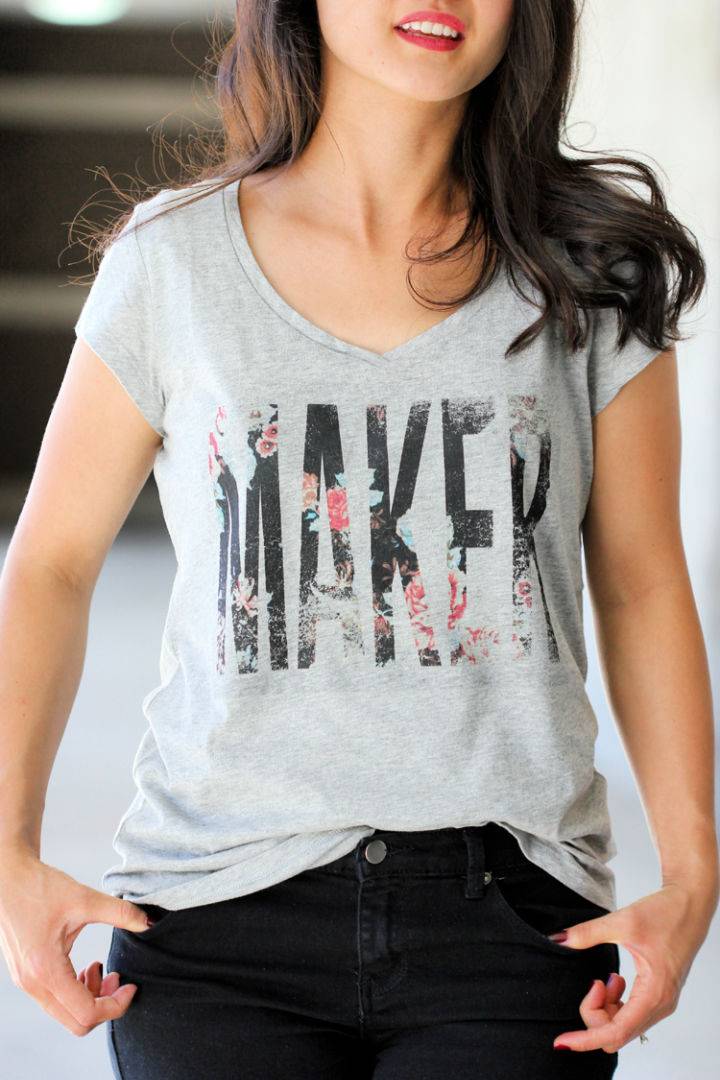
Show your creativity and wardrobe flair with DIY graphic tees, accompanied by free printables. Discover how to customize your outfits through simple, cost-effective methods like freezer paper stenciling or using photo transfer paper. Whether you prefer articulate, bold statements or playful designs, this guide offers essential tips for durable and stylish creations.
Ideal for crafting unique, personalized tees, these detailed tutorials ensure your DIY projects are both fun and successful. Elevate your fashion game by making tees that genuinely speak to you, with invaluable tips and printable designs at your fingertips.
4. DIY Graphic T-shirt with Silhouette Portrait

Unleash your creativity with a DIY graphic t-shirt tutorial using the Silhouette Portrait®! Perfect for adding a personal touch to your wardrobe, this guide walks you through the entire process. From selecting your design to the final iron-on application, you'll learn to craft a unique piece that truly represents you. Need supplies or more detailed instructions? Visit Sprinkle Creative for a comprehensive step-by-step tutorial. Enjoy crafting a t-shirt that lets your personality shine through!
5. Making a Disney Beauty and The Beast Graphic T-Shirt
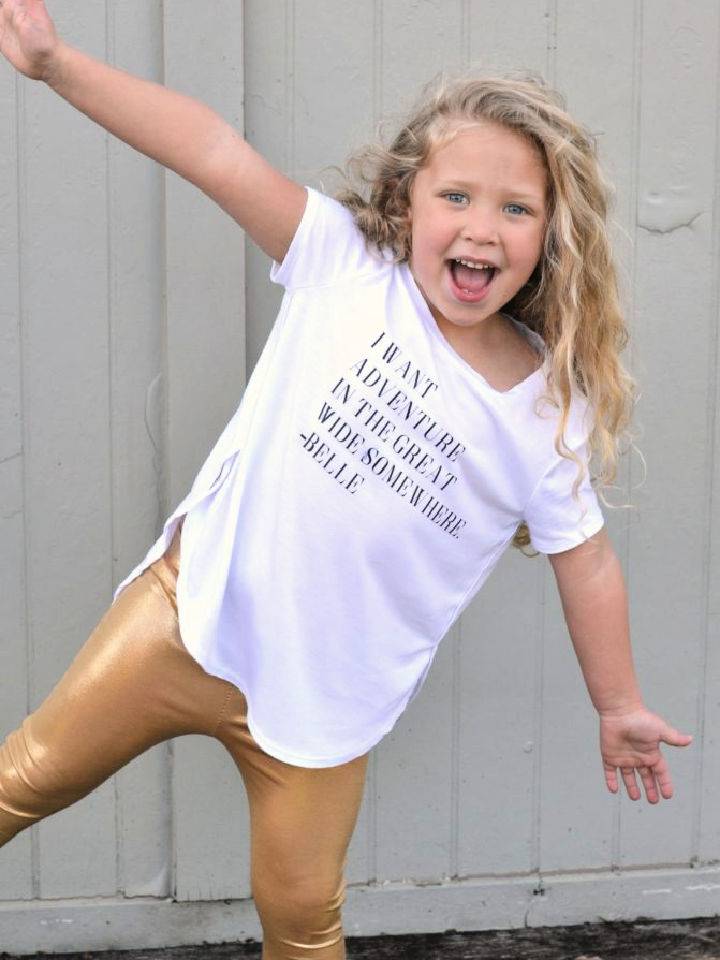
Unleash your creativity with our step-by-step guide on how to make graphic tees that showcase your unique style. Transform your enthusiasm for Disney's Beauty and the Beast into a fashionable statement with this easy DIY graphic t-shirt guide. Perfect for fans eagerly awaiting the movie's release or anyone looking to add a touch of Disney magic to their wardrobe.
With straightforward instructions and a touch of creativity, you can make a unique piece that celebrates your love for adventure and style. For a detailed tutorial that will help you craft this special t-shirt, visit Moms Without Answers. Get ready to showcase your Belle-inspired look with pride!
6. Homemade Vintage Summer Graphic Tee
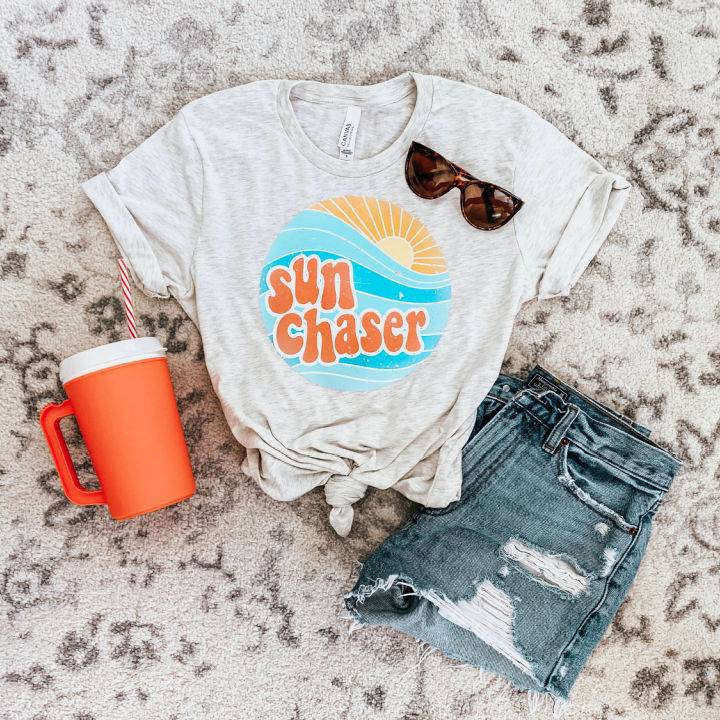
Revitalize your summer wardrobe by crafting a vintage-inspired graphic tee with the help of Craftables. This instructive DIY guide walks you through the process of using Inkjet Printable Heat Transfer Vinyl, from printing your design to applying it to a blank t-shirt.
In under 30 minutes, you'll learn how to add a cool, distressed look to your tee, making it uniquely yours. Simple steps and clear instructions make this project accessible for everyone, ensuring a fun and successful crafting experience. Start refreshing your style today with a personalized touch!
7. Easy DIY Glitter Graphic Shirts
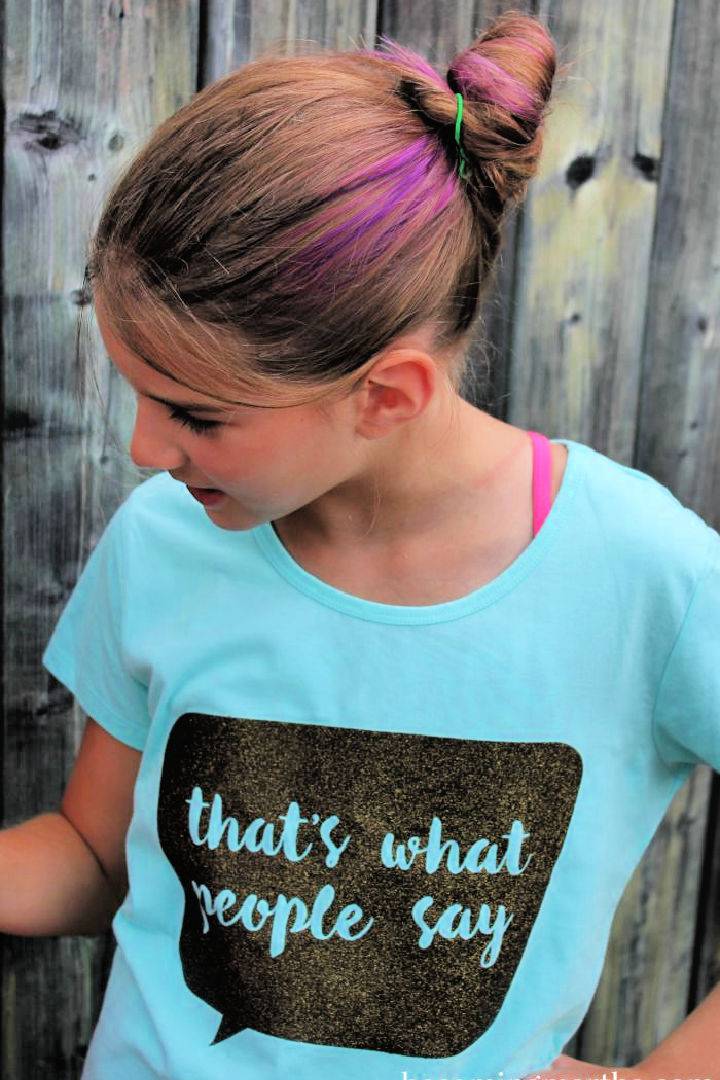
Express your individuality by learning how to make your own graphic tee with our easy-to-follow instructions. Kickstart your back-to-school preparations with unique DIY glitter graphic shirts. This delightful project is rooted in simplicity and creativity, blending fashion and fun seamlessly. With The Simply Crafted Life, discover how you can transform plain shirts into dazzling outfits with glitter heat transfer vinyl.
From choosing catchy song lyrics to applying the vinyl with precision, the process is described in an easy-to-follow way, ensuring a stunning outcome. Remember to mirror your image and place the vinyl correctly for perfect results. Dive into this craft and make designs your kids will love to flaunt!
8. How to Make Graphic Tees - Step by Step
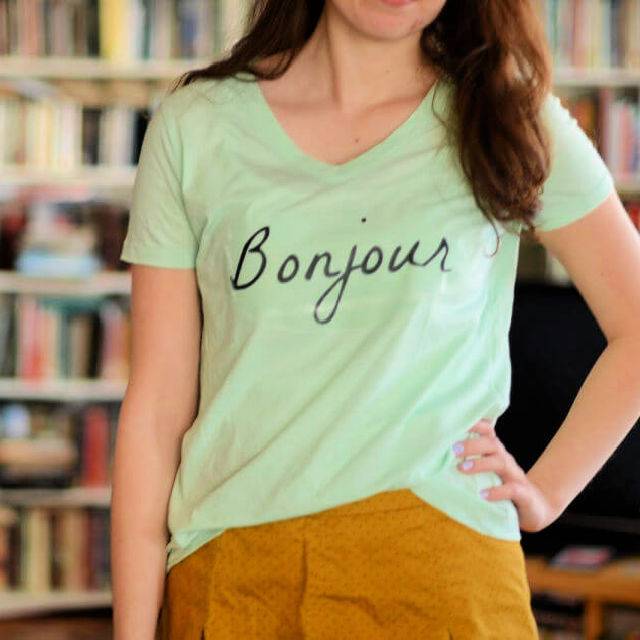
Unleash your creativity and fashion sense by designing your graphic tees with this easy-to-follow DIY tutorial. Transform any plain tee into a personalized statement piece using nothing more than transfer paper, a computer, and an iron. Perfect for those who adore unique fonts and want to express their style through words and designs.
This guide walks you through the process, from making your design to ironing it onto your shirt. For detailed steps and more inspiration, check out the full tutorial on Bramblewood Fashion. Whether you're crafting a tee with a catchy phrase or a design that speaks to your soul, make your wardrobe truly yours.
9. Make Embellished Pocket Graphic Tees
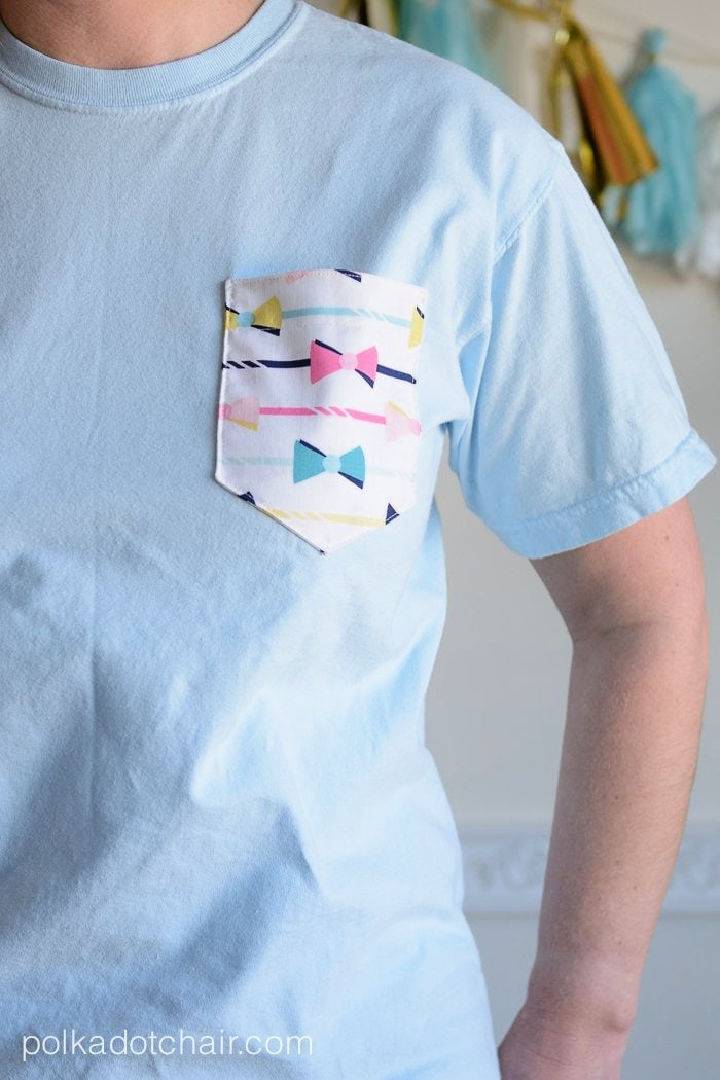
Upgrade your wardrobe with a personalized touch by adding unique embellishments to a basic pocket tee. With this straightforward and engaging DIY tutorial on Polka Dot Chair, you'll learn how to infuse creativity into your t-shirts using simple sewing and applique techniques.
Perfect for anyone who loves a bit of DIY flair, this guide walks you through making a tee that features charming details like bow-tie pockets and state silhouettes. Gather your materials, and let's add that special touch to your tees today!
10. Cool DIY Apres Ski Graphic Tees

Discover the joy of creating personalized fashion with our comprehensive guide to DIY graphic tees. Gear up for the slopes and après-ski fun with a DIY project that turns heads. Transform a simple pullover into a statement après-ski sweater with a few easy steps, perfect for warming up in style after a day in the snow. Visit Francois et Moi for a detailed guide on making your own cozy, chic ski-themed sweater.
Armed with iron-on letters, an iron, and a pullover, you'll have a bespoke ski sweater ready in no time. Ideal for anyone looking to add a personal touch to their winter wardrobe. Follow the simple instructions and enjoy a unique sweater that's as fun to make as it is to wear.
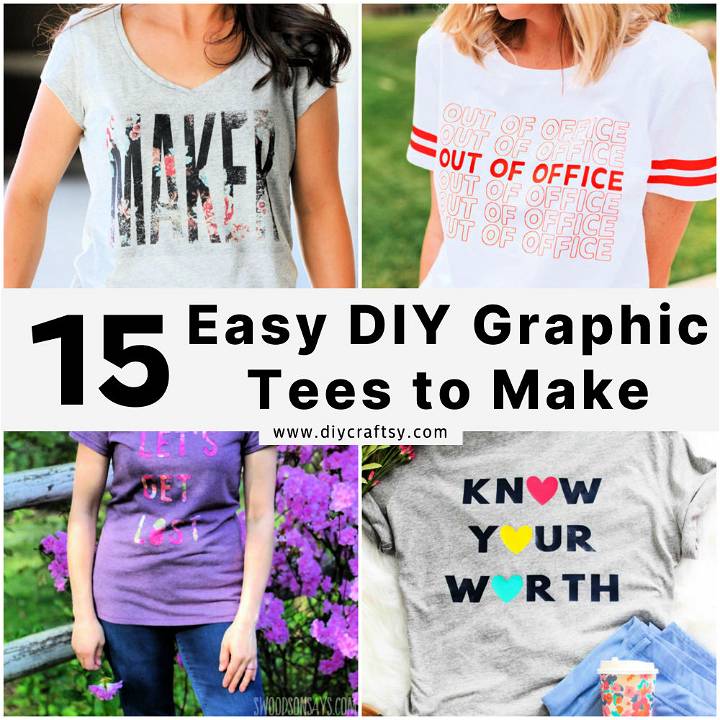
11. Beautiful Out Of Office Graphic Tees
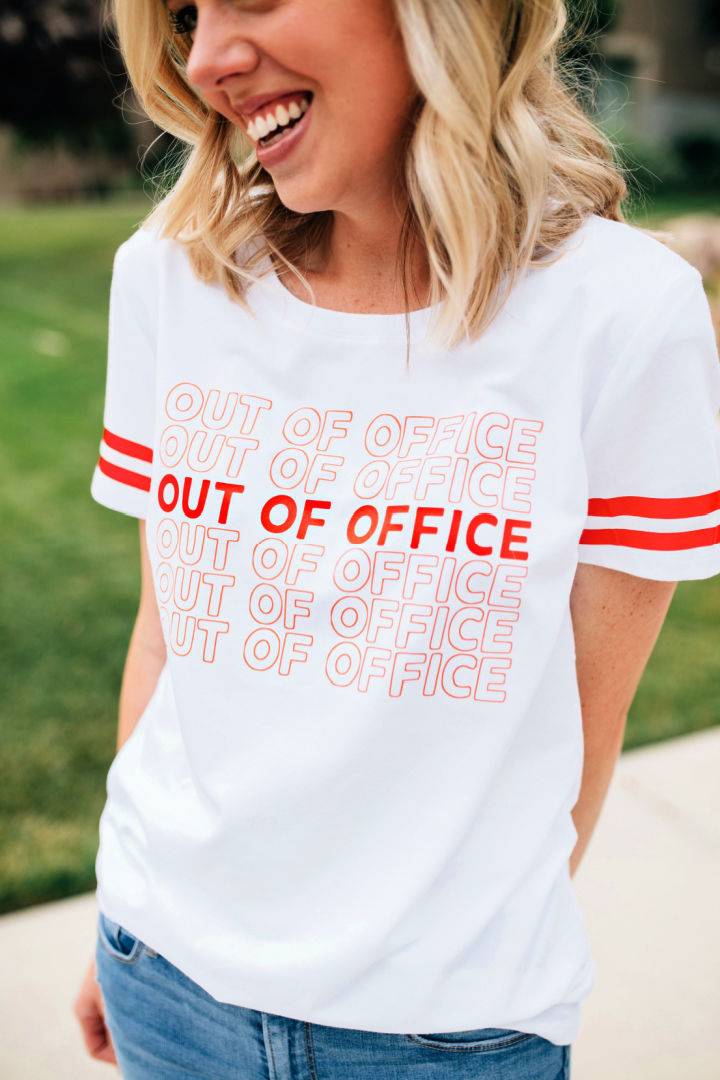
Make your summer unforgettable with a DIY out-of-office T-shirt, courtesy of The Pretty Life Girls. This easy guide ensures you craft a tee perfect for every summer adventure. From pool days to campouts, express your out-of-office vibe in style.
Materials include a blank T-shirt and Easyweed Heat Transfer Vinyl, ensuring a smooth crafting experience. Follow simple steps to cut, weed, and iron on your design. Prepare to make a statement this summer with your very own DIY T-shirt. Happy crafting!
12. Reverse Applique T-Shirt Refashion

Explore a world of endless possibilities with these inspiring DIY graphic tee ideas for your next custom apparel project. Creatively refresh your wardrobe with a reverse applique t-shirt refashion. This innovative DIY technique involves sewing a design on a t-shirt and then cutting away the top layer to reveal a contrasting fabric underneath.
With detailed steps and helpful tips, this guide makes it easy and fun to add a personal touch to your clothing. Whether you're using a Cricut Maker or simple scissors, this method breathes new life into plain tees. Perfect for anyone wanting to personalize their wardrobe and try their hand at refashioning!
13. Gorgeous DIY Iron On Vinyl Shirt

Make a bold statement with the Know Your Worth Iron-On Vinyl Shirt from Purely Katie. This DIY project invites you to broadcast a powerful message of self-value and acceptance through fashion. Perfect for anyone who loves unique and meaningful wardrobe additions, this guide shows you how to personalize a T-shirt that speaks to your heart. With easy-to-follow instructions, you'll delight in crafting a piece that's as special as you are. Express your individuality and remind everyone of their worth with this creative endeavor.
14. How to Dye Flocked Iron On Letters
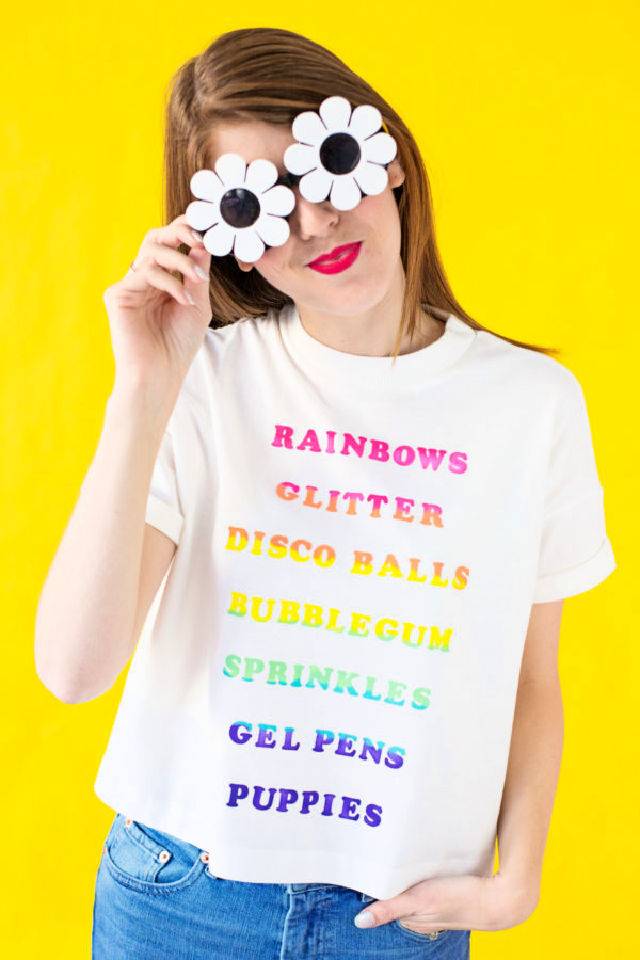
Reinvent your wardrobe with an easy DIY guide to dyeing flocked iron-on letters! Breathe new life into your clothes by adding a splash of color to your designs. No longer are you limited to the basic black-and-white options from the craft store.
Follow this straightforward method for a colorful makeover that can range from subtle shades to a vibrant ombre rainbow. Interested in how to bring this creative idea to life? Check out the tutorial at Studio DIY for a step-by-step guide. Transform your tees and sweatshirts into personalized masterpieces today!
15. How to Style a Graphic Tee
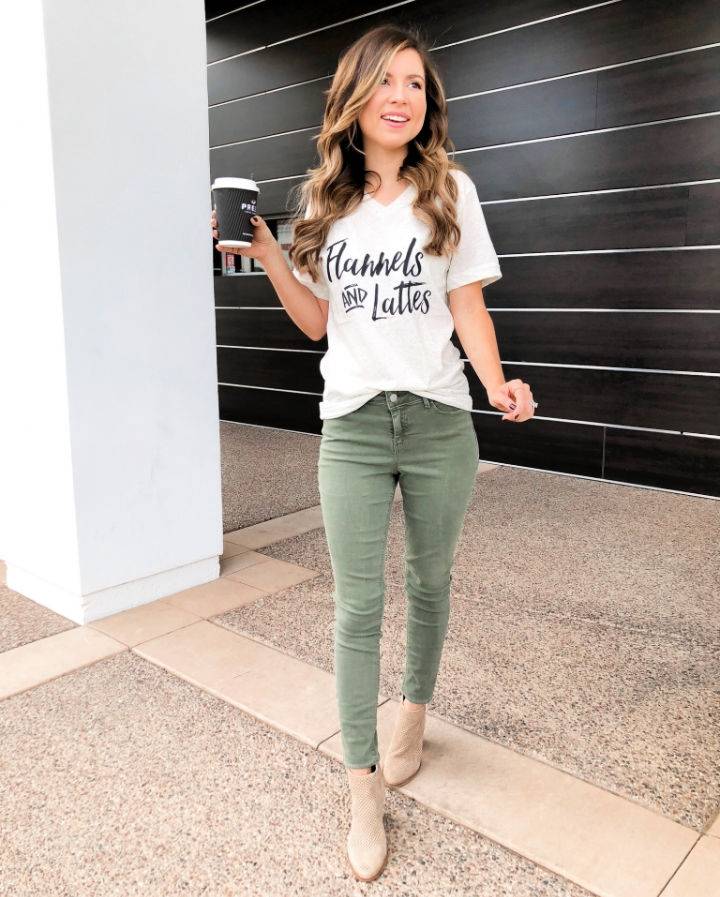
Upgrade your wardrobe with two chic DIY ways to style a graphic tee, as shared by Simply Sutter. For a laid-back vibe, combine your tee with olive pants and ankle boots, adding a denim jacket for an extra layer of cool. Or, elevate your look with a sleek black blazer and heels for a dressier touch. These versatile ideas breathe new life into your favorite graphic shirts. For visual inspiration and more fashion tips, visit Simply Sutter.
Conclusion:
In conclusion, crafting your very own DIY graphic tees is not just a fun and creative outlet, but also an opportunity to express your personal style, explore sustainable fashion, and even make a statement with your choices. We've covered everything from selecting the right fabric, to choosing your printing method, and provided you with step-by-step instructions to ensure your designs come to life just as you envision them.
Plus, we delved into design inspiration for your next project and tackled common troubleshooting issues to keep your creations looking their best. Remember, every tee you make is a reflection of your creativity and individuality. So, grab your materials, let your inspiration flow, and bring your unique DIY graphic tees to life with confidence and flair!


