Building a memorable volcano experiment for kids was an exciting experience. I started by gathering all the materials: baking soda, vinegar, food coloring, and a plastic bottle. I sat down with my son and explained the process step-by-step. We both loved how adding food coloring made the eruption look real. This hands-on activity was not only fun but also educational for my child.
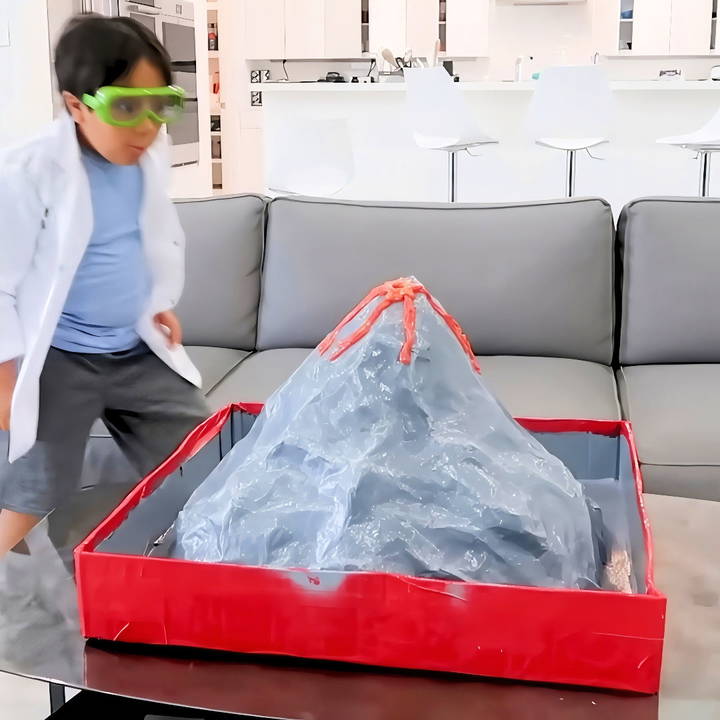
Setting up the DIY volcano project was easy and quick. We built a small mountain using clay around the bottle. After adding baking soda and pouring in the vinegar, we watched in amazement as the "lava" erupted. This simple science experiment allowed my son to understand the basics of chemical reactions.
I'm confident that you and your kids will enjoy this as much as we did. Get your materials ready and start your volcano today!
Scientific Explanation of Volcanic Eruptions
Volcanic eruptions are one of nature's most powerful events. They happen when magma, a hot liquid made of melted rocks, rises to the Earth's surface. When the magma bursts out, it's called lava. But why does this happen? Let's break it down:
- Pressure and Heat Inside the Earth: Deep below the ground, it's very hot. The heat comes from the Earth's core, which is as hot as the Sun's surface! This heat melts rocks into magma. The magma is lighter than solid rocks, so it wants to rise, just like a bubble in water.
- The Role of Magma Chambers: Magma collects in areas called magma chambers. These are like big underground pools of liquid rock. Over time, more and more magma pushes into these chambers, and the pressure builds up.
- Finding a Way Out The Earth's crust is like a hard shell with cracks and weak spots. The magma looks for these places to escape. When the pressure gets too high, the magma forces its way up through the cracks.
- The Eruption: When magma reaches the surface, it erupts from the volcano. Gases that were trapped in the magma get released too. These can be steam, carbon dioxide, and other gases. The eruption can be quiet with lava flowing out, or explosive, sending ash and rocks into the air.
- After the Eruption: Once the eruption is over, the volcano might go quiet for a while. But the process can start all over again if more magma starts to rise.
Studying volcanic eruptions helps us prepare. Scientists may predict eruptions by observing earthquakes and volcano shape changes. This info can save lives by providing time to evacuate.
Gathering the Materials
Discover why each material is needed to gather the materials. Learn essential steps and items to ensure successful gathering in this informative guide.
Why Each Material is Needed:
- Baking Soda: The chemical base that reacts with the vinegar to make the eruption.
- Vinegar: An acid that reacts with baking soda to produce carbon dioxide - the eruptive force.
- Food Coloring (Red): To mimic the lava's color, making the eruption visually striking.
- A Small Bottle: Serves as the volcano's magma chamber, where the reaction occurs.
- A Tray or Large Box: To contain the mess and act as the base of our volcano.
- Modeling Clay/Papier M* âché: This is used to shape the volcano around the bottle.
- Paint (Brown, Green, and Red): For detailing the volcano to make it look as realistic as possible.
Step by Step Instructions
Learn how to make a volcano with our step-by-step instructions. From building to eruption, follow each easy step for a fun and educational experience!
Step 1: Setting the Stage
First off, placed the small bottle on a tray, making sure it was centered. The tray not only helped to contain the mess post-eruption but also served as the land surrounding the volcano.
Step 2: Making the Volcano Structure
I opted for papier-m* âché to craft my volcano, which involved a mix of water, flour, and torn newspaper strips. For a more straightforward approach, you can also mold the shape using clay. Whichever method you choose, ensure the volcano forms around the bottle, leaving the mouth open for the eruption.
Step 3: Painting the Volcano
After the papier-mâché dried overnight, it was time to bring the volcano to life with paint. I mixed brown and green for the base and sides, then added red streaks running down from the top to mimic lava channels. This step truly transformed a newspaper-clad bottle into a miniature marvel of nature!
Step 4: The Eruption Mix
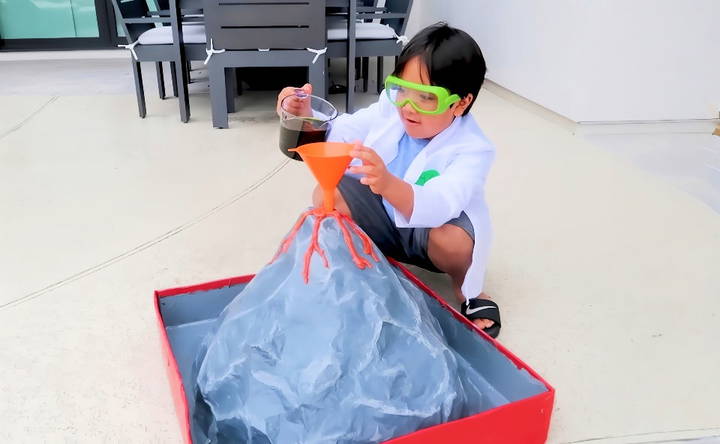
Before the grand eruption, I added about three tablespoons of baking soda inside the bottle. I then mixed red food coloring with vinegar in a separate cup – the quantity depending on how large your bottle is and how massive you want the eruption to be.
Step 5: Witnessing the Eruption
With everything set, I poured the vinegar mix into the bottle and stepped back. The reaction was instant, with foamy "lava" spewing out, cascading down the volcano's sides. It was a spectacular sight, with the red liquid oozing out, simulating a real volcanic eruption!
Step 6: Clean-Up
After the excitement settled, clean-up was surprisingly easy. The tray caught most of the mess, and a quick wipe down restored order, leaving me with a cool volcano model that I could activate any time.
Additional Tips for Success
- Safety First: Even though the materials are household items, conducting this experiment in an open, well-ventilated space is best.
- Experiment: Don't be afraid to experiment with the amounts of baking soda and vinegar. Finding the perfect ratio for a spectacular eruption is part of the fun!
- Get Creative: Beyond the basic model, feel free to enhance the landscape with trees, houses, or even dinosaurs to transport your volcano into different settings.
Volcano Safety Tips
Visiting a volcano can be an exciting adventure, but it's important to stay safe. Here are some tips to help you enjoy the experience without putting yourself in danger:
Before You Go:
- Learn About the Volcano: Find out if the volcano is active, dormant, or extinct. Active volcanoes can erupt at any time, so it's crucial to know the risks.
- Check for Warnings: Always check for any recent warnings or activity reports from local geological services or volcano monitoring centers.
What to Bring:
- Safety Gear: Wear a hard hat, mask, and eye protection to shield yourself from ash and flying debris.
- Emergency Kit: Pack a first aid kit, flashlight, extra batteries, food, water, and a whistle.
While You're There:
- Stay on Marked Trails: Follow the marked paths and trails. Venturing off can be dangerous due to hidden hazards like unstable ground or toxic gases.
- Keep Distance: Keep a safe distance from the crater. The edge can be more fragile than it looks.
If an Eruption Happens:
- Stay Calm: If the volcano starts to erupt while you're there, stay calm. Panic can lead to accidents.
- Follow Evacuation Routes: Know the evacuation routes in advance. If an eruption occurs, leave quickly and calmly via these routes.
- Protect Yourself from Ash: If you're caught in an ashfall, cover your mouth and nose with a mask or cloth. Protect your eyes with goggles.
After Your Visit:
- Clean Up: Ash can be harmful, so clean your clothing and gear after visiting a volcano.
- Share Your Experience: Let others know about your visit and share any safety tips you learned.
The best way to enjoy a volcano is safe. By following these tips, you can have a memorable experience while minimizing the risks.
FAQs About How to Make a Volcano
Learn the essentials with our FAQs about how to make a volcano, covering steps, materials, and safety tips for a fun science project.
Start by mixing the dough using 3 cups of flour, 1 cup of salt, 1 cup of water, and 2 tablespoons of oil. Knead it until it’s firm and not too sticky. Place the plastic bottle on your base and mold the dough around it to form a mountain shape. Make sure the opening of the bottle is at the top of the volcano.
For the eruption, mix baking soda and dish soap in the bottle. In a separate container, mix vinegar and food coloring. When you’re ready for your volcano to erupt, pour the vinegar mixture into the bottle and watch the colorful lava flow!
Yes! To enhance the realism, add red and orange food coloring to the vinegar to mimic lava. You can also use hot glue and paint to create lava flows on the sides of the volcano for a more dramatic effect.
Absolutely, this project is safe and fun for all ages. However, it’s always a good idea to have an adult supervise the process, especially during the eruption phase. The ingredients are non-toxic, but it’s best to perform the experiment outdoors or in a well-ventilated area to avoid any mess.
After shaping your volcano, it's time to bring it to life with some color. Paint the exterior with browns, greens, and grays to mimic rocks and vegetation. For the lava, use red, orange, and yellow paint to make a flowing lava effect. You can also add small trees or houses made from craft materials to show the scale of your volcano. Once the paint dries, your volcano will be ready for its explosive debut!
Wrapping Up
Wrapping up, if you want to know how to make a volcano for a kids' science experiment, this guide provides everything you need. From simple ingredients to step-by-step instructions, making a fun and educational project has never been easier. Start your project today and watch your child's excitement grow.


