When I first decided to remodel my bathroom, the idea of installing DIY shower panels seemed daunting. I'd seen pictures of the sleek and modern finishes they can give a bathroom, but I wasn't entirely sure how to go about the installation. Armed with basic DIY tools and a lot of enthusiasm, I embarked on the journey of installing my shower panels. This is how I did it, and how you can too.
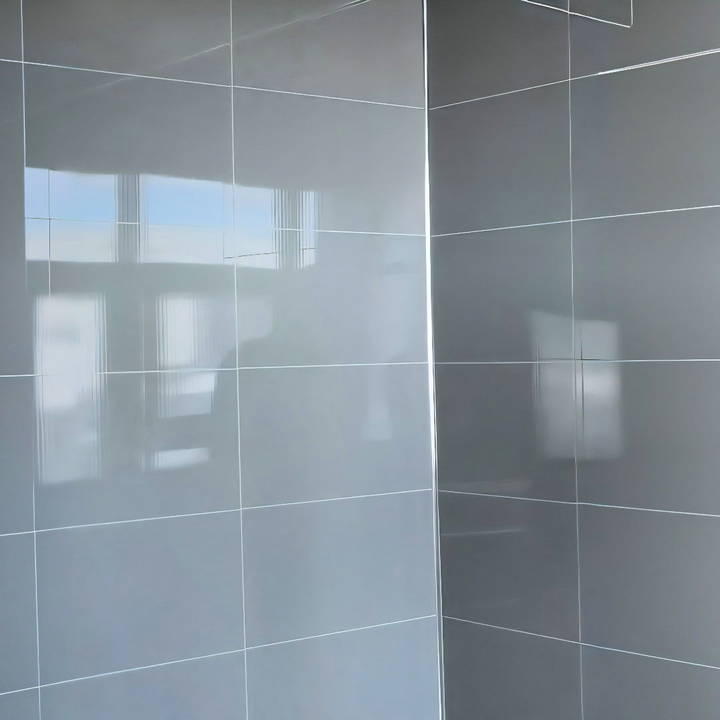
Why Choose Shower Panels?
Before I jump into the steps, let's quickly address why shower panels are a great choice for your bathroom. They offer a stylish and low-maintenance alternative to traditional tiles, with the added advantage of being quicker to install. For those who love DIY projects, shower panels don't require specialized tools or skills. If you're hesitant about trying a large-scale home improvement project, this could be the perfect place to start.
Gathering Your Materials
Before beginning the installation process, it's important to gather all the necessary materials. Here is everything I used:
- Shower Panels: Obviously essential; opt for panels that fit the aesthetic of your bathroom.
- Clad Seal Strip: Ensures a watertight seal around the bath or shower tray.
- Clad Seal End Caps: Protects the edges and prevents silicone from being exposed.
- Silicone Sealant: Used to achieve a watertight finish.
- Fine-Tooth Saw: Necessary for cutting the panels to size.
- Miter Block: Helps achieve precise angled cuts.
- Stanley Knife: Used for scoring and cutting panels.
- Adhesive: For fixing the panels onto the walls.
- Staple Gun or Screws: To secure the panels if needed.
- Spatula: For leveling the silicone.
- Damp Cloth: For cleaning excess silicone.
Now that you know what you need, let's dive into the installation process.
Step by Step Instructions
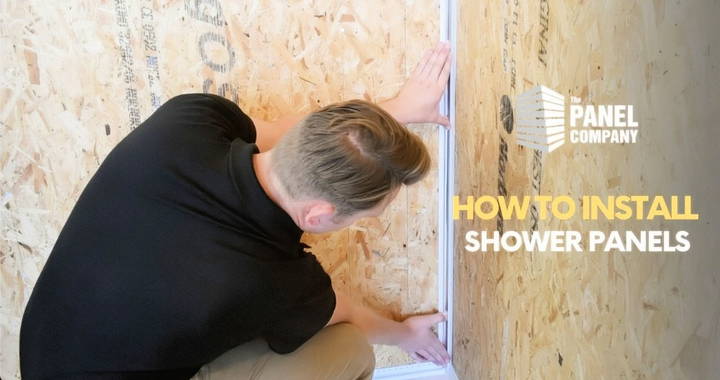
Learn how to install DIY shower wall panels with step-by-step instructions, including installing trims and cutting panels easily with a fine-tooth saw or Stanley knife.
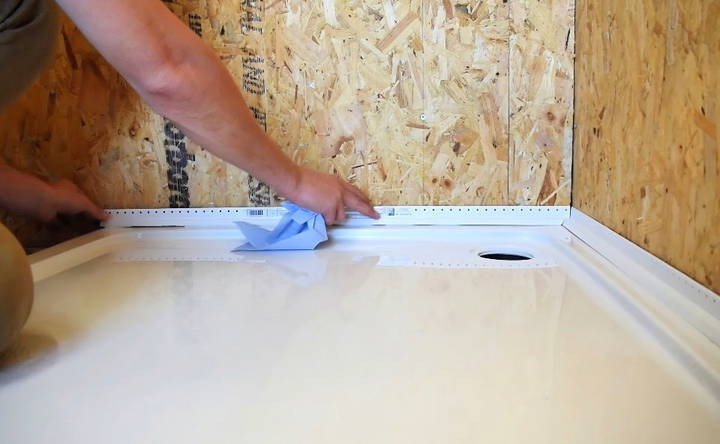
Step 1: Installing the Clad Seal Strip
The clad seal strip is crucial for preventing water leaks. Here's how I installed it:
- Measure: I measured from the corner of the shower tray to the end against the walls. This ensures the strips are the right length.
- Cut to Size: Using a fine-tooth saw, I cut the clad seal trim. For a neat finish, I employed a miter block to get flush cuts at the corners.
- Apply Silicone: I ran a line of silicone on the underside of the strip and along the surfaces of the shower tray and wall where it would adhere.
- Fix the Strip: After ensuring everything was aligned, I pressed the strip into place and cleaned off any excess silicone.
- Add End Caps: Finally, the end caps were pushed on to cover the strip ends, giving it a neat finish.
Step 2: Setting Up the Internal Corner Trim
The internal corner trim adds a professional touch to the job. Here's how I added it:
- Measure and Cut: Similar to the seal strip, I measured from where the panel sits on the clad strip to the ceiling. Using the saw, I cut the trim to length.
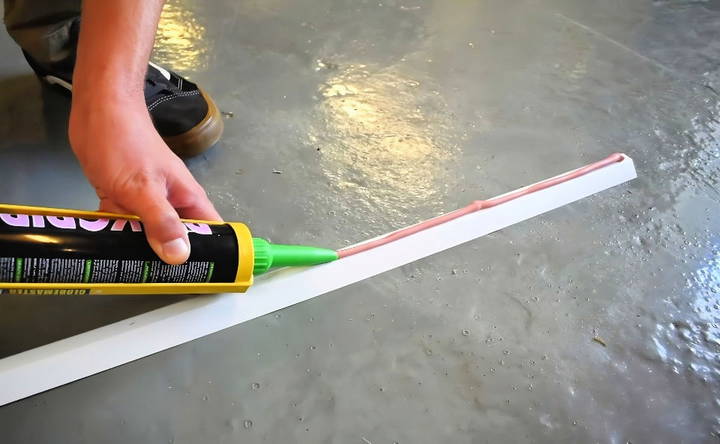
- Apply Silicone: A line of silicone was applied to the underside to ensure it adhered to the wall.
- Install: Firm pressure was applied at both ends to secure it.
This trim was a bit tricky since it sets the foundation for how the panels will sit, so take care here for a polished look.
Step 3: Preparing and Cutting the Shower Panels
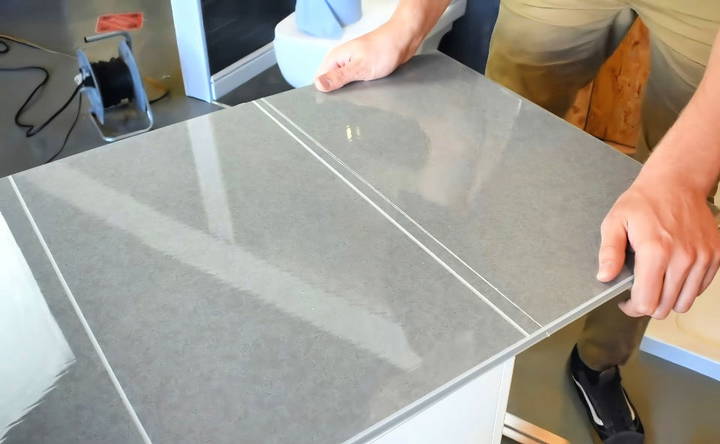
Cutting the panels was a critical step. I used two different methods to see which worked best:
Stanley Knife Method:
- Position & Measure: I flipped the panel design-side up, measured, and marked where to cut.
- Score: With a new blade in the Stanley knife, I scored along the line several times.
- Snap Off: Applying pressure, the panel snapped off along the scored line.
Fine-Tooth Saw Method:
- Position & Measure: With the design facing down, I repeated the marking process.
- Cut: Using the fine-tooth saw, I carefully cut along the marked line.
Each method has its merits, but the Stanley knife was more controlled and less likely to damage the panel.
Step 4: Installing the Shower Panels
Here's how to get your panels up and looking fantastic:
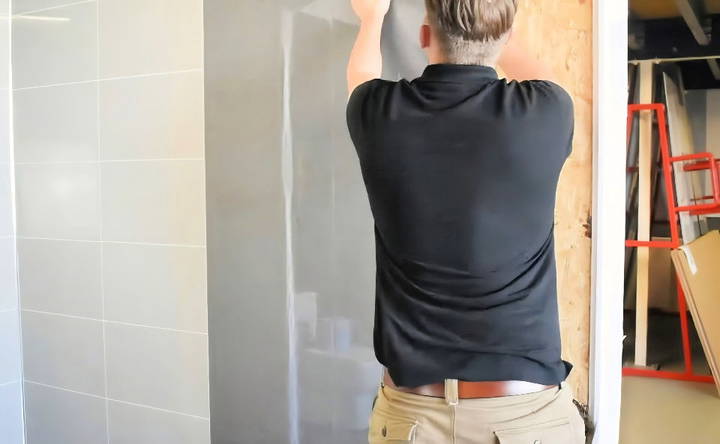
- Apply Adhesive: I applied adhesive to the back of the panel in a zigzag pattern, using more on uneven wall areas.
- Fix to Wall: Pressure was applied at the top, middle, and bottom to ensure a good bond. To keep the first panel in place while the adhesive set, a staple gun was used on its tongue.
- Seamless Joining: For the next panel, I ran a bead of silicone along the groove of the first before fitting the second panel in, wiping away any excess silicone immediately.
- Repeat: This was repeated until the entire wall was covered.
Step 5: Installing the Finishing Trims
The final touch was adding finishing trims for a neat border:
- Measure and Cut the Trim: After measuring the required length, I used a miter block to cut any necessary angles.
- Silicone Application: A bead of silicone was applied to the underside of the trim.
- Fixing the Trim: The trim was then pressed into place and any protective film removed.
Common Mistakes to Avoid
When installing DIY shower wall panels, it's easy to make mistakes that can affect the final result. Here are some common pitfalls and how to avoid them:
Incorrect Measurements
- Problem: Not measuring accurately can lead to panels that don't fit properly.
- Solution: Measure twice, cut once. Use a tape measure and double-check all dimensions before cutting.
Poor Surface Preparation
- Problem: Installing panels on an uneven or dirty surface can cause them to not adhere properly.
- Solution: Clean and dry the wall thoroughly. Ensure the surface is smooth and free of any debris or old adhesive.
Using the Wrong Adhesive
- Problem: The wrong adhesive can cause panels to fall off or not stick well.
- Solution: Use an adhesive recommended by the panel manufacturer. Check the label to ensure it's suitable for your panel material.
Ignoring Manufacturer Instructions
- Problem: Skipping or not following the manufacturer's instructions can lead to installation issues.
- Solution: Read and follow all instructions provided with your panels. They often include important details specific to the product.
Improper Sealing
- Problem: Failing to seal edges and joints can lead to water damage and mold growth.
- Solution: Use a high-quality sealant around all edges and joints. Ensure it's waterproof and mold-resistant.
Rushing the Installation
- Problem: Trying to complete the installation too quickly can result in mistakes.
- Solution: Take your time. Plan each step and work methodically to ensure a professional finish.
Not Allowing Adhesive to Cure
- Problem: Using the shower before the adhesive has fully cured can cause panels to shift or fall.
- Solution: Follow the adhesive manufacturer's curing time recommendations. Avoid using the shower until the adhesive is fully set.
Overlooking Ventilation
- Problem: Poor ventilation can lead to moisture buildup and mold.
- Solution: Ensure your bathroom has adequate ventilation. Use an exhaust fan to reduce humidity levels.
Choosing the Wrong Panel Material
- Problem: Some materials may not be suitable for your specific shower environment.
- Solution: Research and choose a panel material that is durable and suitable for wet environments.
Inadequate Support
- Problem: Panels may need additional support, especially in larger showers.
- Solution: Use appropriate backing or support structures as recommended by the manufacturer.
Avoid these mistakes to ensure a successful and durable DIY shower wall panel installation. Doing it right saves future hassle and repairs.
FAQs About DIY Shower Wall Panels
Discover the top FAQs about DIY shower wall panels, including installation tips, material options, and maintenance for a perfect bathroom upgrade.
DIY shower wall panels are a popular choice for bathroom renovations due to several benefits:
Easy Installation: These panels are designed for straightforward installation, even for those with limited DIY experience.
Water Resistant: They create a waterproof barrier, protecting your walls from moisture damage.
Low Maintenance: The smooth surface of the panels is easy to clean and resists mold and mildew growth.
Cost-Effective: Compared to traditional tile, shower wall panels are often a more budget-friendly option.
Variety of Styles: Panels come in a range of colors, patterns, and textures, allowing you to customize your bathroom's look.
Proper preparation ensures a successful installation:
Clean the Walls: Remove any existing tiles, wallpaper, or debris. Ensure the walls are clean and dry.
Repair Damage: Fill any holes or cracks with a suitable patching compound and allow it to dry completely.
Level the Walls: If necessary, use a leveling compound to make a smooth and even surface for the panels.
Keeping your panels looking their best is simple:
Regular Cleaning: Wipe down the panels with a mild soap and water solution or a non-abrasive cleaner.
Avoid Harsh Chemicals: Don't use harsh chemicals or abrasive scrubbers, which can damage the surface.
Dry Thoroughly: After cleaning, dry the panels with a soft cloth to prevent water spots and mildew growth.
Inspect Seams: Periodically check the caulk seams for any cracks or gaps, and re-caulk as needed.
In some cases, yes. If the existing tile is in good condition and securely adhered to the wall, you may be able to install panels directly over it. However, it's important to ensure the surface is clean, level, and free of any loose tiles. If the tile is damaged or uneven, it's best to remove it before installing the panels.
Shower wall panels are a versatile option suitable for most shower types, including alcove showers, walk-in showers, and even bathtub surrounds. However, for steam showers, it's crucial to choose panels specifically designed for high-moisture environments.
Final Thoughts and Tips
After installing my DIY shower panels, I was amazed at the transformation. The panels gave my bathroom a fresh, streamlined look, all completed over the weekend. Here are a few tips from my experience:
- Precision is Key: Spend time measuring accurately; it'll save time and frustration later.
- Don't Rush: Allow ample drying time for adhesive and silicone to ensure the panels don't move.
- Clean As You Go: Use a damp cloth to keep silicone and adhesive from setting messily.
- Safety First: The tools used can be sharp, so always proceed with caution during cutting.
Discovering Aesthetic Opportunities
One of the most exciting parts of this project was discovering the range of options available. Different textures and colors allowed me to find panels that matched my vision perfectly. If you're looking to customize your space, considering the vast selection of panel designs is a must.
Ultimately, my experience of installing shower panels was rewarding and empowering. It showed me that with the right materials and instructions, even a novice can achieve professional-looking results. With patience and attention to detail, you, too, can revitalize your bathroom space.


