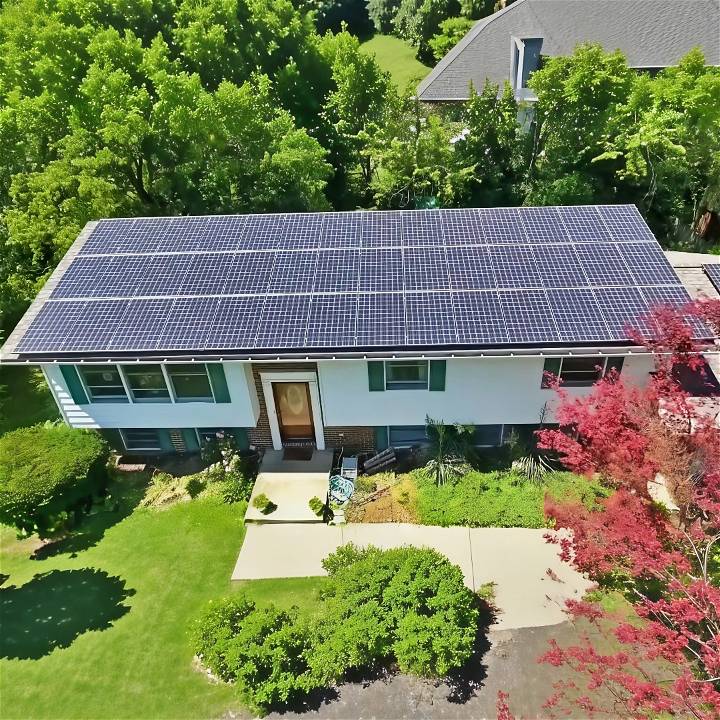
For years, I watched enviously as solar panels popped up on rooftops throughout my neighborhood. The idea of reducing my electric bill to nothing while contributing positively to the environment appealed greatly to me. Yet, the financial and knowledge barriers seemed too high. That changed the day I decided I would install a solar panel system on my own. This is my story of overcoming fear, acquiring new skills, and achieving a net-zero home. Let’s dive into how I made it happen, step by step.
Understanding the Financials
This comprehensive guide explains the financials of DIY solar panels. You can save money while harnessing renewable energy for your home.
Why It's Essential
The first hurdle was determining whether a solar panel system was a financially sound investment for me. The thought of spending a significant amount of money upfront without understanding the potential returns was daunting.
The Process
I began by measuring the available space on my roof and researching the standard sizes of solar panels. With these measurements, I estimated how many panels I could fit. Using a smartphone app, I collected data on my roof's angle and direction, inputting this into the PV Watts calculator for a rough production estimate. I then compared this estimate with my yearly electric bills to gauge the system's potential to offset my energy costs.
The result? A projected payback period of 5-7 years and a return on investment outpacing the historical average of the stock market. Financially, it made sense to proceed with the project.
Navigating Permits and Codes
The Challenge
Securing the necessary building and electrical code permits was a maze of paperwork and regulations I knew little about.
My Approach
Equipped with determination, I tackled the forms, sometimes creatively, to get the approvals I needed. Utilizing online tools, I completed a 16-page electrical code permit application. This included designing the physical and electrical system — a process that required a deep dive into the National Electrical Code, online forums, and the wisdom of Internet strangers.
Selecting the Right Equipment
Solar Panels
After thorough research, I chose Panasonic panels for their size, efficiency, and the deal I got on a closeout sale. These panels allowed me to maximize the use of my rooftop space.
Inverter System
I opted for SolarEdge's system, which uses power optimizers and a central inverter. This setup not only maximizes efficiency but also enables panel-by-panel monitoring — a feature that greatly appealed to my desire for control and insight into my system's performance.
Installation Day(s)
The Real Work Begins
Starting with the installation of mounts and rails, I worked methodically, ensuring everything was perfectly aligned and secured. This process involved drilling into roof trusses, a task that initially filled me with dread. However, with careful planning and execution (and plenty of roofing caulk), my concerns about potential leaks were alleviated.
Wiring the system was an intricate process but manageable with detailed guidance from the equipment manuals. To ensure a polished, professional appearance, I ran the conduit discreetly and painted it to blend in with my home's exterior.
The Final Steps
Installing the panels themselves was surprisingly straightforward. The wiring clicked into place, and securing the panels to the rails brought the project to near completion. The last critical step was connecting my system to the grid, a task I entrusted to a professional electrician for safety and compliance reasons.
Inspection and Going Live
A Moment of Truth
The electrical inspection was a nerve-wracking but ultimately rewarding experience. The inspector's commendation of my work as “professional” was an immense source of pride and validation of my efforts.
Finally, with the bi-directional meter installed by the power company, my solar system was operational. Watching the first kilowatts of electricity being produced by my own creation was an exhilarating moment.
Reflections and Next Steps
The journey from a solar enthusiast to a solar producer has been deeply empowering. Not only have I slashed my energy bills, but I've also gained new skills and confidence in tackling complex projects. More than that, I've contributed to a more sustainable world, right from my rooftop.
For anyone considering a similar project, my advice is simple: do your research, plan meticulously, and don’t be afraid to take the leap. The rewards, both financial and personal, are well worth the effort.
Remember, my journey is just one example. Every roof, every home, and every family’s energy needs are unique. If you’re inspired to explore solar energy for your home, start with a clear understanding of your objectives, and reach out to professionals or DIY communities online for guidance. Together, we can make a difference, one solar panel at a time.
Latest Trends in Solar Technology
The solar power industry is constantly evolving, with new technologies emerging that make solar panels more efficient, affordable, and accessible to the DIY enthusiast. Here’s a look at some of the latest trends in solar technology that you can consider for your DIY projects.
Enhanced Efficiency Solar Cells
Perovskite solar cells are a new class of materials that have shown great promise in increasing the efficiency of solar panels. These cells are not only cheaper to produce but also more efficient at converting sunlight into electricity compared to traditional silicon cells. They can be printed using simple techniques, making them an ideal choice for DIY projects.
Flexible and Portable Panels
Solar technology has become more versatile with the development of flexible solar panels. These panels can be rolled up and transported easily, allowing for portable solar solutions. They are perfect for small-scale applications, such as charging devices on the go or providing power in remote locations.
Building-Integrated Photovoltaics (BIPV)
BIPV technology integrates photovoltaic materials directly into building materials, such as roof shingles or windows. This allows for a seamless blend of solar technology with home aesthetics. DIY enthusiasts can now incorporate solar power into their homes without the need for bulky panels on their roofs.
Smart Solar Systems
Advancements in smart technology have led to the creation of smart solar systems that can be monitored and controlled via smartphones. These systems provide real-time data on energy production and consumption, enabling users to optimize their energy usage and increase efficiency.
Transparent Solar Panels
A groundbreaking innovation in solar technology is the development of transparent solar panels. These panels can be used as windows, allowing light to pass through while also generating power. This technology is still in its early stages but holds great potential for urban and residential applications.
Stay updated on trends to improve DIY solar projects. Embrace innovations for efficiency and sustainability in energy.
Maintenance and Troubleshooting for DIY Solar Panels
Maintaining your DIY solar panels is crucial for ensuring their longevity and efficiency. Here’s a straightforward guide to help you keep your solar panels in top condition.
Regular Cleaning
Dust, leaves, and other debris can reduce your solar panels’ efficiency. It’s important to clean your panels regularly. Use a soft cloth or sponge and soapy water—avoid harsh chemicals and abrasive materials that could damage the panels.
Monitoring Performance
Keep an eye on your solar panels’ performance. If you notice a significant drop in power output, it might be time for some troubleshooting. Many solar systems come with monitoring software that makes this easy to do.
Inspecting for Damage
Visual inspections can help catch issues early. Look for cracks in the panels or frayed wires. These could be signs of wear and tear that need addressing to prevent further damage.
Ensuring Proper Ventilation
Solar panels need good ventilation to perform optimally. Make sure there’s enough space between the roof and the panels to allow for air circulation.
Professional Check-Ups
While many aspects of solar panel maintenance can be handled on your own, it’s wise to have a professional inspection at least once a year. They can spot potential problems you might miss and ensure everything is functioning correctly.
Troubleshooting Common Issues
If you’re experiencing problems, here are some common issues and their potential fixes:
- Reduced power output: Check for obstructions blocking sunlight or consider cleaning your panels.
- Inverter problems: If the inverter is flashing red or not turning on, it may need resetting or replacing.
- Battery issues: For systems with batteries, ensure they’re charged and in good health. Replace batteries that no longer hold a charge.
By following these maintenance tips and addressing issues promptly, you can enjoy the benefits of your DIY solar panels for many years to come.
DIY Solar Panels: Top 10 FAQs
When considering a DIY solar panel project, you may have numerous questions about where to start, what you need, and how to ensure the system works efficiently. Below are the top 10 FAQs that will guide you through the process of setting up your own solar panels.
What is the average cost of a DIY solar panel project?
The cost can vary widely depending on the size of the system and the quality of the materials used. On average, you can expect to spend between $1 to $3 per watt for a DIY solar panel system.
How do I calculate the number of solar panels I need?
To determine the number of panels, you’ll need to calculate your household’s average energy usage. This figure, combined with the average sunlight hours your location receives, will dictate the total wattage required from your solar panels.
Can I install solar panels on a flat roof?
Yes, solar panels can be installed on a flat roof using special mounting systems that tilt the panels to the optimal angle for sunlight exposure.
What are the best batteries for solar storage?
The best batteries for solar storage are typically lithium-ion or lead-acid batteries. Lithium-ion batteries are more expensive but have a longer lifespan and higher efficiency.
Is a grid-tie, off-grid, or hybrid solar system best for a DIY project?
This depends on your energy needs and goals. A grid-tie system is connected to the public electricity grid and allows you to sell excess power back. An off-grid system is completely independent of the grid, ideal for remote locations. A hybrid system combines both, providing flexibility and reliability.
What are the hidden costs of a DIY solar project?
Hidden costs can include additional electrical components, permits, and potential structural modifications to your property. It’s important to research and budget for these potential expenses.
Am I eligible for any tax breaks as an independent homeowner doing the solar installation?
Many regions offer tax incentives for installing solar panels. Check your local government’s website or consult with a tax professional to understand what incentives you may qualify for.
Which type of solar panel is best for your DIY solar project?
Monocrystalline panels are highly efficient and space-efficient, while polycrystalline panels are more cost-effective but slightly less efficient. The choice depends on your budget and space availability.
How many solar panels do I need to power a house?
The number of panels needed to power a house varies based on the house’s energy consumption and the panels’ efficiency. An average home may require between 20 to 25 solar panels.
Can you buy and install your own solar panels?
Yes, you can purchase and install your own solar panels. However, it’s crucial to have a good understanding of electrical systems and to follow local regulations and safety standards.
By addressing these FAQs, you’ll be better prepared to embark on your DIY solar panel project with confidence.
Conclusion:
In conclusion, DIY solar panels are a cost-effective and eco-friendly way to power your home. By following the step-by-step guide provided, you can create your own renewable energy source and reduce your carbon footprint. Start your solar panel project today!


