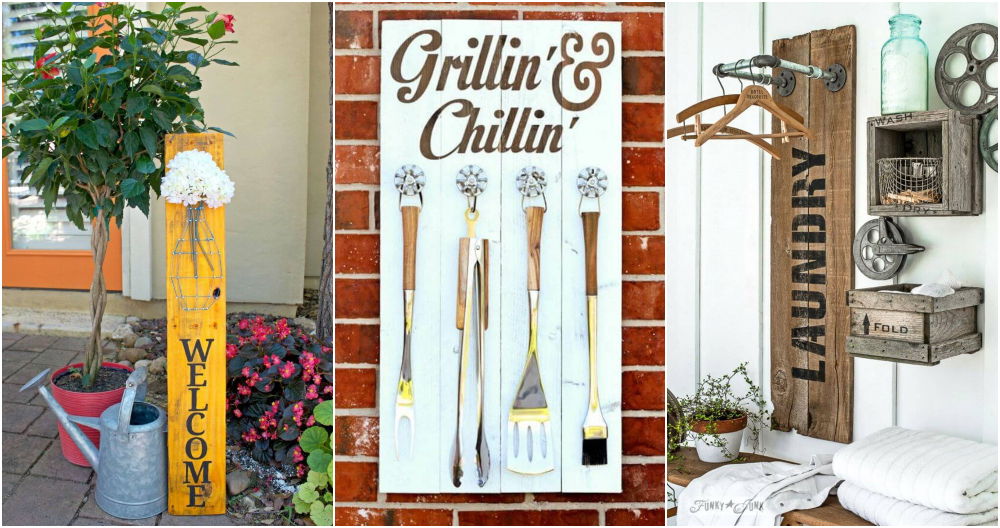
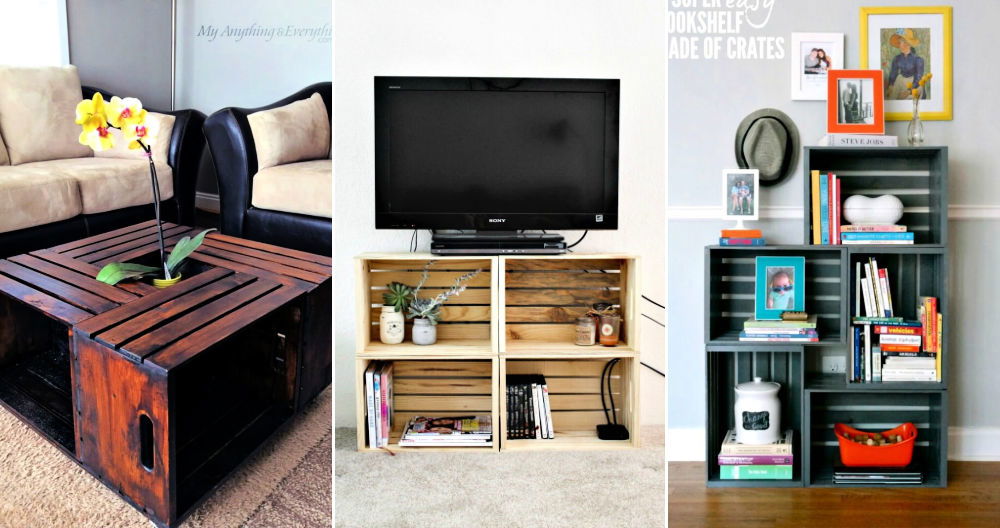
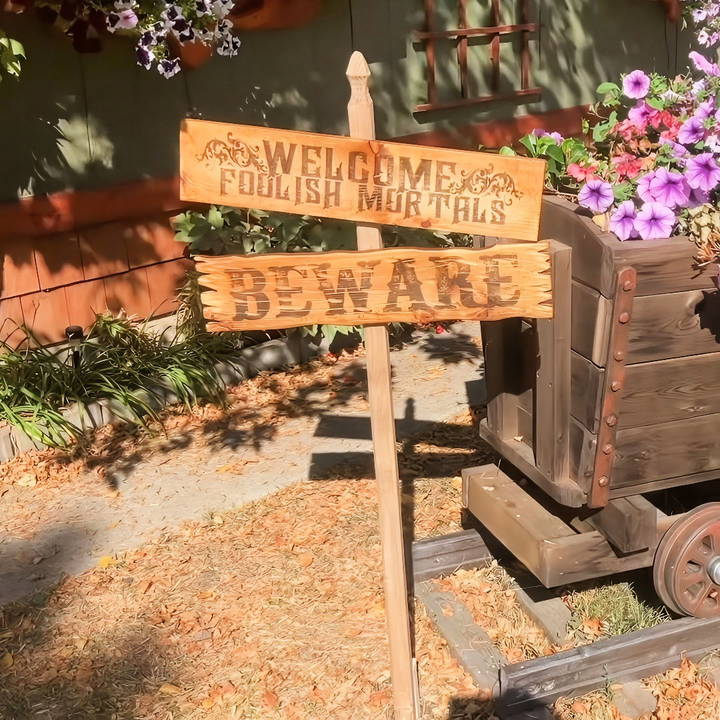
Building beautiful DIY wood signs has always been something I yearned to try. Not only did I want to add a personal touch to my home decor, but I was also eager to dive into the world of crafts and DIY projects. One day, inspired by a video I stumbled upon, I decided to take the plunge into crafting my own wooden signs using printable templates. Here's a detailed guide on my journey, one that you can easily follow.
Getting Started: Gathering Your Materials
Before you begin, ensure you have all the necessary materials. Trust me, having everything at your fingertips makes the process much smoother.
Essential Materials:
- Fence Boards: Choose fence boards because they are not only affordable but also provide the rustic charm often sought in wooden signs. Their size (typically six feet long) allows for the creation of multiple signs from a single board.
- Xylene: This chemical is critical for transferring your printed designs onto the wood. It effectively melts the toner found in laser prints, facilitating a seamless transfer.
- Sandpaper: Necessary for smoothing the wood's surface, ensuring the xylene and toner adhere properly. Uneven surfaces can lead to patchy transfers.
- Laser Printer and Printable Templates: Printable templates are the blueprints for your designs, while a laser printer provides the necessary toner-based prints.
- Facial Tissues or Kleenex: These will help you apply xylene, allowing the design to transfer onto the wood.
- Wood Stain: Choose a stain color that complements your design. I used Golden Oak Minwax for its classic oak tone, but there are various options depending on your taste.
Step by Step Instructions
Build stunning DIY wood signs with step-by-step instructions! From preparing the boards to sealing your creation, discover how to master this craft.
Preparing the Boards: The First Essential Step
Preparing the wood is perhaps the most crucial step. It sets the foundation for everything that follows.
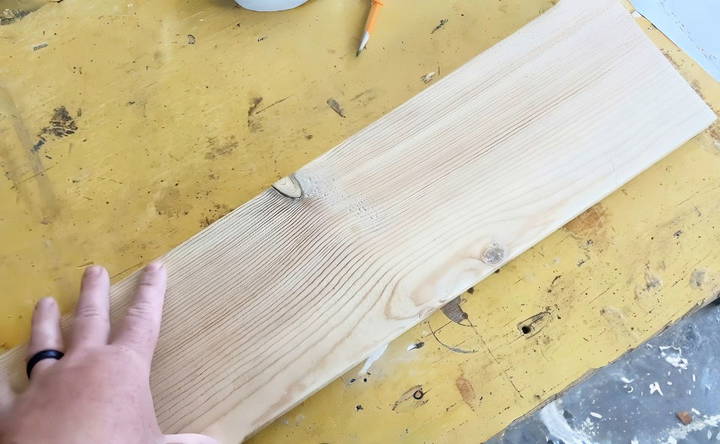
Sanding the Wood
Start by sanding your fence boards. The goal here is to remove any mill surface remnants and make a smooth canvas for your design. Without a smooth surface, you might find that the xylene doesn't work as effectively, which could compromise the overall look of your sign.
Choosing Your Design
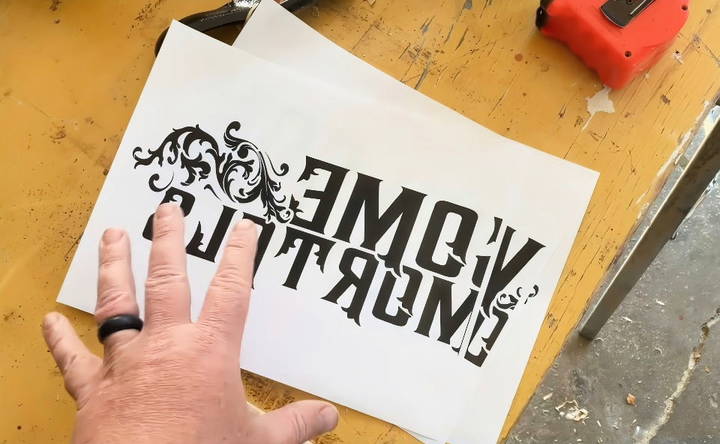
Before you print your templates, decide on what message or imagery you want. This should be a reflection of your personal style or the ambiance you're aiming to make. Once decided, print your designs using a laser printer. Remember, the toner from the laser print is what transfers onto the wood.
Transferring the Design: Bringing It All Together
Here's where the magic begins. With your wood prepped and design printed, it's time to transfer those images onto the wooden canvas.
Positioning the Template
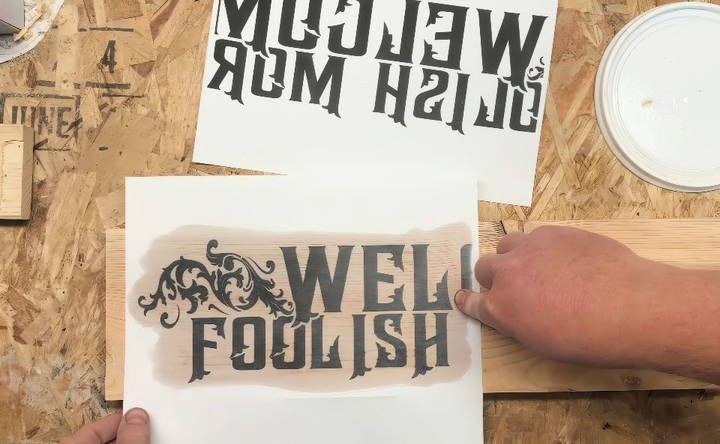
Align your printed design on the wood. It's important to visualize its placement before proceeding. For precision, I recommend marking an inch from the edge of your board as a guide for where your design should start.
Using Xylene for Transfer
Pour a small amount of xylene into a container; it evaporates quickly, so use just enough for the task at hand. Lightly dab a tissue into the xylene and begin the transfer process:
- Place the tissue on the back of the printed design.
- Carefully and steadily drag the tissue across, ensuring the xylene penetrates the paper.
- Press gently but firmly to ensure full contact between the paper and wood.
Be cautious: too much xylene can cause the toner to blur and bleed into the wood, affecting the crispness of your design.
Enhancing Your Sign: Adding Color and Character
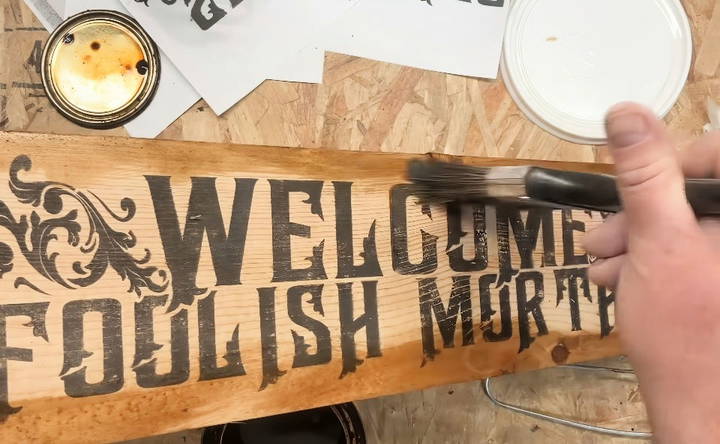
Once your design is set, the next step is applying wood stain. This step enhances the sign's aesthetic, giving it depth and life.
Staining the Wood
Choose a lighter stain if you want the design to stand out. I initially used a Golden Oak stain along the edges, while maintaining a natural finish in the center. This dual tone provides a captivating contrast, making the main design the focal point.
Apply the stain with a brush or cloth, working with the wood grain. This method not only enhances the wood's natural beauty but also ensures a professional, polished finish.
You could stop at this point, but the sign can still be further customized depending on your preference.
Final Touches: Assembling and Displaying
You now have a beautifully stained wooden sign, but how do you display it as a proud creation of your own labor?
Constructing a Signpost
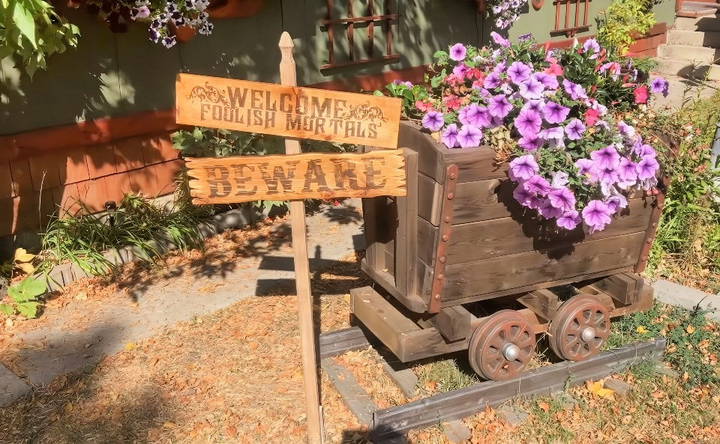
If you plan to display your sign outdoors, construct a simple signpost. A 1x5x1.5 wood piece works perfectly as a stand. Once the post is sharpened at one end, it can easily be driven into the ground using a hammer. Secure the sign onto this post using deck screws.
Sealing Your Creation
Finish with a protective sealant, especially if your sign will be exposed to the elements. This will help preserve your wood and design for years to come.
Customization Tips
Customizing your DIY wood signs can make them unique and personal. Here are some easy-to-follow tips to help you add a special touch to your creations.
Personalization Ideas
- Names and Initials: Adding names or initials is a simple way to personalize your wood signs. You can use stencils, vinyl letters, or freehand painting. This is perfect for gifts or home decor.
- Quotes and Sayings: Choose a favorite quote or saying to add to your sign. This can be inspirational, funny, or meaningful. Use different fonts and sizes to make the text stand out.
- Special Dates: Commemorate important dates like birthdays, anniversaries, or weddings. Adding a date makes the sign more memorable and special.
Using Technology
- Cricut Machines: A Cricut machine can cut out intricate designs and letters from vinyl or paper. These can be used as stencils or directly applied to the wood. This tool is great for detailed and precise customization.
- Laser Engraving: If you have access to a laser engraver, you can make detailed and permanent designs on your wood signs. This method is perfect for intricate patterns and fine details.
Decorative Elements
- Paint and Stain: Experiment with different paint colors and wood stains. You can make a rustic look with distressed paint or a modern look with bold colors. Staining the wood can enhance its natural beauty.
- Embellishments: Add embellishments like ribbons, buttons, or flowers to your signs. These small additions can make a big impact and add a touch of charm.
- Mixed Media: Combine wood with other materials like metal, fabric, or glass. This can make a unique and interesting texture on your signs.
Tips for a Professional Finish
- Sanding: Always sand your wood before painting or staining. This ensures a smooth surface and helps the paint or stain adhere better.
- Sealing: Use a clear sealant to protect your finished sign. This will keep the paint or stain from fading and protect the wood from moisture.
- Layering: Apply multiple layers of paint or stain for a richer color. Let each layer dry completely before adding the next.
Inspiration Sources
- Online Galleries: Look for inspiration on websites like Pinterest or Instagram. There are countless ideas and tutorials available.
- Nature: Take inspiration from nature. Use natural elements like leaves, flowers, or wood grain patterns in your designs.
- Home Decor Trends: Stay updated with the latest home decor trends. Incorporate popular styles like farmhouse, boho, or minimalist into your wood signs.
By following these tips, you can make beautiful and personalized wood signs that stand out.
Common Mistakes and How to Avoid Them
Making DIY wood signs can be a fun and rewarding project, but it's easy to make mistakes along the way. Here are some common pitfalls and tips on how to avoid them.
Skipping the Sanding Step
- Mistake: Not sanding the wood before painting or staining can lead to a rough surface and uneven finish.
- Solution: Always sand your wood thoroughly before starting. Use a fine-grit sandpaper to smooth out any rough spots. This helps the paint or stain adhere better and gives a professional look.
Using the Wrong Type of Paint
- Mistake: Using paint that is not suitable for wood can result in poor adhesion and a finish that doesn't last.
- Solution: Choose paint specifically designed for wood. Acrylic and latex paints are good options. For outdoor signs, use exterior-grade paint to withstand the elements.
Ignoring the Grain Direction
- Mistake: Painting or staining against the grain can cause streaks and an uneven appearance.
- Solution: Always apply paint or stain in the direction of the wood grain. This ensures a smoother and more even finish.
Overloading the Brush
- Mistake: Applying too much paint or stain at once can cause drips and an uneven coat.
- Solution: Dip your brush lightly and apply thin, even coats. It's better to apply multiple thin layers than one thick one. Let each layer dry completely before adding the next.
Not Using a Primer
- Mistake: Skipping the primer can lead to poor paint adhesion and a less durable finish.
- Solution: Always use a primer before painting. This helps the paint stick better and provides a more even base. For dark wood, use a stain-blocking primer to prevent bleed-through.
Inadequate Drying Time
- Mistake: Rushing the drying process can cause smudges and imperfections.
- Solution: Be patient and allow adequate drying time between coats. Follow the manufacturer's instructions for drying times. If possible, let the sign dry in a dust-free environment.
Neglecting to Seal the Sign
- Mistake: Not sealing the finished sign can leave it vulnerable to damage from moisture and UV rays.
- Solution: Apply a clear sealant to protect your sign. For indoor signs, a water-based polyurethane works well. For outdoor signs, use a UV-resistant sealer to prevent fading and weather damage.
Poor Lettering Techniques
- Mistake: Freehand lettering without a guide can result in uneven and crooked text.
- Solution: Use stencils, vinyl letters, or transfer paper to ensure your lettering is straight and even. Practice on a scrap piece of wood before working on your final piece.
Inconsistent Measurements
- Mistake: Not measuring accurately can lead to uneven spacing and alignment.
- Solution: Use a ruler or measuring tape to mark out your design before you start. Double-check your measurements to ensure everything is aligned properly.
Overcomplicating the Design
- Mistake: Trying to include too many elements can make the sign look cluttered and messy.
- Solution: Keep your design simple and focused. Choose a few key elements and arrange them thoughtfully. Less is often more when it comes to design.
By being aware of these common mistakes and following these tips, you can make beautiful and professional-looking wood signs.
FAQs About DIY Wood Signs
Discover answers to FAQs about DIY wood signs. Learn tips, techniques, and tools for crafting your own beautiful wooden signs.
Preparing your wood is important for a smooth finish:
Sand the wood: Start with a coarse grit sandpaper and gradually move to finer grits until the wood is smooth.
Wipe off the dust: Use a damp cloth to remove any sawdust.
Apply primer (optional): Primer helps the paint adhere better, especially if you're using a light color on dark wood.
There are lots of options, even if you're not an artist:
Stencils: These are a great way to get a clean, professional look.
Freehand drawing: If you're feeling confident, sketch your design directly onto the wood with a pencil.
Transfer paper: You can trace a design onto transfer paper and then iron it onto the wood.
Vinyl lettering: Cut out letters or designs from vinyl and stick them onto the wood.
If your sign will be outdoors, it's important to protect it:
Seal the wood: Apply a clear sealant to the entire sign to protect it from moisture and UV rays.
Use outdoor paint: Choose paint that is specifically designed for outdoor use.
Hang the sign in a sheltered spot: If possible, hang your sign under an overhang or porch to protect it from direct rain and sunlight.
Let your imagination run wild! Here are a few ideas:
Welcome sign for your front door
Personalized family name sign
Inspirational quote sign for your living room
Directional signs for a wedding or event
Funny bathroom sign
Menu board for your kitchen
Garden markers for your plants
Distressing is a popular technique for building a vintage or weathered look:
Hit the wood with a hammer or chain: This makes dents and scratches.
Sand the edges and corners: Focus on areas that would naturally wear down over time.
Apply a dark stain and then wipe it off: This highlights the dents and scratches.
Use sandpaper to lightly distress the painted areas: This makes a chipped paint effect.
Additional Tips and Insights
Discover valuable tips, alternative ideas, and common mistakes to avoid. Learn and grow with our comprehensive guide.
Alternative Ideas
If chiseling is your forte, consider adding more dimension to your sign by carving out patterns or letters, giving it a 3D effect. While this adds complexity, it also elevates the sign's craftsmanship.
Mistakes and Learning
I once made the mistake of not flipping the text before printing a design, resulting in a reversed final product. Always double-check your print settings to ensure the text is flipped correctly. It saves time and the cost of redoing work.
Conclusion:
In conclusion, making DIY wood signs with printable templates is both an art and a science. By following these steps, you're not just learning a craft—you're building something uniquely yours. The process is rewarding, providing ample opportunities for customization and creativity, making each sign a reflection of personal artistry. Whether you're building for home decor, a gift, or simply for the joy of crafting, this DIY project is sure to fulfill.


