Have you ever thought about installing DIY central air conditioning but were intimidated by the process and potential costs? Well, I was, too, until I embarked on a journey that not only equipped my home with a new cooling system but also taught me invaluable skills. With guidance from my friend Dave from the DIY HVAC Guy channel, I discovered that installing central air is easier than you might think. This is the story of how we turned my mother-in-law's 35-year-old house into a summer retreat — without breaking the bank.
Why DIY Central Air Installation?
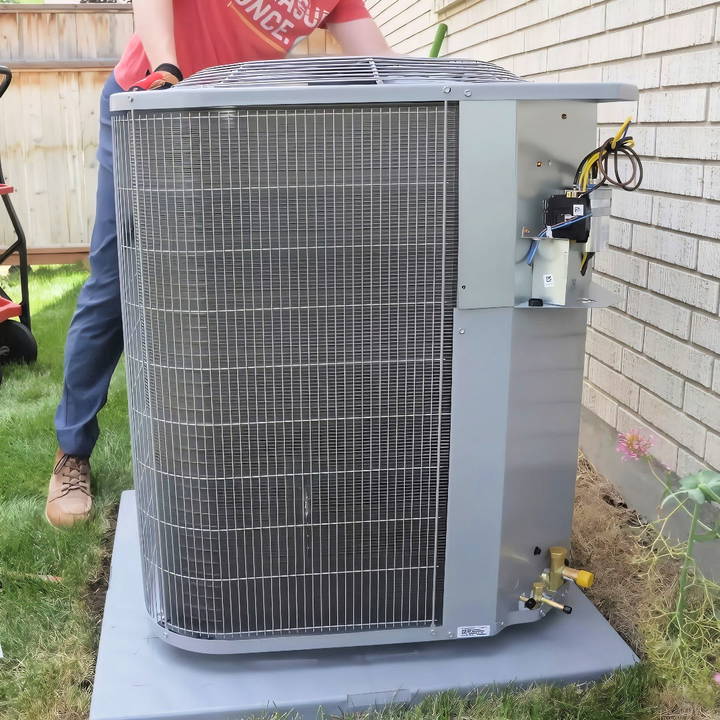
When we decided to undertake this project, one of the main motivations was cost savings. Traditional central air installations can run upwards of $11,000, but we managed it with just $3,300. That's almost $8,000 in savings. This isn't just about saving money, though. It's about self-reliance, learning new skills, and the immense satisfaction of achieving something with your own hands.
Planning and Preparation
Optimize your air conditioning setup with effective planning and preparation. Learn to assess your current system, choose the best condenser location, and gather essential tools.
Assessing the Current System
Before you get started with any construction or installation project, you need to assess what already exists. In my case, the house had an existing furnace with a coil replaced in 2019. This was a fortunate situation as it meant that some of the major components were already in place, eliminating the need for extensive ductwork.
Deciding on the Best Location for the Condenser
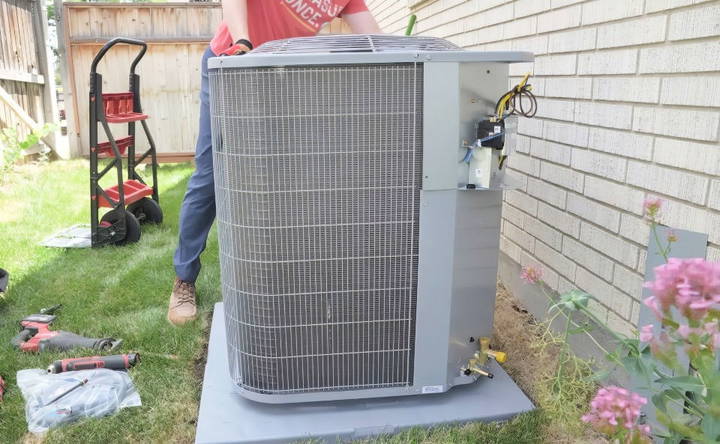
Selecting the right outdoor spot for the condenser is crucial. Initially, we considered placing it under a covered space, but that area was intended for outdoor living and entertainment. So, instead, we chose a location that was out of the way and where noise wouldn't be an issue. This required a creative solution for routing the refrigerant lines through the basement utility room, leveraging an existing opening meant for fresh air supply.
Gathering Necessary Materials and Tools
Having the right materials and tools is half the battle. Here is a breakdown of what we used and why:
- Condenser Unit: A 3-ton ACI IQ condenser was just the right size, considering part of the home was in the basement.
- Line Set (7/8 and 3/4 inch) with Electrical Tape: To run refrigerant lines efficiently and safely.
- Communication Wire (185): For linking the condenser to the thermostat.
- Wire Strippers and Lineman's Pliers: Essential for any electrical work, making wire handling easier and safer.
- Nitrogen and a Pump: Used for pressure testing and to pull a vacuum on the system.
- PVC and Connections: For building a condensate pipe to ensure no water gets trapped within the system.
- Circuit Breaker and Electric Whip: Crucial for configuring the power supply to the air conditioner, ensuring it runs effectively.
Step by Step Instructions
Learn how to install DIY central air with step-by-step instructions, from running refrigerant lines to electrical setup and the final reveal.
Running the Refrigerant Lines
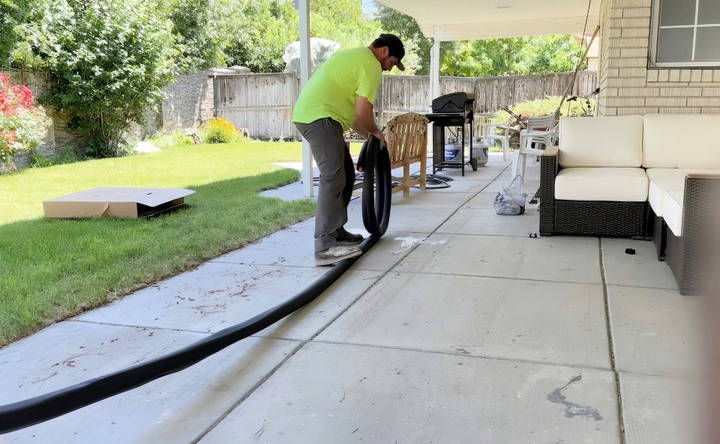
Navigating the layout of the home and adapting to existing structures was a challenging yet exciting puzzle to solve. We had to creatively use the fresh air vent cavity to run our line sets effortlessly from the furnace to the outside, bending and adjusting as we went.
Electrical Setup
One of the most vital parts of this installation was ensuring a reliable electrical connection. Luckily, an unused 20-amp single pole circuit breaker was available, which I replaced with a dual 30-amp breaker suitable for our needs. Then came attaching the electric whip to the condenser unit, ensuring all connections were tight and secure.
Making the Condensate Drain
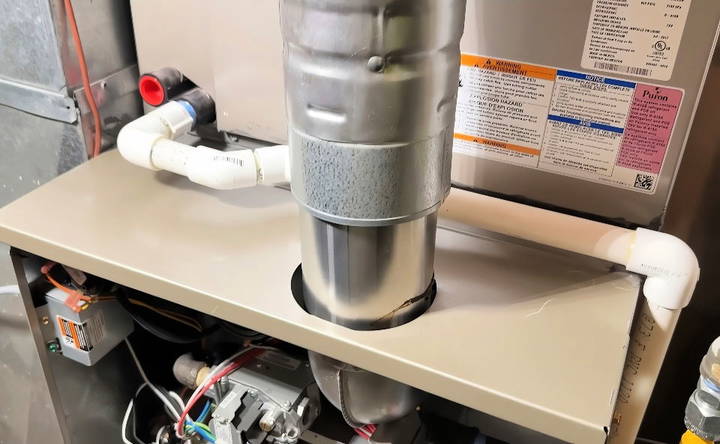
Water management in HVAC systems is often understated, but it's crucial for both the unit's efficiency and the building's structural integrity. We crafted a drain system using PVC pipes to guide any excess condensation safely into an existing floor drain.
Pressure Testing and Vacuuming the Lines
To ensure the system's integrity, we performed pressure tests using nitrogen, confirming there were no leaks. Pulling a vacuum was necessary to remove any air or moisture from the lines, which is essential to prevent contamination and ensure the unit functions effectively.
Final Touches and First Run
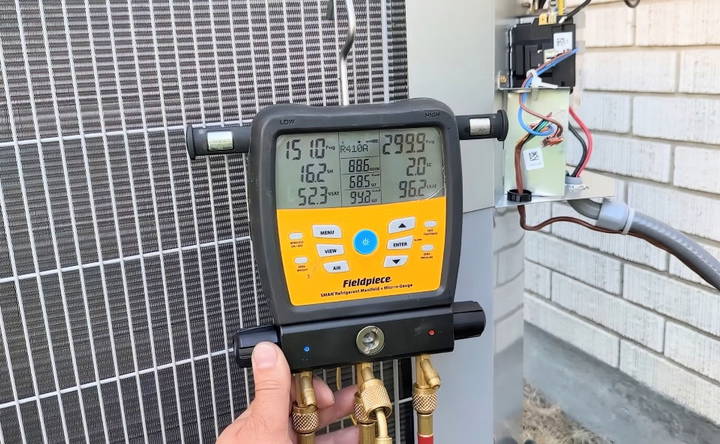
Emphasizing patience and precision, we wrapped up the project by setting the refrigerant levels and thoroughly testing the system to ensure optimal running conditions. Hearing the sweet hum of the compressor kicking in and feeling the chilled air emanating from the vents for the first time was the reward of hours of hard work.
A special moment came when we revealed the surprise to my mother-in-law. After years of sweltering summers and justifying why a cooling system wasn't in the budget, we were able to provide this improvement free of charge as a gift, making every moment of the day-long project worthwhile.
Troubleshooting Common Issues
Even with proper installation and maintenance, central air systems can sometimes encounter problems. Here are some common issues and how to troubleshoot them:
Uneven Cooling
If some rooms are cooler than others, it could be due to several reasons:
- Blocked Vents: Ensure all vents are open and not obstructed by furniture or curtains.
- Leaky Ducts: Check for leaks in the ductwork. Sealing leaks can improve airflow and cooling efficiency.
- Thermostat Placement: Make sure the thermostat is placed in a central location, away from direct sunlight or drafts.
Strange Noises
Unusual sounds from your central air system can indicate various issues:
- Rattling: This could be due to loose parts or debris in the unit. Turn off the system and inspect for any loose screws or debris.
- Hissing: A hissing sound might indicate a refrigerant leak. This requires professional attention.
- Banging: Banging noises often mean there is a problem with the blower or motor. It's best to call a technician to diagnose and fix the issue.
System Not Turning On
If your central air system won't turn on, try these steps:
- Check the Thermostat: Ensure the thermostat is set to “cool” and the temperature is set lower than the current room temperature.
- Inspect the Circuit Breaker: Check if the circuit breaker has tripped and reset it if necessary.
- Examine the Power Switch: Make sure the power switch near the indoor unit is turned on.
Poor Airflow
Poor airflow can reduce the efficiency of your system:
- Dirty Filters: Replace or clean the air filters regularly to ensure proper airflow.
- Blocked Ducts: Inspect the ducts for any blockages or obstructions.
- Fan Issues: If the fan isn't working properly, it might need cleaning or replacement.
Water Leaks
Water leaks around the indoor unit can be a sign of:
- Clogged Drain Line: Clear the drain line to prevent water buildup.
- Frozen Evaporator Coil: If the coil is frozen, it could be due to low refrigerant levels or poor airflow. Turn off the system and let the coil thaw before addressing the underlying issue.
High Energy Bills
If your energy bills are unusually high, consider these factors:
- Dirty Filters: Clean or replace filters to improve efficiency.
- Leaky Ducts: Seal any leaks in the ductwork.
- Old System: Older systems are less efficient. Consider upgrading to a newer, more energy-efficient model.
Maintain your central air system regularly, address issues promptly, and consult a technician if unsure. This saves time and money.
Safety Precautions
When installing or maintaining a central air system, safety should always be your top priority. Here are some essential safety precautions to follow:
Turn Off Power
Before starting any work on your central air system, make sure to turn off the power. This includes switching off the circuit breaker and unplugging the unit if possible. This step prevents electrical shocks and accidents.
Use Proper Tools
Always use the right tools for the job. Using improper tools can lead to accidents or damage to the system. Make sure your tools are in good condition and suitable for the task at hand.
Wear Protective Gear
Wear appropriate protective gear, such as gloves, safety glasses, and sturdy footwear. This gear helps protect you from injuries caused by sharp edges, debris, or electrical components.
Follow Manufacturer Instructions
Read and follow the manufacturer's instructions carefully. These guidelines are designed to ensure safe and effective installation and maintenance. If you're unsure about any step, consult the manual or contact the manufacturer for clarification.
Avoid Wet Conditions
Do not work on your central air system in wet or damp conditions. Water and electricity are a dangerous combination and can lead to serious injuries. Ensure the area is dry before starting any work.
Handle Refrigerants with Care
Refrigerants can be hazardous if not handled properly. Avoid direct contact with refrigerants and ensure proper ventilation when working with them. If you suspect a refrigerant leak, contact a professional technician immediately.
Secure the Work Area
Keep your work area clean and organized. Remove any tripping hazards and ensure there is adequate lighting. A tidy work area reduces the risk of accidents and makes it easier to complete tasks safely.
Check for Gas Leaks
If your central air system is connected to a gas line, check for gas leaks before starting any work. Use a gas leak detector or a soap solution to identify leaks. If you detect a leak, turn off the gas supply and contact a professional immediately.
Avoid Overexertion
Do not attempt to lift heavy components on your own. Use proper lifting techniques and get help if needed. Overexertion can lead to injuries such as strains or sprains.
Know When to Call a Professional
Some tasks are best left to professionals. If you encounter a problem that you're not comfortable handling, or if the work requires specialized knowledge or tools, don't hesitate to call a licensed technician. It's better to be safe than sorry.
By following these safety precautions, you can ensure a safer installation and maintenance process for your central air system. Always prioritize safety to protect yourself and others.
FAQs About DIY Central Air
Find answers to common questions about DIY central air projects, from installation tips to cost-saving tricks and essential tools needed.
Installing central air conditioning is a complex task that involves electrical work, ductwork, and refrigerant handling. While it’s possible to do it yourself, it’s generally recommended to hire a professional. Incorrect installation can lead to inefficiency, higher energy bills, and potential safety hazards.
Choosing the right size unit is crucial for efficiency and comfort. The size is measured in British Thermal Units (BTUs). A professional can perform a load calculation to determine the appropriate size based on your home’s square footage, insulation, and climate. As a general rule, you need about 20 BTUs per square foot.
The installation process typically involves:
Planning and preparation: Assessing your home’s needs and obtaining necessary permits.
Installing the indoor unit: Mounting the evaporator coil and air handler.
Installing the outdoor unit: Placing the compressor and condenser.
Connecting the ductwork: Ensuring proper airflow throughout your home.
Electrical and refrigerant connections: Wiring the system and charging it with refrigerant.
Testing and calibration: Ensuring the system operates efficiently and safely.
Regular maintenance is essential to keep your system running smoothly. Key tasks include:
Changing air filters: Every 1-3 months to maintain airflow and efficiency.
Cleaning the coils: To remove dirt and debris that can reduce efficiency.
Inspecting ductwork: For leaks and sealing them to prevent energy loss.
Checking refrigerant levels: Ensuring they are within the recommended range.
Installing central air conditioning offers several advantages:
Consistent Temperature: Central air provides even cooling throughout your home, eliminating hot spots and ensuring a comfortable environment.
Improved Air Quality: Central air systems filter and dehumidify the air, reducing allergens, dust, and humidity levels.
Increased Home Value: A central air system can enhance your home's market value and appeal to potential buyers.
Energy Efficiency: Modern central air units are more energy-efficient than window units, leading to lower energy bills.
Convenience: With a central air system, you can control the temperature of your entire home with a single thermostat, offering greater convenience and ease of use.
Lessons Learned and Final Thoughts
Reflecting on this project, it wasn't just about installing air conditioning at half the price; it was about growth and empowerment. Here's what I learned:
- Research is Key: Before diving into such a project, I spent countless hours watching tutorials and reading DIY guides. Knowledge is powerful, and it bolstered my confidence.
- Proper Planning Prevents Poor Performance: Scoping out the perfect path for installation and having all tools ready saved us precious time and avoided frustration.
- Teamwork Makes the Dream Work: Having an experienced mentor like Dave transformed this daunting task into a manageable, even enjoyable experience.
If you're contemplating a similar project, remember — with patience, perseverance, and a bit of guidance, you can achieve impressive results. Not only will you save money, but you'll also gain valuable DIY skills and gain a sense of achievement that's hard to beat. Here's to cool summers and proud smiles!


