When it comes to upgrading your home's exterior lighting, the process can seem daunting, especially when there’s no existing wiring where you want to place a new fixture. If you've ever wondered how to tackle this type of project, you’re not alone. Many homeowners face similar challenges, especially when dealing with brick pillars, walls, or other tricky areas. In this guide, I'll share step-by-step instructions on how to add new exterior lights, even when there isn't existing wiring, and the best ways to approach these common wiring challenges.
Understanding the Challenge: Adding an Exterior Light with No Existing Wiring
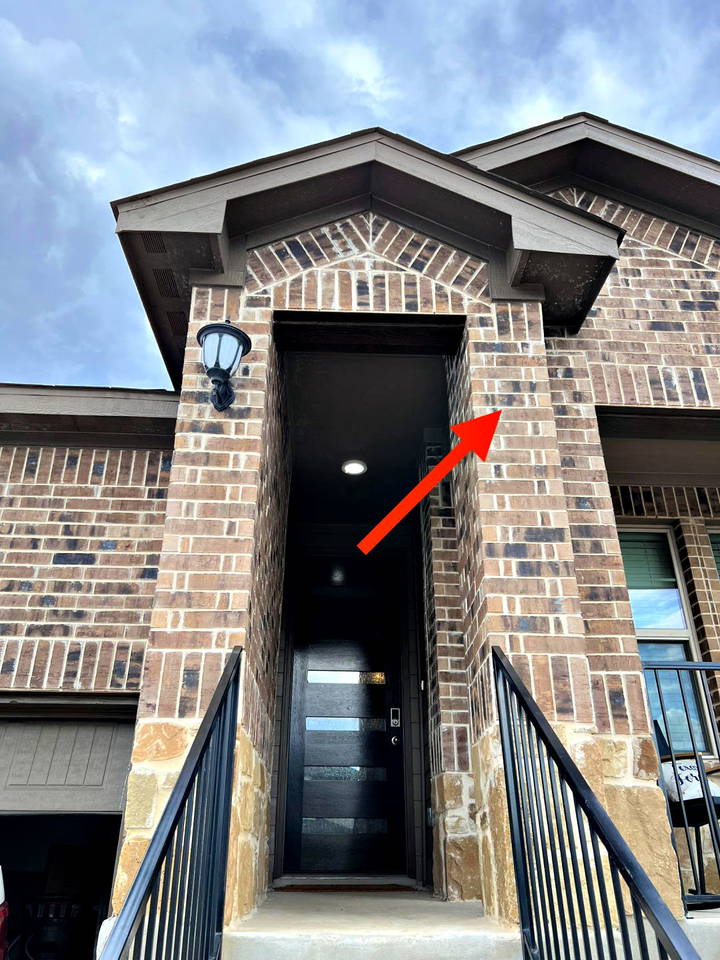
One of the most common hurdles in adding exterior lighting is the lack of wiring in the desired location. For instance, imagine a brick pillar on the side of your house that looks like it’s begging for a light fixture, but there’s no wiring in sight. This asymmetry can be aesthetically displeasing, and it’s understandable to want to balance things out. However, running new wires through brick or other solid structures is no small feat.
Here’s the good news: It’s possible to add new exterior lights, but it requires a bit of planning, some handy work, and the right tools. Let’s walk through the steps together.
Step 1: Evaluate Your Existing Setup
Before jumping into the installation process, it’s crucial to understand your existing electrical setup. Here’s what you need to consider:
- Locate Existing Wires: Start by checking if there are any existing wires running up to the attic or another accessible area near the desired location. This can be a key factor in determining whether you can simply tap into the existing circuit.
- Check the Type of Wall or Pillar: If you are dealing with a brick pillar or wall, note that there’s likely an air gap between the brick cladding and the wood framing of the house. This gap can provide space to run new wires without damaging the structure.
- Determine the Power Source: Identify where you will tap into power. Ideally, you want all outdoor lights to be on the same switch for consistency and ease of use.
Step 2: Decide on the Wiring Method
There are a few ways to run new wiring for exterior lights, depending on the structure and your preference for aesthetics versus ease of installation.
- Surface-Mounted Conduit: This is often the simplest solution but may not be the most visually appealing. A surface-mounted conduit can be run from the existing exterior light to the new location. This option doesn’t require drilling through the pillar but will look like an add-on.
- Fishing Wires Through the Brick Pillar: If you prefer a cleaner look, consider drilling a hole through the brick pillar to run the conduit or wiring up the backside where it won't be visible from the front. Be mindful that brick pillars are often not solid; they may consist of mortared cinder blocks with a brick exterior.
- Using the Air Gap Behind the Brick: If you have a brick-clad house, there’s typically an air gap behind the brick where you can run a wire. To access this space, you may need to remove the soffit or fascia to see the top of the bricks and determine how much room you have to work with.
- Recessed Wiring: This involves dismantling and rebuilding parts of the brick pillar, which is more complex and may require professional help. This is usually not recommended for most DIYers unless you have advanced masonry skills.
Step 3: Gather the Right Tools and Materials
Once you have decided on the wiring method, it's time to gather the necessary tools and materials. Here are some essential items you might need:
- Electrical Wire (Romex or NMWU): Use Romex for indoor areas and NMWU (Non-Metallic Underground Wiring) for outdoor areas as it is rated for damp or wet locations.
- Conduit and Conduit Benders: If using surface-mounted conduit, you’ll need PVC or metal conduit and the appropriate fittings.
- Drill with Masonry Bits: For drilling through brick or mortar.
- Wire Fish Tape: Essential for fishing wires through walls or tight spaces.
- Electrical Boxes (Octagon Boxes): You’ll need these to mount the new light fixtures. Consider weatherproof boxes for exterior use.
- Screws, Anchors, and Mounting Hardware: To secure fixtures and conduit.
- Caulk or Sealant: To seal any holes drilled through exterior walls or brick to prevent moisture intrusion.
Step 4: Plan the Wiring Route
Careful planning of your wiring route will save you time and frustration. Here are some things to consider:
- Check Accessibility: If you’re running wire through the attic, check for accessible points where you can drop the wire down to the desired location.
- Avoid Obstacles: Plan to avoid any obstacles, such as studs, insulation, or existing electrical lines.
- Ensure Safety and Code Compliance: Make sure your work complies with local electrical codes. It might be worth consulting with a licensed electrician to ensure your plans are safe and up to code.
Step 5: Run the Wires
Once you have planned your route and gathered your tools, it’s time to run the wires:
- Cut Power to the Circuit: Before starting any electrical work, always cut power to the circuit at the breaker box to avoid any accidents.
- Drill Holes (If Necessary): If you’ve chosen to run wiring through a brick pillar, carefully drill a hole using a masonry bit. Start small and gradually increase the size to avoid cracking the brick.
- Fish the Wire Through the Wall or Conduit: Use a fish tape to guide the wire through walls, conduit, or any tricky spots. This step can be time-consuming, especially if working through narrow spaces or around corners.
- Mount the Electrical Boxes: Install the octagon box where the new light will be mounted. If you’re placing it in brick, use a core drill to create a recess for the box.
- Connect the Wires: Once the wiring is in place, connect it to the existing circuit or the new junction box you’ve installed. Make sure all connections are secure and insulated properly.
- Test the Connection: Before sealing everything up, restore power and test the new light to ensure it works correctly.
Step 6: Finish Up and Make It Look Good
The final touches can make or break the project. Ensure everything is secure, and the installation looks clean:
- Seal All Openings: Use caulk or a suitable sealant around any holes drilled in exterior walls or brick to prevent moisture from entering.
- Paint or Cover Conduits: If you’ve used surface-mounted conduit, consider painting it to match the house’s exterior for a more seamless appearance.
- Mount the Light Fixtures: Install the new exterior light fixtures and ensure they are securely mounted and properly aligned.
Alternative Solutions: When Running New Wiring Isn’t Feasible
Sometimes, running new wiring just isn’t practical, especially if you’re dealing with complex brickwork or want to avoid extensive drilling. Here are some alternative solutions:
- Solar-Powered Lights: If wiring is too challenging, consider installing solar-powered lights. These have come a long way in recent years and can provide ample light without any wiring. Many models offer dusk-to-dawn features and motion sensors.
- Battery-Powered Lights: Another option is battery-powered lights, which are easy to install but may require frequent battery replacements depending on usage.
Conclusion: Making an Informed Decision
Adding new exterior lights can dramatically improve your home’s curb appeal and functionality, especially in poorly lit areas. While the process of overcoming wiring challenges can be complex, it's entirely doable with some planning, the right tools, and a willingness to tackle a DIY project. Whether you choose to run new wiring, use surface-mounted conduit, or opt for solar or battery-powered alternatives, the key is to assess your specific situation, understand your options, and proceed with care. And if ever in doubt, consulting a professional electrician is always a good idea to ensure safety and code compliance.
FAQs on Installing New Exterior Lights and Overcoming Wiring Challenges
Get answers to FAQs on installing new exterior lights and overcoming wiring challenges. Ensure a smooth and safe installation with expert tips.
No, regular Romex wire should not be used for exterior applications without proper protection. For exterior use, wiring must be rated for damp or wet conditions. NMWU (Non-Metallic Underground Wire) is recommended because it is specifically designed for such environments. If Romex wire is used, it must be inside a weatherproof conduit to comply with electrical codes and ensure safety.
Drilling through a brick pillar requires caution to avoid cracking or damaging the brickwork. Here’s how you can approach it:
Use an SDS Rotary Hammer Drill: This tool, combined with a core bit, is excellent for drilling through brick or concrete. It allows for precise holes without excessive force, reducing the risk of cracks.
Start Small: Begin with a smaller pilot hole to guide the larger drill bit. This helps ensure accuracy and control.
Go Slow and Steady: Apply steady pressure without forcing the drill. Let the tool do the work, and avoid rushing, which can lead to cracking.
Consider Renting Equipment: If you don’t have an SDS rotary hammer, consider renting one from a local hardware store like Home Depot or Lowe's.
If the brick pillar has a steel column or another structural element behind it, running wiring through it becomes significantly more challenging. Here’s what to consider:
Surface-Mounted Conduit as an Alternative: If drilling through the steel column is not an option, consider using surface-mounted conduit to run the wiring externally. While not as aesthetically pleasing, this method avoids compromising structural integrity.
Reassess Light Placement: Consider alternative locations for the light that don’t require penetrating structural steel. Adjusting the plan could save time and potential headaches.
When installing an exterior light, especially on a brick surface, securing the fixture and ensuring it is weatherproof is crucial:
Use a Weatherproof Octagon Box: These boxes provide a secure and sealed enclosure for the electrical connections. If mounting in brick, carefully chisel out a space to recess the box for a cleaner look.
Seal All Openings: After installation, use caulk or a weatherproof sealant around the fixture and any openings to prevent moisture ingress.
Consider a Weatherproof Cover: If the electrical box is surface-mounted, use a weatherproof cover designed for outdoor use to protect the connections.
Yes, hiding conduit behind a pillar is possible and often preferred for aesthetic reasons. Here’s how to do it:
Drill Through the Backside of the Pillar: If you choose to run conduit behind the pillar, drill a hole through the backside that won’t be visible from the front. Ensure the hole is large enough to accommodate the conduit and wiring.
Secure the Conduit: Use appropriate brackets and fasteners to secure the conduit behind the pillar, ensuring it is both hidden and stable.
Paint the Conduit: For further blending, paint the conduit to match the surrounding materials. This step helps it disappear into the background.
Choosing the right type of fixture can significantly impact the final look of your project:
Recessed or Flush-Mount Fixtures: These fixtures provide a clean, low-profile look that blends well with brick or stucco exteriors. They require careful installation to ensure they are flush with the surface.
Dusk-to-Dawn or Motion Sensor Lights: These types of lights add functionality by turning on automatically when it gets dark or when motion is detected, which is useful for security and convenience.
Matching Style with Existing Fixtures: If there are existing lights, try to match the style and finish of the new fixtures to create a cohesive look.
Connecting a new light to an existing circuit involves careful planning:
Check Circuit Load Capacity: Ensure the existing circuit can handle the additional load of the new light without tripping the breaker.
Locate the Nearest Power Source: This could be an existing exterior light or an outlet that is on the same circuit. Make sure it’s easy to access and modify.
Understand Switch Configuration: If you want all the lights to operate from the same switch, ensure that the wiring is properly configured to achieve this.
Yes, there are several alternatives to drilling into brick:
Use Brick Clips or Adhesive Mounts: These can provide a non-invasive way to attach fixtures to brick without permanent drilling.
Solar or Battery-Powered Lights: These lights often come with mounting kits that use strong adhesives, which avoid drilling altogether.
Freestanding or Planter-Mounted Lights: These lights do not require any mounting on walls and can be placed strategically around entryways or pathways.
If you are uncertain about what lies behind the brick pillar or wall:
Drill a Small Test Hole: This can provide insight into what materials are present (e.g., hollow, solid, steel).
Use a Camera or Scope: A borescope or similar tool can help you see inside the drilled hole to assess the situation without making a large opening.
Consult a Professional: If you’re unsure about structural safety or potential obstacles, consulting with a professional can prevent costly mistakes.


