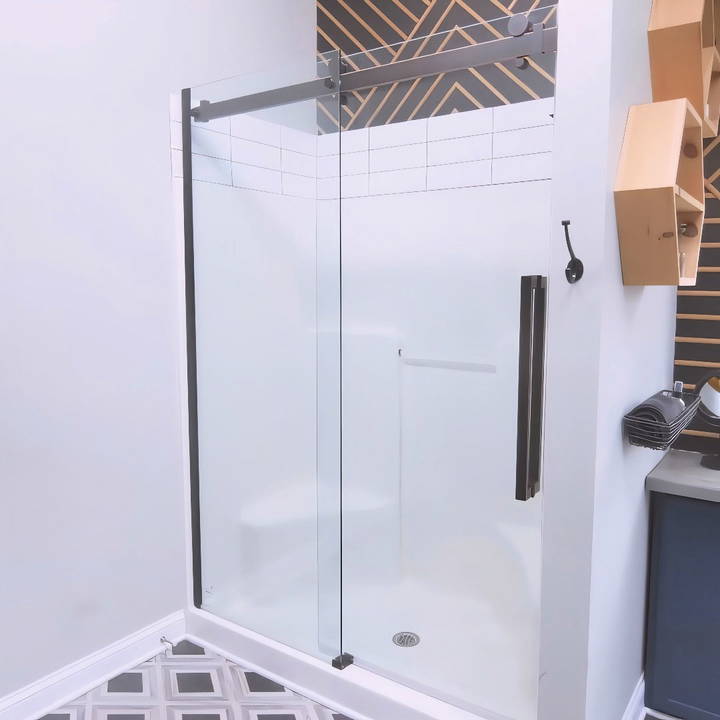
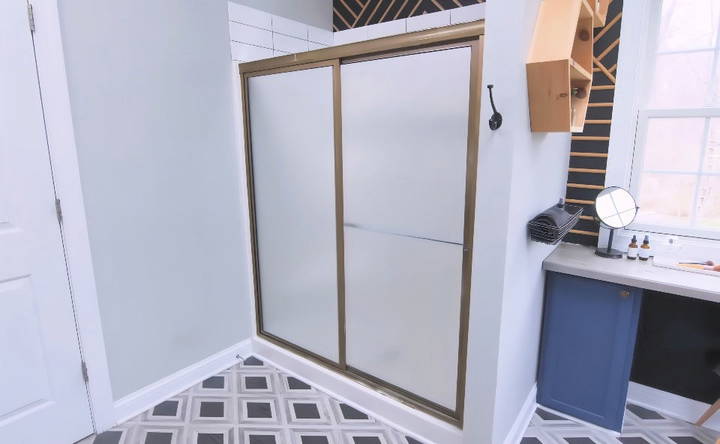
Recently, I decided to upgrade my bathroom by installing a new glass shower door. The old door not only looked outdated, but it also had a frosted finish that blocked light and made the space feel cramped. One handle was broken, and the tracks were worn. It was time for a change.
After watching several tutorials and reading guides, I was ready to tackle this project myself. Here, I'm sharing my journey and showing you how to install a shower door in your own home.
Gathering Materials and Tools
Before getting started, it's important to gather the necessary materials and tools for this project. Here's what I used:
Materials:
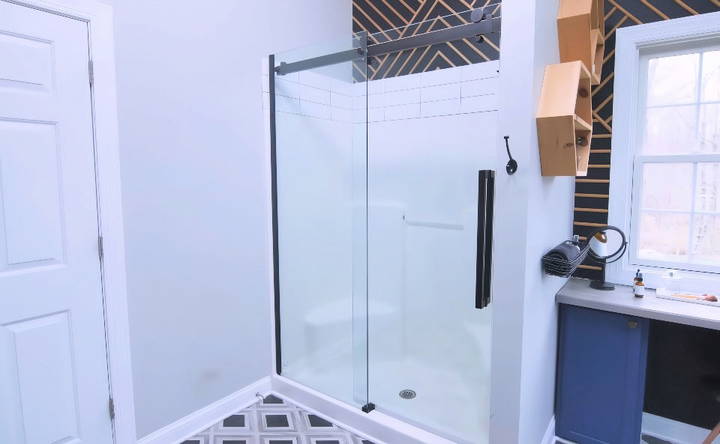
- New Shower Door Kit: I chose a semi-frameless, oil-rubbed bronze finish sliding door with clear glass for a modern look. This type of door gives a sleek appearance and requires careful handling due to the heavy tempered glass.
- Drop Cloth: To protect the floor and drain, preventing any debris from going down.
- Silicone Caulk: Used to seal the edges, making a watertight barrier.
- Screws and Anchors: Stainless steel to prevent rust.
Tools:
- Drill with Quarter-inch and 5/16-inch Masonry Bits: Essential for making holes, especially if you're working with tile or ceramic.
- Level and Pencil: For ensuring everything is plumb and marking positions accurately.
- Hacksaw and Sandpaper: To cut and smooth metal if adjustments are needed for the wall track.
- Putty Knife: Useful for scraping old caulk.
- Phillips Head Screwdriver: For removing screws and fixing panels.
- Allen Wrench: Handy for attaching rollers and other small parts.
Having the right materials and tools makes the job smoother and safer, ensuring you don't have to make repeated trips to the store in the middle of the project.
Step by Step Instructions
Learn how to install a glass shower door with our detailed step-by-step guide. From removing the old door to the final touches, we cover it all.
Removing the Old Shower Door
The first step in installing a new shower door is removing the old one. Trust me, preparing the area properly prevents future hassles.
Step 1: Preparing the Area
Lay down a drop cloth inside the shower to catch dust and debris. This will also help prevent any screws or parts from falling down the drain.
Step 2: Taking Off the Doors
Slide the shower doors carefully off their track. They're hung on rollers, which makes this step straightforward but requires a careful hand. Lift the doors up from the track, tilt them toward you from the top, and lift them out entirely. It's best to have a partner to hand them over once they're off, as they can be quite heavy.
Step 3: Removing the Metal Frame
After the doors, it's time to tackle the frame. Cut any caulk sealing the frame with a utility knife. Be cautious not to damage the shower wall or tiles. Once the caulk is cut, you might need to gently tap the frame to loosen it. Remove any screws holding the frame in place with a drill or screwdriver.
The bottom rail is usually held by caulk alone, so carefully cut through it to detach. Once the frame pieces are removed, use your putty knife to scrape away all the leftover caulk from the walls to leave a smooth surface for the new installation. Keep the edge of the putty knife flat against the wall to prevent scraping the main surface.
Choosing the Right Shower Door
When selecting a new shower door, there are a few important considerations to keep in mind:
Types of Shower Doors
- Frameless Shower Doors: Provide a minimalistic look with tempered glass and no metal framing, though they require precise installation to prevent leaks.
- Semi-Frameless: Have partial frames and offer a sleek look with some structural backing.
- Framed Doors: More traditional with metal or plastic around the glass. They are often more affordable, but may lack the streamlined appearance of frameless doors.
Glass Options
Choose between clear glass, which is transparent and offers a spacious feel, or textured/frosted glass for more privacy. I opted for clear glass to enhance the space's visual depth.
Your choice will depend on your space, preferences, and style considerations. Bypass doors (sliding) are efficient and don't require additional clearance for opening, making them perfect for small bathrooms.
Installing the New Glass Shower Door
Now that the old door is gone, here's how I installed the new glass shower door:
Step 1: Install the Wall Track
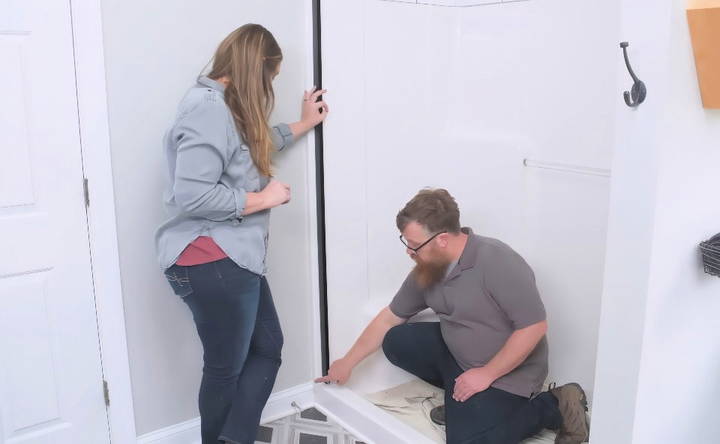
Begin by marking the positions for your wall track. The wall track I chose was straight and required slight trimming to fit against the rounded fiberglass shower pan. Using a hacksaw, I carefully cut the edge at a 45-degree angle and sanded it smooth. Silicone covers minor imperfections here, making it forgiving.
With the track prepared, align it vertically using the level. Mark the pre-drilled hole positions with a pencil. Use a drill and proper bit to drill holes for the screws. If installing into tile, opt for a masonry bit and go slow to prevent cracking. Secure the track with stainless steel screws, ensuring it is perfectly vertical (plumb) for optimal function.
Step 2: Fix the Support Bar
The support bar should be cut to the appropriate length if necessary. It serves as the top rail that holds the sliding glass doors in place. After measuring, I used a hacksaw to make it fit. Loosely attach it initially to allow adjustments.
Check that the bar is level and mark the positions for drilling. Make any necessary adjustments to ensure it supports the glass properly.
Step 3: Attach the Fixed Panel
Prior to securing the fixed glass panel, think about water direction. Fixed panels should be installed opposite the showerhead to avoid water leakage. Insert the panel into the wall-mounted track and fasten it with the provided screws. Add protective silicone into the pre-drilled holes to strengthen the water seal.
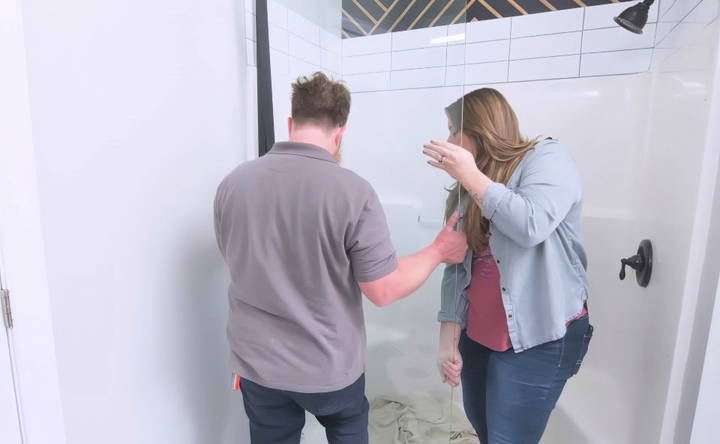
Step 4: Install the Sliding Glass Door
Attach rollers to the top of the sliding glass door using the provided Allen wrench and kit instructions. Position the door in the top rail and check that it glides smoothly along the track. Fix "anti-jump" pegs near the bottom to ensure the door doesn't derail.
Step 5: Attach Handles and Door Stops
Secure the handles on both the inside and outside of the sliding panel using the supplied hardware. Then, install door stops to prevent the door from crashing into the walls. They should face each other to limit movement within safe bounds.
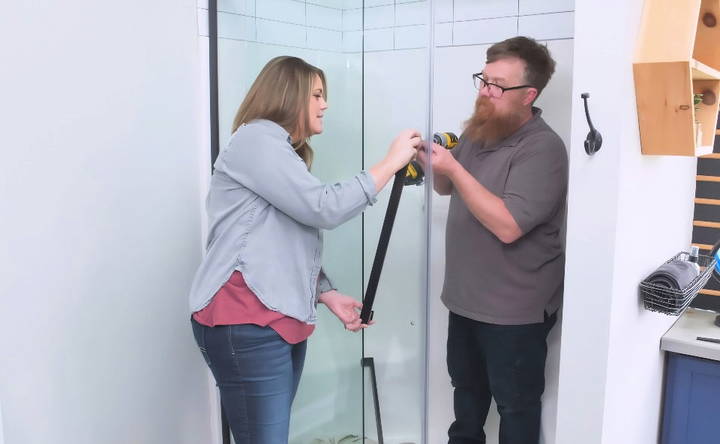
Step 6: Add Finishing Touches
Apply a strip of water seal onto the bottom edge of the door to prevent water from sneaking underneath. Attach decorative caps to all exposed screw heads for a polished finish. Double-checking every step ensures the stability and waterproofing of your shower door.
Sealing and Final Touches
Caulk is essential for sealing the fixed components against water intrusion.
Step 1: Adding Silicone Caulk
Use clear silicone caulk to seal along all edges of the frame and around any screws. Apply it along the interior and exterior joints of the shower to keep water from escaping. A smooth, continuous bead is necessary to prevent future leaks. Allow 24 hours for the caulk to set completely before using the shower.
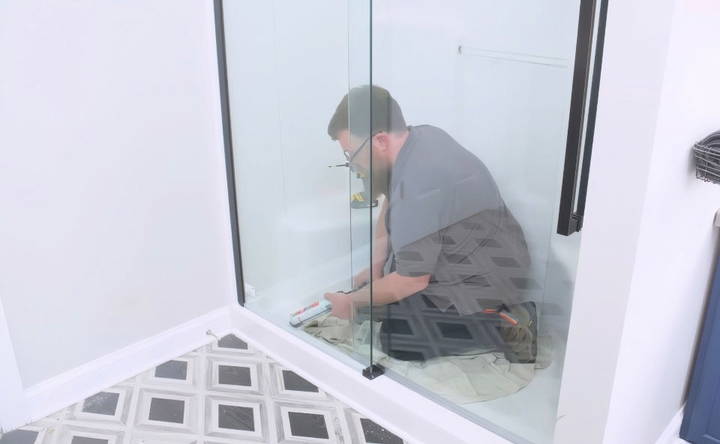
Step 2: Resolving Exposed Screw Holes
If any screw holes from the previous installation remain visible and uncovered by the new frame, fill them with waterproof materials like Bondo. This compound dries hard and is paintable, ensuring a seamless final appearance.
Common Mistakes to Avoid
Installing a glass shower door can be a rewarding DIY project, but it's easy to make mistakes that can lead to frustration or even damage. Here are some common mistakes to avoid:
Incorrect Measurements
One of the most common mistakes is not measuring accurately. Ensure you measure the width and height of the shower opening at multiple points. Use a level to check for any uneven surfaces. Accurate measurements are crucial for a proper fit.
Ignoring Manufacturer Instructions
Each glass shower door comes with specific installation instructions. Ignoring these can lead to improper installation. Always read and follow the manufacturer's guidelines carefully. They provide important details tailored to the specific product.
Skipping the Dry Fit
Before permanently installing the door, do a dry fit. This means assembling the door without any adhesive or screws to ensure everything fits correctly. This step helps identify any issues before they become permanent.
Using the Wrong Tools
Using incorrect or low-quality tools can make the installation process difficult and can damage the door or frame. Invest in the right tools, such as a good quality drill, level, and glass suction cups.
Not Sealing Properly
Improper sealing can lead to water leaks. Ensure you apply a continuous bead of silicone sealant along the edges where the door meets the wall and floor. This prevents water from seeping out and causing damage.
Overtightening Screws
Overtightening screws can crack the glass or damage the frame. Tighten screws just enough to hold the door securely, but be careful not to apply too much force.
Ignoring Safety Precautions
Handling glass can be dangerous. Always wear safety gloves and goggles to protect yourself from sharp edges and potential breakage. Make sure you have a helper to assist with lifting and positioning the glass.
Rushing the Installation
Take your time with the installation process. Rushing can lead to mistakes and poor workmanship. Follow each step methodically and double-check your work as you go.
Not Checking for Level and Plumb
Ensure the door is level and plumb (vertically straight). Use a level to check both the door and the frame. An uneven installation can cause the door to swing open or closed on its own.
Neglecting Maintenance Tips
After installation, regular maintenance is key to keeping your shower door in good condition. Clean the glass regularly with a non-abrasive cleaner and check the seals periodically to ensure they remain watertight.
Avoiding these mistakes ensures a smooth, successful glass shower door installation and prevents future issues.
Safety Precautions
Installing a glass shower door involves handling heavy and fragile materials, which can be hazardous if not done correctly. Here are some essential safety precautions to ensure a safe and successful installation:
Wear Protective Gear
Always wear safety gloves and goggles. Gloves protect your hands from sharp edges, while goggles shield your eyes from glass shards and dust.
Handle Glass with Care
Glass panels are heavy and fragile. Always handle them with care to avoid breakage. Use glass suction cups to lift and move the panels safely.
Have a Helper
Never attempt to install a glass shower door alone. Having a helper can make the process safer and easier. They can assist with lifting, holding, and positioning the glass.
Use Proper Tools
Ensure you have the right tools for the job. Using improper tools can lead to accidents and damage. Essential tools include a drill, level, measuring tape, and silicone sealant.
Check for Sharp Edges
Inspect the glass edges for any sharp or rough areas. If you find any, smooth them out with a fine-grit sandpaper to prevent cuts.
Secure the Work Area
Clear the work area of any obstacles and ensure it is well-lit. A clutter-free space reduces the risk of tripping and allows for better visibility.
Follow Manufacturer Instructions
Always follow the manufacturer's installation instructions. These guidelines are designed to ensure the product is installed safely and correctly.
Avoid Overexertion
Glass panels can be heavy. Avoid overexerting yourself by lifting too much weight at once. Take breaks if needed and lift with your legs, not your back.
Use a Level
Ensure the door and frame are level and plumb. An uneven installation can cause the door to swing unexpectedly, posing a safety risk.
Seal Properly
Apply silicone sealant carefully to prevent water leaks. Leaks can cause slippery surfaces, increasing the risk of falls.
Dispose of Packaging Safely
Dispose of all packaging materials, such as plastic wraps and cardboard, safely. These can be tripping hazards if left on the floor.
Check for Structural Integrity
Before starting the installation, check the walls and floor for any structural issues. Weak or damaged areas can compromise the stability of the shower door.
By following these safety precautions, you can minimize risks and ensure a smooth installation process. Safety should always be your top priority when working with glass and heavy materials.
FAQs About Installing a Glass Shower Door
Learn everything about installing a glass shower door with our comprehensive FAQs. Get tips, costs, and maintenance advice for a seamless installation.
Accurate measurements are crucial for a proper fit:
Width: Measure the width of the shower opening at the top, middle, and bottom. Use the smallest measurement.
Height: Measure from the base of the shower to the top where the door will be installed.
To ensure your glass door is level and secure:
Use a Level: Check the alignment of the bottom track and side rails with a level before securing them.
Adjust as Needed: Use shims to adjust the glass panels and door until they are perfectly level.
Tighten Screws: Ensure all screws are tight but avoid over-tightening to prevent damage.
Avoid these common mistakes:
Incorrect Measurements: Double-check all measurements before cutting or drilling.
Skipping Sealant: Always use silicone sealant to prevent water leaks.
Over-Tightening Screws: This can crack the glass or damage the frame.
Ignoring Manufacturer Instructions: Follow the specific instructions provided with your glass shower door kit.
You can install a glass shower door by yourself if you have basic DIY skills and the right tools. However, consider professional help if:
Complex Installation: If your shower space has unusual dimensions or requires custom glass cutting.
Heavy Glass Panels: Handling large, heavy glass panels can be challenging and dangerous.
Precision Required: Ensuring a perfect fit and avoiding leaks might require professional expertise.
To keep your glass shower door looking new:
Daily Cleaning: Wipe down the glass with a squeegee after each use to prevent water spots and soap scum.
Weekly Cleaning: Use a non-abrasive glass cleaner or a mixture of vinegar and water to clean the glass.
Avoid Harsh Chemicals: Do not use abrasive cleaners or pads that can scratch the glass.
Check Seals: Regularly inspect and replace any worn-out seals to prevent leaks.
In conclusion, replacing a shower door is a manageable DIY project with dramatic impact. It enhances both the look and functionality of your bathroom. My biggest tip is to go slowly and methodically, adhering to the manufacturer's instructions and double-checking your work at each step. If you ever feel unsure, reach out to customer support for assistance or consider consulting an expert. With patience, you too can achieve a professional-looking installation.


