I've been gardening for many years and experimenting with different methods to keep my garden healthy and thriving. One of the techniques I've found incredibly effective is the "Back to Eden" gardening method, which involves making a rich, natural mulch using wood chips. I'll take you through my process of making mulch and share my firsthand experiences with this method.
What is the Back to Eden Gardening Technique?
The "Back to Eden" gardening technique, developed by Paul Gautschi, is a method of gardening that mimics the natural processes found in forests. Paul noticed how the forest floor makes its own fertile soil through layers of decaying organic matter, such as leaves, branches, and other natural debris. Inspired by this natural cycle, he applied thick layers of wood chips to his garden to replicate this process. This technique helps retain moisture, suppress weeds, and gradually build healthy, nutrient-rich soil.
I was drawn to this method because it makes a closed-loop system—much like a natural ecosystem. In my garden, this method has made a significant difference in improving soil quality and conserving water, especially in dry conditions.
Materials Needed for Making Mulch
Before diving into the process, let's go over the materials needed:
- Wood Chipper: Essential for chipping branches and brush into smaller pieces to make mulch. I use a gas-powered chipper, but there are electric options available that are more affordable and environmentally friendly.
- Fresh Branches and Limbs: Freshly cut branches are ideal because they have moisture, which helps cool the chipper blades during the process and makes a better mulch mix.
- Protective Gear: Safety is crucial when working with a wood chipper. Ensure you have hearing protection, eye protection, and gloves.
- Loppers: Useful for pruning off side branches to ensure that limbs feed smoothly into the chipper.
Why These Materials are Essential
Each of these materials plays a critical role in the mulch-making process. The wood chipper is the main tool that breaks down organic matter into mulch, while fresh branches provide the best texture and moisture content. Protective gear ensures safety, and loppers help manage branches for efficient chipping.
Step by Step Instructions
Learn how to make mulch with step-by-step instructions on using a wood chipper, gathering materials, and effective mulching tips for gardens and landscapes.
Step 1: Prepare Your Wood Chipper and Safety Gear
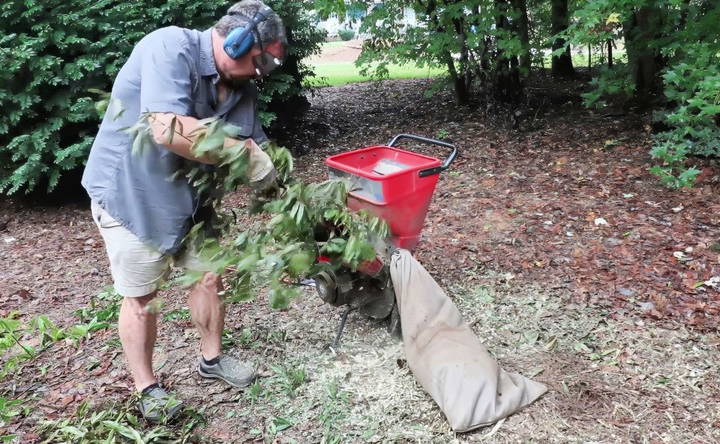
I always start by prepping my wood chipper. Depending on your model—whether it's gas or electric—you'll need to ensure it's in good working condition. I check the fuel levels, oil, and the sharpness of the blades. Safety comes first, so I put on my hearing protection, safety glasses, and gloves.
Step 2: Gather and Prep Your Materials
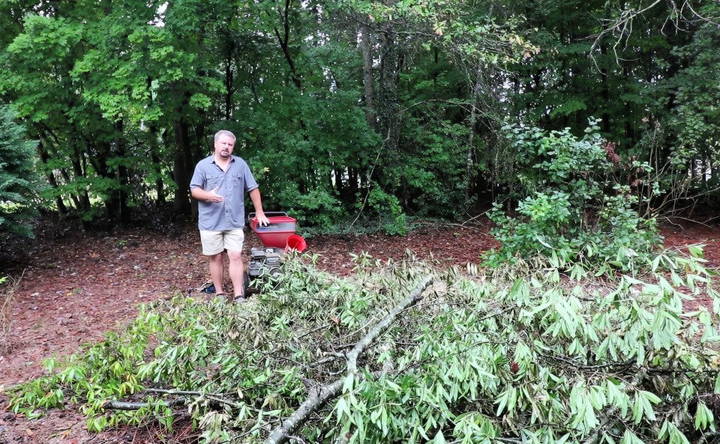
The next step involves gathering the branches and limbs I've pruned from around my garden. I focus on fresh cuttings as they still contain moisture, which prevents the chipper blades from overheating. I also use my loppers to prune any side branches so the main limbs can easily feed into the chute.
Step 3: Start Chipping
With the chipper ready and the branches prepped, I start feeding them into the chipper. It's important to rotate between wet and dry materials if you have both. This balance helps keep the blades cool and prevents jamming. I find that a good mix of green (leafy) material and woody branches makes a more balanced mulch.
Step 4: Collect and Spread the Mulch
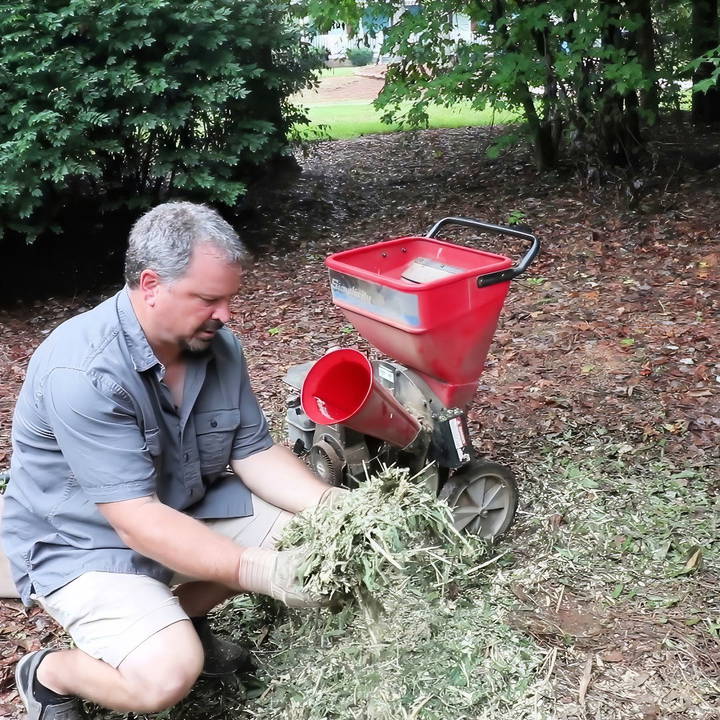
Once the branches are chipped, the resulting mulch is a perfect mix of wood and greens that can be used immediately in areas where I won't be planting soon. The bag on the side of my chipper makes it easy to transport the mulch around the garden. Sometimes, I just let the chipper shoot the mulch directly into an area that needs coverage.
Important Considerations When Using Wood Chips
When using the Back to Eden method, there are some key points to keep in mind:
- Don't Mix Fresh Wood Chips Into the Soil: One of the most common mistakes is mixing fresh wood chips into the soil. This can disrupt the natural process and lead to improper breakdown, which can steal nitrogen from plants. Instead, keep the mulch on top of the soil.
- Give It Time to Break Down: Freshly chipped wood needs time to decompose. I usually let it sit for about a year before planting directly into it. This waiting period allows the mulch to break down properly and enrich the soil without making excessive heat or binding up nitrogen.
- Add Nitrogen-Rich Materials: Wood chips alone don't have much nitrogen, which is necessary for them to decompose efficiently. In my garden, I supplement with compost or chicken manure to speed up the decomposition process and add essential nutrients.
- Apply Mulch at the Right Depth: When applying wood chips, avoid piling them too thickly around existing plants. Instead, lay them down in areas you plan to plant in the future, or in between rows of already established plants.
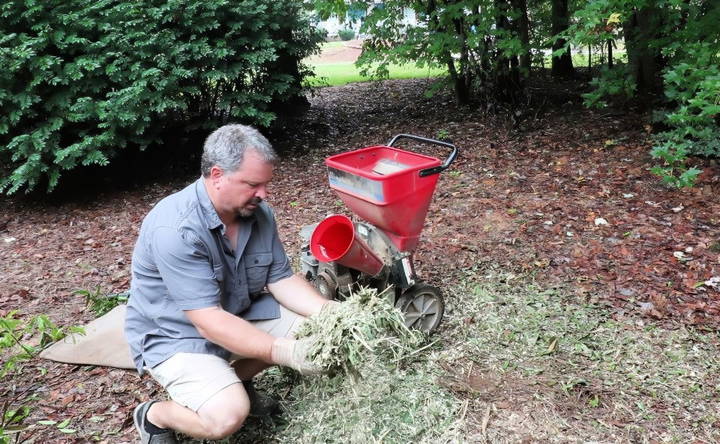
My Experience with the Back to Eden Method in Different Gardening Environments
Discover my experience with the back to eden method in various gardening environments: vegetable gardens, woody landscape plants, and annual flower beds.
Vegetable Gardens
In my vegetable garden, the Back to Eden technique has been transformative. The wood chips make a moisture-retaining barrier that keeps the soil cool and reduces the need for frequent watering. Over time, as the mulch breaks down, it forms a rich, loamy layer that is perfect for planting vegetables.
Woody Landscape Plants
For woody plants like trees and shrubs, I use wood chips more cautiously. Since my soil is clay-based, I find that just slightly amending the soil to improve drainage is usually enough. I don't use thick layers of wood chips directly around these plants because it can lead to waterlogging and root problems.
Annual Flower Beds
I've also used the Back to Eden method for annual flower beds, but with a twist. Since annuals need more immediate nutrients and can be sensitive to the nitrogen-binding effects of fresh wood chips, I wait until the chips have decomposed for at least a year before incorporating them into these beds.
Tips and Tricks for Effective Mulching
- Use Fresh Material: Fresh limbs and leaves work best for cooling the chipper and making a nutrient-rich mulch.
- Balance Wet and Dry: Alternate between wet and dry material to prevent overheating and to make a balanced mulch.
- Apply a Thin Layer First: If you're new to this technique, start with a thin layer of mulch and gradually build it up over time.
- Keep Mulch Above Ground: Never dig fresh wood chips into your soil; always keep them on the surface to maintain proper airflow and decomposition.
The Benefits of Mulching with Wood Chips
From my experience, mulching with wood chips offers numerous benefits:
- Moisture Retention: Helps retain moisture in the soil, reducing the need for frequent watering.
- Weed Suppression: A thick layer of mulch acts as a natural weed barrier.
- Soil Improvement: Over time, decomposing wood chips improve soil structure and add organic matter.
- Erosion Control: Mulch helps prevent soil erosion, especially on slopes and in areas prone to runoff.
Types of Mulch
Choosing the right type of mulch for your garden can make a big difference in plant health and garden maintenance. Here are the main types of mulch, explained in simple terms:
Organic Mulch
Organic mulch is made from natural materials that decompose over time, adding nutrients to the soil. Here are some common types:
- Wood Chips and Bark: These are popular for flower beds and around trees. They decompose slowly, providing long-term benefits. They also help retain moisture and suppress weeds.
- Straw: Straw is great for vegetable gardens. It breaks down quickly, adding organic matter to the soil. Make sure to use clean straw to avoid introducing weed seeds.
- Leaves: Shredded leaves are an excellent, free mulch option. They decompose quickly, enriching the soil. They are best used in flower beds and around shrubs.
- Grass Clippings: Grass clippings are readily available and decompose rapidly, adding nitrogen to the soil. Use them in thin layers to prevent matting and odor.
- Compost: Compost is rich in nutrients and improves soil structure. It can be used as a mulch in any garden area, providing a boost to plant growth.
Inorganic Mulch
Inorganic mulch is made from non-living materials and does not decompose. It is often used for decorative purposes and long-term weed control. Here are some common types:
- Gravel and Stones: These are ideal for pathways, driveways, and around plants that prefer dry conditions. They help with drainage and prevent soil erosion.
- Landscape Fabric: This is a synthetic material placed under other types of mulch to prevent weed growth. It allows water and air to reach the soil but blocks weeds.
- Rubber Mulch: Made from recycled tires, rubber mulch is durable and long-lasting. It is often used in playgrounds and around trees and shrubs. It does not decompose, so it does not add nutrients to the soil.
Choosing the Right Mulch
When selecting mulch, consider the needs of your plants and the specific conditions of your garden:
- For Moisture Retention: Use organic mulches like wood chips, straw, or leaves. They help keep the soil moist and cool.
- For Weed Control: Inorganic mulches like gravel, stones, or landscape fabric are effective at suppressing weeds.
- For Nutrient Addition: Organic mulches like compost and grass clippings decompose quickly, enriching the soil with nutrients.
Knowing mulch types and benefits helps you select the best for your garden. Mulching boosts soil health, keeps moisture, and curbs weeds, enhancing garden beauty.
Application Techniques
Applying mulch correctly is essential to maximize its benefits for your garden. Here are some practical tips to help you get the most out of your mulch:
Proper Depth
- Organic Mulch: Apply organic mulch, like wood chips or leaves, in a layer about 2-4 inches deep. This depth is enough to suppress weeds and retain moisture without suffocating plant roots.
- Inorganic Mulch: For inorganic mulch, such as gravel or stones, a 1-2 inch layer is usually sufficient. These materials don't decompose, so they don't need to be as thick.
Mulching Around Trees and Shrubs
- Tree Mulching: When mulching around trees, make a donut-shaped ring. Keep mulch about 6 inches away from the trunk to prevent rot and pest problems. The mulch should be 2-4 inches deep and extend to the tree's drip line (the outermost edge of the tree's canopy).
- Shrub Mulching: For shrubs, follow the same principle. Keep mulch away from the base of the shrub and spread it evenly around the plant.
Seasonal Mulching Tips
- Spring: Apply a fresh layer of mulch in the spring to help retain moisture and suppress weeds as plants begin to grow.
- Summer: In hot climates, mulch helps keep the soil cool and reduces water evaporation. Check mulch levels and add more if needed.
- Fall: Add mulch in the fall to protect plant roots from freezing temperatures. This is especially important for perennials and young plants.
- Winter: In colder regions, a thicker layer of mulch can insulate the soil and protect plants from frost heave (when soil freezes and thaws, pushing plants out of the ground).
Common Mulching Mistakes to Avoid
- Over-Mulching: Avoid piling mulch too high, which can suffocate plant roots and lead to rot. Stick to the recommended depths.
- Using the Wrong Mulch: Choose the right type of mulch for your plants. For example, avoid using fresh grass clippings around delicate plants, as they can generate heat and harm the plants.
- Ignoring Soil Health: Before applying mulch, check the soil's health. Ensure it has good drainage and is not compacted. Mulch works best on healthy soil.
Proper application of mulch retains moisture, suppresses weeds, regulates soil temperature, and improves soil health for a thriving garden.
FAQs About DIY Mulch
Discover answers to common questions about DIY mulch. Learn how to make and use homemade mulch for your garden effectively.
Mulch is a layer of material spread over the soil surface in gardens and landscapes. It helps retain moisture, suppress weeds, regulate soil temperature, and improve soil health as it decomposes. Using mulch can also enhance the appearance of your garden, making it look neat and well-maintained.
Homemade mulch offers several benefits:
Cost-effective: It uses materials you already have, saving money.
Eco-friendly: Reduces waste by recycling yard debris.
Customizable: You can mix different materials to suit your garden's needs.
Nutrient-rich: Organic mulch adds nutrients to the soil as it decomposes.
Avoid using the following materials as mulch:
Treated wood: It may contain harmful chemicals.
Fresh grass clippings: They can mat down and create a barrier to water and air.
Invasive plants: They might spread and take over your garden.
Colored newspaper or glossy paper: These can contain inks and chemicals that are harmful to plants.
Mulch should be replenished at least once a year, typically in the spring or fall. Organic mulch decomposes over time, adding nutrients to the soil, but it also means the layer gets thinner. Check the mulch depth regularly and add more to maintain a 2-4 inch layer. This helps ensure continued benefits like moisture retention and weed suppression.
While mulch can attract beneficial insects like earthworms, it can also attract pests if not managed properly. To minimize pest issues:
Avoid piling mulch against plant stems or tree trunks: This can make a habitat for pests.
Use well-composted organic mulch: Fresh mulch can attract insects.
Monitor for pests regularly: Check under the mulch layer for signs of pests and take action if needed.
Final Thoughts
The Back to Eden gardening method has been a game-changer for me. By following the natural cycles observed in forests, I've been able to make a sustainable, low-maintenance garden that thrives without synthetic fertilizers or excessive watering. While this technique may not be perfect for every situation, especially in more urban or manicured landscapes, it offers a fantastic option for anyone looking to improve their soil health and reduce water usage naturally.
If you're interested in exploring this method, I encourage you to start small, experiment, and see how it works for you.


