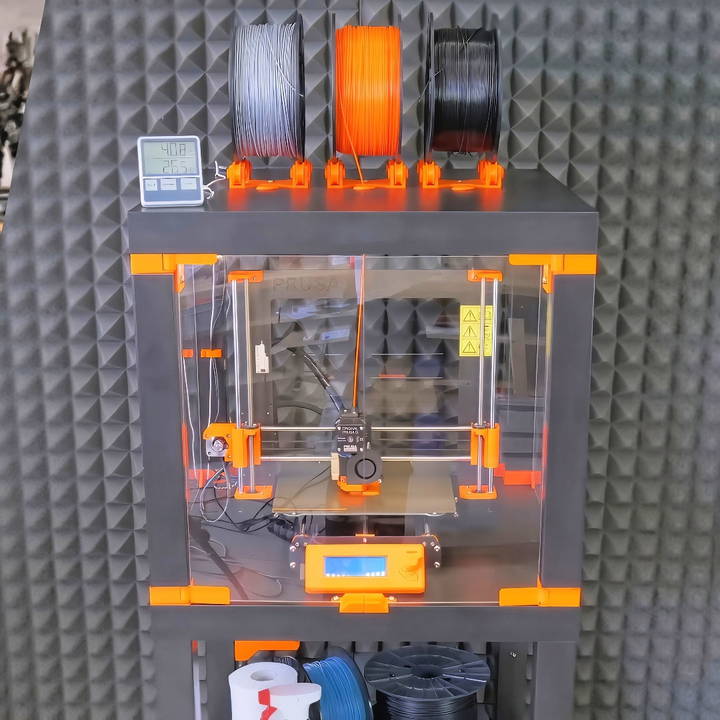
When you dive into the world of 3D printing, you'll quickly find that the environment around your printer is just as important as the printer itself. That's where 3D printer enclosures come in. Think of an enclosure as a mini-room for your printer, designed to keep external factors from messing with your creations.
Why Use an Enclosure?
Stability is key in 3D printing. Fluctuations in temperature or drafts can cause prints to warp or split. An enclosure helps maintain a consistent environment, which is especially crucial when using materials like ABS, which are prone to warping.
The Benefits
- Temperature Control: Enclosures trap heat, keeping the printing area warm.
- Reduced Warping: Stable temperatures mean fewer print deformities.
- Dust Protection: They keep out dust and other particles, ensuring clean prints.
- Noise Reduction: Enclosures can muffle the often-loud printing noises.
- Safety: They contain any potentially harmful fumes and reduce the risk of accidental burns or injuries.
Choosing the Right Enclosure
Selecting an enclosure depends on your printer's size, the materials you use, and your budget. You can buy a ready-made enclosure or build one yourself. DIY options range from simple cardboard boxes to elaborate constructions with temperature controls and LED lights.
Building Your Own
Making a DIY 3D printer enclosure can be a rewarding project. You'll need materials like acrylic sheets or plywood, as well as tools to cut and assemble them. Online tutorials and videos can guide you through the process. Remember, the goal is to build a stable environment that lets you print with precision and safety.
Determination
A good enclosure is a game-changer for 3D printing. It leads to better quality prints, a safer workspace, and a more enjoyable printing experience. Whether you buy or build, make sure it meets your printing needs and enhances your creative journey.
Choosing Your Materials
Discover the best enclosure options and materials. Learn why choosing these specific materials is essential for your project's success.
The Enclosure Options
I explored two popular options for my enclosure: a photographic light tent and an Ikea Lack table setup. The light tent is an out-of-the-box solution that requires no modifications and can reach an internal temperature of around 40* °C (104°F) within minutes of printing, all at a cost of about 300 to 500 CZK (approximately $13-$22).
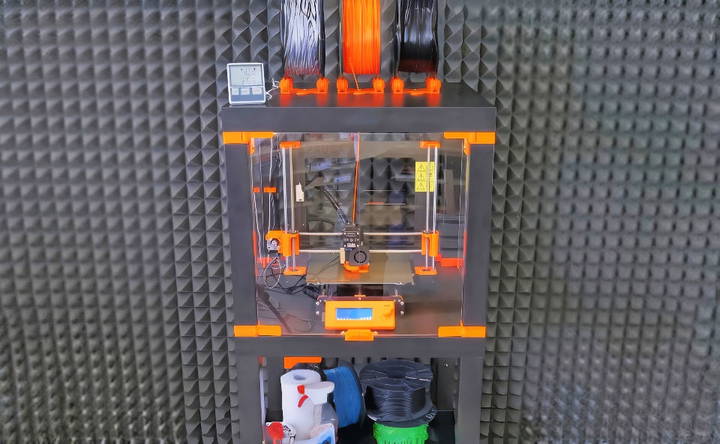
However, the most popular choice among 3D printing aficionados is using Ikea Lack tables. Despite the existence of several designs, I decided to craft my unique solution, designed for enhanced convenience and functionality.
Why These Materials?
- Photographic Light Tent: It's affordable and requires no modifications. Ideal for those seeking a straightforward solution.
- Ikea Lack Tables: Widely available, these tables offer a sturdy and customizable base for building a more permanent enclosure.
- Plexiglass: Provides visibility while keeping the heat in, essential for quality ABS prints.
- LED Lighting and Smoke Detector: Improves visibility and adds a layer of safety, given 3D printers' propensity to get quite hot.
Step by Step Instructions
Learn how to build a DIY 3D printer enclosure with Ikea lack tables. Step-by-step instructions, from preparation to final touches, ensure perfect assembly.
Building with Ikea Lack Tables
Discover how to build with Ikea Lack Tables: Preparation, Corner Brackets Installation, Plexiglass Setup to flawlessly assemble your project.
1. Preparation
- Start by setting up the LED strip and mounting the smoke detector. Safety should always be your top priority.
2. Corner Brackets Installation
- Screw in the corner brackets, which will hold the tables together and provide a place to mount the plexiglass.
3. Plexiglass Setup
- Insert the plexiglass into the printed parts designed to hold them. For a snug fit, use 3mm thick plexiglass. This will ensure your enclosure retains heat effectively without sacrificing visibility.
4. Put It All Together
- Once the plexiglass is securely in place, proceed to assemble the door handles and mount the filament holder on the upper table. For the lower table, start by installing the door stopper and corner pieces.
External Power Supply
It's paramount to place the power supply outside the enclosure. High temperatures can drastically shorten its lifespan. Use two printed parts to attach the power supply to the box, ensuring easy removal if necessary.
5. Final Touches
- Replace the conventional bulky frame components with printed substitutes to maintain frame integrity and manage cable routing more efficiently. This modification also helps minimize the printer's footprint within the enclosure.
6. Assembly
- Stack the tables, connect the LED strip cables, and secure everything in place. Your simple and cost-effective 3D printer enclosure is now complete!
What I Learned
This project not only improved my ABS prints but also taught me several valuable lessons:
- The Importance of a Stable Environment: Enclosures provide a controlled atmosphere, crucial for material like ABS, prone to warping and splitting.
- Safety First: Incorporating a smoke detector within the setup ensures peace of mind, especially during long prints.
- DIY Solutions Can Be Effective: With some ingenuity and basic materials, you can build solutions that rival commercially available products.
Customization and Upgrades
Upgrading your 3D printer enhances performance and functionality. Whether for hobby or work, these mods improve print quality, reliability, and capabilities. Here are some useful upgrades to consider:
Automatic Bed Leveling Sensors
Say goodbye to manual calibration with automatic bed leveling sensors. These devices measure the print bed's topography and adjust the Z-axis accordingly, ensuring a perfectly level bed every time. It's a game-changer for achieving consistent print quality.
Solid Bed Mounts
Reduce vibrations and enhance stability with solid bed mounts. They replace the spring-loaded mounts that come with most printers, providing a firmer foundation for your prints. This leads to fewer errors and smoother surfaces.
Upgraded Extruders
An upgraded extruder can offer better control over filament feeding, reducing the risk of jams and improving the consistency of your prints. Look for extruders with a strong grip and precise filament control.
High-Quality Nozzles
Investing in high-quality nozzles can fine-tune your print quality. Different materials and print resolutions may require specific nozzle types, so having a variety on hand is beneficial.
Enhanced Hot Ends
The hot end is where the filament melts, and an upgrade can ensure more reliable extrusion and allow for printing with a wider range of materials. Look for hot ends that can handle higher temperatures and offer better heat distribution.
Improved Build Plates
A good build plate can make all the difference in print adhesion and quality. Consider materials like glass or PEI, which provide a smooth finish and strong adhesion without the need for additional adhesives.
Cooling Fans and Shrouds
Proper cooling is essential, especially for detailed prints. Upgrading your fans and shrouds can improve airflow, leading to sharper details and preventing warping.
LED Lighting
Adding LED lighting to your printer not only looks cool but also helps you monitor print progress and spot any issues early on. It's a simple upgrade that can be both functional and aesthetically pleasing.
Tool Holders and Organizers
Keep your workspace tidy with custom tool holders and organizers. These can be 3D printed and designed to fit your specific tools, making them easily accessible during printing projects.
Smart Home Integration
For the tech-savvy, integrating your printer with smart home devices can allow for remote monitoring and control. This can include starting prints remotely, receiving notifications, or even stopping the printer in case of an error.
Upgrade your 3D printer as your skills grow, starting with basics and moving to advanced. Customize your setup and experiment to find what works best.
Ventilation and Temperature Control
Building the perfect environment for your 3D prints involves more than just the right temperature; it's also about ensuring good air quality. Here's how you can manage both ventilation and temperature control in your 3D printer enclosure:
Why Ventilation Matters
When you print, especially with materials like ABS, fumes can be released. These fumes need to be vented out to keep the air around you safe to breathe. Plus, good ventilation helps prevent overheating, which can affect your printer's performance.
Temperature Control
The temperature inside your enclosure should be just right—not too hot, not too cold. A consistent temperature helps prevent warping and ensures your prints come out looking great. Using a thermostat can help maintain this balance.
Setting Up Ventilation
Here's how to set up effective ventilation:
- Use a Fan: A fan helps circulate air and vent out fumes. For best results, place it at the top of the enclosure where hot air rises.
- Consider Filters: If you're worried about fumes, add a carbon filter to your fan setup. This helps trap any harmful particles before they're vented out.
Managing Temperature
To keep the temperature steady:
- Insulate Your Enclosure: Materials like foam can help keep the heat in, so your printer stays at the right temperature.
- Monitor with Sensors: Thermistors and temperature sensors give you real-time data, so you can adjust the heat as needed.
Safety First
Always prioritize safety:
- Fire-Resistant Materials: Use materials that won't catch fire easily, just in case something goes wrong.
- Regular Checks: Keep an eye on your setup. If something doesn't look or smell right, turn everything off and check it out.
With the right setup, you can build a safe and stable environment for your 3D prints. Good ventilation and temperature control are key to getting those perfect prints.
Troubleshooting Common Issues
3D printing has its challenges, but identifying and fixing issues quickly can save time and frustration. Here's a guide to troubleshoot common 3D printer enclosure problems:
Temperature Fluctuations
If you notice inconsistent print quality, it might be due to temperature variations inside your enclosure. Ensure that your enclosure's heating elements are working correctly and that the door or any openings are properly sealed to maintain a stable temperature.
Poor Ventilation
A lack of proper ventilation can lead to an accumulation of fumes and heat, affecting print quality and safety. Check if the fans are operating as they should and that any filters are clean and unobstructed.
Warping or Cracking
Warping or cracking can occur if the internal environment is too cold or drafts are present. Make sure that the enclosure is insulated and that there are no gaps allowing cold air to enter.
Electrical Issues
If you're experiencing power fluctuations or failures, inspect the wiring and connections within your enclosure. Loose or damaged wires can cause intermittent power supply issues.
Sensor Malfunctions
Sensors play a crucial role in monitoring the enclosure's conditions. If they're giving inaccurate readings, recalibrate them or consider replacing them if they're faulty.
Noise Levels
Excessive noise can be a sign of a problem. Check for loose components or parts that may need lubrication or tightening.
Overheating Components
If parts of your printer are overheating, it could be due to poor airflow or a malfunctioning cooling system. Ensure that cooling fans are directed at hotspots and that nothing is blocking the airflow.
Regular Maintenance
Performing regular checks and maintenance on your enclosure can prevent many issues. Keep an eye on all moving parts, clean filters regularly, and check for any signs of wear and tear.
Stay vigilant and address issues quickly to keep your 3D printer enclosure reliable. Most problems are simple to fix, so investigate and resolve any irregularities promptly.
Safety and Maintenance
Ensuring the safety and longevity of your 3D printer enclosure involves regular maintenance and adherence to safety protocols. Here's a straightforward guide to help you keep your enclosure in top condition while prioritizing safety:
Regular Cleaning
Keep your enclosure free of dust and debris. This not only maintains a clear viewing area but also prevents any potential fire hazards. A simple wipe-down with a damp cloth can do the trick for most surfaces.
Ventilation Checks
Proper ventilation is crucial for both the safety of your workspace and the quality of your prints. Make sure that any installed fans or vents are not obstructed and are in good working order.
Structural Integrity
Periodically inspect the enclosure for any signs of wear or damage, such as cracks in acrylic panels or loose fittings. Address these issues promptly to maintain the enclosure's effectiveness.
Temperature and Humidity Monitoring
Use a hygrometer and thermometer to check the humidity and temperature levels inside the enclosure. Keeping these within optimal ranges is essential for print quality and safety.
Electrical Safety
Ensure that all electrical components, such as lighting and heating elements, are properly insulated and secured. Regularly check for any frayed wires or loose connections.
Fire Safety
While enclosures can contain fires, it's best to prevent them:
- Use fire-resistant materials whenever possible.
- Keep a fire extinguisher nearby, just in case.
- Consider installing a smoke detector within or near the enclosure.
Emergency Preparedness
Have a clear plan for what to do in case of an emergency. This includes knowing how to quickly shut down the printer and ventilate the area if needed.
Follow these simple maintenance steps to ensure a safer 3D printing experience. Regular upkeep extends your enclosure's life and keeps 3D printing enjoyable, not worrisome.
FAQs About DIY 3D Printer Enclosure
Learn essential answers about DIY 3D printer enclosure setups. Get tips, materials, benefits, and troubleshooting advice for optimal printing results.
A DIY 3D printer enclosure is a homemade structure that surrounds your 3D printer. It helps maintain a consistent temperature, reduces noise, and can improve print quality by protecting the printer from drafts and dust. Enclosures can be made from various materials like wood, acrylic, or even repurposed furniture.
Building an enclosure can enhance your 3D printing experience by:
Stabilizing temperature: This is crucial for printing with materials like ABS that can warp due to temperature changes.
Reducing noise: Enclosures can dampen the sound of your printer, making it less disruptive in shared spaces.
Improving safety: Enclosures contain fumes and particles that some materials emit during printing, which can be harmful if inhaled.
You can build a cost-effective enclosure by repurposing furniture or using affordable materials. For example, an IKEA Lack table can be transformed into an enclosure with acrylic panels and 3D printed brackets to hold everything together. This approach is popular for its simplicity and low cost.
When designing your enclosure, consider including:
Ventilation: To handle fumes and maintain air quality.
Filtration: To capture fine particles and potentially harmful emissions.
Lighting: To help you monitor your prints.
Access door: For easy printer operation and maintenance.
Yes, if DIY isn't your thing, there are ready-made enclosures available for purchase. These come in various sizes and feature different materials to suit your needs and budget. Some popular options include the Official Creality Enclosure and the Wham Bam HotBox V2.
Final Thoughts
In conclusion, building a DIY 3D printer enclosure is a practical way to enhance your printing experience. It helps protect your prints from dust and temperature fluctuations, ensuring better quality results. With a few simple materials and steps, you can build an effective enclosure that meets your needs.


