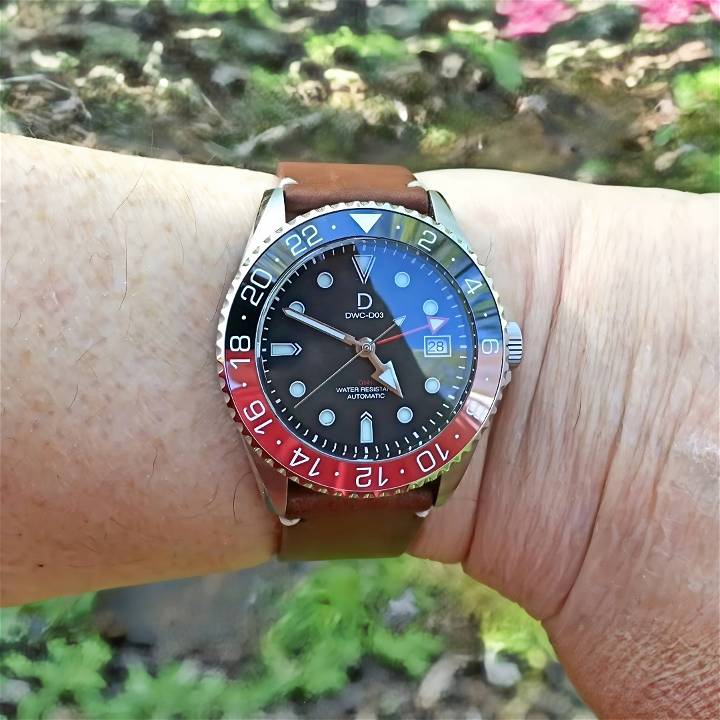
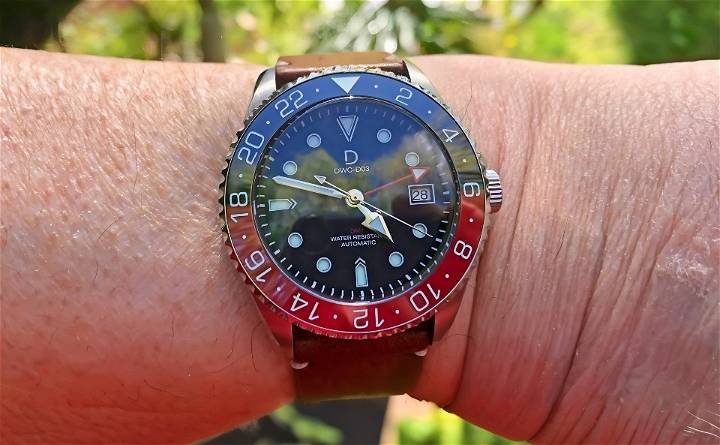
As someone who has always been fascinated by the intricacy and beauty of watches, I found myself diving headfirst into the world of DIY watches. Initially, the thought of assembling a watch from scratch sounded daunting. Like many others, I feared the complexity and the precision required in watchmaking. However, my perspective changed when I encountered the DIY Watch Club, a platform that caters specifically to enthusiasts keen on crafting their own timepieces. This is my journey in building a GMT watch, swayed by the promise of a guided adventure into watchmaking.

Why DIY Watch Club?
My interest was piqued after learning about the wide range of watchmaking kits available from the DIY Watch Club. This platform isn't just a marketplace for watch parts; it's a comprehensive toolkit designed for beginners and seasoned watch enthusiasts alike. Armed with curiosity and a bit of skepticism, I decided to try my hand at assembling a GMT watch.
Unboxing the Kit
Upon receiving my watchmaking kit, my initial skepticism was replaced with excitement. The kit was well-organized, containing every tool and component necessary for assembling a GMT watch. The materials included were:
- A watch case
- A movement (the heart of the watch)
- Bezel inserts for customization
- Dial
- Watch hands (with spares, thankfully)
- Standard and rubber straps
- An assortment of watchmaking tools
Every item had its place, and the quality immediately stood out. The fact that spare hands were included was a relief, acknowledging upfront the reality of beginner's errors.
Step-by-Step Assembly
Learn how to build your own DIY watch step-by-step with this assembly guide. From disassembling the case to installing the movement, we've got you covered.
Preparing the Workspace
Before diving into the assembly, I prepared my workspace, ensuring it was clean, well-lit, and free from potential distractions. I laid out the tools and components, double-checking against the kit's inventory. This preparatory step is crucial for a smooth experience.
Disassembling the Case
The first step involved disassembling the watch case to insert the movement. This required careful use of the provided tools to remove the crown and open the case back. It was a delicate process that demanded patience and precision.
Installing the Movement
Installing the movement was a thrilling step; it's where the watch begins to come alive. Handling the movement required a steady hand and focused attention, making sure it was properly seated and secured within the case.
Attaching the Dial and Hands
Attaching the dial and then the hands was, for me, the most challenging yet rewarding part of the process. The dial went on first, followed by the hand's GMT, hour, minute, and finally, the second hand. Ensuring the hands were properly aligned and securely fitted tested my patience and dexterity. It was a meticulous task that involved using tweezers and specialized tools to place and press the hands onto the movement.
Final Steps: Bezel Insert and Straps
The final steps involved attaching the bezel insert, which required a steady hand to align properly, and then choosing and fitting a strap. Opting for the rubber strap first, its flexibility and durability seemed fitting for a watch I built myself.
What I Learned
This hands-on experience offered more than just the satisfaction of assembling a watch; it provided invaluable insights into the precision, craftsmanship, and dedication inherent in watchmaking. It instilled a deeper appreciation for the art and the professionals who master it.
The Result
The finished product was a fully functional GMT watch, uniquely mine in every aspect. Holding the watch, knowing every piece and part that went into its assembly, was incredibly fulfilling. While it might not compete with luxury brands in terms of sophistication or materials, it stands unparalleled in sentimental value and personal accomplishment.
Would I Recommend DIY Watch Club?
Absolutely. Whether you're a watch enthusiast curious about the mechanics behind your timepieces or someone looking for a meaningful project, the DIY Watch Club offers an engaging and educational experience. The step-by-step guidance alleviates the fear of complexity, making watch assembly accessible to novices and providing a platform for more experienced enthusiasts to experiment and customize.
Crystal Upgrades: Enhancing Clarity and Durability
The watch crystal, that transparent cover protecting the dial, plays a crucial role in both aesthetics and functionality. Let's delve into crystal upgrades to elevate your watch experience.
Sapphire Crystals
- What Is Sapphire?: Sapphire crystals are made from synthetic sapphire, a crystalline form of aluminum oxide. They are incredibly hard, ranking 9 on the Mohs scale (just below diamonds). This hardness makes them highly scratch-resistant.
- Clarity and Transparency: Unlike mineral glass, sapphire crystals offer exceptional clarity. They don't distort the view of the dial, allowing you to appreciate every detail. Whether you're admiring the intricate movement or checking the time, sapphire provides a crystal-clear window.
- Anti-Reflective Coatings: Many sapphire crystals come with anti-reflective coatings. These coatings minimize glare and reflections, especially in bright sunlight or under artificial lighting. Your watch face remains legible from all angles.
- Durability: Sapphire is tough. It can withstand accidental bumps, scrapes, and everyday wear. If you're an active watch wearer, sapphire is your ally.
Double-Domed Crystals
- Vintage Charm: Double-domed crystals have a gentle curvature, reminiscent of classic dive watches from the mid-20th century. They add depth and character to the watch face. Imagine the warm glow of a vintage timepiece—the double dome contributes to that nostalgic appeal.
- Visual Impact: The slight bulge builds visual interest. It catches light differently, emphasizing the dial and hands. Whether you're going for a retro vibe or a unique modern look, a double-dome crystal delivers.
Installation Considerations
- Professional or DIY?: While some watch enthusiasts confidently replace crystals themselves, others prefer professional installation. If you're new to watch modding, seek guidance or have a skilled watchmaker handle the upgrade.
- Compatibility: Ensure the replacement crystal fits your watch case. Measure the diameter and thickness accurately. Some watches have specific crystal shapes (like domed or flat), so choose accordingly.
- Gasket Replacement: When changing the crystal, consider replacing the gasket (the rubber or nylon ring that seals the crystal). A fresh gasket ensures water resistance.
Remember, upgrading your watch crystal is like giving it new eyes. Choose wisely, and your watch will thank you with improved aesthetics and longevity.

Final Thoughts
Building a watch from a kit might not be for everyone, but for those inclined, it's an enriching journey that combines creativity, patience, and learning. The DIY Watch Club not only demystifies watchmaking but also celebrates it, allowing anyone to partake in this ancient craft. Through this process, I've gained not just a timepiece, but a story, a slice of watchmaking culture, and the confidence to explore further. If you're on the fence about trying it, my advice is simple: go for it. The experience is as rewarding as the watch you'll end up holding.


