When I first decided to build my own PC, I was overwhelmed by the sheer amount of information and choices available. Like many first-time builders, I feared doing something wrong and damaging the components. But, after diving in and educating myself, building a PC turned from a daunting task into an enlightening experience.
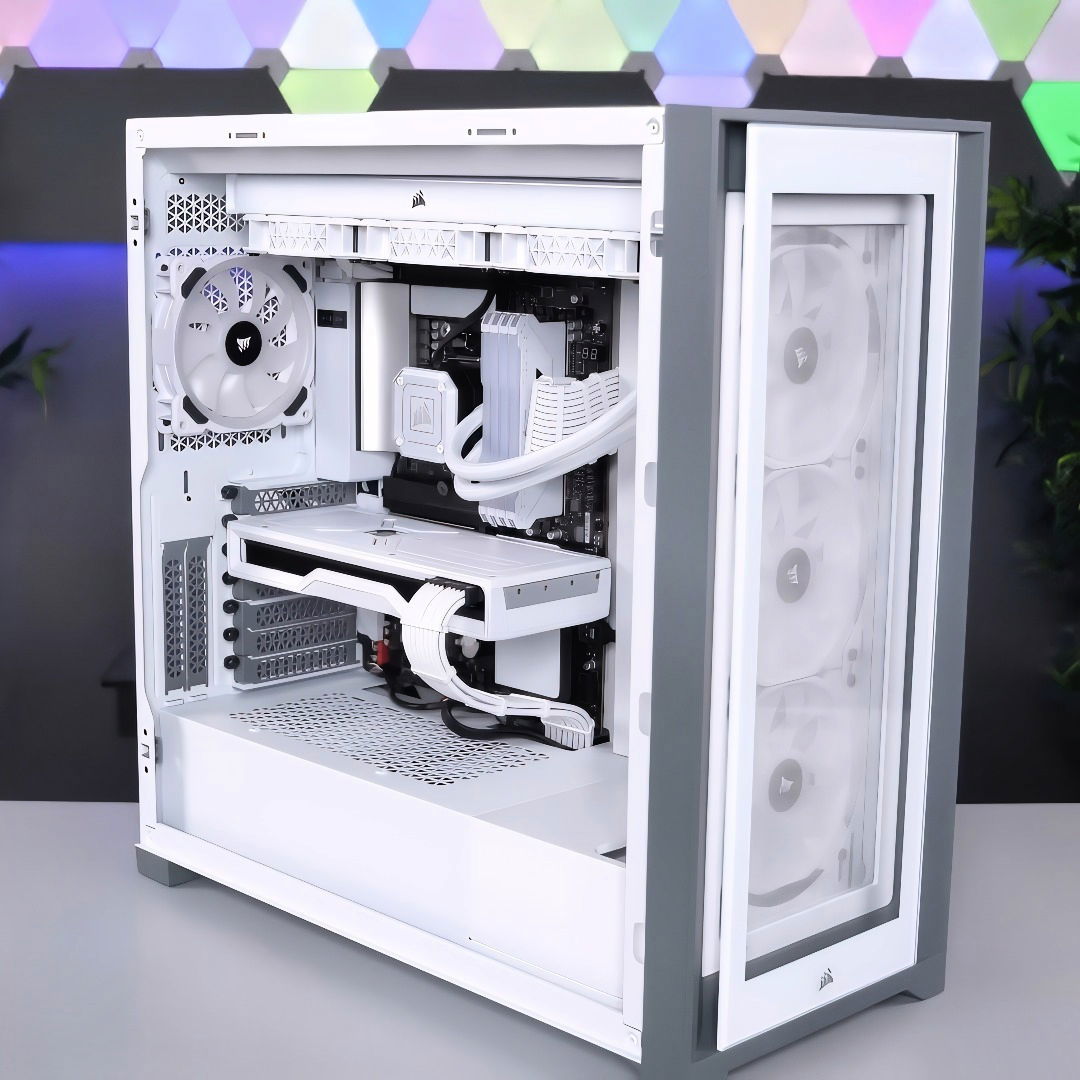
I'm here to guide you through it just as I found my way, using plain and simple language to ensure you don't feel overwhelmed by the tech jargon.
What You Need to Get Started
Before you jump into the actual building process, gathering the right components and understanding their functions is crucial. Here's what you need and why it's important:
Central Processing Unit (CPU)
- The CPU is the brain of the computer. It processes instructions sent to it by various programs and will dictate the overall speed of your computer.
Motherboard
- Think of the motherboard as the nervous system of your PC. It connects and allows communication between all the components.
Random Access Memory (RAM)
- RAM provides space for your computer to read and write data, which is crucial for operating multiple applications smoothly.
Storage Drives (SSD or HDD)
- This is where your data, including the operating system and applications, is stored.
Power Supply Unit (PSU)
- Supplies power to all components of the PC. It's critical to ensure stability and performance.
Graphics Processing Unit (GPU) (optional for non-gaming PCs)
- Provides the images you see on your monitor. It's essential for gaming PCs to handle complex graphics.
PC Case
- Protects and holds all of your components together in an organized way.
CPU Cooler
- Maintains the temperature of the CPU to prevent overheating, which can lead to performance issues and damage.
Thermal Paste
- Facilitates effective heat transfer from the CPU to the cooler.
Tools: Phillips-head screwdriver
- Essential for screwing in parts and securing components.
Step by Step Instructions
Discover easy, step-by-step instructions to build a computer from scratch. Learn how to install components and configure bios settings effortlessly!
Step 1: Prepare the Workspace
Find a clean, stable surface to work on. Ideally, a non-static surface like wood is best. Static can damage sensitive parts.
- Tip: Use a magnetic tray to keep screws organized and avoid losing them.
Step 2: Install the CPU
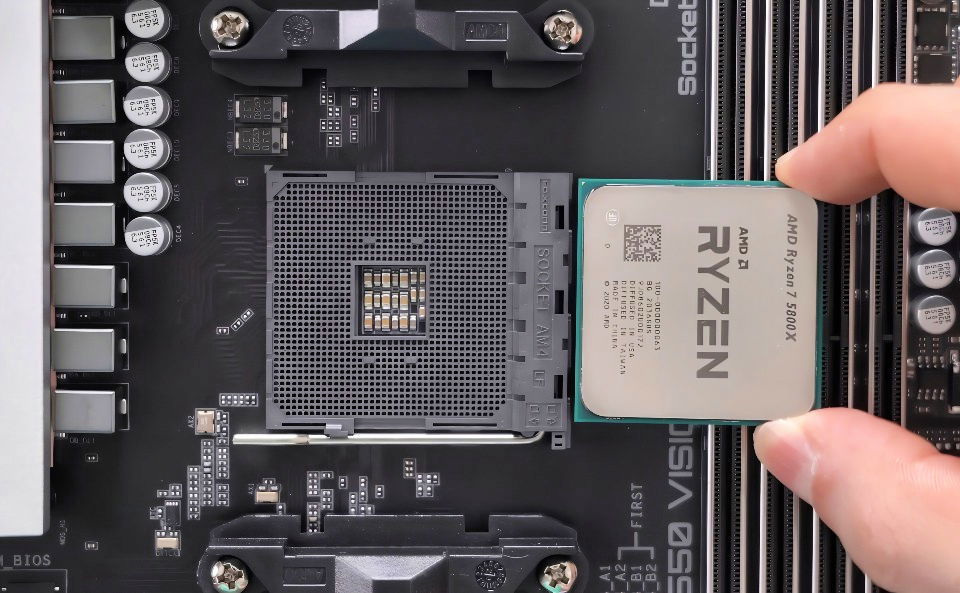
- Unbox the CPU Carefully: Hold the CPU by its edges.
- Align the CPU: Find the golden triangle on the corner of the CPU. Match it with the triangle on the motherboard socket.
- Install: Gently place the CPU onto the socket. Do not force it.
Step 3: Install the CPU Cooler
If your cooler has pre-installed thermal paste, move to installation. If not, apply a pea-sized dot of thermal paste on the CPU.
- Secure the Cooler: Attach the cooler over the CPU and secure it with screws.
Step 4: Install RAM
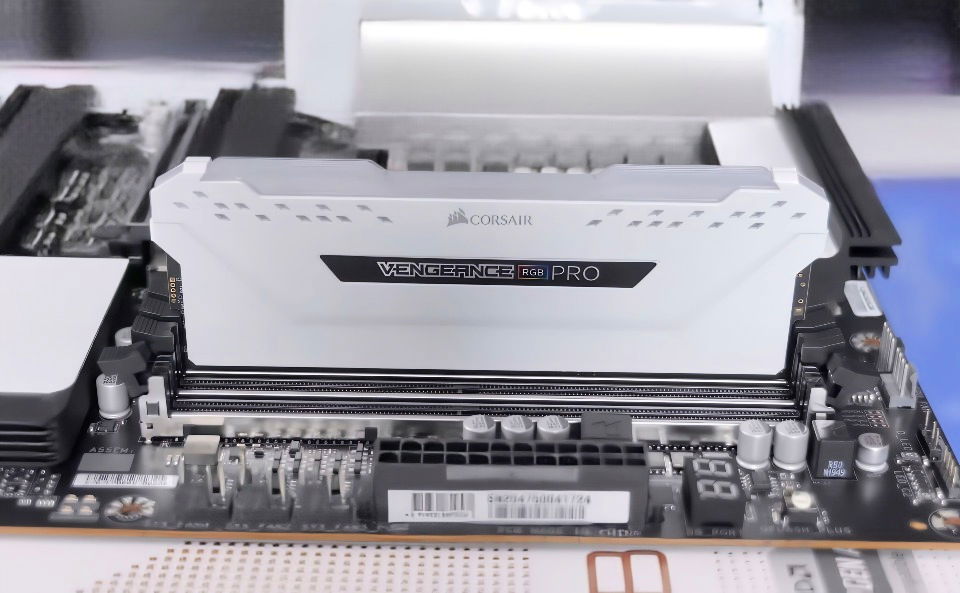
Refer to your motherboard's manual to find out which slots to use for dual or single channel setup.
- Align and Insert: Match the notch on the RAM stick with the slot on the motherboard and press gently until it clicks.
Step 5: Install Storage Drives
Depending on whether you have an SSD or HDD (or both), find the appropriate slot or tray.
- Screw in Place: Ensure the drives are firmly secured in their bay or on the motherboard.
Step 6: Mount the Motherboard in the Case
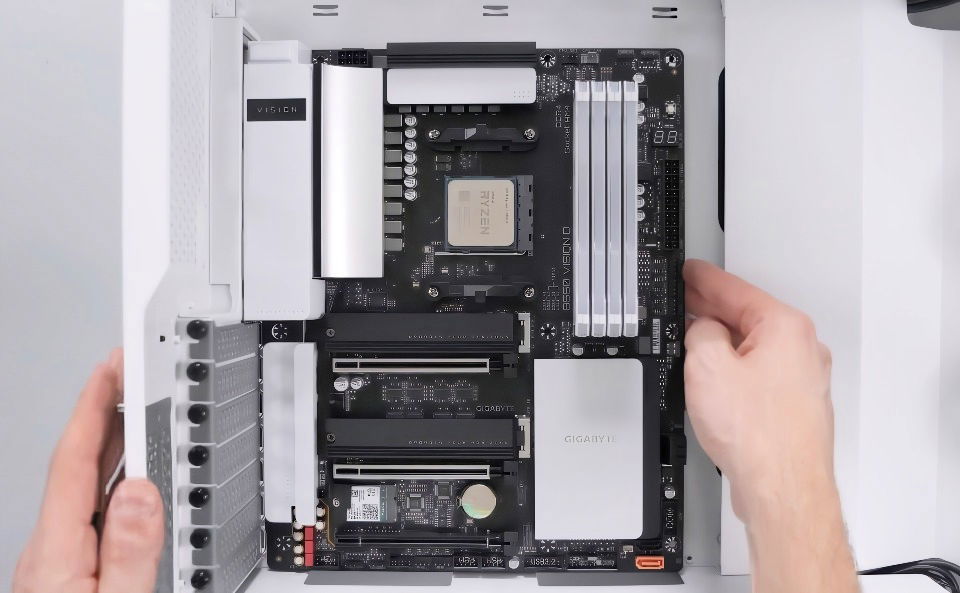
Ensure that all necessary standoffs are in place before you start.
- Secure it: Carefully place the motherboard inside the case and screw it in.
Step 7: Install the Power Supply
- Align it with the Exhaust Vent: Place it in the designated chamber of the PC case, usually at the bottom or top.
Step 8: Connect Power and Data Cables
- 24-Pin Connector: Connect this from the PSU to the motherboard.
- EPS 8-Pin Connector: Powers the CPU, connect it to the designated port on the motherboard.
- SATA Power Connectors: Connect these to your storage devices.
- PCIe Cables: Needed for the GPU (if applicable).
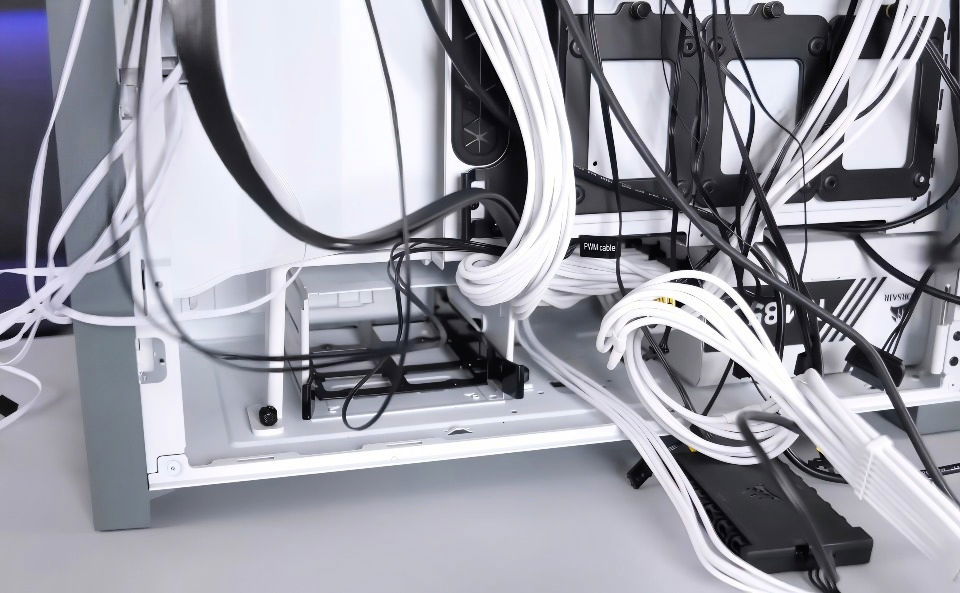
Step 9: Install the GPU (if necessary)
- Align with the PCIe Slot: Insert the GPU into the top PCIe x16 slot and secure it with screws on the bracket.
Step 10: Install and Connect Fans
Fans help with cooling and airflow. Install them in designated slots in the case, such as the front, back, or top.
- Connect to Motherboard or Fan Hub: Use fan headers on the motherboard or a hub for powered fan management.
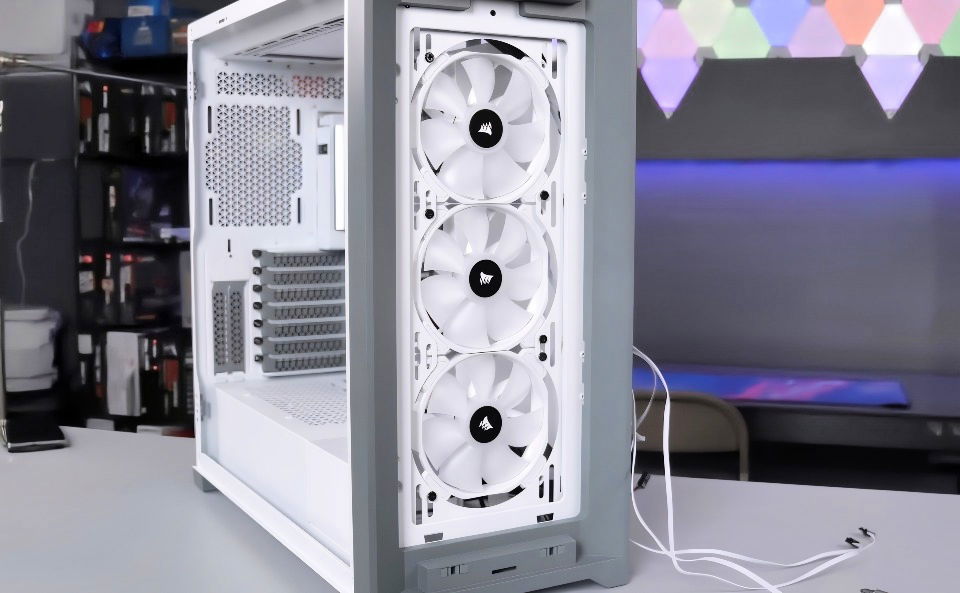
Step 11: Connect Front Panel Connectors
Your case has connectors for USB ports, power button, etc. Align them with the headers on the motherboard according to the manual.
Booting Up and First-Time Setup
Get your pc ready with our guide to booting up and first-time setup: install operating system, drivers, enable xmp, configure bios, and more.
Step 12: Install Operating System
Insert the bootable USB with your desired operating system into a USB port.
- Boot Installation: Power up the PC and enter BIOS by pressing a key such as F2 or Delete while booting up. Select the USB drive as the boot device.
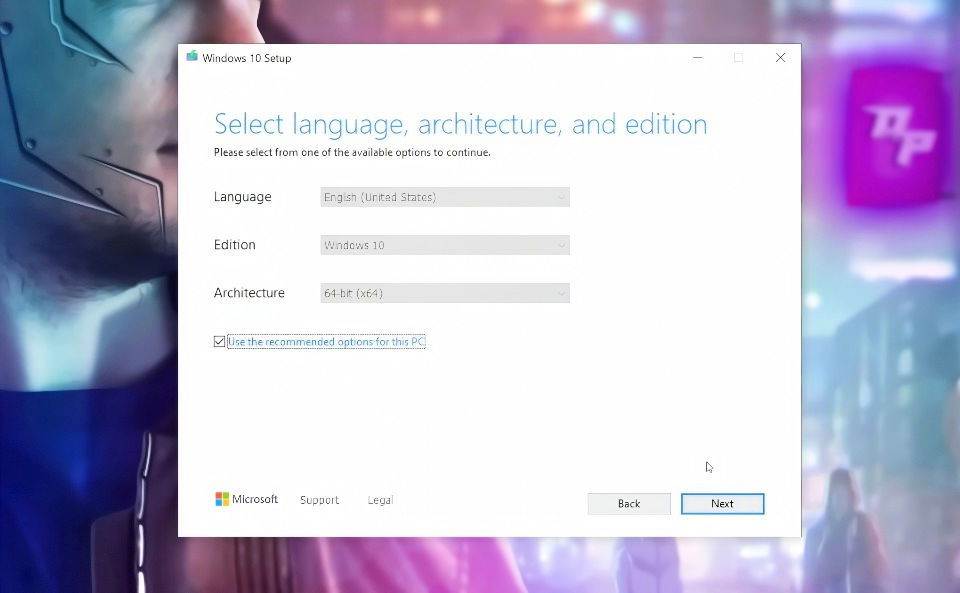
Step 13: Install Drivers
Install drivers from the motherboard's website using a different PC if needed. Transfer them via USB and install them on your new system.
Step 14: Enable XMP and Configure BIOS Settings
Enabling XMP in BIOS optimizes RAM performance.
- Access BIOS: Again, boot up and press the BIOS key.
- Find XMP Profile: Usually found under overclock settings. Enable it for your RAM to run at full potential.
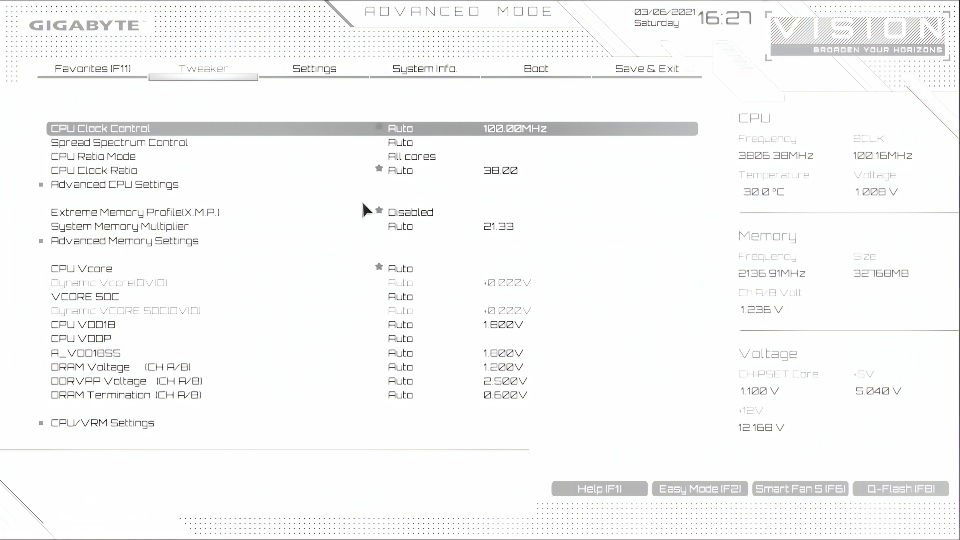
Step 15: Finishing Touches
- Cable Management: Ensure the inside of your case is tidy for optimal airflow and aesthetics.
- Install Essential Software: Anti-virus, browsers, favorite apps, etc.
Troubleshooting Common Issues
Building a computer can be a rewarding experience, but sometimes things don't go as planned. Here are some common issues you might encounter and how to troubleshoot them.
Computer Won't Turn On
- Check Power Connections: Ensure all power cables are securely connected. This includes the main power cable to the motherboard and the power supply unit (PSU) switch.
- Test the Power Supply: Use a PSU tester or swap with a known working PSU to check if the power supply is faulty.
- Inspect the Power Button: Make sure the power button on the case is connected to the motherboard correctly.
No Display on Monitor
- Verify Monitor Connection: Ensure the monitor is connected to the correct port on the graphics card or motherboard.
- Check Graphics Card: Make sure the graphics card is seated properly in its slot. If possible, test with another graphics card.
- Reset BIOS/UEFI: Clear the CMOS by removing the battery on the motherboard for a few minutes, then replace it.
Computer Freezes or Crashes
- Check for Overheating: Ensure all fans are working and the cooling system is properly installed. Clean any dust from the components.
- Run Memory Tests: Use tools like MemTest86 to check for faulty RAM.
- Update Drivers: Ensure all drivers, especially for the graphics card and motherboard, are up to date.
Slow Performance
- Check for Background Processes: Use Task Manager to identify and close unnecessary programs running in the background.
- Upgrade Components: Consider upgrading the RAM or switching to a solid-state drive (SSD) for better performance.
- Run Disk Cleanup: Use built-in tools to clean up temporary files and free up disk space.
USB Ports Not Working
- Restart the Computer: Sometimes a simple restart can fix USB port issues.
- Reinstall USB Drivers: Go to Device Manager, uninstall the USB drivers, and restart the computer to reinstall them automatically.
- Disable USB Selective Suspend: In Power Options, disable the USB selective suspend setting to prevent power-saving issues.
Network Connectivity Issues
- Check Network Cables: Ensure all Ethernet cables are securely connected.
- Reset Network Settings: Use the network troubleshooter in Windows or reset network settings in your operating system.
- Update Network Drivers: Ensure the network adapter drivers are up to date.
Fixing common computer issues is easy with the right steps. Follow these tips for a smooth experience. If problems continue, seek professional help.
FAQs About Building a Computer
Discover essential faqs about building a computer, from choosing components to assembly tips. Perfect for beginners and DIY enthusiasts.
To build a computer, you need several key components:
Central Processing Unit (CPU): The brain of your computer.
Motherboard: The main circuit board that connects all components.
Memory (RAM): Temporary storage for data being used by the CPU.
Storage (HDD/SSD): Long-term storage for your files and operating system.
Power Supply Unit (PSU): Provides power to all components.
Graphics Processing Unit (GPU): Handles rendering images and videos (optional for non-gaming PCs).
Case: Encloses and protects all components.
Cooling System: Keeps your components from overheating.
These components are the foundation of any computer build.
Choosing the right components depends on your needs and budget:
Purpose: Determine if you need a gaming PC, a workstation, or a general-use computer.
Compatibility: Ensure all components are compatible with each other. For example, the CPU must fit the motherboard socket.
Budget: Set a budget and prioritize components based on your needs. For gaming, invest more in the GPU; for multitasking, prioritize RAM and CPU.
Future-proofing: Consider components that will remain relevant for a few years.
Research and compare different brands and models to find the best fit for your build.
If your computer doesn't start, try these troubleshooting steps:
Check power connections: Ensure all cables are securely connected.
Inspect components: Make sure the CPU, RAM, and GPU are properly seated.
Listen for beeps: Many motherboards emit beep codes to indicate issues. Refer to the motherboard manual for details.
Test with minimal setup: Remove non-essential components and try to boot with just the CPU, RAM, and motherboard.
Consult forums and guides: Online communities and guides can provide solutions for common issues.
If problems persist, you may need to consult a professional.
To install an operating system (OS) on your new computer, follow these steps:
Build a bootable USB drive: Download the OS installation file (e.g., Windows, Linux) and use a tool like Rufus to build a bootable USB drive.
Insert the USB drive: Plug the bootable USB drive into your computer.
Enter BIOS/UEFI: Restart your computer and press the key (usually F2, F12, DEL, or ESC) to enter the BIOS/UEFI settings.
Set boot priority: Change the boot order to prioritize the USB drive.
Install the OS: Follow the on-screen instructions to install the OS on your storage drive.
Install drivers: After the OS installation, install necessary drivers for your hardware components.
This process will get your computer up and running with a fresh OS.
Regular maintenance and cleaning can extend the life of your computer:
Dust removal: Use compressed air to blow out dust from fans, vents, and components.
Cable management: Keep cables organized to improve airflow and reduce clutter.
Software updates: Regularly update your OS and software to ensure security and performance.
Check for malware: Use antivirus software to scan for and remove malware.
Monitor temperatures: Use software to monitor component temperatures and ensure they are within safe limits.
Performing these tasks regularly will keep your computer running smoothly.
Final Words of Wisdom
Building your first PC may seem intimidating, but the joy of having a machine personalized to your needs is unmatched. Be patient, follow the steps carefully, and don't hesitate to ask for help or refer to extra resources like online forums or specific component manuals.
With everything set, turn on your machine and dive into the world of productivity, creativity, or gaming like never before. Trust in the architecture you've built and enjoy the fruits of your labor!


