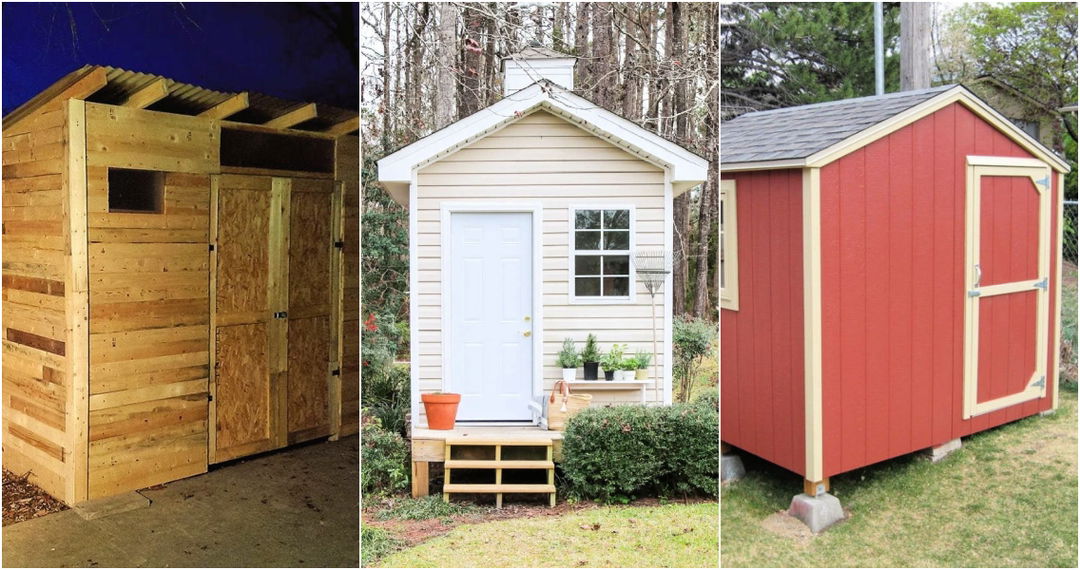
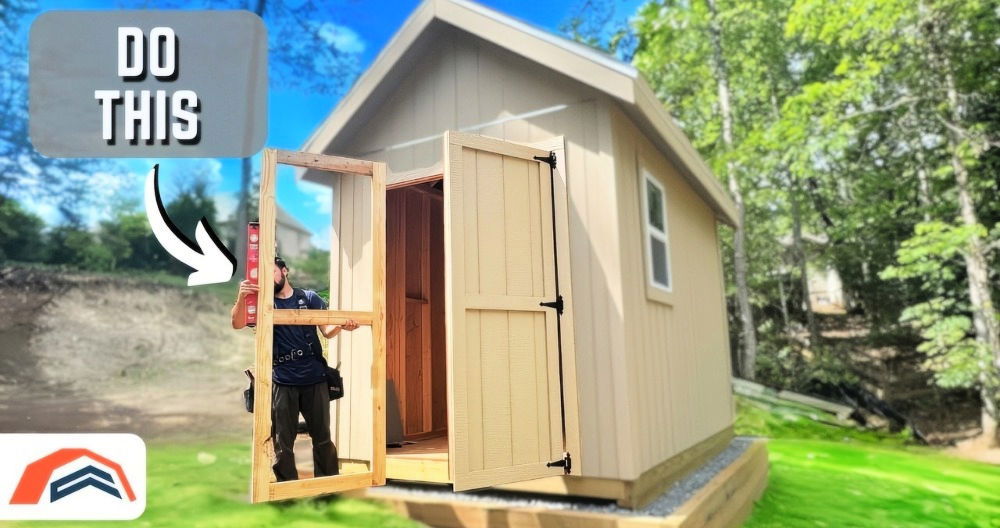
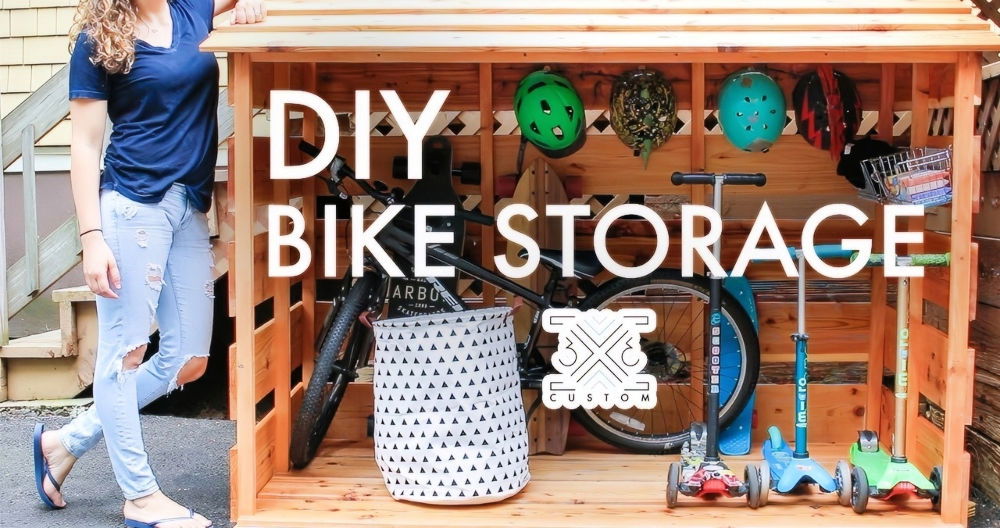
Building a DIY she shed can be an exciting project that adds a unique space to your home. This special retreat allows you to focus on hobbies, work, or simply unwind. With the right tools and guidance, you can design a relaxing spot just for you. From choosing the perfect location to selecting materials, each step plays a crucial role in making your she shed truly yours.
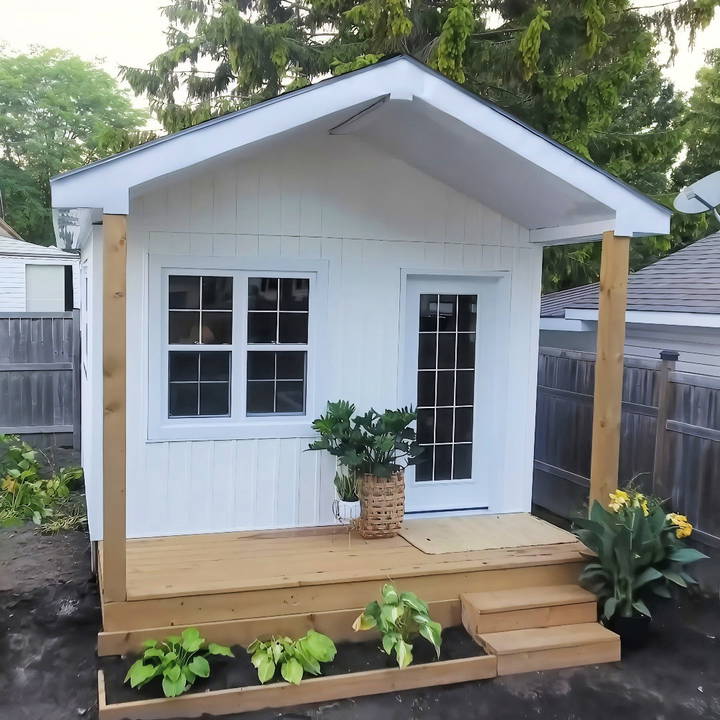
Why I Chose a 12x12 Backyard Package from Home Hardware
I've always been a hands-on person. I love working with tools, learning new skills, and the sense of accomplishment that comes with completing a project. When I started looking into making my own She Shed, I stumbled upon Home Hardware's backyard packages. These packages were incredibly appealing because they came with all the materials I needed, plus detailed plans. I went for one of their "funky builds" because it had a unique look that resonated with my style. The 12x12 size felt just right—not too big to overwhelm me, yet spacious enough to house all my creative ideas.
My Tips on Choosing the Right Package:
- Consider Your Purpose: Think about how you'll use the space. Will it be a home office, an art studio, or just a place to relax? Your intended use will help guide your choice.
- Look at Different Styles: Home Hardware has various packages, from classic to more modern designs. Choose one that aligns with your vision.
- Evaluate the Size: A 12x12 was perfect for me, but if you need more room for, say, a workshop or multiple activities, consider going larger.
Step by Step Instructions
Transform your space with our DIY she-shed guide! Follow step-by-step instructions from foundation to furnishing for your perfect retreat.
Step 1: Laying the Foundation
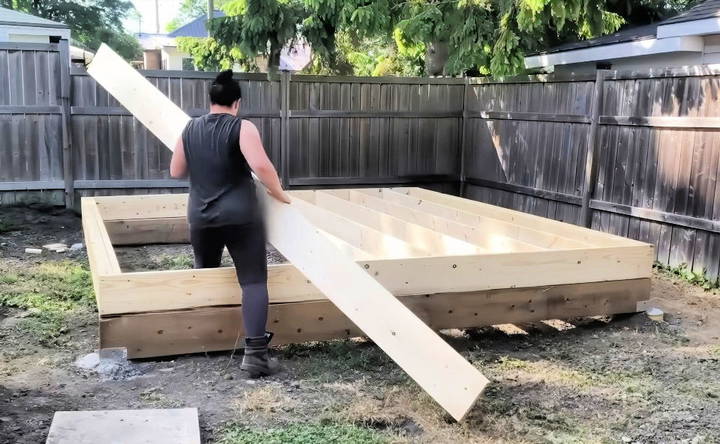
The foundation is literally where everything begins. I opted for a solid gravel base for my She Shed, as it provided stability and good drainage. I highly recommend taking time with this step, as a well-laid foundation ensures the longevity and durability of the shed.
- Experience Tip: Make sure your foundation is level. I used a laser level to make sure everything was perfectly flat. It saved me so much hassle later on.
Step 2: Building the Frame
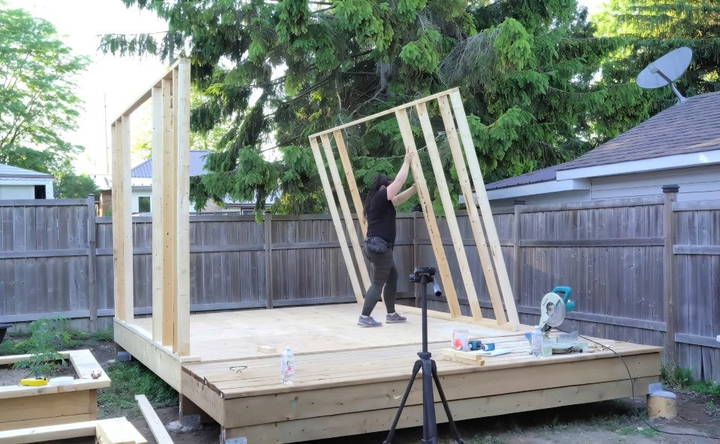
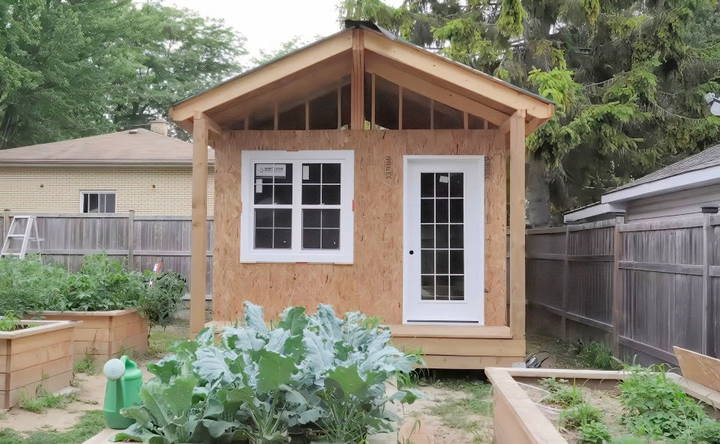
With the foundation set, the next step was framing the walls. This is where the shed starts to take shape. It's also the stage where you can really see your vision come to life. The plans from Home Hardware made this step straightforward. They included clear instructions on where each wall stud should go, which was incredibly helpful for a novice like me.
- Experience Tip: Don't rush this part. Make sure each piece of lumber is cut precisely. I learned the hard way that even a small mistake can cause problems later on.
Step 3: Installing the Roof
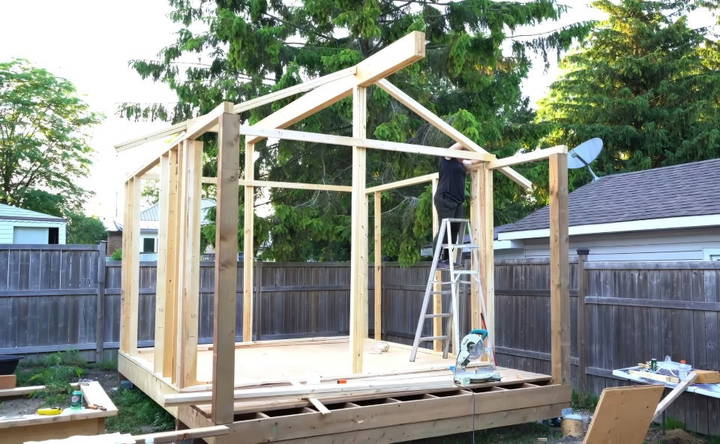
Installing the roof was both a challenging and exciting step. I chose a simple gable roof design, which is relatively easy for beginners to handle. The kit included all the necessary trusses, and while they were heavy, I managed to get them up there with a bit of ingenuity (and a lot of patience).
- Experience Tip: If you're doing this alone, consider renting or borrowing some scaffolding. It's a safer and more efficient way to get up high without having to balance precariously on a ladder.
Step 4: Windows and Doors – Let There Be Light!
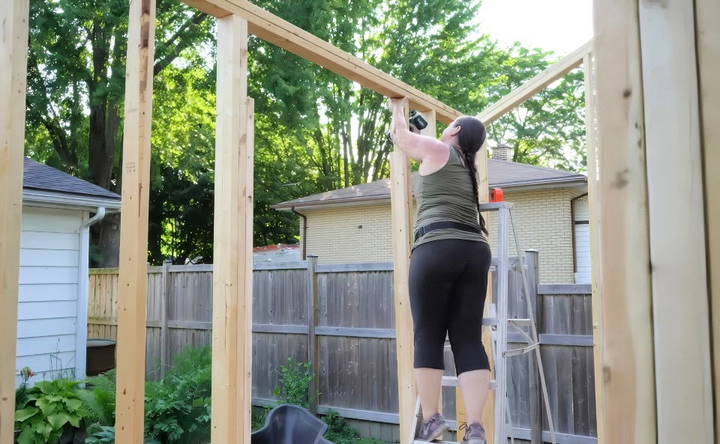
I was most excited about this step because adding windows and doors truly makes the space feel like a room rather than just a wooden structure. I wanted a lot of natural light, so I chose large windows that would flood the space with sunlight.
- Experience Tip: Invest in quality windows and doors. They not only provide better insulation but also add to the aesthetic of the shed. Plus, the installation plans provided by Home Hardware were foolproof!
Personalizing the Interior: Turning a Shed into a Studio
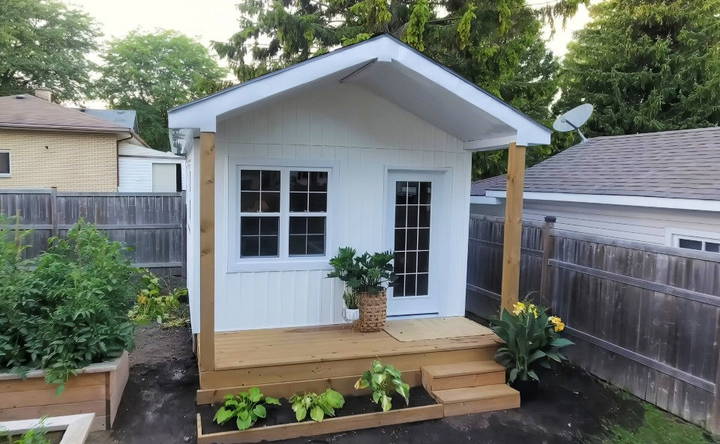
The exterior was complete, but the journey was far from over. The next challenge was to transform this wooden box into a cozy, inspiring studio.
Step 5: Insulating and Paneling
Insulation was a must for me, as I wanted to use this space year-round. I used a combination of foam board insulation and traditional fiberglass rolls to ensure maximum warmth during winter and a cool retreat in the summer. After insulating, I added shiplap paneling to the interior walls, which gave the space a charming, rustic feel.
- Experience Tip: Don't skimp on insulation. Even if you're on a budget, this is one area worth investing in for comfort and energy efficiency.
Step 6: Flooring and Lighting
I opted for a warm-toned vinyl plank flooring that's easy to clean and maintain. For lighting, I installed a mix of overhead lights and wall sconces to build a flexible and cozy atmosphere. Being able to control the lighting according to my needs—whether I'm filming a video or painting—has been a game-changer.
- Experience Tip: Layer your lighting. Different tasks require different lighting, and having multiple options allows you to customize your environment based on what you're doing.
Step 7: Furnishing the Space
I wanted my studio to be a place where creativity and productivity could flourish. I added a large workbench, some comfy chairs, and plenty of shelves for storage. Every piece of furniture was selected with intention, ensuring it not only served a functional purpose but also contributed to the overall aesthetic of the room.
- Experience Tip: Think vertical for storage. Shelves and wall-mounted organizers free up floor space, making a small area feel much larger and less cluttered.
Creative Themes and Styles
Building a she shed is a wonderful opportunity to express your personal style and creativity. Here are some popular themes and styles to inspire you:
Rustic Charm
A rustic she shed embraces natural materials and a cozy, country feel. Use reclaimed wood for the walls and floors. Add vintage furniture and soft, earthy colors. Decorate with items like old lanterns, woven baskets, and handmade quilts. This style is perfect for those who love a warm, inviting space.
Modern Minimalist
For a sleek and contemporary look, go for a modern minimalist style. Choose clean lines, neutral colors, and simple furniture. Use materials like metal, glass, and polished wood. Keep decorations minimal, focusing on a few statement pieces. This style is ideal for those who prefer a clutter-free, elegant space.
Bohemian Bliss
A bohemian she shed is all about vibrant colors, eclectic decor, and a relaxed vibe. Mix and match patterns and textures. Use colorful rugs, cushions, and wall hangings. Add plants, fairy lights, and unique, handmade items. This style is great for those who love a free-spirited, artistic space.
Vintage Elegance
For a touch of nostalgia, build a vintage she shed. Use antique furniture, lace curtains, and pastel colors. Decorate with old photographs, vintage mirrors, and delicate china. This style is perfect for those who appreciate the charm and elegance of bygone eras.
Coastal Retreat
Bring the beach to your backyard with a coastal-themed she shed. Use light, airy colors like white, blue, and sandy beige. Incorporate natural materials like driftwood and seashells. Decorate with nautical items like ropes, anchors, and marine art. This style is ideal for those who love the sea and want a relaxing, beachy escape.
Garden Oasis
Turn your she shed into a garden oasis by surrounding it with plants and flowers. Use natural materials like stone and wood. Add large windows to let in plenty of light. Decorate with botanical prints, garden tools, and outdoor furniture. This style is perfect for those who love nature and gardening.
Artistic Studio
If you're an artist, consider turning your she shed into a creative studio. Use bright, inspiring colors and plenty of storage for your supplies. Add a large worktable and comfortable seating. Decorate with your artwork and inspirational quotes. This style is ideal for those who need a dedicated space for their creative pursuits.
Cozy Reading Nook
For book lovers, a cozy reading nook is a dream come true. Use soft, comfortable furniture and warm lighting. Add plenty of bookshelves and a small table for your tea or coffee. Decorate with plush cushions, blankets, and personal mementos. This style is perfect for those who want a quiet, relaxing space to read and unwind.
By choosing a theme that resonates with you, you can build a she shed that is not only beautiful but also a true reflection of your personality.
Seasonal Maintenance Tips
Maintaining your she shed throughout the year ensures it remains a cozy and functional space. Here are some seasonal maintenance tips to keep your she shed in top shape:
Spring
- Inspect for Damage: Check for any damage caused by winter weather. Look for cracks, leaks, or any signs of wear and tear.
- Clean Gutters: Clear out any debris from gutters and downspouts to ensure proper drainage.
- Refresh Exterior: Repaint or touch up the exterior if needed. This helps protect the shed from the elements.
- Ventilation Check: Ensure that vents are clear and functioning to prevent moisture buildup.
Summer
- Pest Control: Inspect for pests such as insects or rodents. Seal any gaps or cracks to keep them out.
- Cooling Solutions: Consider adding fans or portable air conditioners to keep the shed cool during hot months.
- Garden Maintenance: Trim any overgrown plants or trees around the shed to prevent damage and improve aesthetics.
- Outdoor Furniture Care: Clean and treat any outdoor furniture to protect it from sun damage.
Fall
- Roof Inspection: Check the roof for any loose shingles or tiles. Repair any damage to prevent leaks during the rainy season.
- Seal Windows and Doors: Ensure that windows and doors are properly sealed to keep out drafts and moisture.
- Clean and Store Tools: Clean and store any gardening tools or equipment that won't be used during the winter.
- Leaf Removal: Regularly remove leaves and debris from around the shed to prevent moisture buildup and pests.
Winter
- Insulation: Add insulation to keep the shed warm and energy-efficient. This is especially important if you use the shed year-round.
- Heating Solutions: Consider portable heaters or electric heating options to maintain a comfortable temperature.
- Snow Removal: Regularly remove snow from the roof and around the shed to prevent structural damage.
- Check for Moisture: Inspect the interior for any signs of moisture or mold. Use a dehumidifier if necessary.
General Tips
- Regular Cleaning: Keep the shed clean and organized to prevent clutter and make maintenance easier.
- Safety Checks: Regularly check smoke detectors, carbon monoxide detectors, and fire extinguishers.
- Routine Inspections: Schedule regular inspections to catch any issues early and keep the shed in good condition.
By following these seasonal maintenance tips, you can ensure your she shed remains a comfortable and inviting space all year round.
FAQs About DIY She Sheds
Discover answers to common questions about DIY she sheds and get inspired to build your own tranquil retreat. Tips, ideas, and expert advice are included.
A she shed is a small, personalized space typically located in the backyard. It's designed for relaxation, hobbies, or as a quiet retreat. Building a she shed allows you to build a dedicated area for activities like reading, crafting, or even working from home. It's a great way to carve out personal space and add value to your property.
Before you start building, consider the following:
Purpose: Decide what you’ll use the shed for (e.g., office, art studio, yoga space).
Location: Choose a spot in your yard that is level and has good drainage.
Size: Determine the size based on your needs and local regulations. Common sizes are 10x12 feet.
Budget: Plan your budget, including materials, tools, and any professional help you might need.
Permits: Check if you need a building permit in your area.
Customization is where you can get creative:
Interior Design: Choose a theme or color scheme that reflects your style.
Furniture: Select functional furniture that fits your shed's purpose (e.g., desks, shelves, comfy chairs).
Lighting: Install good lighting, including natural light sources like skylights or large windows.
Decor: Add personal touches like artwork, plants, and cozy textiles.
To keep your she shed in good condition:
Regular Cleaning: Clean the interior and exterior regularly to prevent dirt and mold buildup.
Inspect for Damage: Check for any structural damage or leaks and repair them promptly.
Pest Control: Keep an eye out for pests and take measures to prevent infestations.
Weatherproofing: Ensure your shed is weatherproofed to withstand different seasons.
Yes, you can convert an existing shed into a she shed with some modifications:
Clean and Inspect: Start by cleaning out the shed and inspecting it for any damage or needed repairs.
Insulation: Add insulation to make the space comfortable year-round.
Electricity: Consider adding electrical wiring for lighting, heating, and any other electrical needs.
Interior Finishing: Finish the interior with drywall, paint, and flooring to make it cozy and inviting.
Decor and Furniture: Finally, decorate and furnish the space according to your needs and style.
Lessons Learned and Final Thoughts
This project has been one of the most fulfilling endeavors I've ever taken on. Not only did I end up with a beautiful studio space tailored to my needs, but I also gained a wealth of knowledge and confidence in my abilities. Here are a few final thoughts:
- Plan Ahead, But Be Flexible: Things don't always go as planned, and that's okay. Sometimes, those unexpected changes lead to even better outcomes.
- Don't Be Afraid to Ask for Help: While I prided myself on this being an all-woman build, there were moments when I needed advice or an extra pair of hands.
- Enjoy the Process: Building a She Shed isn't just about the end result; it's about the journey. Take time to savor each step, celebrate the small wins, and learn from the setbacks.
What's Next?
The interior of my She Shed is almost done, but there's still so much more I want to share about the process of styling and decorating it to fit my evolving needs. Stay tuned for the next phase of this project where I dive deeper into making the perfect ambiance, organizing the space efficiently, and maybe even adding some unique DIY furniture pieces.
Thank you to everyone who has supported me through this journey, especially Home Hardware for making such an empowering project possible. If you've been considering taking on a build like this, I hope my experience has given you the inspiration and confidence to go for it.


