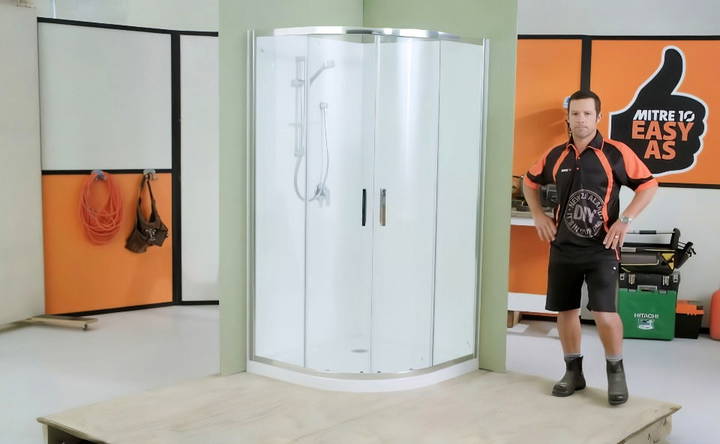
Upgrading an old shower has always been a goal of mine to refresh my bathroom and give it a modern touch. Despite feeling a bit daunted initially, I discovered that installing a new shower enclosure is actually something you can tackle on your own. The moment the thought crossed my mind, I decided to dive into this DIY project with a determined spirit. I chose the round Calais model for its sleek design and clear instructions.
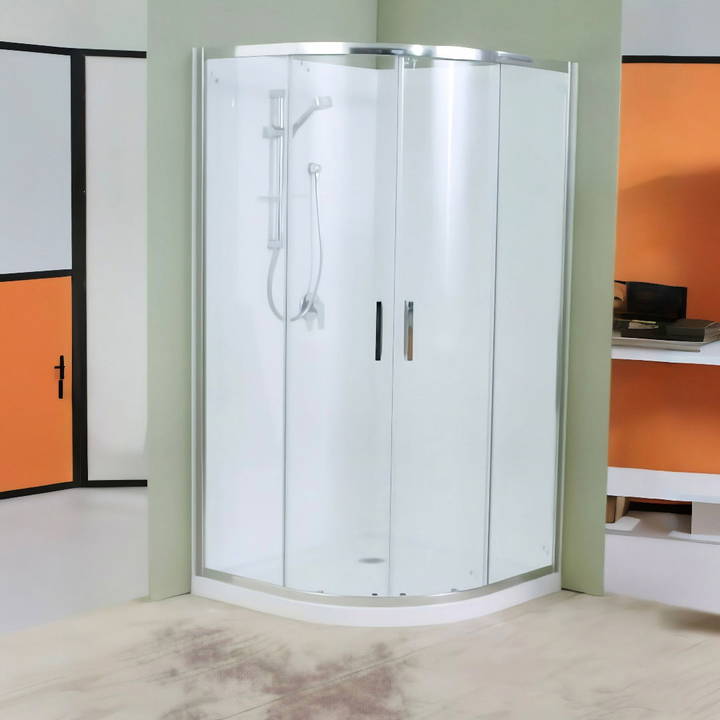
This guide will walk you through the step-by-step process of installing a shower enclosure, ensuring that you gain valuable insights and practical advice based on my personal experience. We'll cover everything you need to know about the project, from gathering materials to achieving that perfect fit. Let's get started!
Materials You'll Need
Before you kick off your project, it's crucial to have all the necessary materials on hand. Here's what you'll need and why:
- Shower Enclosure Kit: This is your primary material, and it includes the glass panels, door, tray, and necessary fittings. Make sure to follow the specific instructions included with your model.
- Shower Liner: Essential for preventing water damage and ensuring a watertight seal. Take it out and let it open up before use, as it can develop a memory from being stored in an awkward position.
- Silicon and Adhesive: These are key for sealing joints and securing parts together. Note that the Calais model comes with its own silicon and adhesive.
- Solid Timber: Needed for nogs and solid fixing frames to support the shower liner and door.
- Self-leveling Compound (if needed): This is critical for ensuring a level floor, especially in older homes.
- Tools: Utility knife, combination square, utility drill, tape measure, pencil, rubber hammer, and level.
- Protective Gear: Safety glasses, gloves, and sturdy footwear to keep you protected during installation.
Step by Step Instructions
Learn how to install a shower enclosure with our step-by-step guide. Prepare, install, and complete your project easily and efficiently.
Step 1: Preparing the Space
First, ensure the space where you're installing the new shower is ready:
- Check the Walls and Floor: Your walls should be plumb (straight and square), and your floor should be level. I had an older house, so I used a self-leveling compound to smoothen my floor.
- Remove Old Fixtures: Clear out any old fixtures or hardware from the space to make an empty slate. Keep any plumbing connections you may need.
Step 2: Install the Shower Tray
The shower tray sets the foundation for the entire unit. Here's how I did it:
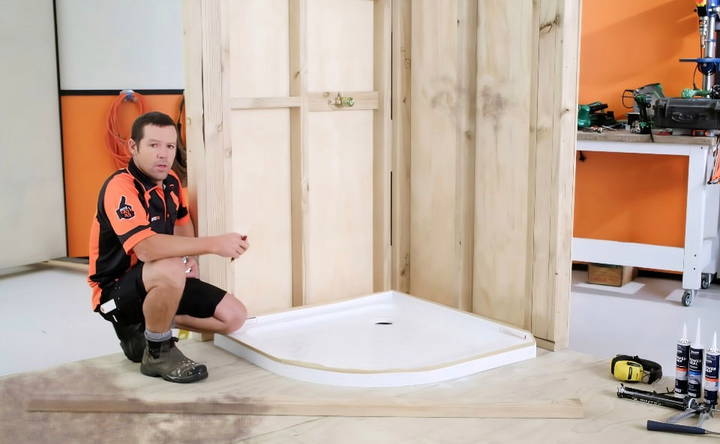
- Align the Waste Pipe: Position the shower tray and make sure the waste pipe lines up correctly. I had to adjust mine slightly for proper alignment.
- Cut Nogs for Wall Support: Nogs provide additional support for your wall board. I installed mine just above the tray.
- Check the Positioning: Ensure the tray is positioned where your shower door will start. In my case, it was 20 millimeters from the edge.
- Apply Silicon and Adhesive: I put some silicon on the bottom plate to act as a buffer, preventing squeaking when stepping on the tray. Then, I added adhesive to the feet of the tray before sliding it in place.
- Set and Leave for 24 Hours: Let the adhesive set for at least a day to ensure a firm foundation.
Step 3: Measure and Cut the Wall Board
Careful measurement and cutting are vital for a seamless installation:
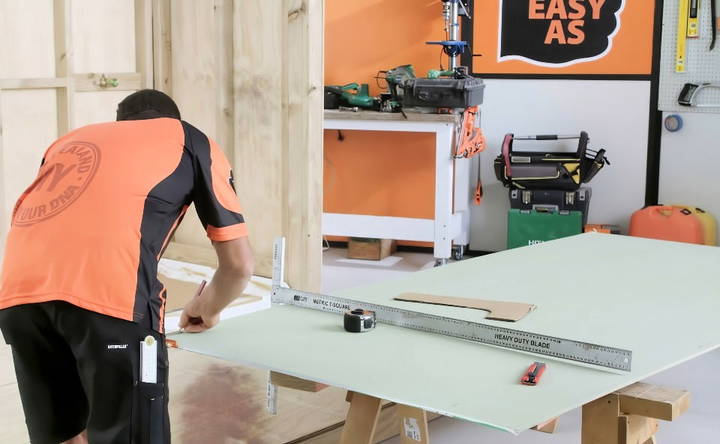
- Mark the Board: I measured my wall board to be 10 millimeters above the tray and floor. Using a combination square set to 105 millimeters, I marked and cut the needed sections.
- Make Cardboard Templates: For the corners, I used cardboard to trace and cut out the curves, ensuring they fit perfectly into the corners of the tray.
- Cut Plumbing Holes: After marking the positions of existing pipes, I used precise measurements to cut holes, double-checking against the mixer instructions to ensure accuracy.
Step 4: Installing the Wall Board and Liner
Securing the wallboard is crucial for the integrity of your shower's structure:
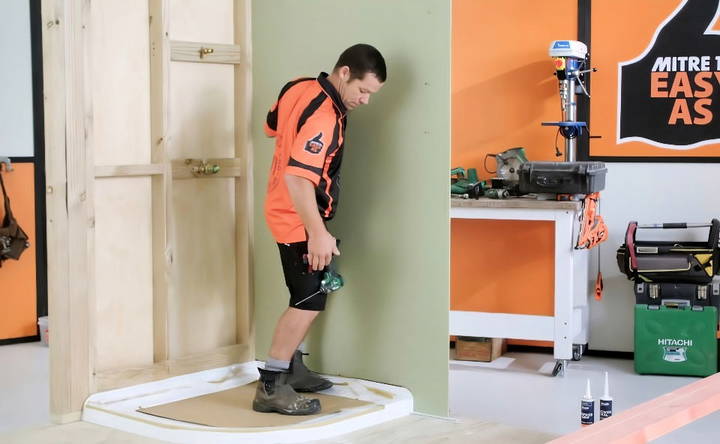
- Attach Wall Board: Using a utility drill and screws, I fixed the wall board to the nogs, ensuring a stable installation.
- Place Temporary Shower Liner: I draped the liner over the tray for a trial fit, checking for size accuracy and plumb alignment with the tray. This step is essential for identifying potential issues before permanent installation.
Step 5: Fit the Shower Liner
Once everything seemed accurate, it was time to secure the shower liner:
- Mark with a Pencil: I placed the liner into position and marked the edges with a pencil for adhesive placement.
- Apply Silicon and Adhesive: Following my pencil guide, I applied silicon and added strips of adhesive to secure the liner. The vertical adhesive lines allowed for proper gas escape during setting.
- Firmly Attach the Liner: Beginning with the corners, I pressed the liner into position and firmly smoothed it down to help the adhesive take hold.
Step 6: Assembling the Door Frames
The door frames are one of the most satisfying parts to install:
- Assemble on a Table: I assembled the frame on a stable table, ensuring each piece was securely fastened.
- Protect the Glass: When handling the glass, I ensured it was on a protected surface to prevent shattering.
Step 7: Install the Shower Doors
Finally, it was time to put the doors in place:
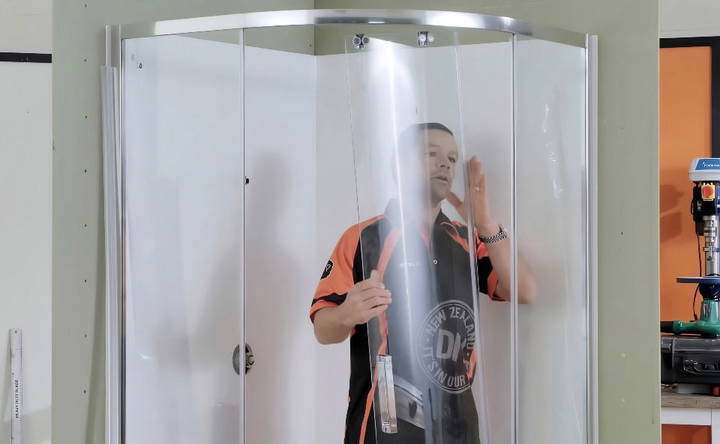
- Position the Frame: With the help of another pair of hands, I lifted the frame and placed it into the wall profile half-set.
- Lock the Frame in Place: Once in the profile, I adjusted and locked the mechanism to ensure stability.
- Add Seals: Using a rubber hammer, I gently tapped the door seals into place and tested the door alignment, making sure it was even across the tray.
Step 8: Finalize and Seal
The last step involves sealing areas to maintain water tightness:
- Attach Seals and Handles: With the seals in place on the doors, I affixed handles, taking care to secure them with screws on the inside.
- Added Silicon around Edges: I applied silicon around the exterior edges of the shower unit, ensuring no water would breach the seal. It's important only to apply silicon only on the outside to prevent mold inside.
Customization Ideas
Customizing your shower enclosure can enhance both its functionality and aesthetic appeal. Here are some ideas to help you make a shower space that suits your needs and style.
Design Options
Frameless vs. Framed Enclosures
- Frameless: Offers a sleek, modern look with minimal hardware. Easier to clean and maintain.
- Framed: Provides a more traditional appearance. Often more affordable and can be more durable.
Glass Types
- Clear Glass: Makes an open, airy feel. Best for showcasing tile work.
- Frosted Glass: Adds privacy while still allowing light to pass through.
- Textured Glass: Offers a unique look and additional privacy.
Functional Upgrades
Built-in Shelves and Niches
- Shelves: Add extra storage space for toiletries. Can be installed at various heights.
- Niches: Recessed into the wall for a sleek, space-saving solution.
Seating Options
- Built-in Benches: Provide a place to sit or store items. Ideal for larger enclosures.
- Fold-down Seats: Save space and can be folded away when not in use.
Hardware Choices
Handles and Knobs
- Styles: Choose from a variety of styles, such as modern, classic, or rustic.
- Finishes: Options include chrome, brushed nickel, oil-rubbed bronze, and more.
Showerheads and Fixtures
- Rain Showerheads: Offer a luxurious, spa-like experience.
- Handheld Showerheads: Provide flexibility and ease of use. Great for cleaning and rinsing.
Aesthetic Enhancements
Tile Patterns and Colors
- Mosaic Tiles: Add a pop of color and texture.
- Large Format Tiles: Make a seamless, modern look. Easier to clean due to fewer grout lines.
Accent Features
- Accent Walls: Use contrasting tiles or materials to make a focal point.
- Decorative Trim: Add elegance with decorative trim or borders.
Eco-Friendly Options
Water-Saving Fixtures
- Low-Flow Showerheads: Reduce water usage without sacrificing pressure.
- Eco-Friendly Materials: Choose sustainable materials like recycled glass or bamboo.
Energy-Efficient Lighting
- LED Lights: Use less energy and last longer than traditional bulbs.
- Natural Light: Incorporate windows or skylights to reduce the need for artificial lighting.
Personal Touches
Custom Etching
- Glass Etching: Personalize your glass with custom designs or patterns.
- Monograms: Add a personal touch with initials or family crests.
Accessories
- Towel Bars and Hooks: Coordinate with your hardware for a cohesive look.
- Shower Mats and Rugs: Add comfort and style with matching mats and rugs.
Customize your shower enclosure to be functional and stylish, reflecting your personal needs and style for long-term enjoyment.
Common Mistakes to Avoid
Installing a shower enclosure can be a rewarding DIY project, but it's important to avoid common mistakes that can lead to problems down the line. Here are some key pitfalls to watch out for:
Ignoring Water Pressure Requirements
- Problem: Choosing a showerhead without considering your home's water pressure can result in weak or uneven water flow.
- Solution: Check your water pressure before purchasing a showerhead. Most standard showerheads require 20-80 PSI. If your pressure is too low, consider installing a booster pump.
Poor Waterproofing
- Problem: Inadequate waterproofing can lead to leaks, mold, and structural damage.
- Solution: Use waterproof membranes beneath the shower pan and up the walls. Ensure all seams and joints are sealed properly. Install flashing at corners and around plumbing penetrations.
Incorrect Shower Base Installation
- Problem: An improperly installed shower base can crack or leak, causing water damage.
- Solution: Ensure the shower base is level and properly supported. Use a mortar bed if required, and follow the manufacturer's instructions carefully.
Skipping the Slope
- Problem: A flat shower floor can cause water to pool, leading to slippery surfaces and potential leaks.
- Solution: Slope the shower floor towards the drain. A slope of 1/4 inch per foot is typically recommended.
Misaligned Doors and Panels
- Problem: Misaligned doors and panels can cause leaks and make the enclosure difficult to use.
- Solution: Measure carefully and ensure all components are level and plumb. Use shims if necessary to adjust the alignment.
Using Incompatible Materials
- Problem: Using materials that are not designed for wet environments can lead to deterioration and mold growth.
- Solution: Choose materials specifically designed for use in showers, such as waterproof backer boards and mold-resistant caulk.
Neglecting Ventilation
- Problem: Poor ventilation can lead to mold and mildew growth.
- Solution: Install an exhaust fan to remove moisture from the bathroom. Ensure the fan is properly vented to the outside.
Overlooking Maintenance
- Problem: Failing to maintain the shower enclosure can lead to buildup of soap scum, mold, and mildew.
- Solution: Clean the shower regularly with appropriate cleaners. Inspect seals and caulking periodically and replace them if they show signs of wear.
By avoiding these common mistakes, you can ensure your shower enclosure is both functional and durable. Taking the time to do it right will save you headaches and repairs in the future.
FAQs About How to Install a Shower Enclosure
Learn everything you need to know about how to install a shower enclosure with our detailed FAQs. Expert tips to get it done right!
Preparation is key to a successful installation:
Clear the area: Remove any old fixtures and clean the space thoroughly.
Check the walls: Ensure they are plumb (vertically straight) and level. If not, you may need to make adjustments.
Install the shower tray: Place the tray in position and ensure it is level. Secure it according to the manufacturer’s instructions.
Installing the glass panels involves:
Positioning the panels: Carefully place the glass panels into the frame. Ensure they fit snugly.
Securing the panels: Use the provided seals and screws to secure the panels in place. Check for any gaps and adjust as needed.
Sealing: Apply silicone sealant along the edges to prevent water leakage.
To finish and seal the enclosure:
Install the door: Attach the door to the frame using the provided hinges or runners. Ensure it opens and closes smoothly.
Apply sealant: Use silicone sealant to seal all joints and edges. This prevents water from escaping the enclosure.
Final checks: Inspect the enclosure for any gaps or loose parts. Make any necessary adjustments and allow the sealant to cure as per the manufacturer’s instructions.
Ensuring your shower enclosure is waterproof involves several steps:
Apply silicone sealant: Use a high-quality silicone sealant around all joints and edges where the enclosure meets the walls and floor.
Check for gaps: Inspect the enclosure for any gaps or spaces where water could escape. Fill these with sealant.
Test for leaks: After installation, run water in the shower and check for any leaks. If you find any, apply additional sealant as needed.
If your shower enclosure door doesn't close properly, try these steps:
Check alignment: Ensure the door is aligned correctly with the frame. Adjust the hinges or runners if necessary.
Tighten screws: Make sure all screws and fittings are tight. Loose screws can cause misalignment.
Lubricate moving parts: Apply a small amount of lubricant to the hinges or runners to ensure smooth operation.
Conclusion
Installing a shower enclosure may seem intimidating initially, but once you break it down into manageable steps, it becomes an achievable DIY project. Each phase, from setting the tray to final sealing, builds on the previous one to make a sturdy and elegant enclosure that can enhance any bathroom. With the right materials, a bit of patience, and attention to detail, you too can accomplish this task. The satisfaction of admiring a brand new, personally installed shower enclosure is truly rewarding.


