When we think about hurricanes, it's often with a sense of urgency—rushing to prepare as the storm approaches. However, I've learned from experience that the best time to prepare is well before any signs of trouble. I've been through a few hurricane seasons myself, and trust me, getting ready early is a game changer. Today, I want to walk you through installing DIY hurricane shutters that are simple, cost-effective, and can be set up in just minutes.
Why Prepare Early for Hurricane Season?
Living in hurricane-prone areas, I quickly realized that preparation isn't something you should put off. When the weather is calm, and there's no threat in sight, that's the perfect time to get everything in order. I've seen it happen too often: people scrambling last minute, dealing with long lines at hardware stores, and working through the stress of an impending storm. Taking the time now to get organized can save you hours of work, give you peace of mind, and potentially save you money.
Materials Needed for Quick Hurricane Shutter Installation
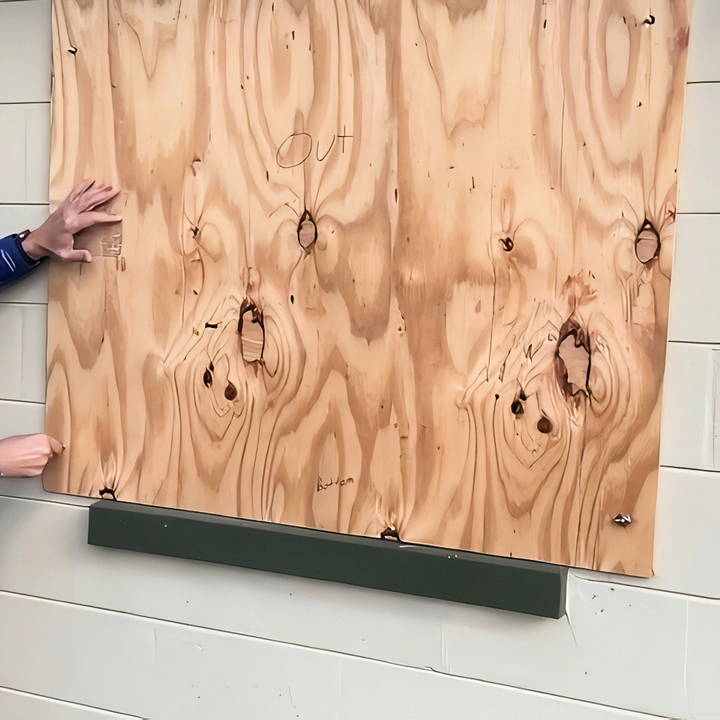
Before diving into the installation process, let's talk about what you'll need. I recently discovered a handy hurricane shutter installation kit at my local hardware store, and it was a game changer for me. This kit, which costs less than $30, includes most of what you'll need:
- Anchors: These will be installed around your window frame.
- Drill Bits: Necessary for making holes in the wall or window frame.
- Installation Tool: Makes it easy to secure the anchors.
- Plywood Sheets (pre-cut): You'll need these to cover your windows. The size will depend on your window dimensions.
- Wingnuts: These secure the plywood to the anchors.
The only extra tools you'll need are a drill and a ladder. If you have these basics, you're good to go!
Step by Step Instructions
Learn how to make DIY hurricane shutters with our step-by-step guide. Protect your home with easy-to-follow instructions and expert tips for the best results.
Step 1: Gather Your Materials
First, make sure you have everything from the list above. I found my kit at a local hardware store, but you can also order them online. The key is to make sure you have all your tools ready to go.
Step 2: Measure and Cut the Plywood
Measure your windows carefully. It's essential to leave a bit of extra space around the edges to ensure full coverage. Then, head over to your local hardware store to have the plywood cut, or cut it yourself if you have the tools. I found that pre-cutting the plywood was a huge time-saver when it came time to install.
Step 3: Install the Anchors
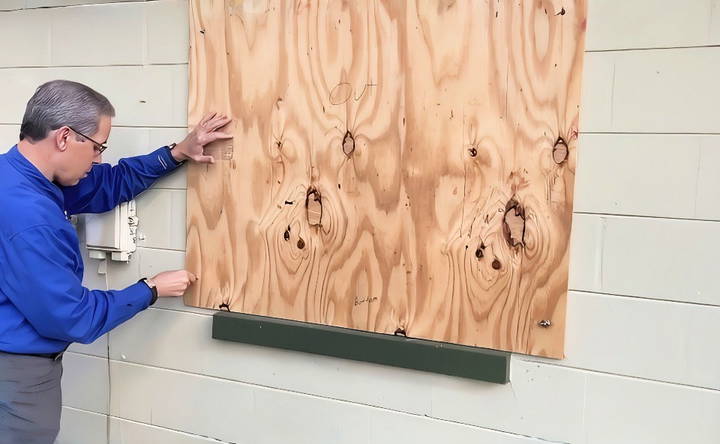
With your kit in hand, you'll start by installing the anchors around each window. For most windows, four anchors are sufficient—one at each corner. Here's how you can do it:
- Drill Holes: Use the drill bits from your kit to build holes in the wall or window frame where you want to place the anchors. Make sure the holes are deep enough for the anchors to fit snugly.
- Insert the Anchors: Use the installation tool from your kit to insert the anchors securely into the holes.
This step might sound daunting, but it's quite simple. If I can manage it without any previous DIY experience, you can too!
Step 4: Attach the Plywood to the Window
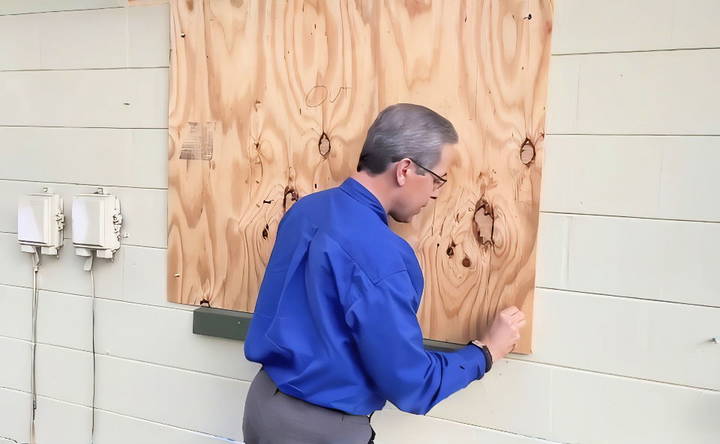
Once your anchors are in place, take your pre-cut plywood and position it over the window. Align the holes in the plywood with the anchors you've just installed.
- Place Plywood Over Anchors: This might require some help from another person if the plywood is large or heavy.
- Secure with Wingnuts: Screw on the wingnuts to hold the plywood securely in place. Tighten them enough to ensure the plywood doesn't shift or rattle in strong winds.
Step 5: Repeat for Each Window
I was able to cover five or six windows with one kit. Repeat the steps above for each window, and you'll have your entire house protected in no time.
Benefits of This Method
What stood out to me the most was how quick and efficient this method is. Typically, boarding up windows is an hours-long task, filled with frustration and sometimes panic. However, using this method, I was able to cover my entire house in about 15 minutes. The ease of setup also makes it easy to take down and reuse for future storms.
Tips and Tricks from My Experience
- Start Early: Don't wait for a hurricane warning. Install the anchors well in advance. When a storm is approaching, you'll only need to put up the plywood.
- Check Your Supplies: Ensure you have all the materials, including extras like wingnuts and drill bits, before starting. Trust me; it's frustrating to realize you're missing something halfway through.
- Practice Installation: Do a dry run with one window to familiarize yourself with the process. This little practice round can make all the difference when time is of the essence.
- Store Everything Together: Keep all your materials (plywood, wingnuts, etc.) in a designated spot in your garage or shed. This way, when you need them, you know exactly where to look.
Why This Method Stands Out
What makes this method so effective is its simplicity and cost-efficiency. With a small upfront investment and a bit of prep work, you're well-equipped to face hurricane season with confidence. This approach is perfect for homeowners like me who prefer a DIY solution that doesn't require advanced skills or expensive equipment.
Maintenance and Storage
Proper maintenance and storage of your hurricane shutters are crucial to ensure they remain effective and last for many years. Here's a comprehensive guide to help you keep your shutters in top condition.
Regular Maintenance
- Inspect Regularly: Check your shutters at least twice a year, preferably before and after hurricane season. Look for any signs of wear and tear, such as rust, cracks, or loose parts.
- Clean Thoroughly: Use mild soap and water to clean your shutters. Avoid harsh chemicals that can damage the material. Rinse thoroughly and let them dry completely before storing or reinstalling.
- Lubricate Moving Parts: If your shutters have moving parts, such as hinges or tracks, apply a silicone-based lubricant to keep them operating smoothly. Avoid using oil-based lubricants as they can attract dirt and grime.
- Check Fasteners: Ensure all screws, bolts, and other fasteners are tight and in good condition. Replace any that are rusted or damaged to maintain the structural integrity of your shutters.
- Repaint or Refinish: If your shutters are painted, consider repainting them every few years to protect against the elements. Use a high-quality, weather-resistant paint suitable for the material of your shutters.
Storage Solutions
- Label and Organize: If your shutters are removable, label each piece clearly to make reinstallation easier. Store all parts, including fasteners and tools, in a designated area.
- Use Protective Covers: Store shutters in a dry, cool place. Use protective covers or tarps to shield them from dust and moisture. This helps prevent rust and other damage.
- Avoid Stacking: Do not stack shutters directly on top of each other. Use padding or spacers between them to avoid scratches and dents.
- Vertical Storage: If possible, store shutters vertically rather than horizontally. This reduces the risk of warping and makes them easier to access.
- Climate Control: If you live in a humid area, consider storing shutters in a climate-controlled environment. Excessive moisture can lead to mold and mildew, which can weaken the material.
Seasonal Preparation
- Pre-Season Check: Before hurricane season starts, take your shutters out of storage and inspect them thoroughly. Make any necessary repairs and ensure they are ready for installation.
- Post-Season Care: After hurricane season, clean and inspect your shutters before storing them away. Address any damage immediately to prevent further deterioration.
Troubleshooting Common Issues
- Rust and Corrosion: If you notice rust, use a wire brush to remove it and apply a rust-inhibiting primer before repainting. For severe corrosion, consider replacing the affected parts.
- Stuck or Jammed Shutters: If shutters are difficult to open or close, check for obstructions in the tracks or hinges. Clean and lubricate these areas to restore smooth operation.
- Cracks or Splits: Small cracks can be repaired with appropriate sealants or adhesives. For larger splits, you may need to replace the damaged section to maintain the shutter's effectiveness.
Learn how to maintain and store hurricane shutters to ensure they stay reliable and protect your home during hurricane season. Extend their life with these tips.
Common Mistakes to Avoid
When installing DIY hurricane shutters, avoiding common mistakes can save you time, money, and ensure your home is well-protected. Here are some frequent errors and how to avoid them:
1. Incorrect Measurements
- Problem: Taking inaccurate measurements can lead to shutters that don't fit properly, leaving gaps that can let in wind and debris.
- Solution: Measure each window and door precisely. Double-check your measurements before cutting materials. It's better to measure twice and cut once.
2. Using Inadequate Fasteners
- Problem: Using the wrong type or size of fasteners can result in shutters that are not securely attached, making them ineffective during a storm.
- Solution: Use heavy-duty, weather-resistant fasteners appropriate for your shutter material and wall type. Stainless steel or galvanized screws and bolts are good choices.
3. Skipping Pre-Installation Checks
- Problem: Failing to check the condition of your walls and windows before installation can lead to problems later on.
- Solution: Inspect your walls and window frames for any damage or weaknesses. Repair any issues before installing the shutters to ensure a solid foundation.
4. Ignoring Manufacturer Instructions
- Problem: Not following the manufacturer's instructions can lead to improper installation and reduced effectiveness of the shutters.
- Solution: Carefully read and follow all instructions provided by the manufacturer. If you're unsure about any step, seek clarification or professional advice.
5. Improper Sealing
- Problem: Not sealing the edges of the shutters properly can allow water and wind to penetrate, reducing their protective capabilities.
- Solution: Use weatherstripping or sealant around the edges of the shutters to build a tight seal. Ensure all gaps are covered to prevent leaks.
6. Overlooking Maintenance
- Problem: Neglecting regular maintenance can cause shutters to deteriorate, making them less effective over time.
- Solution: Regularly inspect and maintain your shutters. Clean them, check for rust or damage, and lubricate moving parts as needed.
7. Inadequate Storage
- Problem: Storing shutters improperly can lead to warping, rust, or other damage.
- Solution: Store shutters in a dry, cool place. Use protective covers and avoid stacking them directly on top of each other. Vertical storage is often best to prevent warping.
8. Not Testing Before the Storm
- Problem: Waiting until a storm is imminent to install or test your shutters can lead to last-minute issues and stress.
- Solution: Install and test your shutters well before hurricane season. This gives you time to address any problems and ensures you're prepared when a storm approaches.
9. Underestimating the Importance of Professional Help
- Problem: Attempting to install shutters without the necessary skills or tools can result in poor installation and reduced protection.
- Solution: If you're not confident in your DIY skills, consider hiring a professional. Proper installation is crucial for the effectiveness of hurricane shutters.
Avoiding common mistakes ensures your DIY hurricane shutters protect your home properly, giving you peace of mind and safety during a storm.
FAQs About DIY Hurricane Shutters
Discover the top FAQs about DIY hurricane shutters, including installation tips, materials, and safety guidelines to protect your home!
DIY hurricane shutters are protective coverings you can make and install yourself to shield your windows from the high winds and debris during a hurricane. They are a cost-effective way to protect your home and can be customized to fit your specific needs. By making your own shutters, you can save money and ensure your home is better prepared for stormy weather.
Yes, there are several types of DIY hurricane shutters, including:
Plywood shutters: Easy to make and install, but can block light.
Accordion shutters: Permanently installed and can be quickly deployed.
Roll-down shutters: Installed above the window and rolled down when needed.
Storm panels: Removable panels that can be stored when not in use.
DIY hurricane shutters can be very effective if properly made and installed. They provide a significant level of protection against wind and debris. However, professional installations might offer additional benefits such as higher quality materials, better fit, and potentially lower insurance premiums. It's important to weigh the cost savings of DIY against the potential benefits of professional installation.
Proper maintenance and storage of your DIY hurricane shutters can extend their lifespan and ensure they are ready for use when needed. Here are some tips:
Clean the shutters: After each use, clean the shutters with mild soap and water to remove dirt and debris.
Inspect for damage: Check for any signs of wear or damage, such as cracks or rust, and repair them promptly.
Store in a dry place: Keep the shutters in a dry, sheltered area to prevent moisture damage.
Label and organize: Label each shutter with the corresponding window it fits and store them in an organized manner for easy access.
In some cases, installing DIY hurricane shutters can help you qualify for insurance discounts. However, this depends on your insurance provider and the specific requirements they have. Here are some steps to take:
Check with your insurer: Contact your insurance company to find out if they offer discounts for hurricane shutters and what criteria must be met.
Ensure proper installation: Make sure your shutters are installed correctly and meet any standards set by your insurer.
Provide documentation: Keep records of your installation process, including photos and receipts, to provide proof to your insurance company.
Conclusion: Stay Safe and Prepared
Preparing for hurricanes doesn't have to be a stressful experience. By taking a little time now, when the weather is calm and pleasant, you're setting yourself up for a much smoother experience when hurricane season arrives. I hope these tips, drawn from my own experiences, help you feel more prepared and secure in your home.
Remember, it's not just about protecting property; it's about peace of mind. Stay safe, and let's get prepared together!


