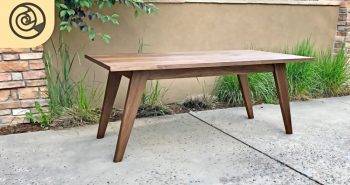
Hey there! I want to share with you an exciting and rewarding experience: building my very own dining bench. This DIY dining bench project was inspired by a desire to match a DIY X Base dining table I had just completed. Let me walk you through the whole process, step by step. If you're keen on woodworking or simply want to make something practical and stylish, this is the guide for you. We'll cover everything from gathering materials to the final touches.
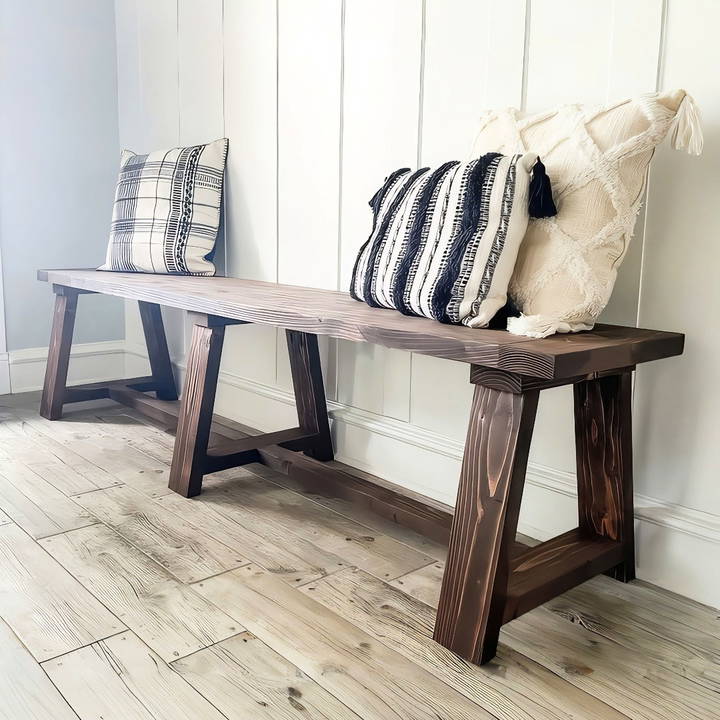
Materials Needed and Why
- Six 2x6 Lumber Planks: This is the main material for our bench. These planks are strong and provide the perfect thickness and support for seating.
- Saw (Miter or Table Saw): Required to cut the wooden planks to the desired size. If you don't have one, a local workshop might have a rental option.
- Drill with Pocket Hole Jig: Essential for making pocket holes, which are crucial for a seamless, durable finish.
- 2.5-inch Pocket Hole Screws: These screws help to assemble the parts together firmly.
- Wood Glue: Though not used for the plank top, it's vital for other parts where swelling isn't a concern.
- Sander and Sandpaper: To smooth down any rough surfaces and edges, ensuring a polished final product.
- Wood Stain and Polyurethane Finish: To protect the wood and give it a lovely sheen that matches your style.
- Face Clamps: These help in holding the planks stable while drilling pocket holes, ensuring they are flush.
- Measuring Tape and Square: Precision is key, and these tools help with accurate measurements and squaring off the pieces.
Step by Step Instructions
Build a stylish DIY dining bench with our step-by-step instructions. From preparing lumber to sanding and finishing, follow our guide for a perfect result!
Step 1: Prepare Your Lumber
First things first, take your six 2x6 lumber planks and trim them down to the size you need. I aimed for four inches in width for each plank. Trust me, having this uniform width is important for a consistent bench surface.
How This Helps:
- Ensures uniformity for easy assembly.
- Reduces any imbalance in thickness which can lead to an uneven bench.
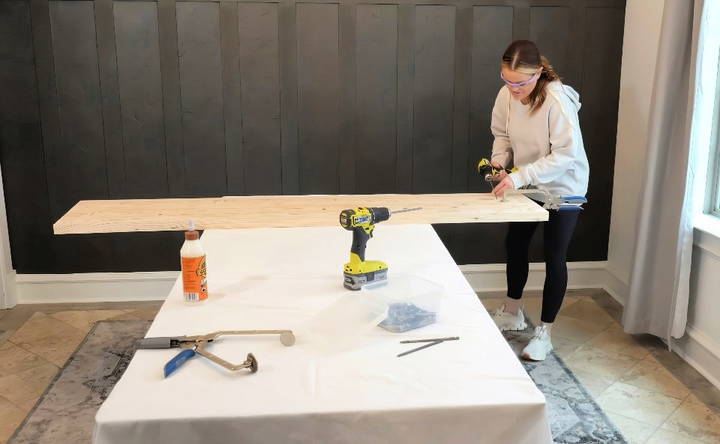
Step 2: Build the Bench Top
For the bench, I decided to start from the "top" and work my way down, albeit upside down! It sounds a bit quirky, but starting with the top helps visualize the final look.
Process:
- Lay the planks out and join them using pocket holes and screws. Here, I learned that glue is unnecessary for the plank alignment because it doesn't accommodate wood's natural expansion and contraction, leading to cracks.
- Use your face clamps at each joint to ensure everything stays flush while you work.
Why Start Here?
This method allows for better control over the final dimensions and alignment of the bench. Plus, it gave me a creative sense of progress as I worked my way down into the structure.
Step 3: Attach the Breadboards
With the top done, it was time to add the breadboards. These are important as they give your bench that finished look and add extra support across the ends.
Steps:
- Cut your breadboards to size using the miter saw.
- Align them to the bench top and secure with pocket holes. Face clamps can help keep them stable.
- Tip: Refrain from using wood glue here. This allows the wood to move naturally, reducing the chances of cracking over time.
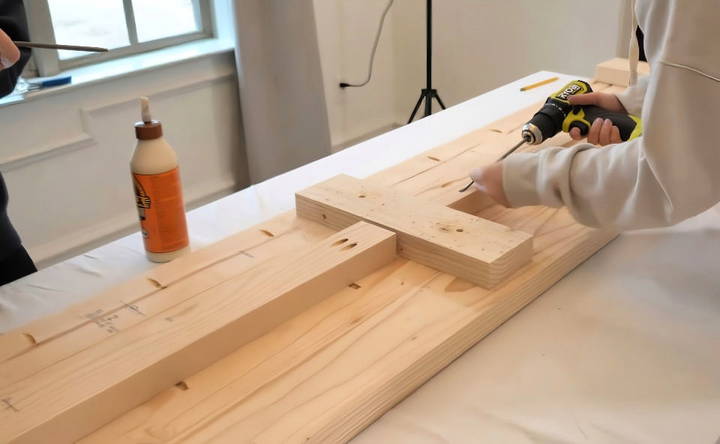
Step 4: Assemble the Frame
The next step is constructing the frame. This acts as the support for the bench's load-bearing capacity.
What to Do:
- Cut frame supports to the correct length and secure them using pocket hole joints.
- Ensure everything is aligned using a square and finally connect to the bench top.
Advantages:
- Builds a sturdy support system.
- Pocket hole joints make assembly rigid yet neat.
Step 5: Pretty Zeal Dining Table Style Frame
Inspired by a dining table design I saw, I utilized a similar "X" leg style. It's aesthetic and strong enough to support multiple users.
How I Did It:
- Rip legs down to four inches at a 10-degree angle.
- Use pocket holes to assemble. Remember, accuracy in cutting angles is vital for the “X” effect to look balanced.
Why This Style?
Aside from being visually striking, the angled cuts distribute weight evenly, aiding in structural stability.
Step 6: Attaching Legs to the Bench Frame
With your legs ready, it's time to put the whole structure together.
Here's What You Do:
- Secure each leg to the frame using screws, keeping everything precisely aligned.
- Use your face clamp to ensure flush fittings.
- Pro Tip: Place the middle leg first if your bench is long, ensuring an even distribution of weight and avoiding bowing.
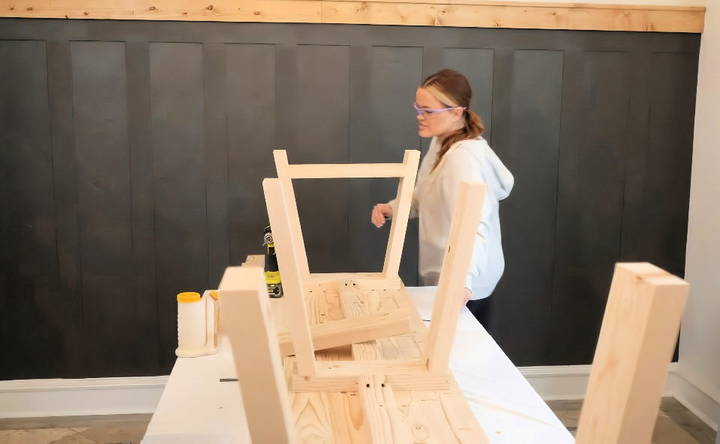
Step 7: Add Support Runners
Before calling it done, add support runners. These ensure that everything stays solid and durable over time.
- Process: Connect each runner with wood glue and screws. Pocket holes made here will help maintain a low profile and keep things tidy.
- Benefit: Added stability makes the piece extremely robust, even if heavily loaded.
Step 8: Sanding and Finishing
To get that showroom-ready bench, thorough sanding is non-negotiable. You don't want splinters, and you want everyone's rear to be comfortable.
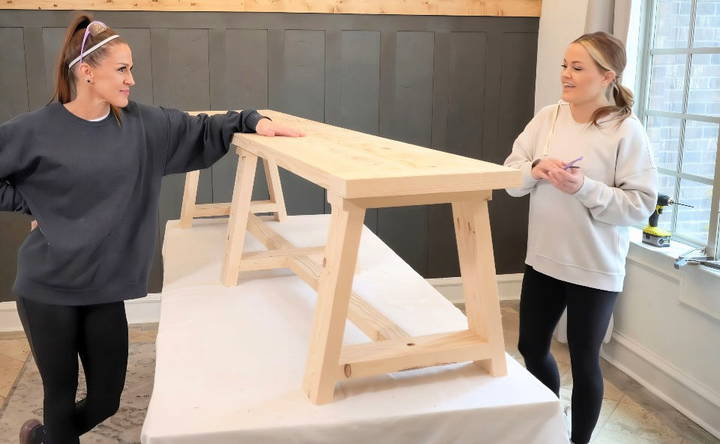
How I Finished It:
- Use a sander to smooth all surfaces, especially the top.
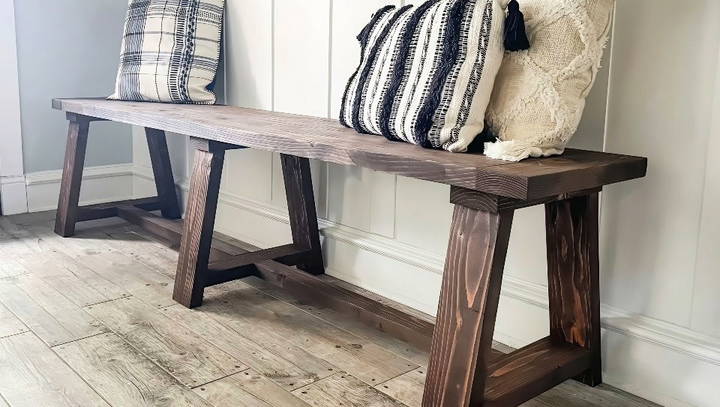
- Apply a protective stain that matches your dining table, followed by a polyurethane coat for shine and protection.
- Insights: Finishing not only beautifies but also protects against moisture and wear. It adds years to the lifecycle of your furniture piece.
Customization Options
Customizing your DIY dining bench can make it unique and perfectly suited to your space and style. Here are some easy-to-understand customization options:
Size Adjustments
- Adjusting the Bench Length: Measure the space where you plan to place the bench. Cut the wood to match this length. If you need a longer bench, ensure you add extra support legs in the middle to prevent sagging.
- Changing the Bench Height: Standard dining benches are about 18 inches high. If you prefer a different height, adjust the length of the legs accordingly. Remember to keep the height comfortable for sitting.
Design Variations
- Rustic Style: Use reclaimed wood for a rustic look. Sand the wood lightly to keep its natural texture. Apply a clear sealant to protect the wood while maintaining its rustic charm.
- Modern Style: Choose sleek, straight lines and smooth finishes. Paint the bench in a solid, bold color like black or white. Use metal legs for a contemporary touch.
- Farmhouse Style: Opt for a distressed paint finish. Use white or pastel colors and sand the edges lightly to give it a worn look. Add decorative brackets for an extra farmhouse feel.
Upholstery Options
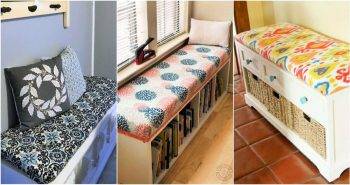
- Cushioned Seat: Add a cushioned seat for extra comfort. Choose a durable fabric that matches your dining room decor. Attach the cushion to the bench using a staple gun.
- Removable Cushions: If you prefer flexibility, use removable cushions. This allows you to change the look easily by swapping out the cushions.
Decorative Elements
- Stenciling and Painting: Use stencils to add patterns or designs to the bench. This can be a fun way to personalize your bench. Choose paint colors that complement your dining area.
- Wood Carving: If you have the skills, add carved details to the bench. Simple carvings along the edges can add a touch of elegance.
Functional Additions
- Storage Space: Build a bench with a hinged seat to build storage space inside. This is perfect for storing dining room essentials like tablecloths and placemats.
- Backrest: Add a backrest for more comfort. This can be a simple wooden back or an upholstered one for added style.
Finishing Touches
- Protective Coating: Apply a protective coating to the bench to make it durable. Choose a finish that matches your style, whether it's glossy, matte, or satin.
- Leg Caps: Add rubber or felt caps to the legs to protect your floors from scratches. This also helps to keep the bench stable.
By customizing your DIY dining bench, you can build a piece that is not only functional but also a reflection of your personal style.
Troubleshooting Common Issues
Building a DIY dining bench can be a rewarding project, but sometimes, things don't go as planned. Here are some common issues you might encounter and how to fix them:
Uneven Legs
- Problem: The bench wobbles because the legs are uneven.
- Solution: Place the bench on a flat surface. Use a level to check which leg is shorter. Sand down the longer legs gradually until the bench is stable. Alternatively, you can add rubber leg caps to the shorter legs to balance them out.
Loose Joints
- Problem: The joints are loose, making the bench unstable.
- Solution: Check all screws and bolts to ensure they are tight. If the joints are still loose, add wood glue to the joints for extra stability. Clamp the joints together until the glue dries completely.
Splintered Wood
- Problem: The wood has splinters or rough edges.
- Solution: Sand the affected areas with fine-grit sandpaper until smooth. Always sand in the direction of the wood grain to avoid further splintering. Apply a wood sealant to protect the surface and prevent future splinters.
Misaligned Parts
- Problem: The parts don't align properly during assembly.
- Solution: Double-check your measurements and ensure all cuts are accurate. If parts are still misaligned, use a clamp to hold them in place while you adjust. You may need to re-drill holes or trim pieces slightly to achieve a perfect fit.
Paint or Stain Issues
- Problem: The paint or stain doesn't look even.
- Solution: Sand the surface lightly to remove any uneven spots. Apply a primer before painting to ensure an even coat. For staining, use a pre-stain wood conditioner to help the stain absorb evenly. Apply thin, even coats and allow each coat to dry completely before adding another.
Bench Sags in the Middle
- Problem: The bench sags when weight is applied.
- Solution: Add additional support legs in the middle of the bench. If the bench is particularly long, consider adding a crossbeam underneath for extra support. Ensure all supports are securely attached.
Difficulty in Drilling
- Problem: Drilling holes is difficult or the drill bit slips.
- Solution: Use a center punch to make a small indentation where you want to drill. This will help guide the drill bit and prevent slipping. Ensure you are using the correct type and size of drill bit for the material.
Stuck Screws
- Problem: Screws are difficult to drive in or get stuck halfway.
- Solution: Rub a bar of soap or wax on the screw threads to make them easier to drive in. If a screw gets stuck, back it out slightly and then try again. Ensure you are using the correct screwdriver or drill bit size.
Wood Cracks
- Problem: The wood cracks when screws are driven in.
- Solution: Pre-drill pilot holes before driving in screws to prevent the wood from cracking. Use screws that are appropriate for the thickness of the wood. If a crack does occur, fill it with wood glue and clamp it until dry.
By addressing these common issues, you can ensure your DIY dining bench is sturdy, safe, and looks great.
FAQs About DIY Dining Benches
Discover answers to common questions about DIY dining benches. Learn how to design, build, and maintain your perfect DIY dining bench today!
The size of your dining bench depends on your table and space. Here are some general guidelines:
Length: The bench should be slightly shorter than the table length.
Height: Standard bench height is around 18 inches from the ground.
Depth: A comfortable depth is about 14-18 inches.
There are many design options for DIY dining benches:
Rustic: Use reclaimed wood for a natural, weathered look.
Modern: Opt for clean lines and minimalistic design.
Farmhouse: Combine wood with white paint for a cozy feel.
Storage: Build a bench with a hinged seat to store items inside.
To enhance comfort, consider these tips:
Add cushions: Use foam cushions with washable covers.
Round the edges: Sand down sharp edges to prevent discomfort.
Backrest: Include a backrest for added support.
Proper height: Ensure the bench height matches your table and chairs.
Avoid these common mistakes:
Incorrect measurements: Always double-check your measurements before cutting.
Weak joints: Use wood glue and screws for strong joints.
Skipping sanding: Sand all surfaces to avoid splinters.
Ignoring finish: Apply paint or stain to protect the wood and enhance its appearance.
To keep your DIY dining bench in great condition, follow these maintenance tips:
Regular cleaning: Wipe the bench with a damp cloth to remove dust and spills. Avoid using harsh chemicals that can damage the wood.
Protective finish: Apply a protective finish like varnish or polyurethane to shield the wood from moisture and wear.
Inspect for damage: Periodically check for loose screws or nails and tighten them as needed.
Reapply finish: Depending on usage, you might need to reapply the finish every few years to maintain its appearance and protection.
Avoid direct sunlight: Prolonged exposure to sunlight can fade the wood. Place the bench in a shaded area or use curtains to block direct sunlight.
Final Thoughts: A Crafty Journey
Building this DIY dining bench was more than just a weekend project. It became an adventure in learning and craftsmanship. I learned the importance of precision and patience and got a first-hand look at how different materials come together to build something new.
Why I Recommend Trying It:
- It's cost-effective, just under $50.
- The sense of accomplishment is second to none.
- Provides a functional and aesthetic addition to any space.
By following these steps, you'll end up with a fabulous piece of furniture and not only that—a new skill to brag about. Whether it's for your own home or a thoughtful gift, you're bound to cherish your creation for years.
Resources and Further Learning
- YouTube Video: A visual demonstration can provide additional clarity on cutting and assembly techniques.
- Online Woodworking Courses: If you feel the need for further understanding, consider enrolling in a basic carpentry course.
I hope this guide inspires and encourages you to take a step into the world of DIY furniture making.


