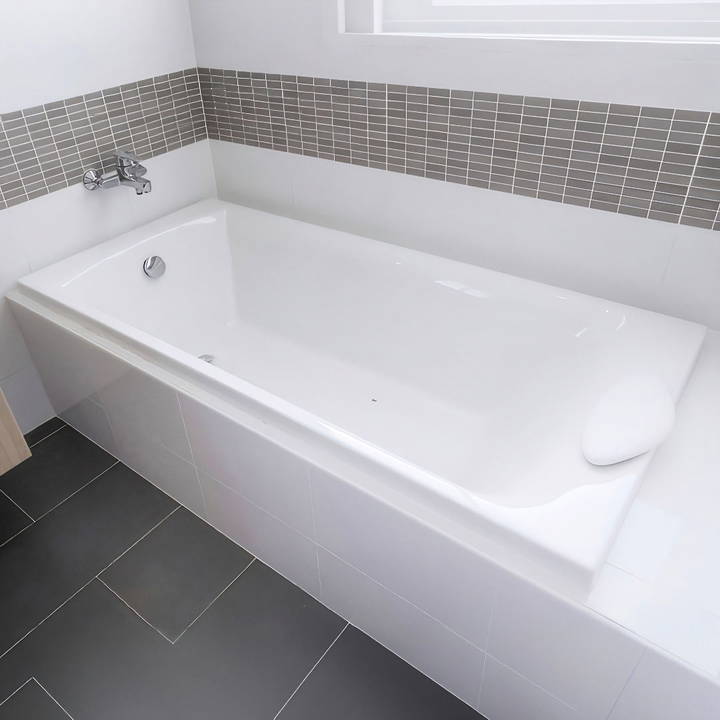
Installing a bathtub might seem like a daunting task, but with careful planning and the right approach, you can transform your bathroom into a luxurious place to relax. In this guide, we'll cover everything you need to know about installing a brand-new acrylic tub, specifically 20-inch deep by 32-inch wide model. Whether you're upgrading to a larger tub or simply replacing your old one, this comprehensive tutorial will walk you through the process from start to finish.
Tools and Materials You'll Need:
- New acrylic tub (in this case, a 32-inch wide, 60-inch long acrylic tub)
- Level
- Hacksaw
- Pipe cutter
- Brass drain kit
- ABS solvent and pipe glue
- Shims
- Tile cutting tools
- Silicone sealant (designed for kitchen and baths)
- Screws (preferably stainless steel or coated flooring screws)
- Safety equipment (gloves, mask, protective eyewear)
Step by Step Instructions
Learn how to install a bathtub with our step-by-step instructions, from preparation to final plumbing. Perfect guide for a smooth tub installation.
Step 1: Preparing for the Tub Installation
Before you start, there are a few preliminary considerations and preparations you'll need to address. The installation process will differ slightly if you're upgrading to a larger tub. In this case, we're upgrading from a 30-inch wide tub to a 32-inch wide model, which makes some challenges when working in an existing space. However, the overall approach will remain the same for most installations.
Evaluate Your Space and Existing Conditions
The first step is to evaluate the space where the new bathtub will be installed. Consider the following:
- Floor Joist Location: You need to know which direction your floor joists are running. This is especially important because the tub drain might need to be relocated, and you don't want it to interfere with a floor joist.
- Tip: Check the direction of the joists by reaching into the heat register vent in your bathroom and feeling the direction of the elbow. The joists will run in the same direction.
- Framing Considerations: When framing the area around your new tub, you'll need wood backing to attach items like overhead shower rods or future glass doors. Make sure you plan for these while framing to avoid relying on the strength of the wallboard or tiles later on.
- Subfloor and Leveling: Houses settle over time, causing floors to slope. To avoid issues with an unlevel tub, ensure that your floor is level or use shims to level the tub. An unlevel tub can lead to improper drainage and a poor seal, causing leaks and other issues down the line.
Step 2: Removing the Old Tub
Before you can install the new tub, you'll need to remove the old one. Here's how to do it safely:
- Turn off Water Supply: Shut off the water supply to your bathroom to avoid leaks or spills.
- Disconnect the Plumbing: Carefully disconnect the plumbing lines connected to the old tub. Use a pipe cutter or wrench to remove the drain and overflow components.
- Cut Away the Tile: Using a tile cutter, remove the tiles surrounding the tub to expose the flange and framing. If your tiles are well-adhered, you might need a porcelain tile bit to carefully remove the tile without damaging surrounding areas.
- Remove the Old Tub: Once all connections are severed, remove the old tub from its frame. This may require help, as tubs can be heavy and unwieldy.
Step 3: Fitting the New Tub into the Space
With the old tub removed, you'll need to make adjustments to the space to fit the new, larger tub. Here's what to consider:
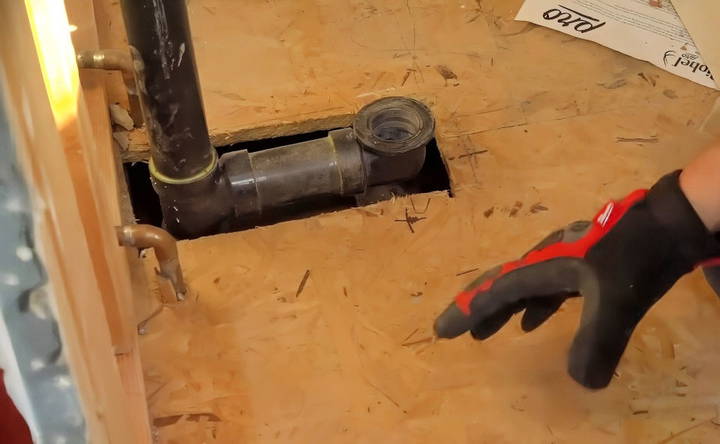
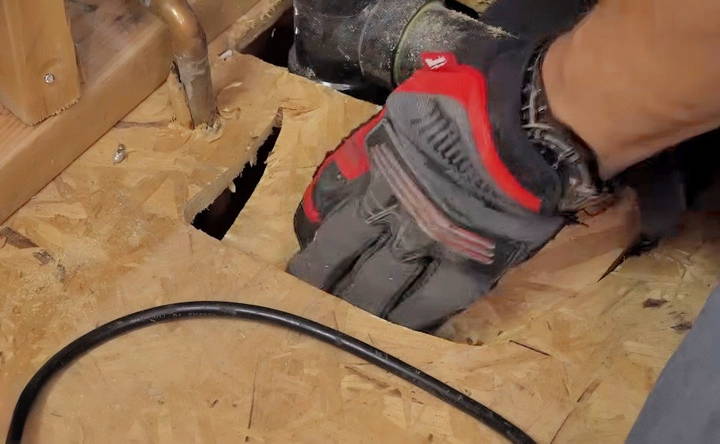
- Cutting the Subfloor: Since the new tub might have a different drain location than the old one, you may need to cut into the subfloor to move the plumbing to the correct location. Be cautious of any floor joists in the way and adjust accordingly.
- Tip: A brass drain kit is recommended for this step because it offers flexibility in moving the drain to a new location. Unlike cheaper options, it also provides a better fit, helping to avoid leaks later on.
- Measuring and Marking: Carefully measure the new tub's drain location and mark where it will connect to the plumbing system. Ensure that these measurements are accurate, as small errors can lead to improper installation and leaks.
Step 4: Installing the Drain and Overflow
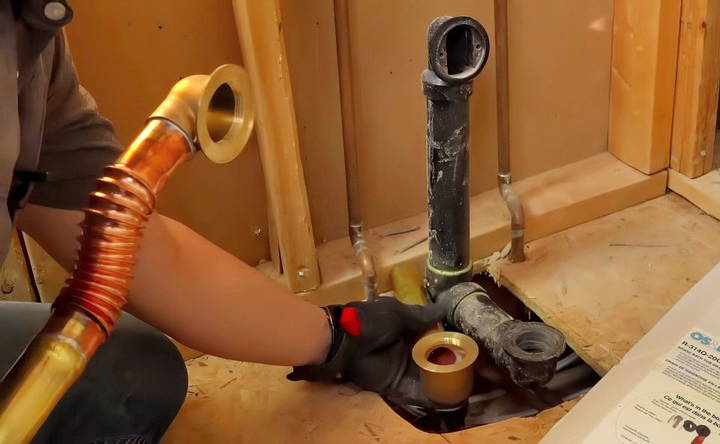
Once the subfloor and framing are adjusted, it's time to install the tub's drain and overflow system.
- Assemble the Drain Kit: Use a brass drain kit for flexibility and durability. Begin by assembling the drain kit, which will involve threading various parts together and connecting them to the tub. Apply ABS solvent to ensure secure connections.
- Dry Fit the Drain: Before permanently attaching any pieces, do a dry fit of the drain pipes to ensure everything lines up properly.
- Apply Sealant: Once you're satisfied with the fit, apply silicone sealant to all threaded joints and around the drain's rubber gasket. This will ensure a watertight seal that won't break down over time.
- Attach the Overflow: The overflow is typically connected to the back of the tub and prevents water from spilling over if the tub is too full. Use the flexible neck on the overflow system to adjust it to the right height and location.
Step 5: Placing the Tub into Position
With the drain and overflow in place, it's time to position the tub in its final location.
- Carry the Tub into the Bathroom: Be careful not to drag or drop the tub. Acrylic tubs, while strong, can crack if mishandled, particularly at the edges.
- Set the Tub in Place: Align the tub with the framing and plumbing. Keep the tub off the ground until it's ready to be lowered into its final position. This prevents any unnecessary pressure on the corners, which could cause visible damage.
- Check the Level: Once the tub is in place, use a level to ensure it's perfectly aligned. If the floor isn't level, use shims to make minor adjustments. A level tub is essential for proper drainage and a solid installation.
- Secure the Tub to the Frame: Attach the tub to the framing using screws. It's important to use coated or stainless steel screws to prevent rusting over time. If necessary, drill pilot holes to avoid cracking the acrylic when driving in screws.
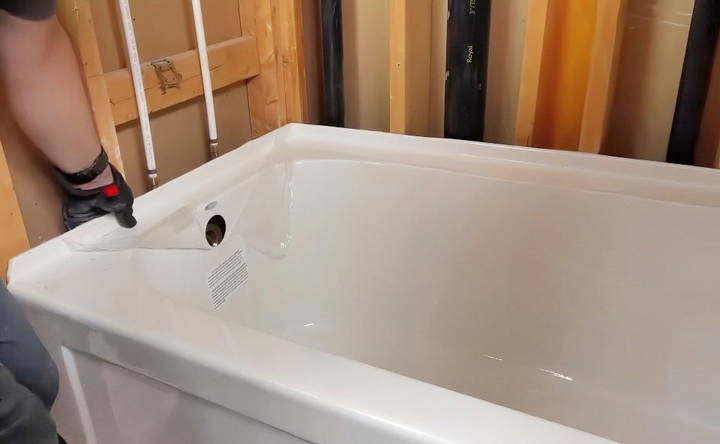
Step 6: Finalizing the Drain Connection
Before finishing the tub installation, connect the plumbing:
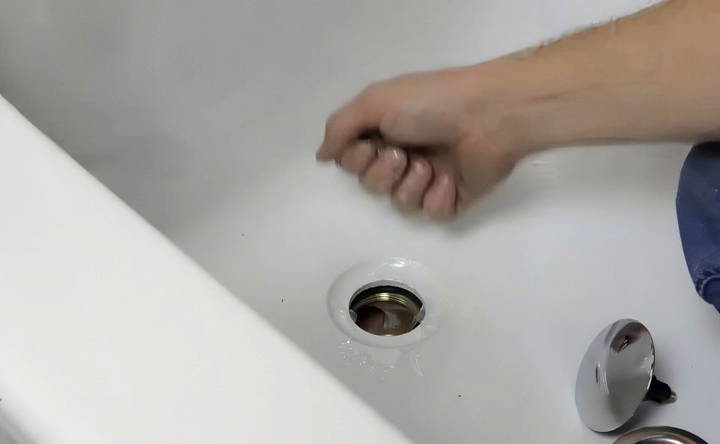
- Connect the Drain: Attach the drain to the plumbing underneath. Tighten all connections to ensure there are no leaks.
- Install the Overflow: Secure the overflow drain using the threaded cap that comes with the kit. Make sure the rubber gasket is in place and that all connections are tight to avoid water leaking behind the tub.
- Test for Leaks: Before moving forward, test the plumbing by running water into the tub. Check for any leaks around the drain, overflow, and other connections. If leaks are detected, tighten the fittings and reapply sealant as needed.
Step 7: Securing the Tub and Adding Tile Backing
With the plumbing installed and leak-free, you can now focus on securing the tub to the walls and preparing for tiling:
- Reinforce the Frame: If needed, add additional framing to support the edges of the tub.
- Attach the Tub to the Wall: Use shims and screws to secure the tub to the studs. Be careful not to overtighten the screws, as this could crack the tub. Once the screws are in place, cut off the excess parts of the shims.
Step 8: Sealing and Waterproofing
Once the tub is in place and properly leveled, it's time to focus on waterproofing the surrounding areas. This step is essential to prevent future water damage to your walls and floors.
- Apply a Vapor Barrier: If you haven't already, install a vapor barrier behind the walls that surround the tub. This barrier will protect your framing from any moisture that seeps through the tile or wall panels. Attach it securely and ensure that it overlaps the tub's flange to prevent leaks.
- Seal Around the Tub: Apply a generous bead of silicone sealant around the edges of the tub where it meets the floor and walls. Silicone is water-resistant and flexible, which helps to prevent water from getting under the tub or behind the walls.
Tip: Be sure to use silicone specifically designed for bathroom and kitchen use, as it's formulated to resist mold and mildew.
Step 9: Installing the Wall Surround or Tile
With the tub securely in place and the waterproofing measures in place, it's time to install the wall surround. This step will vary slightly depending on whether you're using a prefabricated wall surround or tiling the walls.
Installing Prefabricated Wall Panels:
- Dry Fit the Panels: Before applying any adhesive, dry fit the panels around the tub to ensure they fit correctly. Trim any excess material as needed to ensure a snug fit.
- Apply Adhesive: Use a high-quality construction adhesive that's designed for bathroom use. Apply it to the back of the wall panels in a zigzag pattern to ensure even coverage.
- Install the Panels: Place the panels on the walls, starting with the back panel. Press them firmly into place, ensuring they align with the tub and wall studs.
- Seal the Seams: Once the panels are in place, apply silicone sealant along all seams and edges, including where the panels meet the tub. This prevents water from seeping behind the panels and causing mold or water damage.
Tiling the Surround:
- Install Cement Board: If you're using tiles, start by installing cement backer board on the walls around the tub. This material provides a solid, moisture-resistant base for the tile.
- Apply Waterproof Membrane: Over the cement board, apply a waterproofing membrane to ensure that moisture doesn't penetrate the walls.
- Tile the Walls: Start tiling from the bottom of the wall, working your way up. Use tile spacers to keep your tiles evenly spaced, and make sure to leave a slight gap between the bottom row of tiles and the tub.
- Grout and Seal: Once the tiles are set, apply grout between the tiles. After the grout has cured, seal the grout lines with a grout sealer to prevent water from seeping in.
Step 10: Final Plumbing Connections
With the walls finished, it's time to finalize the plumbing connections. This includes the tub's drain and overflow, as well as the faucet and shower components.
- Attach the Faucet and Showerhead: Install the faucet, showerhead, and any other fixtures according to the manufacturer's instructions. Use plumber's tape on the threads of the water supply lines to ensure a watertight seal.
- Connect the Drain: Secure the tub drain and overflow pipes. Tighten the fittings to ensure a proper seal, and apply silicone sealant to any joints as needed. Ensure the overflow is securely attached to prevent leaks.
- Test for Leaks: Before closing up any access panels, run water into the tub and drain it to test for leaks. Check all connections, including the faucet, drain, and overflow, to ensure there are no leaks.
Step 11: Finishing Touches
Now that your tub is fully installed, it's time to finish up with the final touches to make your bathroom both functional and visually appealing.
- Caulk the Edges: Apply silicone caulk along the edges where the tile or wall panels meet the tub. This seals the gap and prevents water from seeping under the tub or into the walls.
- Tip: Fill the tub with water before applying the caulk. This will slightly lower the tub, ensuring that the caulk will not crack when the tub is later filled.
- Install Shower Doors or Curtain Rod: If you're installing a shower curtain, secure the rod above the tub. For glass shower doors, follow the manufacturer's instructions for installation.
- Clean the Area: Wipe down the tub, tiles, and fixtures to remove any dust, debris, or excess caulk. Ensure that the tub is clean and free of any construction materials before using it.
Troubleshooting Common Issues
Even with careful planning, some issues might arise during or after the installation process. Here are a few common problems and solutions:
- Tub Won't Sit Level: If your tub isn't level, try using additional shims to make fine adjustments. In some cases, you may need to check the floor's overall level and adjust the framing.
- Drain Leaks: If you notice a leak around the drain, disassemble the connection and check the alignment of the rubber gaskets. Apply additional silicone sealant and tighten the fittings.
- Squeaky Tub: If your tub squeaks when you step in it, it's likely due to insufficient support. This can sometimes be remedied by adding more shims or placing a mortar bed under the tub during installation.
- Water Not Draining Properly: If water pools in the tub instead of draining efficiently, it could be due to an uneven installation. Double-check the level of the tub and ensure the drain is positioned at the lowest point.
Maintenance Tips for Your New Bathtub
To keep your new bathtub looking and functioning its best for years to come, consider the following maintenance tips:
- Regular Cleaning: Use non-abrasive cleaners to keep your tub free of soap scum and stains. Avoid using harsh chemicals that could damage the finish of the tub or tiles.
- Seal the Grout: If you've tiled around your tub, reapply grout sealer annually to prevent water damage and mold growth in the grout lines.
- Check for Leaks: Periodically inspect the tub's plumbing connections for any signs of leaks, especially around the drain and overflow.
- Ventilation: Keep the bathroom well-ventilated during and after baths or showers to reduce humidity and prevent mold growth.
Conclusion
Installing a bathtub may seem like a complex process, but with careful planning, the right tools, and attention to detail, you can successfully install a durable and beautiful tub that transforms your bathroom. By following this step-by-step guide, you'll ensure that your new tub is not only functional but also built to last.
From preparing the space to waterproofing and final plumbing, each step of the installation is crucial to ensure a long-lasting, leak-free tub. Now that you've completed the process, you can sit back, relax, and enjoy your new bathroom sanctuary!
Step-by-Step Video Tutorial
FAQs About Additional Tips for Bathtub Installation
Explore the FAQs about additional tips for bathtub installation and master the process with expert advice, ensuring a seamless and efficient project.
For tubs installed on concrete floors, setting them in a mortar bed is recommended. Mortar helps provide extra support and prevents cracking over time. This is especially important for acrylic tubs, which may flex under weight if not properly supported.
Silicone is recommended for acrylic tubs, as plumber’s putty can degrade the acrylic material over time. Apply a thin layer of silicone on the threads and the rubber gasket to ensure a watertight seal.
Use a level to check the alignment of the tub. If the floor is uneven, shims can be used to make adjustments. Always level the tub before securing it to the frame, as this ensures proper drainage and prevents leaks.
It depends on the manufacturer's recommendation and the quality of the tub. Higher-quality tubs with reinforced bases may not require a mortar bed, but cheaper tubs can benefit from it to prevent flexing and cracking.
Squeaking can occur when the tub is not properly supported. Ensure that the tub is set level and use shims where necessary. Installing a mortar bed under the tub can also prevent movement and reduce squeaking.
Once the tub is installed, run water to check for any leaks around the drain and overflow. Tighten the connections if necessary. Filling the tub with water before sealing the edges can also help confirm there are no leaks.
While some people use spray foam to insulate their tubs, it’s generally unnecessary for acrylic tubs with reinforced bases. These tubs retain heat well on their own. If insulation is needed, a mortar or sand bed provides better stability.
If the tub is slightly off-level but the slope allows proper drainage, it should function fine. However, if it's significant, leveling the floor or adjusting shims is critical before continuing the installation.
Check the placement of floor joists to avoid interference with the drain location. If the joists obstruct the drain installation, you may need to consult a structural engineer to prevent weakening the floor's integrity.


