Retiling a bathtub surround can be a daunting task, but recognizing the signs that it’s time to retile can save you from a bigger headache down the line. If you've recently noticed loose tiles, crumbling grout, or suspicious signs of water damage around your bathtub, it’s likely that your bathtub surround needs some attention. Let’s break down the common signs that it’s time to retile, what you might be getting into with this project, and some tips from DIY enthusiasts who’ve tackled similar issues.
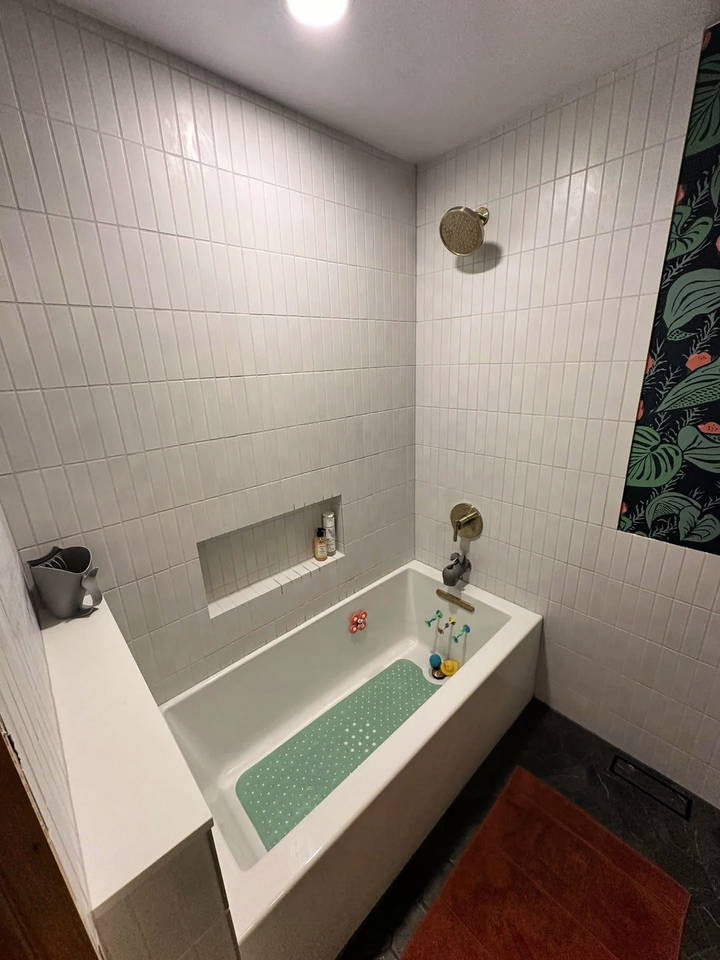
Signs Your Bathtub Surround Needs Retiling
Before jumping into a retiling project, it's important to recognize the warning signs that indicate your bathtub surround may need to be replaced.
1. Loose or Falling Tiles
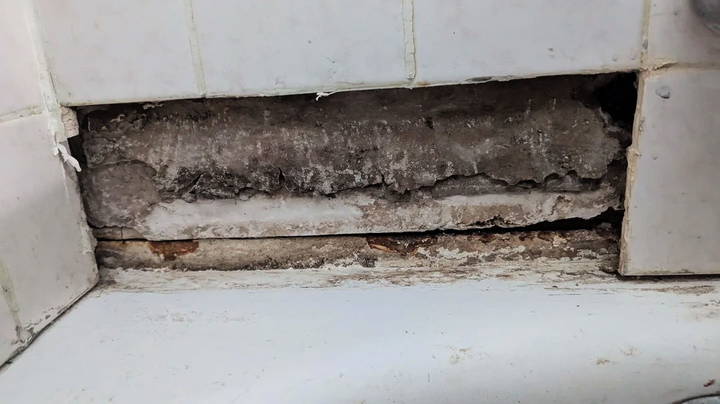
One of the most obvious signs that your bathtub surround needs attention is loose or falling tiles. If you notice tiles moving when you press on them or, worse, falling off the wall, it’s a clear indication that the adhesive behind them has failed. This issue often points to underlying problems such as water damage or a failing substrate (the surface on which the tiles are set). For example, one DIYer found sand-like material falling behind loose tiles, which turned out to be crumbling cement board beneath the tiles.
2. Crumbling Grout or Cracks
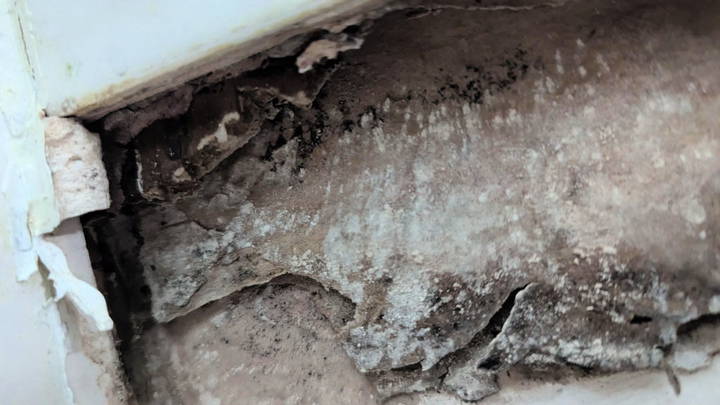
If the grout between your tiles is crumbling or you see visible cracks, it’s more than just a cosmetic issue. Crumbling grout allows water to seep behind the tiles, which can lead to mold growth, water damage to the walls, or even structural damage if left unchecked. Replacing or repairing grout can sometimes be a temporary fix, but extensive crumbling often indicates a need for a more comprehensive retiling job.
3. Signs of Water Damage
Water damage behind the tiles is a significant red flag. Stains, discoloration, or bulging walls around the bathtub area suggest that water has seeped into the wall behind the tiles. This can happen if there’s no proper moisture barrier or if the existing barrier has failed. In cases like these, simply replacing the tiles won't suffice—you’ll need to strip everything down to the studs and rebuild with proper waterproofing materials to prevent future issues.
4. Lack of a Moisture Barrier
If you discover that your bathtub surround lacks a moisture barrier—such as a plastic or rubber membrane behind the tiles—it's a major problem. The moisture barrier is essential for protecting the wall structure from water damage. In older homes, it’s not uncommon to find that the original builders skipped this step, and over time, this can lead to significant damage requiring a full rebuild of the bathtub surround.
What to Expect When Retiling Your Bathtub Surround
If you’ve identified one or more of these signs, you might be wondering, "What am I getting myself into?" Retiling a bathtub surround is not a small job, especially if it involves removing old tiles, addressing water damage, and installing new materials. Here’s a breakdown of the key steps involved:
1. Demo Time: Stripping Everything Down
The first step is to remove all the old tiles and the damaged substrate behind them. This means pulling everything off down to the studs if there’s water damage or the substrate (like cement board or drywall) is crumbling. One homeowner who shared their experience on a DIY forum described their situation where the cement board was crumbling and there was no moisture barrier. In this case, they needed to start fresh by removing everything to the studs.
2. Check for Water Damage and Mold
Once you have everything stripped down, it’s crucial to check for any water damage or mold. Mold can pose serious health risks and can spread quickly if not dealt with properly. Any damaged wood or insulation will need to be replaced before moving on to the next steps.
3. Install a New Moisture Barrier
Installing a moisture barrier is a must to prevent future water damage. Popular options include plastic sheeting, a waterproof membrane like Kerdi, or more advanced options like Wedi board. One DIYer recommended Wedi board as it’s easier to work with and more watertight compared to traditional cement boards.
4. Install Cement Board or Alternative Substrates
Next, you’ll need to install a sturdy, water-resistant substrate like cement board, which is a common choice for bathroom surrounds. Cement board provides a solid foundation for tiles and is less susceptible to moisture damage than drywall. Ensure the substrate is installed correctly and securely attached to the studs to avoid any movement that could lead to cracking tiles or grout.
5. Tile Installation
Once your moisture barrier and substrate are in place, it's time to install the new tiles. This involves applying thin-set mortar, laying the tiles, and ensuring they are spaced correctly and level. After the tiles have set, you’ll need to apply grout between the tiles and seal it to provide additional protection against water infiltration.
6. Finishing Touches
The final step is to caulk around the edges where the bathtub meets the tiles and where the tiles meet the walls. This creates a watertight seal and helps prevent water from sneaking behind the tiles.
Tips and Considerations for Retiling
- Start with a Plan: Make sure you have a clear plan before starting the demo. Understand the materials you’ll need and the steps involved to avoid unexpected delays.
- Consider the Size of the Job: Retiling a bathtub surround is a big project, especially for a first-time DIYer. Make sure you’re prepared for the scope of work and the time it will take to complete.
- Expect Surprises: As with any home improvement project, especially in older homes, be prepared for surprises. You may discover more damage than anticipated, requiring additional repairs.
- Ensure Proper Ventilation: Moisture is the enemy in bathrooms. Ensure your bathroom is properly ventilated to prevent future mold and mildew growth.
- Get Advice from Experienced DIYers: Forums like r/DIY are full of helpful advice from people who have been in your shoes. Don't hesitate to ask questions and learn from their experiences.
Conclusion
Retiling a bathtub surround can be a challenging but rewarding DIY project. Recognizing the signs of damage early and understanding the steps involved will help you tackle the project with confidence. From removing old tiles and installing a new moisture barrier to choosing the right materials and putting everything back together, a well-executed retiling job can give your bathroom a fresh, new look and protect it from water damage for years to come. Remember, while the job may be tough, the satisfaction of a well-done DIY project is always worth the effort!
FAQ: Retiling Your Bathtub Surround
This FAQ section covers additional questions and scenarios that may arise when considering a bathtub surround retile. If you're still unsure about certain aspects of the project, the following questions and answers can provide further clarity.
What If I Find Mold Behind My Tiles?
If you discover mold behind your tiles during demolition, it's crucial to address it immediately. Mold can pose serious health risks and can quickly spread if not removed properly. Use a mold-killing solution or bleach to clean the affected area thoroughly. If the mold has penetrated deeply into drywall or wooden studs, you may need to replace those materials. Always wear protective gear, such as a mask and gloves, when dealing with mold.
How Can I Tell If My Substrate Is in Good Condition?
The substrate, often made of cement board or a similar material, is the foundation upon which your tiles are installed. If your substrate is crumbling, soft, or shows signs of water damage, it needs to be replaced. A solid substrate should feel firm and show no signs of disintegration. If you see sand-like material or pieces falling off, it’s a clear sign that the substrate has failed and requires replacement.
Do I Need to Remove the Bathtub to Retile the Surround?
In most cases, you don’t need to remove the bathtub itself to retile the surround. The focus is typically on removing the tiles, substrate, and any damaged materials around the tub. However, if the bathtub is in poor condition or if there are signs of leaks directly from the tub, it might be worth considering replacing it simultaneously.
Is It Possible to Retile Over Existing Tiles?
While it is technically possible to tile over existing tiles if they are in good condition and securely attached, it is generally not recommended for bathtub surrounds. This method can add unnecessary weight to the wall and may not address underlying issues like water damage or a failing substrate. For a more durable and long-lasting result, it's best to remove the old tiles and start fresh.
What Type of Moisture Barrier Should I Use?
There are several moisture barrier options available for bathroom surrounds. A popular choice is a waterproof membrane like Kerdi, which is easy to apply and highly effective. Alternatively, Wedi board provides an integrated solution that combines a waterproof surface with a solid substrate, making it a great option for DIYers. Ensure that any moisture barrier extends well beyond the wet areas to provide full protection.
Can I Complete This Project If I Only Have One Bathroom?
If you only have one bathroom, plan the project carefully to minimize downtime. A full retiling project can take anywhere from a few days to a few weeks, depending on the extent of the work. Consider using a temporary shower solution, like a portable camping shower, or coordinate with neighbors or friends to use their facilities during the renovation.
How Can I Prevent Future Water Damage?
Proper installation is key to preventing future water damage. Ensure a quality moisture barrier is in place and that all materials are water-resistant. Use a good quality thin-set mortar for setting the tiles and seal the grout well to prevent water seepage. Regular maintenance, like resealing grout and caulking, is essential to keep the area watertight.
What Tools Will I Need for Retiling?
For a bathtub surround retiling project, you’ll need several tools, including:
- Tile cutter or wet saw
- Notched trowel for spreading thin-set mortar
- Rubber float for applying grout
- Level and tile spacers to ensure even installation
- Hammer and chisel for demolition
- Safety gear: gloves, mask, and goggles
Should I Consider Professional Help for This Project?
If you're comfortable with DIY projects and have some experience, retiling a bathtub surround is certainly doable. However, if you encounter extensive water damage, mold, or structural issues, it may be wise to consult with a professional. They can ensure that the job is done safely and correctly, especially when dealing with potential electrical or plumbing complications.
How Long Will It Take to Retile a Bathtub Surround?
The timeline for a retiling project varies depending on the size of the bathroom, the extent of any underlying damage, and your experience level. A basic retiling job could take around 3-5 days, while more extensive jobs involving rebuilding from the studs could take a week or more. Ensure you have a realistic timeline and consider any unexpected issues that could arise.


