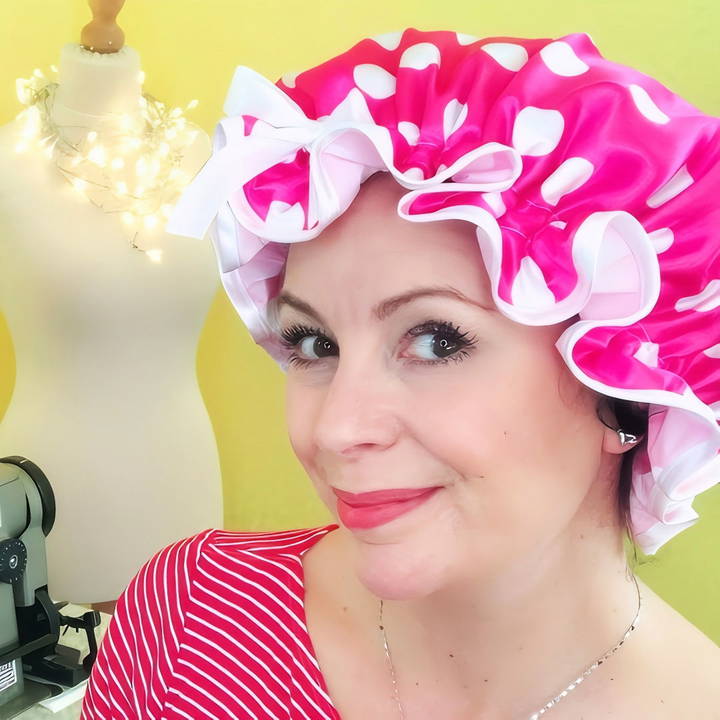
I always enjoyed the simple but profound satisfaction of making something with my hands. Whether it was knitting a scarf or sewing a simple dress, crafting gave me a sense of accomplishment. So, when I found myself looking at the uninspired and often cheap-looking shower caps in the stores, I decided it was time to try making my own. Why not make a DIY shower cap that reflected my personality, with fabrics and ribbons of my choice? Here's my journey, step-by-step, so you can make one too.
Gathering the Materials
Before diving into the sewing process, the first step is to gather all the necessary materials. Here's what I found indispensable:
- Fabric: I chose a medium-weight fabric like cotton poplin for its ease of sewing and vibrant prints. A quick-drying fabric like viscose or poly-cotton blend also works well.
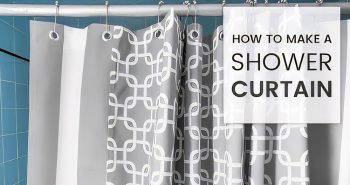
- Lining: A shower curtain is essential for the lining to make the cap waterproof. Most supermarkets carry them. They're inexpensive and a single curtain can yield multiple caps.
- Elastic: A thin six-millimeter elastic band is perfect for the shower cap's casing. It's stretchy but not too thick, providing a snug fit.
- Bias Binding Tape: Used to make the casing for the elastic. Satin bias binding not only looks luxurious but is also gentle on the hairline.
- Satin Ribbon: If you want to add a bow, a wide satin ribbon adds a decorative touch. Bright colors or patterns make the shower cap fun and personalized.
- Sewing Tools: This includes pins, fabric scissors, a sewing machine, and a measuring tape. If you have a bias binding maker, it can be particularly handy for professional-looking finishes.
Armed with these materials, I was ready to begin the actual crafting.
Step by Step Instructions
Learn how to sew a DIY shower cap using a free pattern. From making the template to threading the elastic, make your own shower cap easily at home.
Making the Template
The template forms the foundation of your shower cap. Here's how I crafted mine:
- Size the Circle: I decided on a diameter of 60 centimeters for my shower cap. It's slightly larger than most store-bought options, allowing for more hair or a looser fit.
- Drawing the Circle: Using a homemade compass from eBay, reminiscent of my school days, I drew a perfect circle. If you lack a large compass, don't worry. Simply measure the radius (30 centimeters) from a central point around several spots and join the dots.
- Cut the Template: I initially made my template out of fabric, which I find easier to work with than paper. You can opt for sturdy paper if you prefer.
Cutting and Sewing the Fabric
Now, the fun really begins.
- Prepare the Fabric: Lay down your chosen fabric, right side up. Pin the template onto it and cut carefully around the edges. I used just a few pins since my cutting mat kept everything stable.
- Add the Lining: Unravel the shower curtain. Without pre-cutting a circle from it, place your fabric cutout on the curtain, aligning it snugly with one corner to minimize waste. Pin it securely and cut the lining using your fabric as the guide.
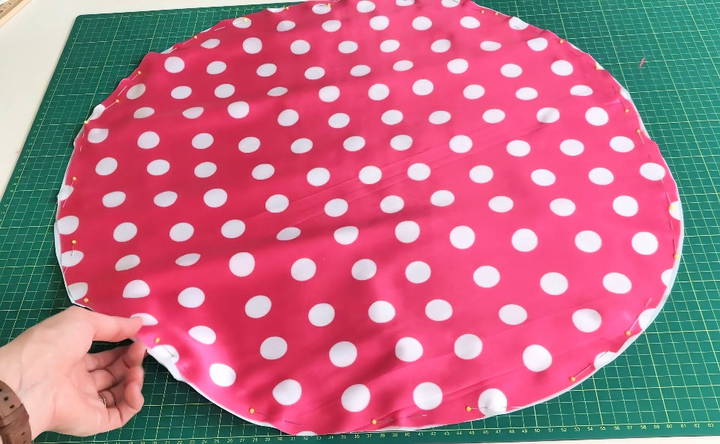
- Sew the Layers Together: It's time to hit the sewing machine. Sew around the edge of the circle, joining the fabric and lining, while carefully removing the pins as you go. I kept a 1-centimeter seam allowance from the edge. Remember, any small puckering will smooth out once the elastic is added.
Finishing the Edges
The edges of the shower cap need a neat finish.
- Trim the Edges: Cut away any excess fabric, leaving a few millimeters beyond the stitch line.
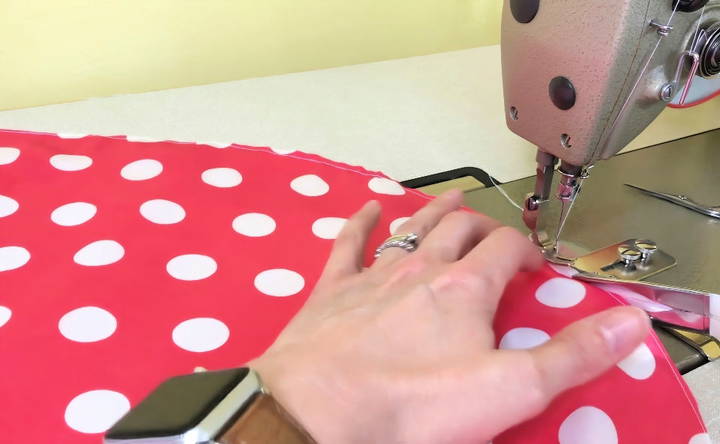
- Attach the Bias Binding: Using a bias binding folder is a nifty trick I learned. Threading the binding through the folder allows you to sew it in one go with a neat finish. Screw the folder onto your sewing machine if required and ensure the binding feeds correctly and sits snugly next to the presser foot.
- Sew the Binding: Insert your stitched circle into the bias folder. Starting with a few stitches to lock it in place, sew around the whole circle. Ensure you guide the fabric smoothly through the binding.
Sewing the Elastic Casing
Your shower cap is coming together beautifully now!
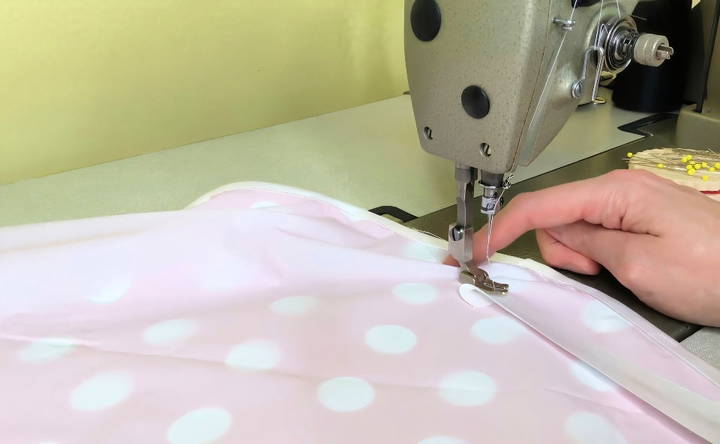
- Make the Elastic Casing: Measure approximately two inches from the edge where you attached the bias binding and sew another round of bias binding to form a channel for the elastic.
- Finish the Channel: Overlap the ends of the bias binding as you near completing the circle. Fold over twice for a clean end and stitch it down securely.
Threading the Elastic
It's time to make your shower cap functional.
- Measure Your Head: Use the elastic to find a comfortable fit around your head. Mark the length needed and allow extra for adjustments.
- Thread the Elastic: A large eye needle or Bodkin can help feed the elastic through the casing. Carefully weave it through without twisting, until both ends emerge.
- Secure the Elastic: Knot the ends securely, ensuring the fit remains comfortable on your head. Trim any excess and tuck the knot into the casing.
Customization Ideas
Customizing your DIY shower cap can make it more personal and functional. Here are some easy and creative ideas to help you make a unique shower cap that suits your style and needs.
Fabric Choices
Choosing the right fabric is essential for both functionality and aesthetics. Here are some popular options:
- Waterproof Fabrics: Use materials like laminated cotton or oilcloth to ensure your shower cap is waterproof.
- Satin or Silk: These fabrics are gentle on your hair and help reduce frizz. They are perfect for the inner lining of your shower cap.
- Patterned Fabrics: Pick fabrics with fun patterns or colors to add a personal touch. You can find a variety of designs at your local craft store or online.
Decorative Elements
Adding decorative elements can make your shower cap stand out. Here are some ideas:
- Ribbons and Lace: Sew ribbons or lace around the edges for a delicate and stylish look.
- Embroidery: Personalize your shower cap with embroidered initials or designs. This adds a unique and handmade touch.
- Buttons and Beads: Attach buttons or beads for a playful and colorful accent.
Functional Enhancements
Improve the functionality of your shower cap with these enhancements:
- Adjustable Elastic: Use adjustable elastic bands to ensure a snug and comfortable fit. This is especially useful if you have thick or long hair.
- Double Layering: For extra protection, sew two layers of waterproof fabric together. This ensures your hair stays completely dry.
- Reversible Design: Make a reversible shower cap by using different fabrics on each side. This gives you two styles in one cap.
Tips for Success
- Measure Carefully: Ensure you measure your head accurately to make a shower cap that fits well.
- Test Waterproofing: Before using your shower cap, test its waterproofing by running it under water. Make adjustments if needed to prevent leaks.
- Experiment with Styles: Don't be afraid to try different styles and materials. Customizing your shower cap is all about making it work for you.
By incorporating these customization ideas, you can make a shower cap that is not only functional but also a reflection of your personal style.
Troubleshooting Common Issues
When making and using DIY shower caps, you might encounter some common problems. Here are practical solutions to help you troubleshoot and ensure your shower cap works perfectly.
Fit and Comfort
- Problem: The shower cap is too tight or too loose.
- Solution: If the cap is too tight, replace the elastic with a longer piece. If it's too loose, use a shorter piece of elastic. Measure your head circumference accurately before cutting the elastic. Ensure the fabric has enough give. Some fabrics might not stretch well, affecting the fit.
Waterproofing
- Problem: The shower cap leaks and your hair gets wet.
- Solution: Use two layers of waterproof fabric. This adds extra protection against leaks. Apply a waterproof sealant to the seams. This prevents water from seeping through the stitching. Run water over the cap to check for leaks. Make adjustments if necessary.
Durability
- Problem: The shower cap wears out quickly.
- Solution: Choose durable, waterproof fabrics like laminated cotton or oilcloth. These materials last longer and provide better protection. Double-stitch the seams for added strength. This helps the cap withstand regular use.
Cleaning and Maintenance
- Problem: The shower cap gets dirty and smells bad.
- Solution: Rinse the cap with warm water after each use. For a deeper clean, use a mixture of water and vinegar. Gently scrub the cap and rinse thoroughly. Hang the cap to dry completely after each use. This prevents mold and mildew from forming.
Storage
- Problem: The shower cap loses its shape when stored.
- Solution: Store the cap in a dry, cool place. Avoid folding it tightly. Instead, lay it flat or hang it to maintain its shape. Keep the cap in a breathable storage bag. This protects it from dust and damage.
Elastic Issues
- Problem: The elastic band stretches out over time.
- Solution: If the elastic loses its stretch, replace it with a new piece. This is a simple fix that can extend the life of your shower cap. Invest in good-quality elastic that retains its stretch longer.
By addressing these common issues, you can ensure your DIY shower cap remains functional and comfortable.
FAQs About DIY Shower Caps
Discover everything you need to know about DIY shower caps with our comprehensive FAQs. Learn about materials, sizing, and step-by-step instructions.
Yes, you can use different fabrics for the outer layer. While waterproof fabrics like laminated cotton or oilcloth are ideal, you can also use plastic sheeting or even regular cotton with an added waterproof layer. Just ensure the fabric is durable and can withstand moisture.
To care for your DIY shower cap:
Hand wash: Gently hand wash with mild soap and water.
Air dry: Let it air dry completely before storing.
Avoid heat: Do not use a dryer or iron directly on the waterproof fabric as it may damage the material.
Using a satin lining for your shower cap has several benefits:
Reduces frizz: Satin is smooth and helps prevent hair frizz.
Protects hair: It reduces hair breakage and keeps your hairstyle intact.
Comfort: Satin feels soft against the skin and is comfortable to wear.
Customizing your DIY shower cap is easy and fun! Here are a few ideas:
Add a bow or ribbon: Sew a decorative bow or ribbon to the front for a cute touch.
Use patterned fabric: Choose fabrics with fun patterns or prints to match your style.
Personalize with initials: Embroider your initials or a small design on the cap.
Adjust the size: Make the cap larger or smaller to fit your hair volume.
Making your own shower cap has several benefits:
Cost-effective: DIY shower caps are often cheaper than store-bought ones.
Custom fit: You can tailor the size to fit your hair perfectly.
Eco-friendly: Using reusable materials reduces waste compared to disposable caps.
Personal satisfaction: Making something yourself can be rewarding and enjoyable.
Adding the Finishing Touches
To add personality and flair:
- Decorative Bow: Craft a neat bow with some leftover satin ribbon. I found that wider ribbons are easier to handle. Securely sew or glue it onto your shower cap for that polished touch.
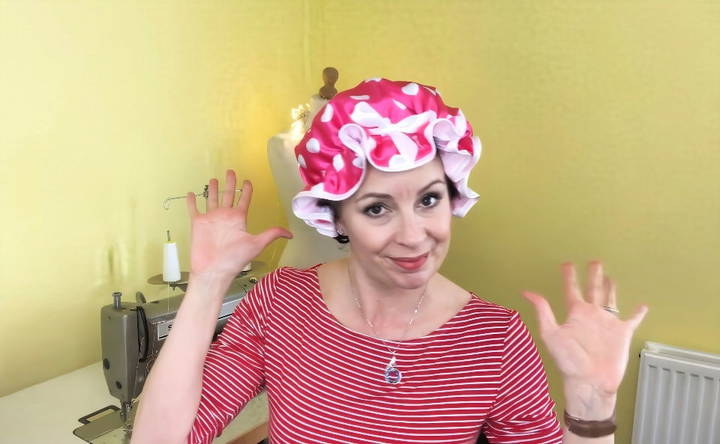
With these steps completed, I finally had a shower cap that was unique, functional, and curiously satisfying to make. The sense of pride in wearing something handmade is immeasurable. And if you love gifting, these shower caps make thoughtful, personalized presents.
Conclusion:
Crafting this DIY shower cap taught me how delightful and rewarding simple sewing projects can be. I hope my experience inspires you to try making your own. Enjoy the process, and remember, creativity knows no bounds!


