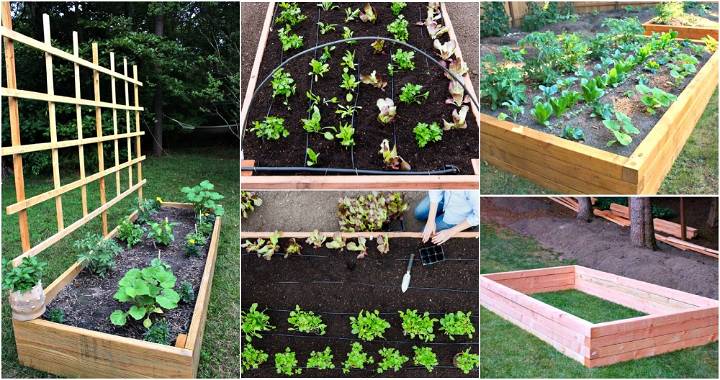
Building raised garden beds transformed not only the look of my garden but also its productivity. When I decided to replace my old, worn-out garden beds, I was determined to find a design that was compact, durable, and suitable for my small backyard. What I came up with was not only functional but also an aesthetically pleasing gardening space. Here's how I did it, step by step.
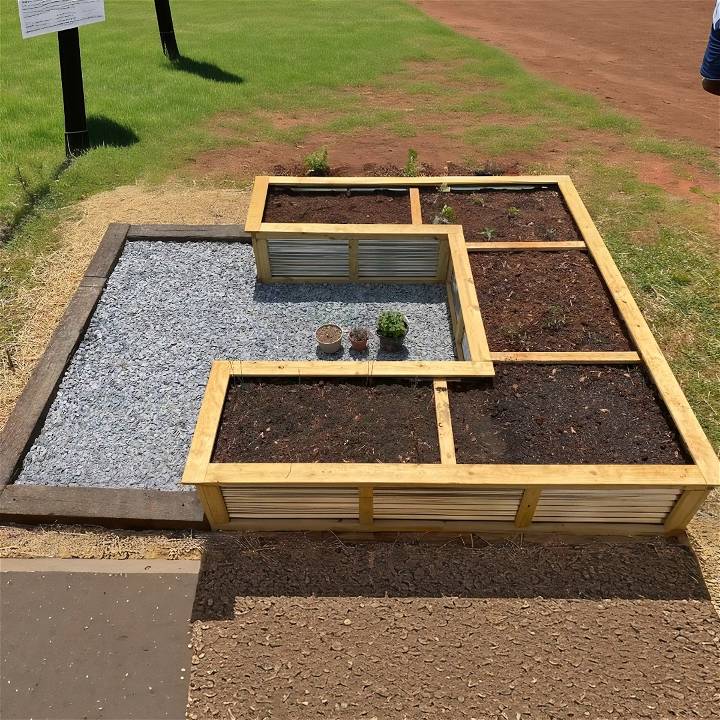
Materials Needed and Their Purpose
- 2x4 Lumber: For constructing the frame. Sturdy and affordable.
- Metal Roofing Sheets: For the garden bed walls. Durable and provides a barrier against pests.
- Deck Screws & Metal Roofing Screws: To assemble the frame securely and attach the metal sheets.
- Saw, Drill, and Cutting Tools: For cutting lumber and metal sheets, and drilling them together.
- Level and Measuring Tape: Ensuring everything is even and fits perfectly.
- Wooden Posts (Optional): For additional support if your bed is particularly large.
Step by Step Instructions
Build a DIY raised garden bed with this step-by-step guide, including the materials needed and instructions for building and planting.
Prepping the Area
Before constructing the new beds, I removed the old ones and salvaged the fertile soil, which I set aside for later. It's crucial to have a level and clear space for your new beds to prevent any unnecessary hassle during the construction process.
Cutting Your Lumber
First, I measured and cut my 2x4 lumber to the desired lengths. The key here is precision; inaccurate cuts can lead to more work later on. I laid out the cut pieces on the ground, mimicking the frame of the garden bed, to have a visual of the final product and to make sure everything fits perfectly.
Building the Frame
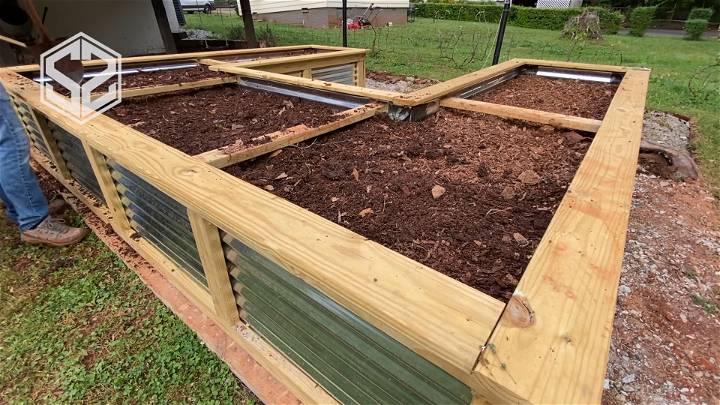
With my lumber cut, I began assembling the frame. This involved screwing the 2x4s into a rectangular shape with support beams every three feet. The supports are essential for the integrity of the metal sheets and the overall structure.
Installing the Metal Sheeting
Next, securing the metal roofing sheets to the frame came in. I opted for metal sheets for their durability and resistance to pests. Attaching the sheets with roofing screws every eight to ten inches made the structure strong and left no room for bending or warping.
Adding Reinforcement
After the basic structure was set up, I reinforced the frame with additional 2x4s across the longer sections to prevent the soil's pressure from pushing out the walls. Moreover, a top rail made from deck boards added both strength to the structure and a finished look.
Foundation Improvement
To protect my raised bed from rot and pests, I laid down a layer of old, partially rotted wood I had from the previous garden beds. This forms a barrier between the new bed and the damp ground below, extending the life of the bed.
Sealing the Corners
For extra moisture protection, I applied a roofing ice and water shield on the corners and edges where the metal meets the wood. This barrier helps in preventing wood rot and extends the life of the raised bed significantly.
Filling the Bed
Before adding soil, I placed a layer of old firewood at the base of the bed. This acts as a filler material that will eventually decompose and enrich the soil. It's an eco-friendly way to dispose of old wood, and it reduces the amount of soil needed to fill the bed.
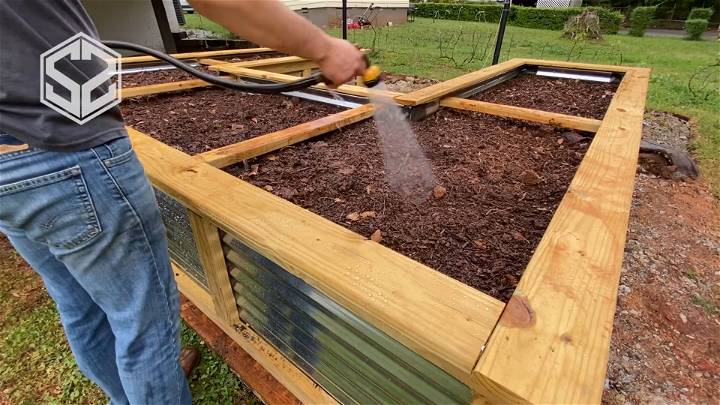
I then added the fertile soil I had saved from my old garden beds, complemented with compost and manure to enrich the mix. Remember, good soil is the foundation of a productive garden.
Planting and Final Touches
With the bed filled, I started planting. Strategic placement is key—taller plants like tomatoes go at the back, and shorter ones in front, ensuring every plant gets enough sunlight. I also built a trellis for climbing plants like beans and cucumbers to maximize the use of vertical space.
Building DIY garden beds took effort, but the result was worth it. They look great, add structure, and provide a healthy environment for plants. With planning and materials, anyone can make a beautiful garden.
Soil and Compost Making for DIY Raised Garden Beds
Building the perfect blend of soil for your raised garden bed is crucial for the health and growth of your plants. Here's how to make a rich, nurturing environment for your garden.
The Ideal Soil Mix
A good soil mix is essential for raised garden beds. It should have excellent drainage, hold moisture, and be rich in nutrients. The best mix includes:
- Topsoil: Provides the base for your soil mix.
- Compost: Adds essential nutrients and improves soil structure.
- Sand or Grit: Ensures good drainage.
For a balanced mix, use about 50% topsoil, 30% compost, and 20% sand or grit. This combination supports plant health and encourages robust growth.
Making Your Own Compost
Composting is a sustainable way to enrich your garden soil. To make your own compost:
- Combine green waste (like vegetable scraps) with brown waste (such as dry leaves).
- Keep the pile moist and turn it regularly.
- Wait for the material to decompose into dark, crumbly soil.
Homemade compost is full of nutrients and beneficial microorganisms that are vital for your plants.
Plant Selection and Layout for Raised Garden Beds
Choosing the right plants and designing an effective layout can maximize the productivity of your DIY raised garden bed.
Best Plants for Raised Beds
Some plants thrive in the conditions that raised beds offer, such as:
- Carrots: They love the loose, well-drained soil of raised beds.
- Cucumbers: Opt for vining varieties to save space.
- Radishes: Quick to mature and easy to grow.
- Onions: Require the rich, aerated soil that raised beds provide.
These plants benefit from the improved soil conditions and can lead to a more bountiful harvest.
Designing Your Garden Layout
When planning your garden layout:
- Consider plant height: Taller plants should be at the back to avoid shading smaller ones.
- Group by needs: Place plants with similar water and sunlight requirements together.
- Use vertical space: Trellises can support vining plants like cucumbers.
A thoughtful layout ensures each plant receives the resources it needs to flourish.
By focusing on these aspects, you can build a raised garden bed that is both beautiful and productive.
Organic Pest Control in Raised Garden Beds
Ensuring your raised garden beds remain free from pests is vital for the health of your plants. Here's a guide to managing pests organically, which is safer for both your plants and the environment.
Understanding Pest Control
Effective pest control in a garden starts with prevention. By making an environment that is unfavorable for pests, you can reduce the chances of an infestation. Here are some strategies:
- Healthy Soil: Begin with rich, well-composted soil. Healthy plants are less likely to succumb to pests.
- Diverse Planting: Mix up your plants. Diversity can confuse pests and attract beneficial insects.
- Physical Barriers: Use row covers or plant collars to physically keep pests away from your plants.
Biological Controls
Nature has its own pest control mechanisms. Encouraging beneficial predators in your garden is a smart way to control pests.
- Ladybugs: These friendly beetles consume aphids, mites, and other harmful pests.
- Lacewings: Their larvae are voracious eaters of many pest species.
- Predatory Wasps: They help control caterpillar populations.
Companion Planting
Some plants have natural pest-repelling properties and can protect their neighbors.
- Marigolds: Repel nematodes and other pests with their roots.
- Basil: Its strong scent is known to deter thrips and flies.
- Garlic: Planting garlic can help keep away aphids and other soft-bodied pests.
DIY Organic Sprays
Sometimes, despite your best efforts, pests can still invade. Here are some homemade solutions:
- Neem Oil: A natural pesticide that controls a wide range of pests.
- Soap Spray: Mix a mild liquid soap with water to build a spray that can handle soft-bodied pests.
- Chili Pepper Spray: A spicy solution that can deter many insects and animals.
Regularly inspect your garden for signs of pests and address them promptly with these natural methods. Your plants—and the planet—will thank you for it!
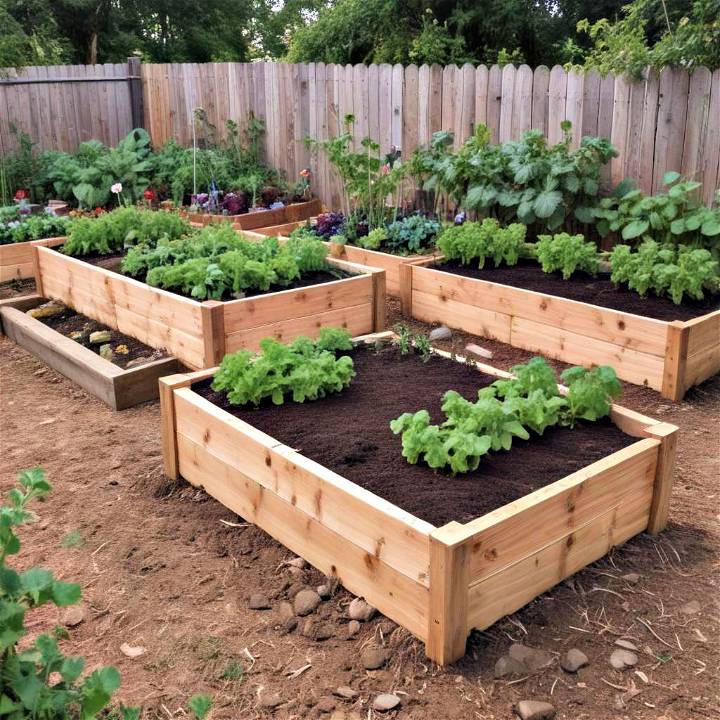
FAQs About DIY Raised Garden Beds
When it comes to raised garden beds, there are always questions that pop up frequently among gardeners. Here are some of the most common inquiries, answered in a straightforward and easy-to-understand manner.
How Deep Should My Raised Bed Be?
The depth of your raised bed can vary based on what you're planting and where it's located. Generally, 6 to 24 inches deep is suitable for most plants. If your bed is on soil, shallower depths are fine as roots can grow down into the earth. For beds on hard surfaces like concrete, aim for at least 18 inches to accommodate the roots.
Do I Need a Barrier at the Bottom of My Raised Bed?
A barrier isn't necessary if your raised bed is on soil, as most weeds can't grow through deep soil. However, for added protection against weeds and burrowing animals, you can line the bottom with cardboard. This also helps to retain soil moisture.
What Materials Are Best for Building Raised Beds?
Untreated timber like pine is affordable but decays faster. Cedar is more expensive but lasts longer due to its rot-resistant properties. Stone and concrete blocks are durable and permanent options, though they can be more costly.
Can I Plant Vegetables in Cinder Blocks?
Yes, you can use cinder blocks for raised beds. They're sturdy and provide good drainage. Just ensure they haven't been treated with harmful chemicals if you're growing edibles.
What's the Best Way to Use Mulch in My Raised Bed?
Mulch helps retain moisture, suppress weeds, and regulate soil temperature. Apply a 2 to 3-inch layer of organic mulch like straw or wood chips around your plants. Avoid piling it against the plant stems to prevent rot.
These FAQs should help clarify some of the common concerns and help you get the most out of your DIY raised garden beds.
Conclusion:
Wrapping up, making a DIY raised garden bed can be a rewarding project that enhances your gardening experience. From choosing the materials to planting your favorite herbs and vegetables, this simple guide can help you get started on your garden journey.


