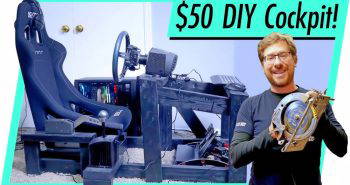
Hey there, everyone! If you've ever dreamt of setting up your own DIY sim rig but felt intimidated by the cost or complexity, you're in good company. I recently took on the challenge of making a SimRacing rig as affordably as possible, using materials I had on hand and a few extra pieces. This guide will walk you through the process I followed, offering insights and advice from my own experience (read: mistakes!).
Step by Step Instructions
Build your own DIY sim racing cockpit with our step-by-step guide. Learn planning, materials, and construction for the ultimate sim racing experience.
Getting Started: Planning Your SimRacing Rig
Get started with simracing by planning your rig. understand the basics, gather essential components, and learn why these materials are crucial.
Step 1: Understanding the Basics
Before diving into the construction, it's essential to understand what a SimRacing rig is and why it's a significant upgrade for racing enthusiasts. Essentially, a SimRacing rig replicates the seating and control setup of a car, providing a more immersive and realistic experience than simply attaching a wheel to a desk.
Step 2: Gathering Materials
Discover essential components and their significance in gathering materials. Learn why these materials are crucial for your projects.
Essential Components
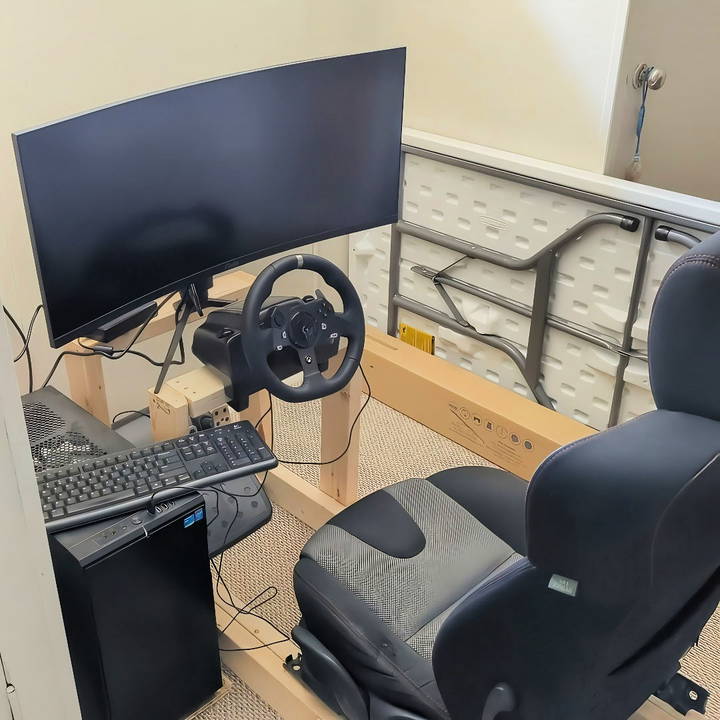
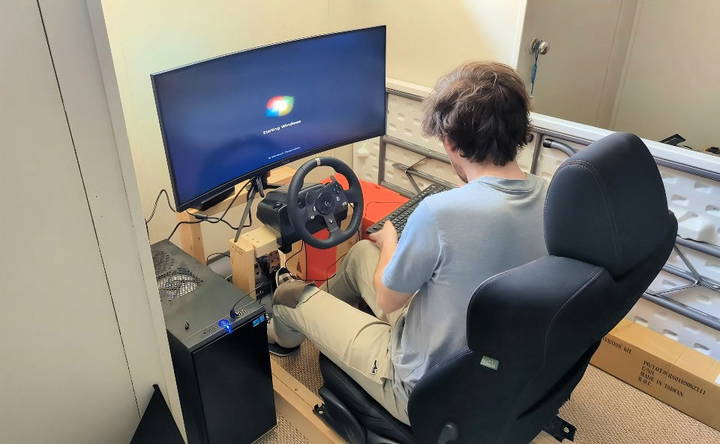
- Frame Materials: I used leftover wood from basement renovations. You'll need several 2x4s, screws, and a saw for cutting.
- Racing Controls: I used my trusty Logitech G29 wheel and pedals, although any similar setup will work.
- Seat: I opted for a second-hand car seat for added realism.
- Monitor: A large monitor, preferably 34 inches or more, enhances immersion. I went for a Pixio curved monitor, perfect for racing simulations.
Why These Materials?
- Wood: Widely available and easy to work with, making it ideal for a DIY project. Using leftover pieces reduces costs significantly.
- Car Seat: Provides a realistic seating position and can often be found second-hand at a reasonable price.
- Monitor: A large, curved screen provides an enhanced field of view, crucial for immersion.
Building the Frame: Crafting the Foundation
Learn how to build a sturdy frame with our easy guide. Step-by-step instructions for laying out the design, constructing the frame, and attaching the seat.
Step 3: Laying Out the Design
With your materials gathered, it's time to sketch out your plan. I based mine loosely on designs I found online, but tailored it to suit my space and materials. The key dimensions were a length of four feet and a width of 16 inches.
Step 4: Constructing the Frame
Discover the essential tools and step-by-step building process for constructing the frame efficiently. Get expert tips for a smooth project from start to finish.
Tools Needed
- Saw
- Drill
- Measuring tape
- Screws (2.5-inch screws are recommended)
Building Process
- Cut the Wood: I cut three interior pieces to 13 inches, although this was a bit overkill. Adjust based on your needs.
- Assemble the Base: Using the screws, construct a basic rectangular frame. Ensure everything is level and sturdy.
- Add Support: If you anticipate heavy use or a heavier screen, reinforce the frame with additional cross pieces.
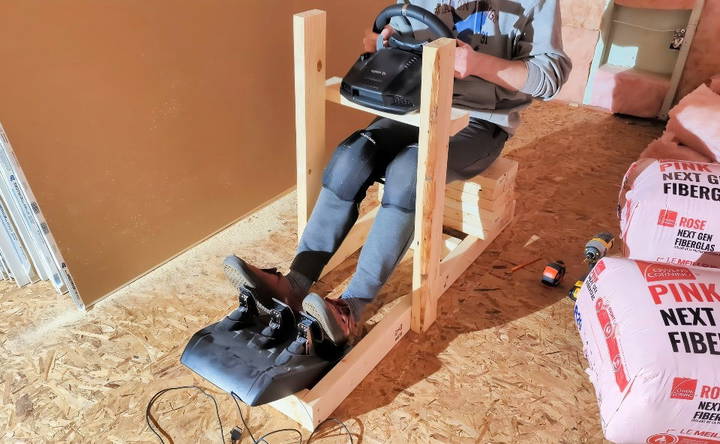
Step 5: Attaching the Seat
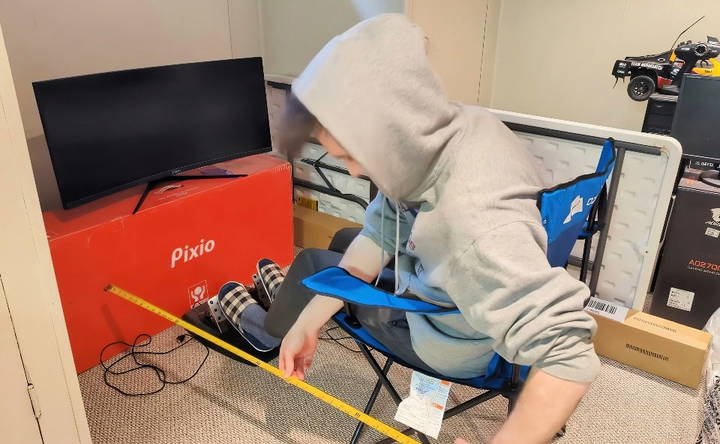
Securing the seat was a bit of a challenge because my initial measurements didn't match the Mazda Speed 3 seat's rail width. Learn from my errors:
- Ensure the seat rails match your frame.
- Consider acquiring your seat before finalizing your frame dimensions.
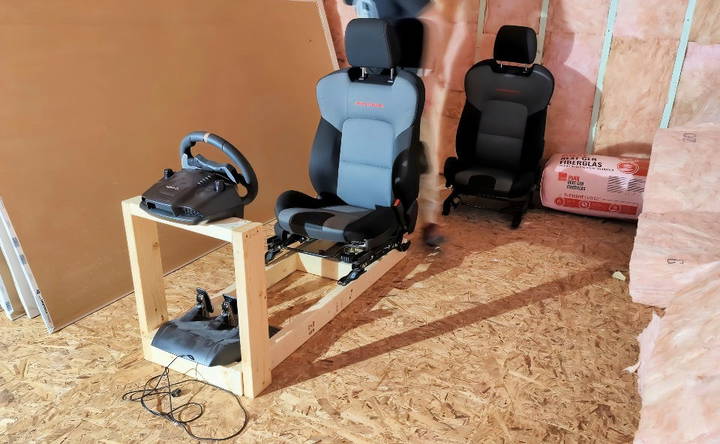
Installation of Racing Controls: Setting Up Immersion
Install racing controls: step-by-step guide for wheel & pedals setup. Learn the tools, mounting, and tips from common mistakes for optimal immersion.
Step 6: Mounting the Wheel and Pedals
Position the wheel at a comfortable height. Without having the seat initially, I adjusted through trial and error, favoring what felt natural.
Tools and Mounting
- Wheel Mounting: Secure it to the frame's top using clamps or bolts.
- Pedals: Use M6 bolts to secure the pedals to a base piece of wood. It's crucial to ensure they're firmly attached for realistic pedal pressure on braking or accelerating.
Learning from Mistakes
- Longer bolts would have saved several adjustments—learn from me and secure the pedals with appropriately sized bolts.
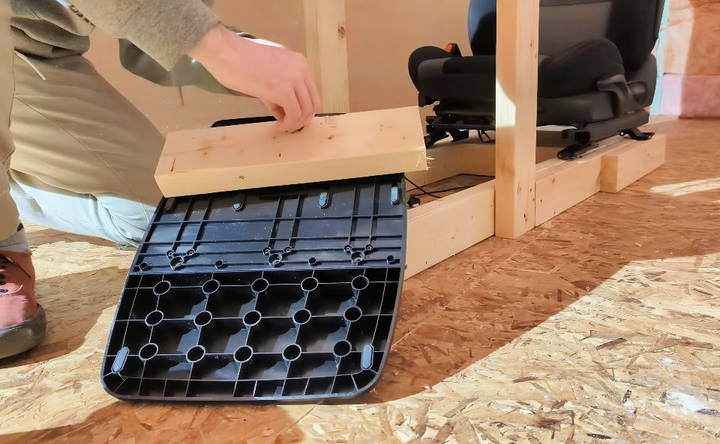
Technology Integration: Display and System Setup
Optimize your workspace with our step-by-step guide to technology integration: display and system setup. Learn positioning the monitor and computer setup.
Step 7: Positioning the Monitor
The monitor should be directly in front of the wheel, simulating the windshield view from a car.
Monitor Details
- A 34-inch curved screen, such as those from Pixio, is excellent for side-to-side visibility. These screens are often more budget-friendly as they avoid unnecessary features.
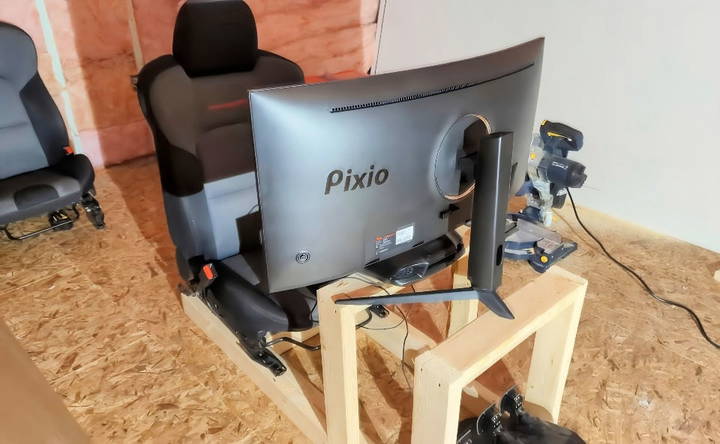
Step 8: Computer Setup
Initially, I used an older computer. However, it struggled with modern games, so a capable PC is advisable. Aim for one with robust graphics capabilities to handle high-resolution gaming smoothly.
Finalization and Testing: Bringing It All Together
Finalize and test your project efficiently. Testing and Adjusting ensure success by overcoming challenges.
Step 9: Testing and Adjusting
- Setup Trials: Before finalizing the build, test the setup with various adjustments in seat and pedal positioning.
- Game Testing: Run different simulations to ensure all elements perform as expected. Adjust as necessary.
Overcoming Challenges
- Hardware Hiccups: An outdated PC may need component upgrades or replacements, especially in cooling systems, to handle extended gaming sessions effectively.
Customization Options
Customizing your DIY sim rig can greatly enhance your racing experience. Here are some options to consider:
Seat Choices
The seat is a crucial part of your sim rig. You can choose from various types, such as:
- Racing Seats: These are designed to mimic real car seats and provide excellent support.
- Office Chairs: A budget-friendly option that can be comfortable for long sessions.
- Gaming Chairs: These often come with additional features like lumbar support and adjustable armrests.
Wheel and Pedal Sets
Your choice of wheel and pedals can significantly impact your performance. Consider the following:
- Entry-Level Sets: These are affordable and great for beginners. Examples include the Logitech G29 or Thrustmaster T150.
- Mid-Range Sets: Offer better build quality and features. The Thrustmaster T300 and Fanatec CSL Elite are popular choices.
- High-End Sets: These provide the best performance and realism. Options include the Fanatec Podium series and Simucube 2.
Shifters and Handbrakes
Adding a shifter and handbrake can make your setup more immersive. Look for:
- Sequential Shifters: Ideal for rally and drift racing.
- H-Pattern Shifters: Perfect for simulating manual transmission cars.
- Handbrakes: Essential for rally and drift enthusiasts.
Monitor Setup
Your monitor setup can affect your field of view and immersion. Consider these options:
- Single Monitor: A large, high-resolution monitor can provide a good experience.
- Triple Monitors: Offers a wider field of view and better immersion.
- Ultra-Wide Monitors: Combines the benefits of a single and triple monitor setup.
VR Integration
For the ultimate immersive experience, consider integrating VR into your sim rig. Popular VR headsets include:
- Oculus Rift S
- HTC Vive
- Valve Index
Sound System
A good sound system can enhance your racing experience. Options include:
- Headphones: Provide clear sound and can be more immersive.
- Surround Sound Systems: Offer a more realistic audio experience.
Motion Systems
For advanced users, adding a motion system can simulate the physical sensations of driving. These systems can be expensive but add a new level of realism.
Custom Paint and Decals
Personalize your rig with custom paint and decals. This can make your setup unique and reflect your personality.
Adjustable Components
Ensure that your rig has adjustable components, such as:
- Pedal Position: Adjust the distance and angle of the pedals for comfort.
- Wheel Height and Angle: Customize the wheel position to match your driving style.
- Seat Position: Adjust the seat for optimal comfort and control.
By exploring these customization options, you can build a sim rig that is tailored to your preferences and enhances your overall racing experience.
Advanced Upgrades
Taking your DIY sim rig to the next level can significantly enhance your racing experience. Here are some advanced upgrades to consider:
Motion Systems
Adding a motion system can simulate the physical sensations of driving, making your experience more immersive. These systems can move your seat and pedals to mimic the forces you would feel in a real car. Popular options include:
- DOF Reality Motion Platforms: These offer a range of motion and are relatively affordable.
- SimXperience Stage Series: Known for their high quality and realistic feedback.
Direct Drive Wheels
Direct drive wheels provide the most realistic force feedback by connecting the steering wheel directly to the motor. This results in smoother and more precise control. Some top choices are:
- Fanatec Podium Series: Offers excellent performance and customization options.
- Simucube 2: Known for its powerful and precise feedback.
High-End Pedal Sets
Upgrading to high-end pedals can improve your control and feel. Look for pedals with load cell technology, which provides a more accurate braking force. Recommended options include:
- Heusinkveld Sprint: Offers adjustable resistance and high precision.
- Fanatec ClubSport V3: Known for their build quality and customization.
VR Integration
Virtual reality can take immersion to a whole new level. With a VR headset, you can look around the cockpit and track, making the experience more realistic. Popular VR headsets include:
- Oculus Rift S: Offers good performance at a reasonable price.
- Valve Index: Known for its high resolution and wide field of view.
Triple Monitor Setup
A triple monitor setup can provide a wider field of view, making it easier to see what's happening around you. This setup involves three monitors placed side by side, making a panoramic view. Ensure your graphics card can handle the increased demand.
Button Boxes and Stream Decks
Adding a button box or stream deck can give you quick access to various controls without taking your hands off the wheel. These devices can be customized to suit your needs, whether it's for adjusting settings or controlling in-game functions.
- Elgato Stream Deck: Highly customizable and easy to use.
- DIY Button Boxes: You can build your own using components from online stores.
Advanced Audio Systems
A high-quality audio system can enhance the realism of your sim rig. Consider adding:
- Surround Sound Systems: Provides immersive audio from all directions.
- Buttkickers: These devices attach to your seat and provide tactile feedback, simulating engine vibrations and road textures.
Custom Cockpit Builds
For the ultimate customization, consider building a custom cockpit. Using materials like 80/20 aluminum profiles, you can build a rig that perfectly fits your needs. This allows for maximum adjustability and stability.
Ergonomic Upgrades
Ensuring your rig is comfortable for long sessions is crucial. Consider adding:
- Adjustable Seats: Allows you to find the perfect driving position.
- Pedal and Wheel Adjustments: Ensure your pedals and wheel are positioned for optimal comfort and control.
By incorporating these advanced upgrades, you can build a sim rig that offers unparalleled realism and immersion, enhancing your overall racing experience.
Common Mistakes and How to Avoid Them
Building a DIY sim rig can be a rewarding project, but it's easy to make mistakes along the way. Here are some common pitfalls and tips on how to avoid them:
Incorrect Measurements
One of the most frequent mistakes is incorrect measurements. This can lead to parts not fitting together properly.
- How to Avoid: Double-check all measurements before cutting or drilling. Use a measuring tape and a level to ensure accuracy. Consider making a mock-up with cardboard or foam board to test fit everything.
Poor Material Choices
Choosing the wrong materials can affect the durability and stability of your rig.
- How to Avoid: Research the best materials for your budget and needs. Common choices include 80/20 aluminum profiles for their strength and adjustability. Avoid using weak or flimsy materials that can compromise safety.
Lack of Stability
A wobbly rig can ruin your racing experience and even cause damage to your equipment.
- How to Avoid: Ensure all joints and connections are secure. Use additional bracing or supports if needed. Check for any movement or wobble before mounting your expensive gear.
Ignoring Ergonomics
Ignoring ergonomics can lead to discomfort and even injury during long racing sessions.
- How to Avoid: Adjust the seat, pedals, and wheel to fit your body size and driving style. Ensure you have a comfortable seating position with proper support. Take breaks and stretch regularly to avoid strain.
Overlooking Cable Management
Messy cables can be a tripping hazard and make your setup look untidy.
- How to Avoid: Plan your cable management from the start. Use cable ties, clips, and sleeves to keep everything organized. Label cables to make troubleshooting easier.
Skipping the Instructions
Not following the instructions can lead to assembly errors and frustration.
- How to Avoid: Read all instructions carefully before starting. Follow each step methodically. Watch tutorial videos if available for additional guidance.
Underestimating the Budget
Costs can quickly add up, leading to an unfinished project.
- How to Avoid: Build a detailed budget before you start. Include all materials, tools, and any additional costs. Allow for a contingency fund for unexpected expenses.
Neglecting Maintenance
A neglected rig can wear out quickly and lose its performance.
- How to Avoid: Regularly check and tighten all bolts and screws. Clean your rig and equipment to keep them in good condition. Replace worn-out parts as needed.
Not Seeking Help
Trying to do everything alone can lead to mistakes and missed opportunities for improvement.
- How to Avoid: Join online forums and communities for advice and support. Share your progress and ask for feedback. Learn from others' experiences and mistakes.
By being aware of these common mistakes and taking steps to avoid them, you can build a DIY sim rig that is stable, comfortable, and enjoyable to use.
FAQs About DIY Sim Rigs
Discover answers to common questions about DIY sim rigs. Learn how to build, customize, and optimize your own racing simulator setup.
A DIY sim rig is a custom-built setup for sim racing or flight simulation. It typically includes a frame to mount your steering wheel, pedals, and other controls. Building your own rig can save money and allow for customization to fit your needs.
Start by planning the dimensions based on your available space and the equipment you have. Consider the following:
Ergonomics: Ensure comfortable seating and reach for controls.
Stability: The rig should be sturdy to handle force feedback from the wheel.
Adjustability: Make parts adjustable to fit different users.
Here are the basic steps:
Measure and cut: Cut your materials to the required dimensions.
Assemble the frame: Use screws, bolts, or welding to put the frame together.
Mount the equipment: Attach your steering wheel, pedals, and other controls securely.
Test and adjust: Make sure everything is stable and comfortable. Adjust as needed.
Building your own sim rig offers several benefits:
Cost-effective: Often cheaper than buying a pre-made rig.
Customization: Tailor the rig to your specific needs and preferences.
Satisfaction: Enjoy the process of building and the end result.
When building a DIY sim rig, it's easy to make mistakes that can affect the performance and durability of your setup. Here are some common pitfalls to avoid:
Poor Planning: Not measuring your space or equipment properly can lead to a rig that doesn't fit well or is uncomfortable to use.
Weak Materials: Using materials that aren't strong enough can result in a flimsy rig that won't withstand the forces of sim racing.
Inadequate Fastening: Failing to secure parts properly can cause instability. Always use the right screws, bolts, and brackets.
Ignoring Ergonomics: A rig that's not ergonomically designed can lead to discomfort or even injury over long sessions.
Lack of Adjustability: Building a rig without adjustable components can make it difficult to find a comfortable driving position.
Conclusion: Reflecting on the Journey
Building this DIY sim rig taught me many valuable lessons about planning, adapting, and problem-solving. It's satisfying to see a collection of materials turn into a functional piece of racing gear. Whether you're aiming for a budget build like mine or planning something more elaborate, I hope this guide inspires and equips you to pursue your SimRacing dreams.


