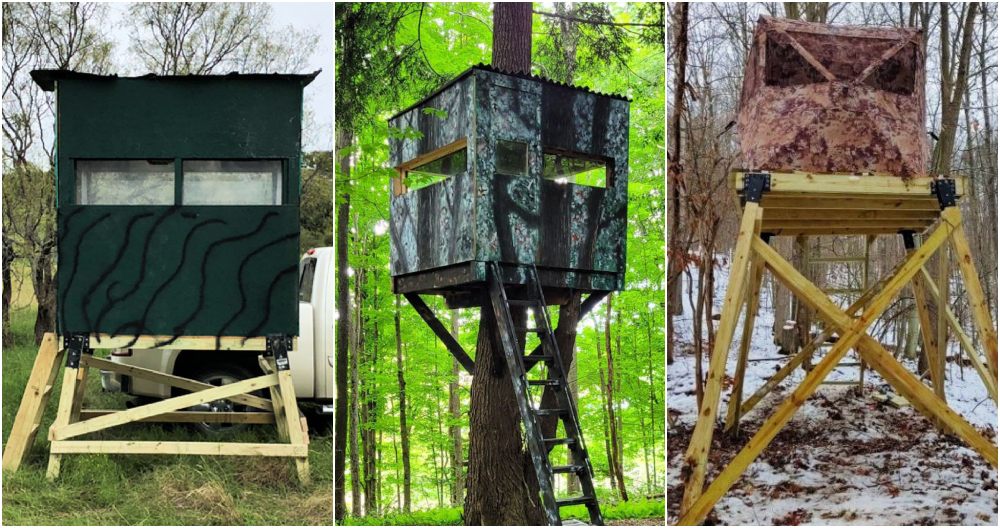
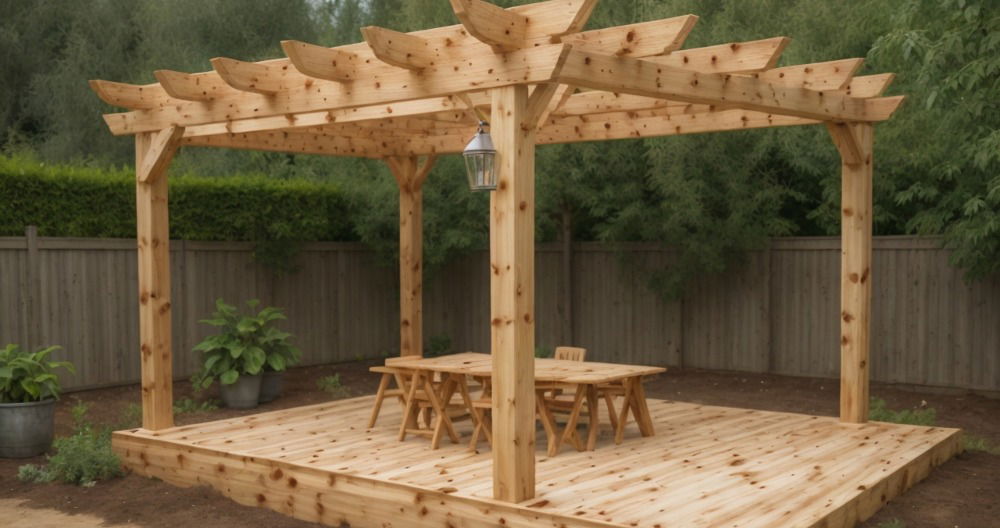
Building my first DIY deer blind was an exciting and rewarding project. I followed a clear plan, gathering the necessary materials and tools. I measured, cut, and assembled the parts carefully. Although it required patience, the sense of accomplishment at each step made it worthwhile. My deer blind turned out sturdy and functional, ready for a successful hunting season.
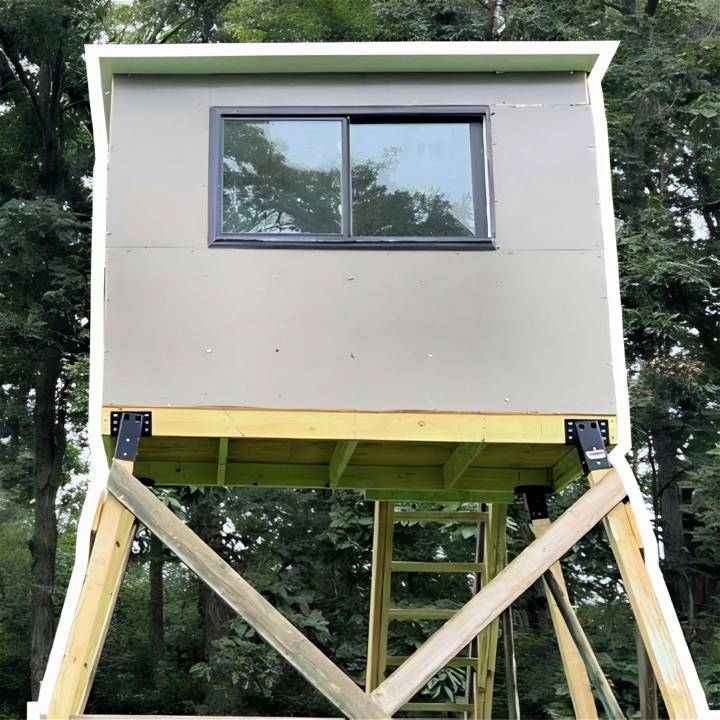
Making my own DIY deer stand gave me great satisfaction. The process was simpler than I thought. I learned new skills and improved my craftsmanship. It was also a cost-effective solution compared to buying a pre-made stand. By following a well-designed guide, I achieved a professional result. Now, I can enjoy hunting from a stand that I built myself.
I'm sharing this to inspire you to begin your own project. These step-by-step instructions will surely help you build your own DIY deer blind or deer stand. The sense of achievement and practicality are unbeatable. Get started today with confidence.
Why Build a Deer Stand?
A deer stand offers several advantages for hunters:
- Elevated View: Being above ground level gives you a better view of your surroundings and potential targets.
- Concealment: It helps to conceal your presence from deer, increasing your chances of a successful hunt.
- Comfort: A well-built stand can provide a comfortable spot to wait for deer, especially during long hunting sessions.
Choosing the Right Type of Deer Stand
There are various types of deer stands, each suited to different hunting styles and environments:
- Ladder Stands: These are stable and ideal for areas with clear sightlines.
- Climbing Stands: Perfect for hunters who need mobility and the ability to adjust their location quietly.
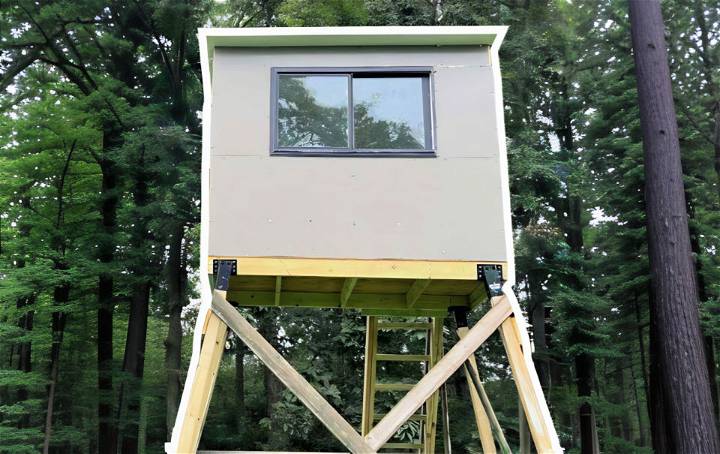
- Box Blinds: These provide shelter from the elements and can be built on the ground or elevated.
Planning Your Build
Before you start building, it's important to plan:
- Location: Choose a spot with good visibility and a clear line of sight to areas where deer are likely to pass.
- Design: Select a design that meets your needs, whether it's a simple ladder stand or a more complex box blind.
- Materials: Gather all the necessary materials, focusing on durability and weather resistance.
Safety First
Always prioritize safety when building and using your deer stand:
- Sturdy Construction: Ensure all joints and supports are secure.
- Safe Access: Make sure the ladder or steps are stable and easy to climb.
- Regular Checks: Inspect your stand regularly for any signs of wear or damage.
Follow these guidelines to build a safe, useful, and enjoyable deer stand for hunting. Plan carefully, choose the right materials, and adhere to safety standards.
Materials and Their Importance
Before diving into the steps, understanding the materials needed and their purposes is crucial. Here's a brief rundown:
- Treated plywood (4x8 sheet, 5/8 inches thick): Forms the platform base, chosen for its durability against weather.
- Treated 2x6s: Used for framing the platform's edge and adding structural integrity with middle supports.
- 4x4 post mounts: Essential for stability, ensuring the stand remains upright and secure.
- Two-by-twos: Serve as the wall framing material, a lightweight and cost-effective choice.
- 2x8 treated lumber: For constructing steps that are sturdy and weather-resistant.
- Composite material for walls: Chosen over wood for its longevity and maintenance-free appeal, avoiding warping or rotting.
- Concrete: Anchors the 4x4 posts, providing a solid foundation.
- Screws, hardware, a power drill, and a saw: Basic construction tools.
Step by Step Instructions
Follow our step-by-step guide to build a sturdy structure, covering framing, mounting, and sealing, with easy instructions for each phase.
1. Frame the Platform
Start with the 4x8 sheet of treated plywood for the base. Frame the edges with treated 2x6s, adding a few more 2x6s in the middle to reinforce the structure.
2. Mount the 4x4 Post Mounts
Attach the 4x4 post mounts at each corner. The angled mounts enhance stability, a crucial factor for safety and durability.
3. Frame up the Walls
Use two-by-twos for the wall frames to manage costs and reduce overall weight. Plan window placements and ensure the sidewalls are slightly pitched for rain runoff.
4. Construct the Steps
The steps, crafted from 2x8 treated lumber, require precise cuts for the stringers to achieve the correct angles. This step is vital for easy access and safety.
5. Prepare the Concrete Foundation
Mix and pour concrete into about two-foot deep holes to set the 4x4 posts, ensuring a firm foundation for the stand.
6. Install the Composite Walls
Measure and cut the composite material for the walls, utilizing large pieces to reduce gaps and increase scent control. Use screws with rubber washers to maintain a weather-tight seal.
7. Assemble and Erect the Structure
With all pieces prepped, start by erecting the 4x4 posts and the platform. Then, proceed to install the walls, roof, and steps, ensuring each part is secured and stable.
8. Seal for Scent Control
After assembly, seal all cracks and potential air leaks with caulking. This step is crucial for scent control, keeping your presence undetected by deer.
9. Build Shooting Lanes
Identify and cut shooting lanes based on known deer paths and your stand's location. This planning enhances your visibility and shooting opportunities.
10. Adjustments and Customizations
Finally, customize your deer stand to your preferences. This might include adjusting window heights or adding additional features for comfort and utility.
Why This Approach Works
This method balances cost-effectiveness with functionality. By choosing materials wisely and putting in a bit of DIY effort, you can have a deer stand that rivals any expensive commercial option. The scent-free design and durable construction have significantly increased my hunting success, providing a reliable and comfortable base for both bow and gun hunts.
Customization Ideas for Your Deer Stand
When it comes to deer stands, customization is key for comfort, effectiveness, and personal preference. Here are some ideas to make your deer stand uniquely yours while enhancing its functionality.
Choose the Right Camouflage
Selecting the appropriate camouflage pattern is crucial. Consider the environment where your stand will be located. Whether it's a leafy woodland, a snowy landscape, or a dry brush area, the right pattern can make a significant difference in blending in.
Comfort Upgrades
Long hours in the stand can be taxing, so consider adding:
- Padded Seats: A cushioned seat can provide much-needed comfort.
- Foot Rests: Install a bar or platform to rest your feet and improve circulation.
Storage Solutions
Maximize space with smart storage options:
- Shelving Units: Small shelves can hold gear and snacks.
- Hooks: Install hooks for hanging binoculars, a range finder, or a backpack.
Weather Protection
Stay protected from the elements by:
- Installing a Roof: A simple, sloped roof can shield you from rain and snow.
- Adding Walls: Enclose your stand with lightweight materials for wind protection.
Stealth Features
Minimize noise and movement with:
- Silent Windows: Use felt-lined windows that open quietly.
- Blackout Interior: Painting the interior dark can reduce silhouetting.
Safety Enhancements
Never compromise on safety:
- Sturdy Railings: Ensure railings are solid and at a safe height.
- Non-slip Surfaces: Apply anti-slip paint or strips to the floor and ladder steps.
Personal Touches
Make the space your own with:
- Custom Paint Job: Choose a color that you like, as long as it's still practical for hunting.
- Decor: Add personal items that won't interfere with the hunt but make the space feel like yours.
These customization ideas will make your deer stand a functional and personalized retreat. Ensure it is comfortable, blends into the environment, and enhances your hunting experience.
Legal Considerations for Deer Stands
When building and using a deer stand, it's essential to be aware of the legal requirements and restrictions to ensure a responsible and lawful hunting experience. Here's a straightforward guide to help you navigate the legal landscape.
Know Your State's Laws
Deer stand regulations can vary significantly from state to state. It's important to:
- Check Local Regulations: Contact your local wildlife agency or visit their website for specific rules.
- Understand the Restrictions: Some common regulations may include how long your stand can stay in a tree and whether it requires any identification attached to it.
Landowner Permissions
Always seek permission from landowners before installing a deer stand on private property. Remember to:
- Get Written Consent: A written agreement can prevent misunderstandings.
- Discuss Stand Placement: Ensure the location is safe and respects property boundaries.
Height and Safety Regulations
Some areas have height restrictions for deer stands to ensure hunter safety. Consider the following:
- Height Limits: Know the maximum allowed height for your stand above the ground.
- Safety Measures: Use harnesses and safety lines, especially with higher stands.
Considerate Hunting Practices
Being a considerate hunter is not only ethical but often required by law. Make sure to:
- Avoid Disrupting Wildlife: Place your stand away from sensitive wildlife areas.
- Respect Other Hunters: Don't place your stand too close to others, and avoid interfering with their hunting activities.
Environmental Impact
Minimize your stand's environmental footprint by:
- Using Eco-Friendly Materials: Choose materials that won't harm the local flora and fauna.
- Leaving No Trace: Remove your stand and any litter at the end of the hunting season.
Following these legal guidelines ensures your deer stand building and hunting comply with laws, respect others, and protect the environment. Stay updated on regulations and hunt ethically for a positive impact.
Maintenance and Upkeep of Your Deer Stand
Regular maintenance is crucial to ensure your deer stand remains a safe and reliable structure throughout the hunting seasons. Here's a comprehensive guide to keeping your stand in top condition, presented in a clear and straightforward manner.
Start with a Clean Slate
At the beginning and end of each season, thoroughly clean your stand. Remove any debris, such as leaves, branches, or animal droppings. This not only maintains the stand but also helps to eliminate scents that could alert deer to your presence.
Inspect and Tighten
Before and after the season, check every part of your stand:
- Bolts and Joints: Tighten all bolts and inspect for any signs of metal fatigue or rust.
- Straps and Cables: Look for wear and tear on ratchet straps and replace them if they are frayed or damaged.
Store Properly
When not in use, especially during the off-season, store your stand in a dry place to prevent rust and wear. If you hunt on public land, you may be required by law to remove your stand until the next season.
Preventative Measures
Take steps to avoid potential issues:
- Lubrication: Apply a protective lubricant like WD-40 to metal parts to prevent rusting.
- Covering: Use a tarp or specially designed cover to protect your stand from the elements when not in use.
Safety Checks
Safety should always be your top priority:
- Stability: Ensure the stand is securely anchored to the tree or ground.
- Wear and Tear: Replace any part that shows significant wear or damage immediately.
Seasonal Adjustments
Be prepared to make adjustments based on the season:
- Summer: Check for and carefully remove any bee hives or hornets' nests.
- Winter: Clear snow and ice from steps and platforms to prevent slipping.
Follow these tips to prolong your deer stand's life and ensure its safety and effectiveness. Regular maintenance will keep you safe and improve your hunting.
FAQs About How to Build a Deer Stand
Discover essential faqs about how to build a deer stand. Learn tips, materials, and steps to construct a safe and effective deer hunting stand.
Select a design based on your hunting area and needs. Options include free-standing deer stands, tree stands, and box blinds. Consider factors like the size, height, and whether you want a roof or camouflaged walls. Look at various plans to find one that suits your skill level and the landscape.
Yes, you can build a deer stand on a budget by using affordable materials and doing the work yourself. There are plans available that provide tips on saving money, such as using less expensive wood or repurposing materials. Follow a step-by-step guide to ensure you're building efficiently.
To ensure safety, use sturdy materials and secure connections. Double-check all measurements and cuts, reinforce joints with brackets or additional screws, and make sure the stand is level and stable before use. Consider adding railings or a handrail if your stand is elevated.
To camouflage your deer stand, use natural materials like branches, leaves, or grasses from the surrounding area. Paint the exterior with colors that match the environment. Consider adding a camo net or fabric to break up the outline of the stand.
Regular maintenance ensures longevity and safety. Check for structural integrity, tighten any loose bolts or screws, and replace worn-out parts. Inspect the stand before and after the hunting season, and make repairs as needed. Look for signs of weather damage, especially if your stand is exposed to the elements.
Final Thoughts
In conclusion, learning how to build a DIY deer blind has provided comprehensive guidelines to ensure a successful project. Building a DIY deer blind can enhance your hunting experience, offering concealment and a strategic advantage. With these easy-to-follow steps, you'll be ready to construct a sturdy and effective blind in no time. Thank you for joining us on this informative journey!


