Fall is a time of warmth, beauty, and natural charm, and one of the best ways to bring the season's essence indoors is by making your own DIY fall centerpieces. As a floral designer, I've had the pleasure of crafting numerous fall arrangements, and today, I'm excited to walk you through three centerpiece ideas that are easy to make yet look professionally done. Each piece is unique, bringing together textures, colors, and elements of the season. Whether you're new to crafting or a seasoned decorator, you'll find that these projects are both fun and rewarding.
Materials You'll Need:
- Foam blocks: These are the base for holding your design together.
- Reindeer moss: To cover up the foam and give your arrangement a natural look.
- Skewers and glue: Essential tools for securing large elements like pumpkins.
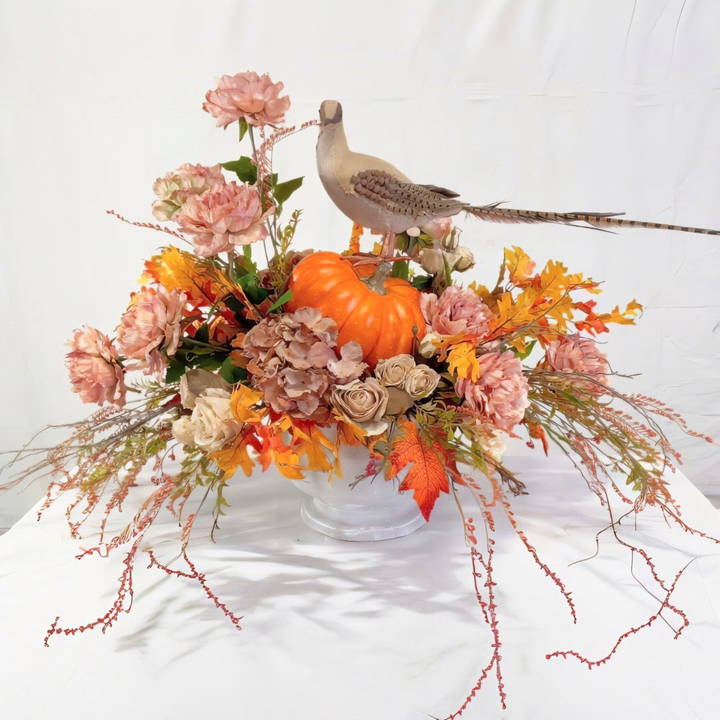
- Faux pumpkins, hydrangeas, sunflowers, roses: A mix of fall flowers and decorative pumpkins to bring autumn vibes.
- Assorted greenery and foliage: Choose pieces that reflect the colors and textures of fall, such as pine cones, berries, and oak leaves.
- A sturdy container: A heavy base, like a concrete pot, will anchor your design and give it value.
Step by Step Instructions
Make stunning DIY fall centerpieces with easy steps. Design pumpkin, lantern, and neutral palette décor for the perfect autumn touch.
1. Making a Pumpkin Centerpiece
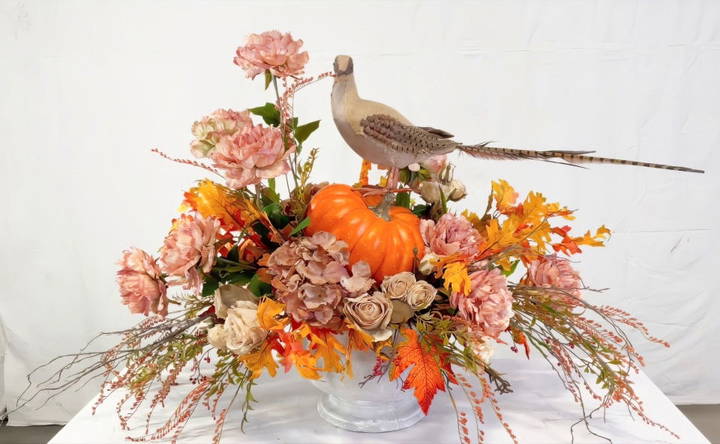
One of my favorite fall centerpiece ideas involves an oversized faux pumpkin. Here's how I do it:
Setting the Foundation
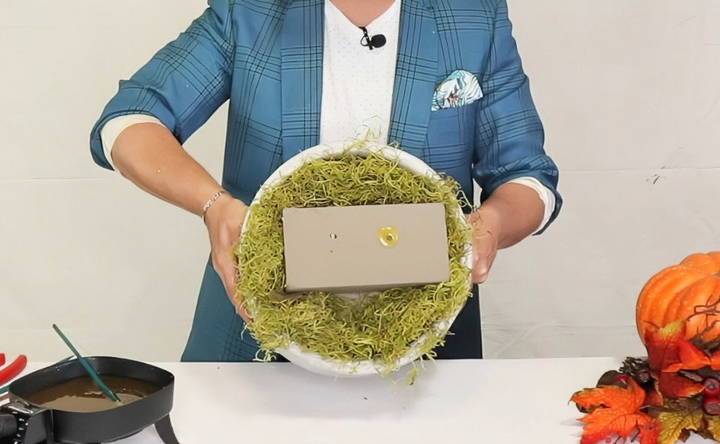
First, start by choosing a heavy container, such as a concrete pot. Not only does this give weight to your arrangement, but it also provides stability, especially for larger designs. Place your foam blocks into the container and secure them with some glue. Cover the foam with reindeer moss to hide any gaps and give the base a natural, forest-like appearance.
Adding the Focal Point
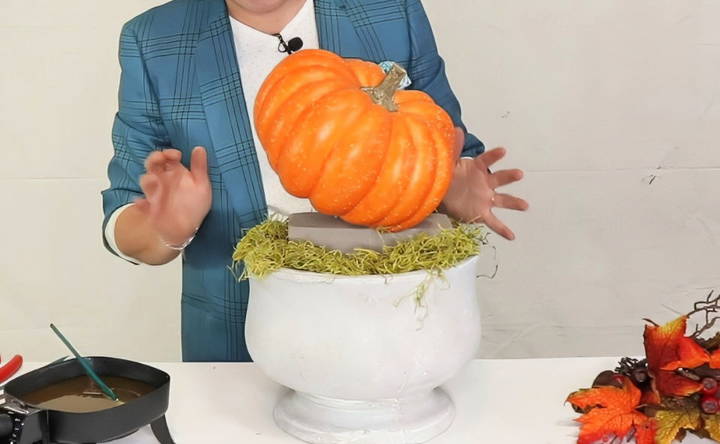
Next, the pumpkin becomes the star. To give it a sideways tilt (which adds a touch of whimsy), I skewer the base and position it slightly off-center. This allows room for the flowers and foliage to spill out naturally around it. Once the pumpkin is secured, I start adding stems.
Building Depth with Foliage
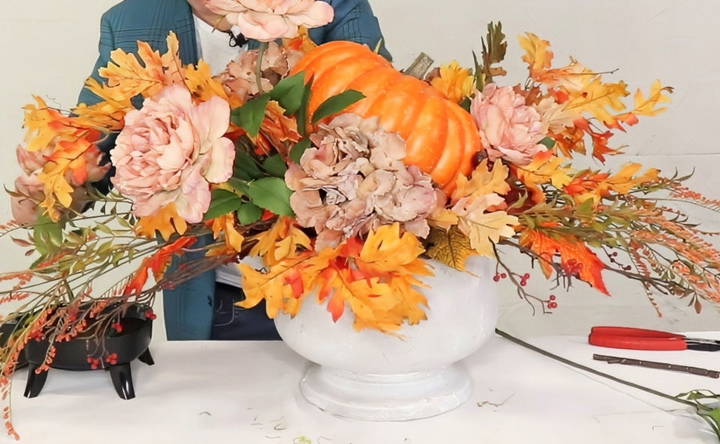
For foliage, I love using twigs with pine cones and rich fall colors. Start by adding stems around the base of the pumpkin, ensuring you maintain balance. As a rule of thumb, remember that what you do on one side, you should mirror on the other. This ensures symmetry, but don't be afraid to add a bit of asymmetry for a more organic feel.
I insert foliage at different angles, some pieces flowing outward to make width, others drooping down for height and depth. This adds movement to the arrangement, making it appear more lifelike. By the time you're done, you should have a lush bed of greenery encircling the pumpkin.
Adding Final Touches
Once the foliage is set, it's time to bring in the flowers. In this case, I chose hydrangeas and berries for their rich texture. Arrange them in clusters around the pumpkin, focusing on making triangles of color to add dimension. Be sure to fill in any empty spaces with smaller accents like berries or mini-pumpkins.
2. A Lantern Centerpiece for Cozy Fall Nights
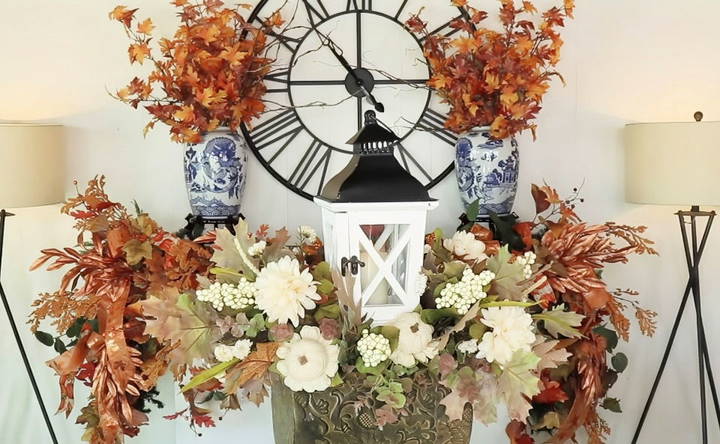
Lanterns are another versatile element for fall centerpieces. I've used one of my mother's vintage lanterns to make an arrangement that's perfect for a dining table or entryway.
Step-by-Step:
Start by placing a battery-operated candle inside the lantern for a soft glow. To build the arrangement around the lantern, add faux foliage like boxwood and oak leaves, making sure the greenery spills over the edges of your container. Place stems at angles to make movement, just as you did with the pumpkin centerpiece.
Now, here's where the magic happens—begin inserting your chosen flowers, like mums and burlap leaves, around the lantern. I find that placing taller flowers, like sunflowers, at the back of the arrangement makes height, while shorter ones fill in the front, providing depth. For extra charm, add a bow or ribbon to the handle of the lantern for a touch of softness.
3. Neutral Palette Centerpiece for a Sophisticated Fall Look
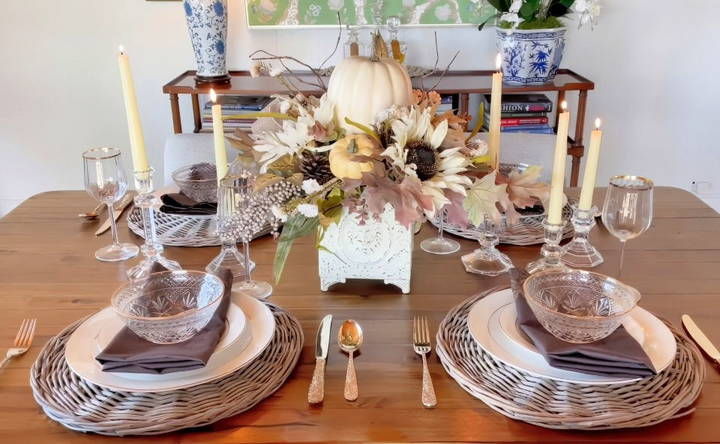
For those who prefer a more subdued fall palette, this neutral centerpiece combines white pumpkins, cream-colored sunflowers, and eucalyptus for a sophisticated, modern look.
Step-by-Step:
Start with a neutral container, like a vintage pot. Fill it with foam blocks and cover them with moss. Position a cream-colored pumpkin as the focal point, elevated slightly using a block of foam so it stands out. Begin adding your greenery—eucalyptus works wonderfully here for its soft texture and mix of green and brown hues.
Next, add your white sunflowers, arranging them in sets of threes to make balance. To keep the palette cohesive, I suggest sticking to neutral tones like cream, white, and beige. Small details like burlap ribbon or a few twigs will give the arrangement an understated elegance, perfect for a dining room or living room.
Finally, tuck in a few faux pumpkins or berries in neutral shades to add a bit of texture and variety.
Pro Tips for Centerpiece Success
Learn pro tips for centerpiece success. Learn to balance, use quality materials, add texture, and perfect your centerpiece with these expert guidelines!
1. Start with Balance
When making any floral arrangement, the most important thing is to maintain balance. For a cohesive design, always remember: what happens on the right should be mirrored on the left, and what goes up must come down. This will make a flow that's pleasing to the eye.
2. Use High-Quality Materials
Investing in good quality faux flowers and foliage will make all the difference. I always choose durable, realistic-looking pieces that can be reused season after season. This way, you're not only saving money, but your arrangements will look high-end and professionally made.
3. Make Layers of Texture
By layering different types of foliage, flowers, and accent pieces like pine cones or berries, you add visual interest and make your centerpiece look more dynamic. Don't be afraid to use large elements like pumpkins or lanterns as focal points and build outward from there.
4. Fluff, Fluff, Fluff
Always take time to fluff out your greenery and flowers. This will make your arrangement look fuller and more natural, as though it came straight from the forest or field.
Seasonal Trends in Fall Decor 2024
Staying updated with the latest trends can make your fall centerpiece stand out. Here are some of the top seasonal trends for fall decor in 2024:
1. Heirloom Pieces
This fall, there's a strong focus on incorporating heirloom items into your decor. Think antique vases, vintage candlestick holders, and embroidered pillows. These pieces add a personal touch and a sense of history to your centerpiece.
2. Artisanal Elements
Handmade and artisanal items are trending. Incorporate textures like copper, plaster, and terracotta. These materials add a cozy, handmade feel to your centerpiece. Consider using artisanal trays or sculptural mugs to elevate the look.
3. Cheerful Colors
Bright and bold colors are making a comeback. This fall, expect to see pops of orange, turquoise, green, blue, and yellow. These colors can uplift the mood and add a cheerful vibe to your centerpiece.
4. Warm Wood Finishes
Rich wood tones are popular this season. Incorporate wooden elements like bowls, trays, or candle holders. These add warmth and a natural touch to your fall decor.
5. Textured Fabrics
Layered textures are key this fall. Use fabrics like wool, velvet, and linen to add depth and interest to your centerpiece. Textured table runners or placemats can make a big impact.
6. Natural Elements
Bringing nature indoors is a big trend. Use natural materials like pine cones, acorns, dried flowers, and leaves. These elements not only look beautiful but also make a connection to the outdoors.
7. Vintage and Modern Mix
Combining vintage and modern elements is a stylish trend. Pair old books or antique items with sleek, modern pieces. This mix makes a unique and balanced look.
8. Candles for Soft Lighting
Candles are essential for making a cozy atmosphere. Use them to add soft, warm lighting to your centerpiece. Opt for candles in fall scents like cinnamon, pumpkin, or apple to enhance the seasonal feel.
By incorporating these trends, you can make a fall centerpiece that is not only beautiful but also up-to-date with the latest decor styles.
Troubleshooting Tips for DIY Fall Centerpieces
Making a DIY fall centerpiece can be a fun and rewarding project, but sometimes things don't go as planned. Here are some common issues you might encounter and how to solve them:
1. Flowers Wilting Quickly
Problem: Fresh flowers wilting too soon can ruin your centerpiece.
Solution:
- Use Fresh Flowers: Always start with the freshest flowers possible.
- Trim Stems: Cut the stems at an angle to allow better water absorption.
- Change Water Regularly: Replace the water every two days and add flower food if available.
- Avoid Direct Sunlight: Keep the centerpiece out of direct sunlight and away from heat sources.
2. Unstable Arrangements
Problem: Your arrangement keeps falling apart or tipping over.
Solution:
- Use Floral Foam: Secure your flowers in floral foam to keep them in place.
- Heavy Base: Choose a sturdy, heavy base to prevent tipping.
- Tape Grid: Make a grid with floral tape over the top of your vase to hold stems in place.
3. Colors Not Matching
Problem: The colors of your centerpiece clash or don't look as expected.
Solution:
- Color Wheel: Use a color wheel to choose complementary colors.
- Test Combinations: Lay out your materials before assembling to see how the colors look together.
- Neutral Base: Start with a neutral base and add pops of color for balance.
4. Materials Not Staying in Place
Problem: Items like pine cones, acorns, or small pumpkins keep shifting.
Solution:
- Hot Glue: Use a hot glue gun to secure items in place.
- Floral Wire: Wrap floral wire around items and anchor them into the foam or base.
- Double-Sided Tape: Use double-sided tape for lightweight items.
5. Overcrowded Look
Problem: Your centerpiece looks too busy or cluttered.
Solution:
- Edit: Remove some items to make a more balanced look.
- Vary Heights: Use items of different heights to add dimension without overcrowding.
- Focal Point: Choose one main focal point and build around it.
6. Difficulty Arranging
Problem: Struggling to get the arrangement just right.
Solution:
- Start Simple: Begin with a simple design and add elements gradually.
- Symmetry: Aim for symmetry to make a balanced look.
- Practice: Don't be afraid to rearrange until you are satisfied with the result.
7. Messy Workspace
Problem: Your workspace gets messy, making it hard to work efficiently.
Solution:
- Organize Materials: Keep your materials organized and within reach.
- Clean as You Go: Clean up scraps and debris as you work to maintain a tidy space.
- Protect Surface: Use a tablecloth or newspaper to protect your workspace from glue and other materials.
By following these troubleshooting tips, you can overcome common challenges and make a beautiful, lasting fall centerpiece.
FAQs About DIY Fall Centerpieces
Get answers to all your questions about DIY fall centerpieces. Discover tips, materials, and design ideas for making stunning autumnal decor.
Yes, artificial pumpkins, leaves, and flowers are great options. They last longer and can be reused each year. Plus, they often look just as good as real items.
Use items from your backyard like pinecones, branches, and leaves. Thrift stores and dollar stores are great places to find inexpensive vases, trays, and other decorative items.
If using fresh items, keep them cool and out of direct sunlight. For flowers, use floral foam soaked in water. Artificial items can be stored in a cool, dry place to use again next year.
Absolutely! Choose colors that match your home decor. Traditional fall colors are orange, yellow, and red, but you can also use neutrals like white and beige for a modern look.
Place candles in glass holders or lanterns to prevent fire hazards. Use battery-operated candles as a safe alternative. Always keep an eye on lit candles and never leave them unattended.
Where to Display Your Centerpieces
These centerpieces are versatile enough to be placed almost anywhere in your home. Try displaying them on:
- Dining tables: They make a striking focal point for dinner parties.
- Buffet tables: Add warmth and charm to your entertaining spaces.
- Entryways: A fall-themed arrangement is a welcoming sight for guests.
- Kitchen islands: Make meal prep a little more festive by placing a centerpiece in the heart of your home.
Making these DIY fall centerpieces is not only a fun way to embrace the season, but also a great way to express your personal style. Whether you choose the vibrant pumpkin centerpiece, the cozy lantern arrangement, or the neutral, modern display, each piece brings a bit of autumn's beauty indoors. Don't be afraid to experiment with different colors, textures, and materials. After all, that's what makes these projects so rewarding.


