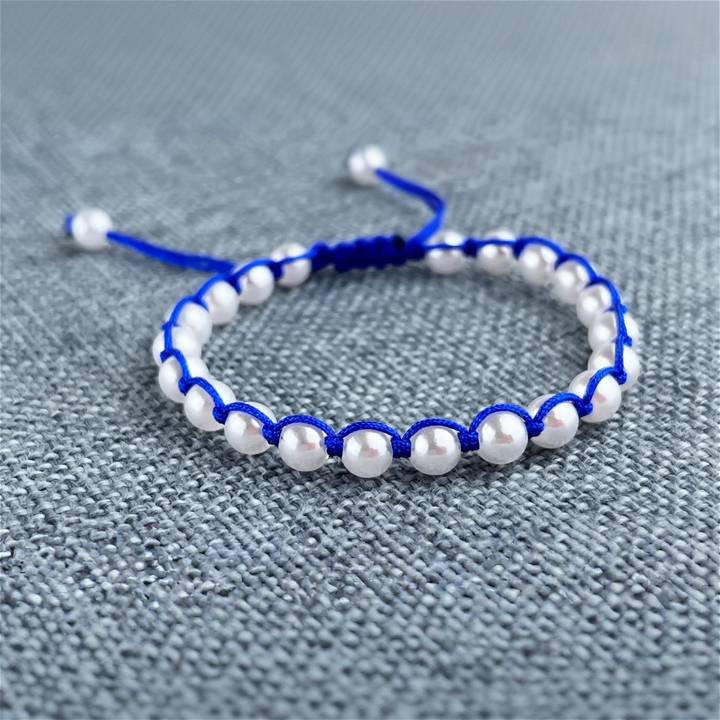
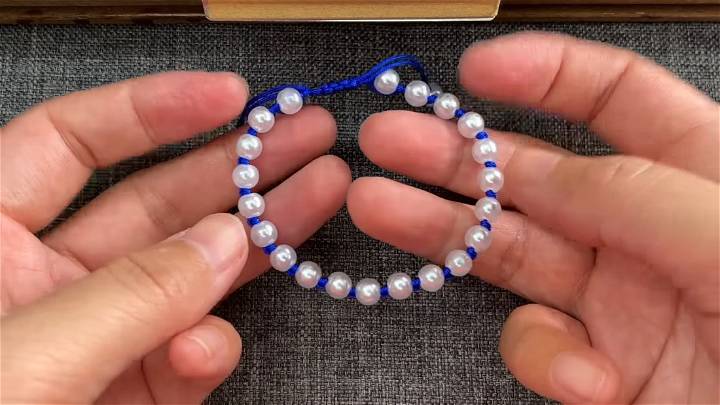
Making your own beaded bracelet can be a fun and rewarding DIY project. Whether you're a crafting novice or a seasoned pro, this guide will walk you through the steps to make your own beautiful beaded bracelet. Let's dive into this easy-to-follow, step-by-step guide.
What You'll Need
- 0.8mm thread (No. 72 jade thread), two pieces, one 35cm and the other 70cm in length
- 22 beads (6mm pearls recommended)
- A lighter
- Scissors
Step by Step Instructions
Learn how to make stunning DIY beaded bracelets with our step-by-step tutorial below:
Step 1: Preparation
Start by preparing your threads. You'll need two lengths: one shorter piece (35cm) and one longer piece (70cm). From the start of the longer thread, measure and leave a 10cm tail—this will be your working area.
Step 2: Tying the First Knot
Using the shorter thread as the axis, take the longer thread and tie a square knot (also known as a "sparrow's head knot") around it. This will serve as the starting point for your bracelet.
Step 3: Adding Beads
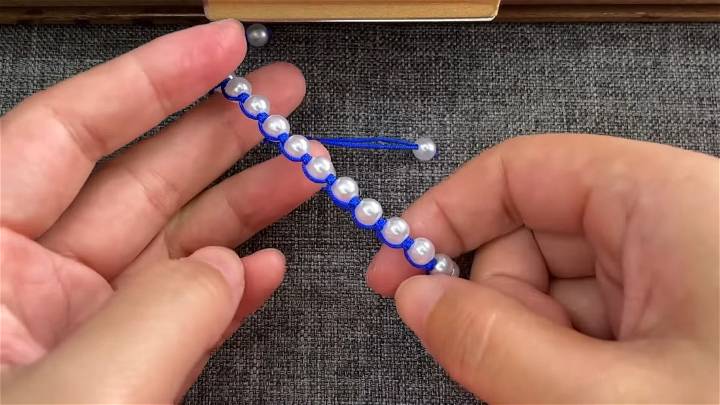
Now, thread one of the 6mm beads onto the shorter thread. After adding a bead, tie another square knot with the longer thread to secure the bead in place.
Step 4: Repeat the Beading Process
Continue the process of adding beads and securing them with square knots. This repetitive process forms the core of your bracelet's design. Keep going until you've added all 22 beads, making sure to tie a square knot after each bead to keep them evenly spaced.
Step 5: Finishing the Bracelet
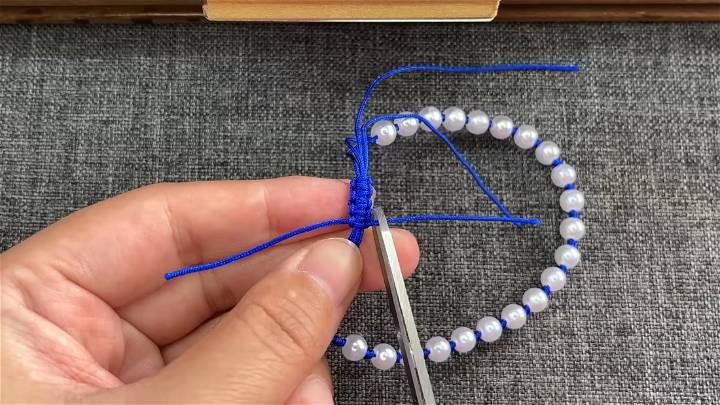
Once all beads are in place, measure around 15cm from the last bead, giving you enough room to finish off the bracelet. To secure the end, use a 20cm piece of the thread to tie four square knots, making a solid ending to your beading work.
Step 6: Securing and Trimming
With the final knots tied, it's time to secure the ends and trim any excess thread. Use a lighter to carefully melt and seal the ends of the thread—this prevents fraying and ensures your bracelet remains sturdy.
Step 7: Adding the Final Touches
As a final touch, thread two more beads onto the ends of the bracelet. These act as a decorative element and also ensure the threads are neatly finished.
Step 8: Celebrate Your Creation!
Congratulations, your beaded bracelet is now complete! You've successfully crafted a beautiful piece of jewelry that's ready to wear or gift to someone special.
Video Tutorial
For a more detailed view of each step, watch the YouTube video tutorial on how to make a bracelet with beads.
It pairs well with this written guide, giving you a visual representation of the techniques described here. The video tutorial ensures that even complex steps are demonstrated clearly, making it easier for crafters of all levels to follow along.
Making your own bracelet is about creativity, crafting skills, and DIY satisfaction.
Tips and Tricks for DIY Beaded Bracelets
Making your own beaded bracelets can be a fun and rewarding experience. Here are some tips and tricks to help you make the most of your DIY beaded bracelet project.
Choosing the Right Beads
- Quality matters. Beads come in a variety of materials, from plastic and glass to semi-precious stones and crystals. Higher quality beads will give your bracelet a more polished look and feel.
- Size is important. Consider the size of your beads in relation to the thickness of your stringing material. If the bead's hole is too small, it won't fit. If it's too large, the bead may move around too much.
Stringing Techniques
- Pre-stretch your cord. This prevents your bracelet from becoming loose over time. Simply pull the cord tight between your hands a few times before you start stringing.
- Use a bead stopper. This handy tool can be clipped onto the end of your string to prevent beads from falling off while you're working.
Securing the Clasps
- Always double-check. Before you cut any excess stringing material, make sure your knot is secure. You don't want your beautiful bracelet falling apart!
- Use a dab of glue. For added security, apply a small amount of jewelry glue to your knot. This will help keep it from coming undone.
The most important tip is to have fun and let your creativity shine!
Variations for DIY Beaded Bracelets
Making your own beaded bracelets allows for a world of creativity and personal expression. Here are some ways you can customize your bracelets to make them truly unique.
Bead Types
Experiment with different materials. Beads come in a variety of materials, including glass, wood, metal, and semi-precious stones. Each material offers a unique look and feel.
Color and Pattern
- Play with color. Color can change the mood of your bracelet. Try using colors that represent a certain theme, season, or mood.
- Make patterns. Patterns can add visual interest to your bracelet. Try alternating colors, sizes, or types of beads to make a pattern.
Charms and Pendants
Add a charm or pendant. Charms and pendants can add a personal touch to your bracelet. Consider adding a charm that represents a hobby, passion, or a special memory.
Multiple Strands
Try multiple strands. Multiple strands can add complexity and depth to your bracelet. You can use the same beads for each strand or mix and match for a more eclectic look.
The most important thing is to have fun and let your creativity shine. There are no rules when it comes to making your own beaded bracelets.
FAQs about DIY Beaded Bracelets
Here are some frequently asked questions about making DIY beaded bracelets.
What type of string should I use for my bracelet?
The type of string you use depends on the type of beads you're using and the style of bracelet you want to make. Some popular options include elastic cord, nylon thread, and jewelry wire.
How do I choose the right size of beads?
The size of the beads you choose will depend on your personal preference and the style of the bracelet. However, a good rule of thumb is to choose beads that are proportionate to the thickness of your stringing material.
How do I secure the ends of my bracelet?
There are several ways to secure the ends of your bracelet. One common method is to tie a knot and then apply a dab of jewelry glue for added security.
Can I mix different types of beads in one bracelet?
Absolutely! Mixing different types of beads can add visual interest and uniqueness to your bracelet.
How do I care for my beaded bracelet?
To keep your beaded bracelet looking its best, avoid exposing it to harsh chemicals or moisture. Wipe it gently with a soft cloth to clean.
What if my bracelet is too loose or too tight?
If your bracelet is too loose or too tight, you may need to restring it. Measure your wrist and add an extra inch for a comfortable fit.
Can I add charms to my beaded bracelet?
Yes, adding charms can be a great way to personalize your bracelet. Just make sure the charm's hole is large enough to fit your stringing material.
How can I make a pattern with my beads?
Making a pattern can be as simple as alternating different colors or types of beads. You can also make more complex patterns by grouping beads together.
What do I do if my string breaks?
If your string breaks, don't worry! You can simply restring your beads onto a new piece of string.
Can I sell the beaded bracelets I make?
Yes, many people enjoy making beaded bracelets as a hobby and then sell them online or at craft fairs. Just make sure to price your bracelets appropriately to cover your time and the cost of materials.
Conclusion:
Wrapping up, making DIY beaded bracelets is a fun and creative way to express your style. From simple designs to intricate patterns, there are endless possibilities for crafting unique pieces. Start making your own bracelets today!


