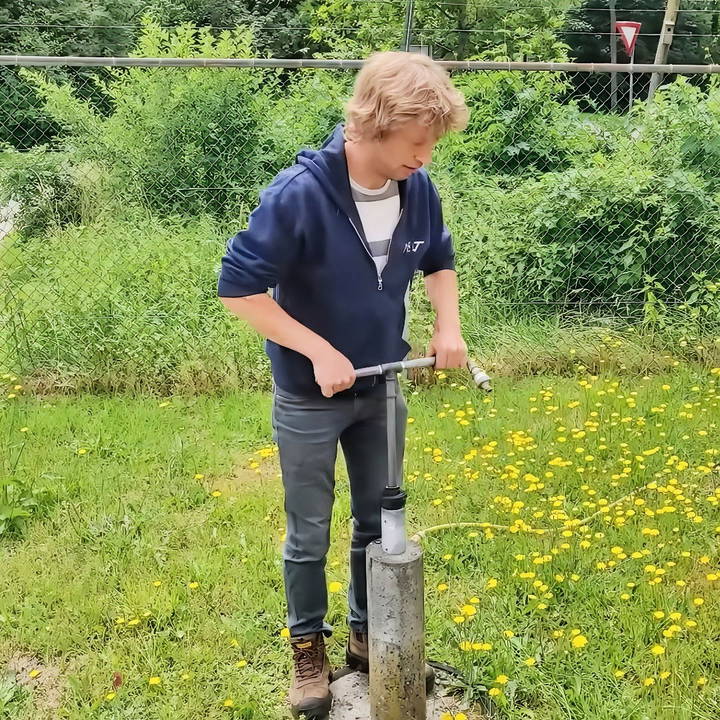
Learn how to drill a well with step-by-step instructions, from planning to installation, ensuring a safe and efficient process. Drilling a well might sound like a tough task, but with the right tools and steps, it's something you can actually do yourself. I'm going to share my experience drilling a borehole using an EMAS hand pump and a standard hand drill. Whether you're looking to extract groundwater or just curious about the process, I'll break down each step, so it's easy to follow and understand.
Tools You'll Need
Before we jump into the details, here's a list of what I used:
- Hand Drill: A regular corded hand drill, which I modified slightly for easier handling.
- PDC Drill Head: These are tough inserts that act as teeth, grinding through the earth.
- Centrifugal Pump: This pump helps circulate water during drilling to remove soil and debris.
- Filter Cloth and PVC Pipe: Essential for making the casing that protects the well from contaminants.
- Water Additives (Barasol): A biodegradable polymer to increase water viscosity and help the drilling process.
Now, let's go through the process, starting with how I prepared the well casing and moved on to actually drilling.
Step by Step Instructions
Learn DIY well drilling with step-by-step instructions, from preparing the drill setup to securing and developing the well. Perfect for beginners!
Preparing the Drill Setup
Learn how to prepare and modify your hand drill setup and prime a centrifugal pump efficiently with our comprehensive guide.
Modifying the Hand Drill
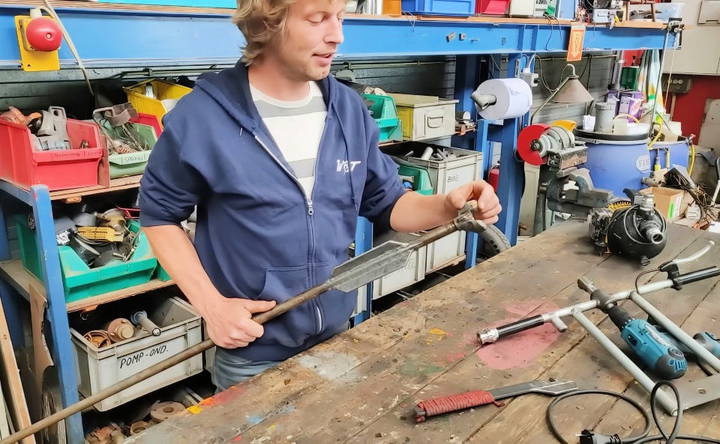
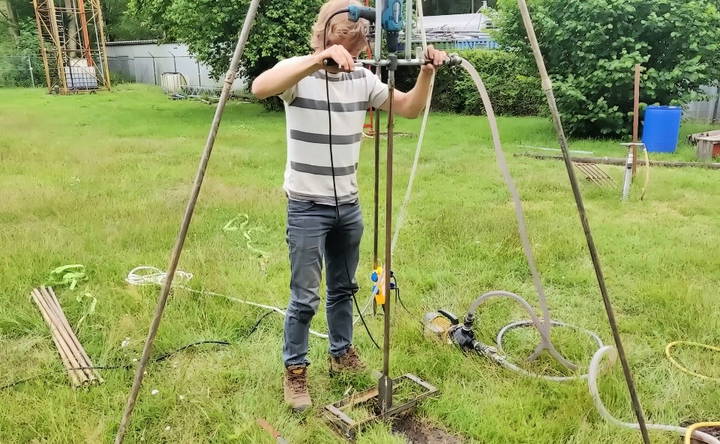
The first thing I did was to connect my hand drill to a rotating system, which allowed continuous drilling. To make it easier, I modified the drill so I could control it with a brake lever from a bicycle. It's a little hack, but it worked perfectly for turning the drill on and off while I was working.
The drill head I used had PDC inserts—these are incredibly durable and handle wear and tear very well. I attached the head to a rope system, which made lowering and raising it a breeze.
Once everything was connected, I attached the water hose to the drill stem. The water flows through the drill and exits at the bottom, helping remove the soil while I drilled. This is crucial to keep the drilling process smooth.
Priming the Centrifugal Pump
Before starting, I had to prime the pump with water. If you skip this step, the pump won't work. Once primed, I connected it to the hose system, and the water started flowing into the drilling stem, carrying away the soil as I drilled.
Starting the Drilling Process
Learn how to start the drilling process, drill the borehole, and use drilling fluid effectively for efficient and safe drilling operations.
Drilling the Borehole
With everything ready, I started drilling. The drill bit rotates continuously while the water flow helps push the dirt and sand to the surface. The mud and debris end up in a trench I dug nearby, allowing the dirty water to settle while the cleaner water gets recirculated through the pump.
One of the things I quickly learned is that patience is key here. Drilling even a meter into the ground takes time because the water needs to clear out all the particles from the hole. I would stop every so often, check the drill, and collect soil samples. This gave me a good idea of how deep I was and what kind of soil I was hitting.
Using Drilling Fluid
For the drilling fluid, I used something called Barasol, a biodegradable polymer. This fluid thickened the water, making it easier to lift out the soil particles. It also sealed the walls of the borehole, which prevented the hole from collapsing and kept the process moving along smoothly.
The trick with the drilling fluid is to make sure it's just the right thickness—not too thin, not too thick. I would check its viscosity every few meters to ensure it was still working well.
Making the Casing
Learn how to make and secure a well with detailed steps on making the pvc casing. Expert tips on making the casing and securing the well.
Building the PVC Casing
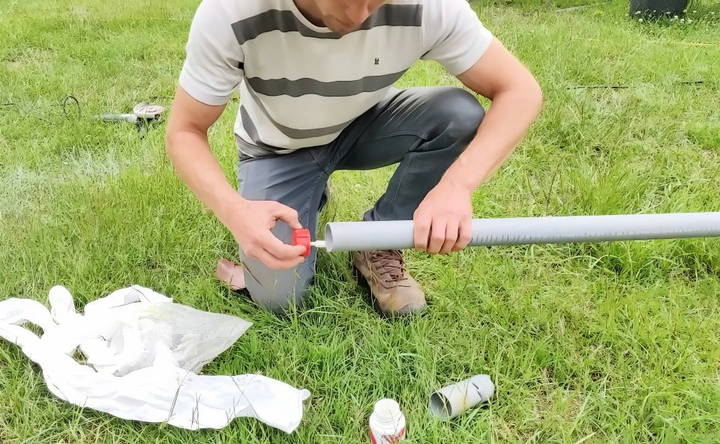
After drilling the hole, the next step was to insert a PVC pipe with a filter screen at the bottom. This pipe helps keep the hole open and filters the water coming in. To make the filter screen, I took a piece of PVC pipe and made several cuts along its length. You can do this with a hacksaw, but I used an angle grinder because it's faster.
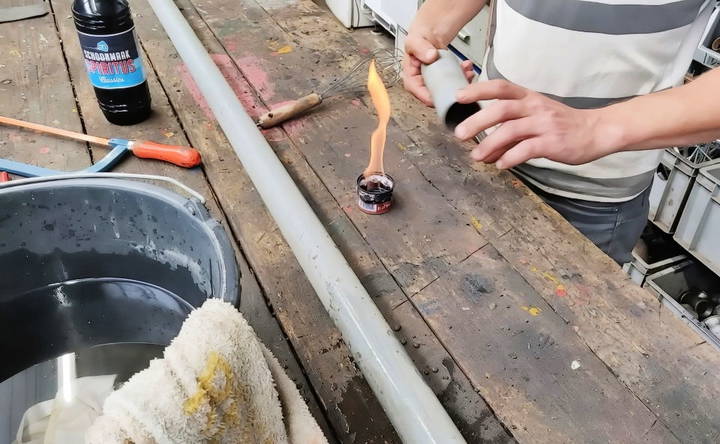
I then wrapped the pipe in filter cloth and secured it with glue. The filter cloth keeps out fine particles while letting the water flow in. After everything was assembled, I quickly lowered the PVC casing into the borehole before it had a chance to collapse.
Securing the Well
Once the casing was in place, I sealed the bottom of the well using clay or cement. This is essential to prevent contamination from entering the well through the top. I used a type of clay that swells when it gets wet, making a tight seal around the casing. You could also use bentonite or cement, depending on what's available.
Final Steps: Developing and Cleaning the Well
ensure a pure water supply with our final steps: developing and cleaning the well, and checking for a water-bearing layer. discover how now!
Developing the Well
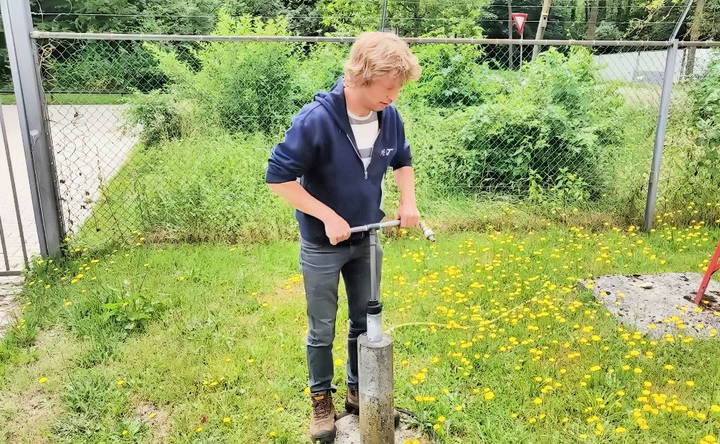
With the casing in place, the next step was to "develop" the well. This means flushing out all the mud, fine particles, and debris that might still be in the hole. I used a centrifugal pump for this, placing the foot valve just below the surface. By moving the hose up and down, I maked a strong flow of water that washed out the remaining dirt.
Developing the well is crucial because it improves the water yield. If you skip this step, your well might not produce as much water, and the water quality might suffer.
Checking for a Water-Bearing Layer
As I drilled deeper, I kept checking for signs of a water-bearing layer—this is where the well would start to fill with groundwater. One clear indicator was when the water level in the mud pit dropped unexpectedly. This often means the ground is absorbing the water, suggesting there's a water table nearby.
Once I hit coarse sand, I knew I had reached a water-bearing layer. It's important to stop drilling once you reach this point, as going deeper might disturb the layer and cause problems.
Tips and Lessons Learned
- Patience Pays Off: Drilling takes time, especially if you're working alone. Don't rush it. Take your time, and check your progress regularly.
- Use the Right Fluid: The drilling fluid makes a huge difference. If the water is too thin, the soil won't clear out properly. Additives like Barasol help, but make sure not to overdo it.
- Keep Your Tools Clean: After every few meters, I checked the filter and pump to make sure they weren't clogged. A little maintenance goes a long way in keeping things running smoothly.
- Watch for Water: If you see the water level drop in your mud pit, it could be a sign you're hitting a water-bearing layer. That's a good time to take a soil sample and assess your progress.
- Use a Filter Pack: Adding coarse sand around the PVC casing makes a natural filtration system, which helps improve the water quality in your well.
Troubleshooting Common Issues
When drilling a well, you might encounter several common problems. Here are some issues you might face and how to solve them.
1. Pipe Sticking
- Problem: The drill pipe gets stuck in the borehole.
- Solution: This can happen due to differential pressure or mechanical sticking. To prevent this, maintain proper mud properties and use lubricants. If the pipe is already stuck, you might need to use jarring techniques to free it.
2. Lost Circulation
- Problem: Drilling fluid is lost into the formation.
- Solution: This occurs when the formation is too porous. To fix this, use lost circulation materials (LCMs) like fibrous, flake, or granular materials to seal the pores.
3. Hole Deviation
- Problem: The borehole deviates from the intended path.
- Solution: This can be caused by uneven rock formations. Use stabilizers and reamers to keep the hole straight. Regularly check the alignment and adjust as needed.
4. Mud Contamination
- Problem: Drilling mud gets contaminated with unwanted materials.
- Solution: Contamination can affect the mud's properties. Regularly test the mud and treat it with chemicals to maintain its quality. Use proper filtration systems to remove contaminants.
5. Formation Damage
- Problem: The formation around the borehole gets damaged.
- Solution: This can reduce the well's productivity. Use proper drilling techniques and fluids to minimize damage. If damage occurs, you might need to perform well stimulation techniques like acidizing or fracturing.
6. Borehole Instability
- Problem: The borehole walls collapse or cave in.
- Solution: This can be due to weak formations or improper mud weight. Use the correct mud weight to balance formation pressures and stabilize the borehole walls.
7. Equipment Failures
- Problem: Drilling equipment breaks down.
- Solution: Regular maintenance and inspections can prevent equipment failures. Keep spare parts on hand and train your team to handle repairs quickly.
8. Water Quality Issues
- Problem: The water from the well is not clean.
- Solution: Test the water quality regularly. If contaminants are found, use filtration systems or water treatment methods to ensure the water is safe for use.
Understanding these issues and solutions ensures a smoother drilling process. Regular monitoring and maintenance prevent and address problems effectively.
Safety Precautions and Regulations
When drilling a well, safety and adherence to regulations are crucial. Here's a comprehensive guide to ensure you stay safe and compliant.
1. Safety Gear
- Protective Clothing: Wear long sleeves and pants to protect your skin from debris and chemicals.
- Gloves: Use heavy-duty gloves to protect your hands from sharp objects and chemicals.
- Goggles: Safety goggles are essential to protect your eyes from dust and debris.
- Hard Hat: A hard hat protects your head from falling objects.
- Steel-Toed Boots: These boots protect your feet from heavy equipment and sharp objects.
- Hearing Protection: Use earplugs or earmuffs to protect your hearing from loud drilling noises.
- Dust Mask: A dust mask helps prevent inhalation of dust and other particles.
2. Local Regulations
- Research Regulations: Start by researching the local regulations governing water well drilling in your area. Regulations can vary significantly by location.
- Obtain Permits: Before you begin drilling, obtain any necessary permits. This often involves submitting an application and paying a fee.
- Licensed Contractors: In some areas, only licensed contractors are allowed to drill wells. Check if this applies to your location.
- Environmental Impact: Ensure your drilling activities comply with environmental regulations to prevent contamination of groundwater.
3. Site Preparation
- Clear the Area: Remove any obstacles and debris from the drilling site to make a safe working environment.
- Mark Boundaries: Clearly mark the boundaries of the drilling site to prevent unauthorized access.
- First Aid Kit: Keep a well-stocked first aid kit on site in case of injuries.
- Fire Extinguisher: Have a fire extinguisher on hand to deal with any potential fires.
4. Drilling Process
- Stabilize Equipment: Ensure all drilling equipment is stable and secure before starting.
- Monitor Conditions: Regularly monitor the drilling conditions and adjust as necessary to maintain safety.
- Emergency Procedures: Have clear emergency procedures in place and ensure all team members are familiar with them.
5. Post-Drilling Safety
- Seal the Well: Properly seal the well to prevent contamination and accidents.
- Water Testing: Test the water quality to ensure it is safe for use. Regular testing is recommended.
- Maintenance: Regularly maintain the well and equipment to ensure long-term safety and functionality.
By following these safety precautions and regulations, you can ensure a safe and successful well-drilling project. Always prioritize safety and compliance to protect yourself and the environment.
FAQs About DIY Well Drilling
Discover essential FAQs about DIY well drilling, covering costs, techniques, equipment, and safety tips to ensure a successful drilling project.
DIY well drilling involves making a water well on your property using your own tools and resources. This method can save money and provide a self-sustaining water source. It requires careful planning, the right equipment, and knowledge of local regulations.
The depth of your well depends on the water table in your area. Typically, wells range from 100 to 300 feet deep. It's important to research local water table levels and consult with experts if needed.
Not all locations are suitable for well drilling. Factors to consider include:
Soil type: Sandy or loose soils are easier to drill than rocky or clay soils.
Water table: Ensure the water table is accessible.
Local regulations: Some areas have restrictions or require permits for well drilling.
Choosing the right spot involves:
Proximity to water sources: Look for areas with a high likelihood of groundwater.
Distance from contamination sources: Avoid areas near septic tanks, livestock, or chemical storage.
Elevation: Higher ground can help prevent contamination from surface water.
Environmental impacts can be minimized with proper practices:
Avoid over-drilling: Only drill as deep as necessary.
Proper disposal of drilling fluids: Prevent contamination of local water sources.
Regular maintenance: Ensure the well does not become a source of contamination.
Conclusion
Drilling a well by hand may seem like a big project, but with the right tools and a bit of patience, it's completely doable. My experience taught me that preparation is key—make sure you have all your materials ready and understand each step before you begin. If you follow the process, you can make a functional well that provides clean groundwater for your needs.


