Making your own makeup brush cleaner can be a game-changer for keeping your tools clean and your skin healthy. You don’t need fancy ingredients or tools. Just some simple, easy-to-find items from around your home can work wonders. This way, your brushes stay in good shape, and you avoid skin problems caused by dirty brushes.
Next, we'll dive into how to mix and use your homemade solution. It's straightforward and doesn't take much time. Plus, it's a budget-friendly way to care for your brushes.
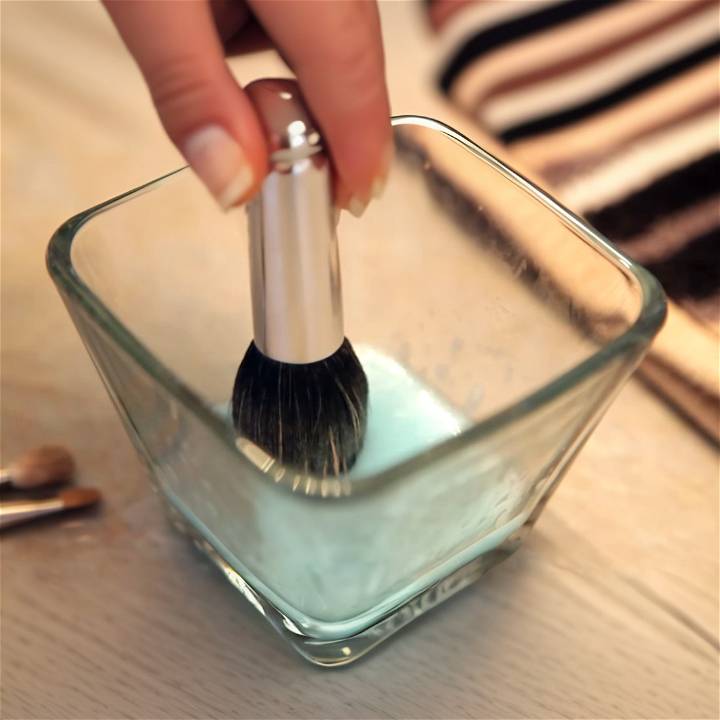
Keep reading to learn how to make a DIY makeup brush cleaner that keeps your beauty tools squeaky clean.
Why Clean Your Makeup Brushes?
Cleaning your makeup brushes is a crucial part of maintaining your beauty tools. It’s not just about keeping your makeup application flawless; it’s also about ensuring the health of your skin. Here’s why:
Prevent Bacterial Growth
Makeup brushes can become a breeding ground for bacteria if not cleaned regularly. These bacteria can cause various skin problems, including acne, rashes, and infections. By cleaning your brushes, you’re removing the bacteria and preventing them from transferring to your skin.
Extend Brush Lifespan
Regular cleaning can help extend the lifespan of your brushes. Makeup residue can cause bristles to stick together, affecting the performance of the brush. Cleaning helps to keep the bristles soft and in good condition, ensuring that your brushes last longer.
Better Makeup Application
Clean brushes apply makeup more evenly and smoothly. When brushes are filled with old makeup, they can’t blend your makeup properly. Regular cleaning allows for better product distribution, resulting in a more professional look.
Avoid Skin Irritation
Old makeup and bacteria in your brushes can lead to skin irritation. If you have sensitive skin, this could lead to redness, itching, and other discomforts. Cleaning your brushes helps to keep your skin healthy.
Prevent Color Mixing
If you use the same brush for different colors without cleaning it, the colors can mix, altering the final look. Regular cleaning prevents color mixing and ensures that you get the true color of your makeup.
A clean brush is a happy brush! And a happy brush makes for a flawless makeup application and healthier skin. So, make brush cleaning a regular part of your beauty routine.
Signs Your Brushes Need Cleaning
Knowing when to clean your makeup brushes is just as important as knowing how to clean them. Here are some signs that your brushes may need a good cleaning:
Change in Color
The most obvious sign that your makeup brush needs cleaning is a change in color. If your brush is no longer the color it was when you bought it, it’s time for a cleaning.
Stiff Bristles
Makeup residue can cause the bristles of your brush to become stiff and hard. If you notice that your brush isn’t as soft as it used to be, it might be time to give it a good clean.
Uneven Makeup Application
If your makeup isn’t applying as smoothly or evenly as it usually does, it could be a sign that your brush needs cleaning. A dirty brush can’t distribute makeup properly.
Skin Breakouts
If you’re experiencing more breakouts than usual, your makeup brush could be to blame. Bacteria from a dirty brush can transfer to your skin and cause acne.
Unpleasant Smell
A dirty makeup brush can often have an unpleasant smell. If your brush smells off, it’s definitely time for a cleaning.
Regular cleaning of your makeup brushes is essential for maintaining both the quality of your brushes and the health of your skin. So, keep an eye out for these signs and make sure to clean your brushes regularly.
How to Make a Makeup Brush Cleaner - Step by Step Guide
Learn how to make a makeup brush cleaner with this easy step-by-step guide. Keep your tools clean and sanitized for flawless makeup application!
Ingredients and Materials Needed
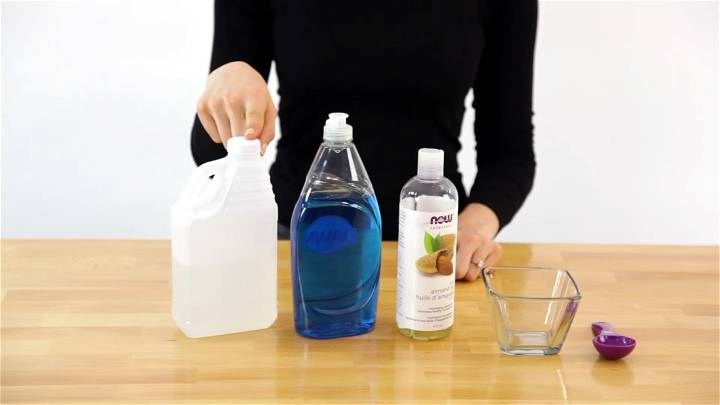
- White vinegar
- Dish soap
- Almond oil
- A small container
- Water for rinsing
- A clean towel or cloth for drying
Step-by-Step Instructions
Learn how to make a DIY makeup brush cleaner at home with simple ingredients below:
1. Gather Your Ingredients
Start by ensuring you have all necessary ingredients: white vinegar, dish soap, and almond oil. These three components will act together to break down makeup residues, disinfect, and condition your brushes' bristles.
2. Mix the Cleaner
In your small container, mix equal parts of white vinegar, dish soap, and almond oil. The quantities don't need to be exact, but aim for about a teaspoon of each if you’re cleaning multiple brushes or adjusting according to your needs.
3. Stir Well
After adding all ingredients to your container, stir the mixture well to ensure they are thoroughly combined into a homogenous cleaning solution.
4. Clean Your Brushes
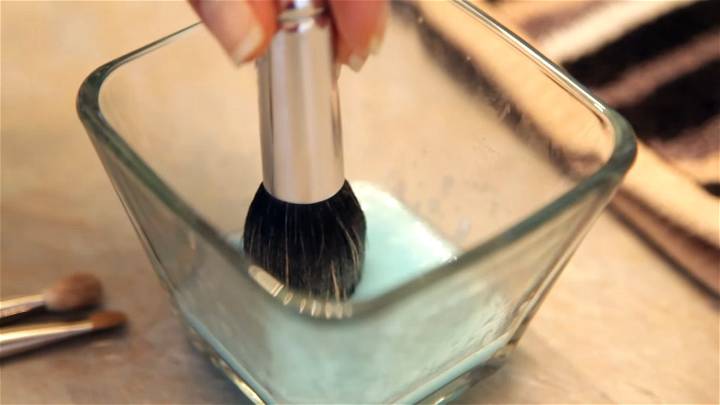
Dip your makeup brush into the solution. Then, under a bit of running water, gently massage the bristles with your hand. This action helps to remove any trapped makeup and dirt from the brush. Be gentle to avoid damaging the bristles.
5. Rinse the Brush
After massaging the bristles, rinse the brush under clean running water. Ensure all the cleaning solution, along with any dislodged makeup, is completely washed out.
6. Dry the Brushes
Once rinsed, gently squeeze out any excess water from the brush. Then, lay it flat on a clean towel or hang it to dry in an area with good airflow. Hanging your brushes bristle down is ideal to prevent water from seeping into the handle, which could damage the brush over time.
Additional Tips
- Regular cleaning of your makeup brushes (at least once a week for frequently used brushes) can prolong their lifespan and prevent skin issues caused by bacteria buildup.
- Avoid soaking the entire brush in water or solution, as this may damage the handle and the glue that holds the bristles.
Video Tutorial
For a more comprehensive guide, watch the makeup brush cleaner step-by-step video tutorial on Clean My Space's YouTube channel here.
It pairs well with this written guide, enriching your understanding with visual demonstrations of the cleaning techniques.
Tips for Drying Brushes
Properly drying your makeup brushes is just as important as cleaning them. Here’s how to do it right:
Don’t Stand Brushes Upright
While it might seem logical to stand your brushes upright to dry, this can actually cause water to seep into the handle and loosen the glue holding the bristles in place. Instead, lay your brushes flat on a clean towel to dry.
Reshape While Wet
After washing, reshape the bristles while they’re still wet. This helps the brush maintain its original shape and prevents the bristles from splaying out.
Avoid Direct Sunlight
Don’t dry your brushes in direct sunlight, as this can damage the bristles. Instead, choose a well-ventilated area out of direct sunlight.
Don’t Use a Hair Dryer
Using a hair dryer to speed up the drying process can damage the bristles and melt the glue in the handle. Allow your brushes to air dry naturally.
Fluff Once Dry
Once your brushes are completely dry, fluff them up by gently swirling them in your hand. This helps to restore their natural softness and volume.
Taking the time to properly dry your brushes can extend their lifespan and ensure they continue to work effectively.
Frequency of Cleaning
Knowing how often to clean your makeup brushes is essential for maintaining their performance and longevity. Here’s a general guide:
Foundation and Concealer Brushes
These brushes are used with liquid or cream products that can breed bacteria more quickly. Therefore, it’s recommended to clean these brushes once a week.
Blush, Bronzer, and Powder Brushes
Brushes used for powder-based products don’t need to be cleaned as often. Cleaning these brushes once every two weeks is usually sufficient.
Eye Makeup Brushes
Because the eye area can be sensitive and prone to infections, it’s best to clean these brushes at least once a week.
Lip Brushes
Lip brushes come into contact with your mouth and should be cleaned after every use to prevent the spread of bacteria.
If you have acne-prone or sensitive skin, clean your brushes regularly for flawless makeup and healthy skin.
Maintaining Brush Quality
Taking care of your makeup brushes is essential for maintaining their quality and ensuring they last as long as possible. Here are some tips to help you keep your brushes in top condition:
Store Brushes Properly
Proper storage can significantly extend the life of your brushes. Keep your brushes in a dry, clean place to prevent dust and bacteria from accumulating. Consider using a brush holder or a protective case, especially for travel.
Avoid Sharing Brushes
Sharing brushes can lead to the spread of bacteria and skin infections. It’s best to keep your brushes to yourself.
Invest in Quality Brushes
While it might be tempting to save money by buying cheaper brushes, investing in high-quality brushes can actually save you money in the long run. Quality brushes not only last longer, but they also provide a better makeup application.
Handle with Care
Be gentle when using and cleaning your brushes. Harsh scrubbing can damage the bristles and shorten the lifespan of your brushes.
Your makeup brushes are an investment. With proper care, they can last for years and help you achieve a flawless makeup application every time.
FAQs About DIY Makeup Brush Cleaner
Get answers to all your questions about DIY makeup brush cleaners in this comprehensive FAQ guide. Learn how to make your own cleaner at home easily!
1. How often should I clean my makeup brushes?
The frequency of cleaning depends on the type of brush and its usage. Foundation and concealer brushes should be cleaned once a week, blush and powder brushes every two weeks, and eye makeup brushes at least once a week. Lip brushes should be cleaned after every use.
2. Can I use regular soap to clean my makeup brushes?
While regular soap can clean your brushes, it might not effectively remove all the makeup residue. It’s recommended to use a gentle, brush-specific cleaner or a mild shampoo.
3. How long does it take for makeup brushes to dry?
The drying time can vary depending on the size and type of brush, but generally, it takes around 24 hours for brushes to fully dry.
4. Can I use a hairdryer to dry my brushes faster?
It’s not recommended to use a hairdryer as the heat can damage the bristles and melt the glue in the handle. Let your brushes air dry naturally.
5. Why is my brush shedding after cleaning?
Brush shedding can occur if the brush is old or if it’s been harshly scrubbed during cleaning. Be gentle when cleaning your brushes and avoid pulling on the bristles.
6. Can I share my makeup brushes with others?
Sharing makeup brushes can lead to the spread of bacteria and skin infections. It’s best to keep your brushes to yourself.
7. How can I prevent my brushes from shedding?
Proper care and gentle cleaning can help prevent your brushes from shedding. Also, investing in high-quality brushes can make a difference as they tend to shed less.
8. Can dirty makeup brushes cause acne?
Yes, dirty makeup brushes can harbor bacteria that can lead to acne, skin irritation, and infections.
9. How do I know when it’s time to replace my makeup brushes?
If your brush is shedding excessively, has a persistent smell even after cleaning, or if the handle is loose, it might be time to replace it.
10. Can I use the same brush for different makeup products?
Using the same brush for different products can lead to color mixing. It’s best to use separate brushes for different makeup products.
Taking care of your makeup brushes is an essential part of your beauty routine. If you have any more questions, feel free to ask!
Conclusion:
Wrapping up this informative guide on making an easy DIY makeup brush cleaner, you now have a cost-effective and efficient solution to keep your brushes clean. Regularly cleaning your makeup brushes is essential for maintaining healthy skin and flawless makeup application. Try out this quick and easy method to ensure your brushes stay clean and bacteria-free.


