Building a DIY shed ramp is a useful project that can make loading and unloading equipment much easier. By constructing a sturdy ramp, you ensure easier access to your shed while reducing risks of injury. This guide will walk you through the essential steps and materials needed so you can tackle the project with confidence and efficiency.
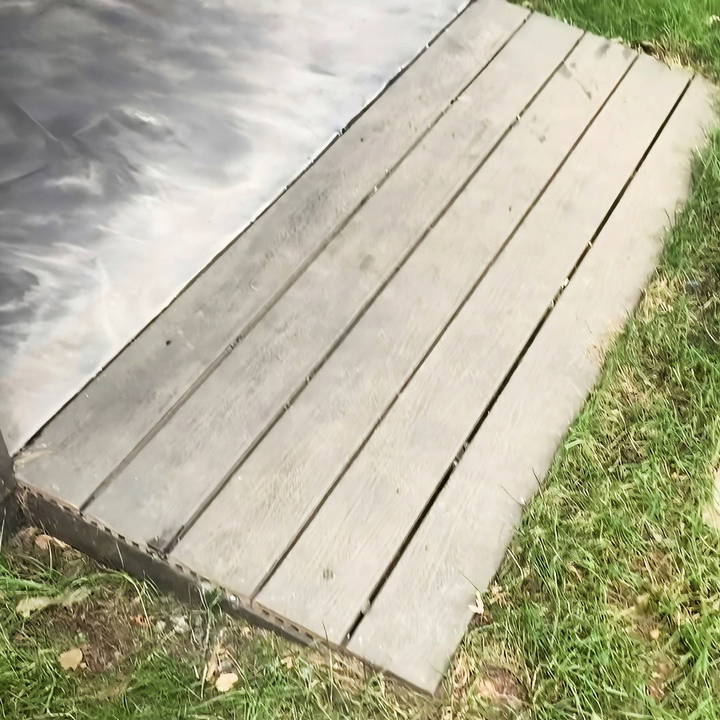
From selecting the right type of wood to measuring and cutting, every detail will be covered. Following this structured approach will help you avoid common mistakes and complete a durable, reliable ramp.
Ready to dive into the details? Keep reading to learn how to build a ramp for your shed step by step.
Materials Needed
- Pressure-treated lumber - Essential for longevity since it will be in contact with the ground.
- Composite decking boards - Provides a durable and low-maintenance surface for the ramp.
- Three-inch exterior-rated screws - Used to secure the structure together.
- Circular saw and miter saw - Necessary for precise cuts.
- Bar clamps - Helpful for holding lumber in place while making cuts.
- Carpenter square and framing square - Essential for marking angles.
- Level - Ensures that your ramp is even.
Step by Step Instructions
Build a sturdy DIY shed ramp with our easy step-by-step instructions. Learn to cut joists, add decking boards, and secure it for lasting durability.
Step 1: Determine the Width of the Ramp
First, measure the opening of your shed door. My door's rough opening was six feet, so I decided to make my ramp six feet wide to match it precisely. This ensures a seamless transition from the shed to the ramp.
Step 2: Cutting the Ledger Board and Bottom Support Brace
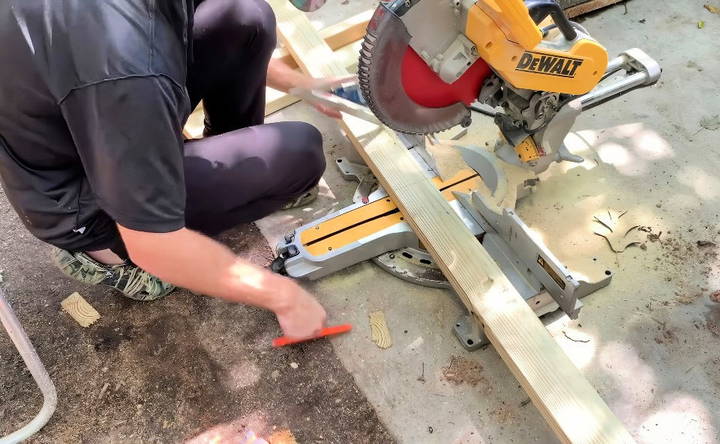
Next, cut the ledger board and bottom support brace to your determined ramp width. Since my shed ramp width was six feet, I cut both pieces to this dimension. Make sure to use pressure-treated lumber for these cuts, as they will be in close contact with the ground.
Step 3: Decide on the Ramp Length
Think about how far you want your ramp to extend from the shed. I aimed for about 28 inches due to my minor slope. The length should be a multiple of your decking board width, plus the spacing between them. My composite decking boards were 5.5 inches wide, so I planned accordingly.
Step 4: Cut the Joists
Measure and cut joists for your ramp. With a six-foot-wide ramp, five joists spaced 16 inches apart were needed. After cutting the first joist, use it as a template for the remaining ones to ensure uniformity.
Step 5: Determine the Ramp Angle
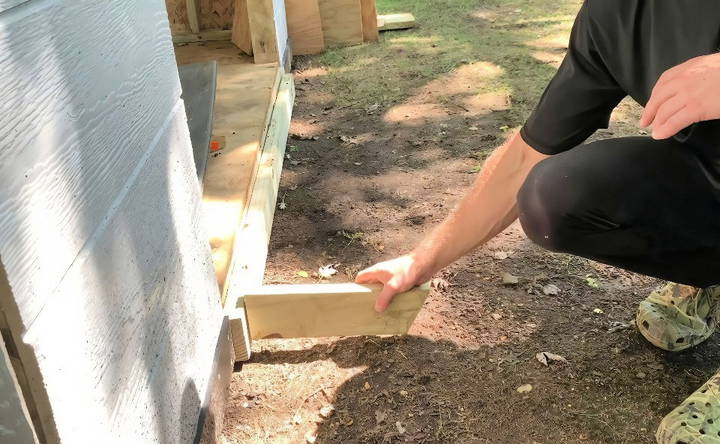
Finding the right angle for your ramp is crucial. I used a scrap piece of lumber to test different angles. After several trials, I found that an eight-degree angle suited my ramp's shallow slope best. Cut this angle on the end of each joist using your miter saw.
Step 6: Match the Angle on the Other Side
To match the angle on the opposite end of the joist, measure 1.5 inches down from the top of each joist and mark it. Using a carpenter square, adjust it to match the eight-degree angle. Secure the joists with bar clamps and use your circular saw to cut along this line.
Step 7: Assemble the Shed Ramp Frame
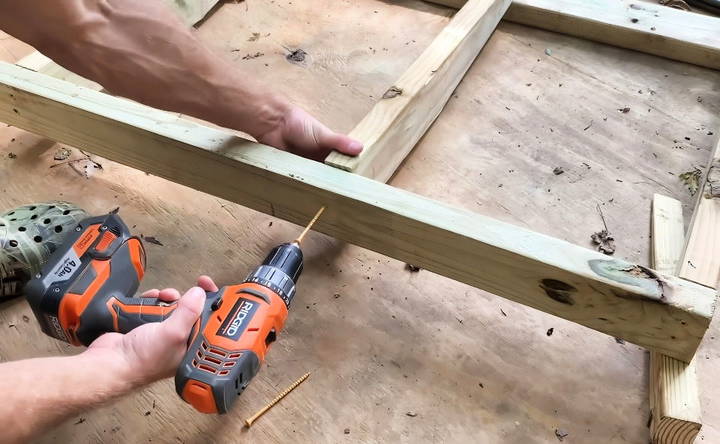
Attach the outermost joists to the ledger board using three-inch exterior-rated screws, ensuring they're flush with the ledger board's top. Then, attach the bottom support brace to the outermost joists, ensuring it's perfectly flush and level. Secure all connections with two screws per joist.
Step 8: Position and Pre-fit the Ramp
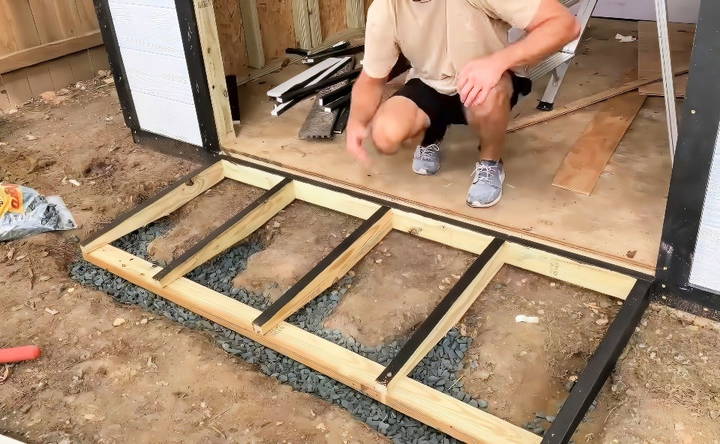
Place the assembled frame in front of the shed. You might need to excavate a bit to ensure the ledger board sits flush against the shed's base. Once positioned, compact the soil underneath for a solid foundation.
Step 9: Add Stone for Stability
Pour stone under the ramp's base. Stone prevents the frame from coming into direct contact with the soil, offering better drainage and stability. Use your level to ensure everything is even, adding or removing stone as necessary.
Step 10: Secure the Ledger Board
Fasten the ledger board to the shed's base frame using three-inch exterior-rated screws. Make sure it's level and sits flush against the shed floor.
Step 11: Cut and Install Decking Boards
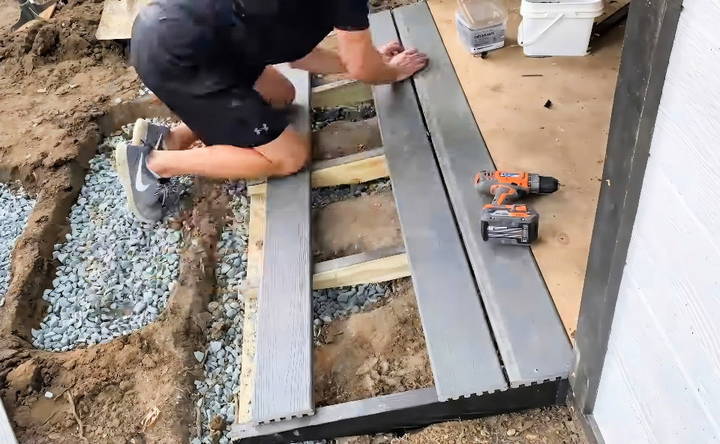
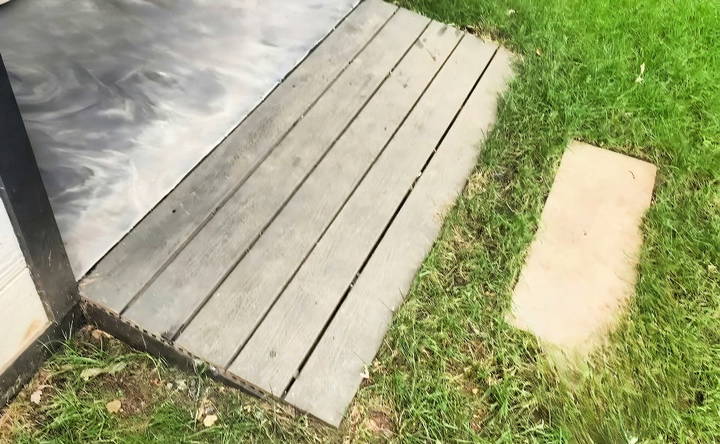
Cut the composite decking boards to the required length, which, in my case, was six feet. Start by positioning the first board, so it touches the shed's subfloor closely, leaving a small gap for expansion. Secure each board to the joists with two screws per joist.
Step 12: Finishing Touches
Backfill any gaps with stone and cover with topsoil. Finally, plant grass seed around the ramp to integrate it smoothly with your lawn.
Customization Ideas for Your DIY Shed Ramp
When it comes to adding a personal touch to your DIY shed ramp, the possibilities are endless. Customizing your ramp not only makes it unique but also allows it to blend seamlessly with your shed and garden landscape. Here are some ideas to inspire your creativity:
- Choose a Theme: Start by deciding on a theme that reflects your personal style or the purpose of the shed. Whether it's rustic, modern, or whimsical, let the theme guide your choices in materials and design.
- Color Coordination: Paint your ramp to match or complement the color of your shed. Use outdoor paint for durability, and consider adding patterns or stripes for an extra flair.
- Functional Decor: Incorporate elements that are both decorative and functional. For example, if you're a gardening enthusiast, you could add built-in planters along the sides of the ramp filled with herbs or flowers.
- Lighting: Install solar-powered lights along the ramp for safety and ambiance. Choose from a variety of styles, such as post lights or string lights, to build a warm welcome in the evenings.
- Textures and Patterns: Use different materials to add texture. For instance, a combination of smooth wooden planks and pebbled edges can build an interesting look while providing traction.
- Artistic Touches: Personalize the ramp with stencils or hand-painted designs. From simple geometric shapes to intricate landscapes, artwork can transform your ramp into a piece of garden art.
- Safety with Style: Safety features don't have to be boring. Design handrails that are both safe and stylish, using materials like wrought iron or carved wood to make a statement.
- Eco-Friendly Options: Consider using recycled or sustainable materials for your ramp. Reclaimed wood or composite materials are not only environmentally friendly but also add a story to your project.
- Seasonal Decor: Make your ramp festive with seasonal decorations. Removable accents like wreaths, garlands, or even a fresh coat of paint can celebrate the changing seasons.
- Personal Signage: Add a personalized sign at the top or bottom of the ramp with your family name, the shed's name, or a welcoming message for visitors.
Ensure all enhancements are securely attached and do not affect the ramp's integrity or safety. Your DIY shed ramp will be both functional and a reflection of your creativity.
Troubleshooting Common Issues with DIY Shed Ramps
Building a DIY shed ramp can be a straightforward project, but sometimes, you might run into a few hiccups along the way. Here's a guide to help you troubleshoot some common issues you might encounter:
The Ramp is Too Slippery
- Solution: Safety is paramount. If your ramp is too slippery, especially when wet, consider adding a non-slip surface. You can use anti-slip tape, paint with sand added for texture, or rubber matting. These materials are readily available and easy to apply.
Ramp is Not Level
- Solution: A level ramp ensures stability. If your ramp isn't level, check the ground where it rests. You may need to adjust the soil or base material to build a stable foundation. Use a spirit level to check your work.
The Ramp is Sagging or Feels Weak
- Solution: A sagging ramp can be dangerous. It might mean that the support structure is inadequate. Reinforce the ramp with additional joists or supports underneath. Make sure the spacing between supports follows the recommended guidelines for the weight they need to carry.
The Wood is Rotting or Warping
- Solution: Wood can suffer from exposure to the elements. To prevent rot and warping, ensure you've treated the wood with a suitable preservative. If damage has already occurred, replace the affected sections with new, treated lumber.
The Ramp Doesn't Align with the Shed Entrance
- Solution: Precise alignment is crucial. If there's a misalignment, measure the height and width of the shed entrance again. You may need to adjust the angle or position of the ramp to fit correctly.
Difficulty Moving Heavy Items Up the Ramp
- Solution: The ramp should make life easier, not harder. If it's difficult to move items up the ramp, consider making the slope gentler. The standard slope for a ramp is 1:12, which means for every inch of height, the ramp should extend 12 inches in length.
The Ramp is Affecting Water Drainage
- Solution: Proper drainage protects your property. If the ramp is redirecting water toward your shed or house, you might need to adjust its position. Alternatively, drainage solutions like gutters or French drains can be installed to redirect the water away.
Nails or Screws are Coming Loose
- Solution: Fixings should stay put. If nails or screws are coming loose, replace them with longer or thicker ones for better grip. Consider using deck screws for their strength and durability.
Take time to understand issues before fixing them. A simple tweak can often make your DIY shed ramp safe. Always prioritize safety; seek professional advice if unsure.
FAQs About DIY Shed Ramp
Discover essential FAQs about DIY shed ramp construction, including materials, tools, and step-by-step guidance for building a durable and functional shed ramp.
The size of your shed ramp should be based on:
The width of the shed door to ensure your ramp is wide enough.
The height from the ground to the shed entrance to calculate the ramp's slope.
The length of the ramp, which should be long enough to provide a gentle incline.
The slope of your shed ramp should be gentle enough to move items in and out of the shed easily. A common recommendation is a 1:8 slope ratio, which means for every inch of height from the ground to the shed entrance, the ramp should extend 8 inches in length.
To attach the ramp to your shed:
Drill pilot holes in the ramp's header.
Secure the header to the shed's sill plate with 3-inch lag screws.
Ensure the ramp is level and stable before use.
To ensure the safety of your shed ramp:
Non-slip surface: Add a non-slip surface material like anti-slip tape or textured paint.
Handrails: Consider installing handrails if the ramp is long or steep.
Regular maintenance: Inspect the ramp periodically for loose screws, rotting wood, or other potential hazards.
For finishing the surface of your shed ramp:
Pressure-treated lumber is already resistant to rot and insects, but a wood sealant can further protect it.
For better traction, especially in wet conditions, apply a textured paint or attach rubber mats.
If you prefer a natural look, sand the surface to remove splinters and then apply a clear sealant for protection.
Conclusion
Building this DIY shed ramp was an incredibly rewarding project. The structure is reliable, durable, and aesthetically pleasing. Following this detailed guide, you can achieve a similar result even if you're a novice in carpentry. Happy building! I hope this guide helped you make your own shed ramp effortlessly!


