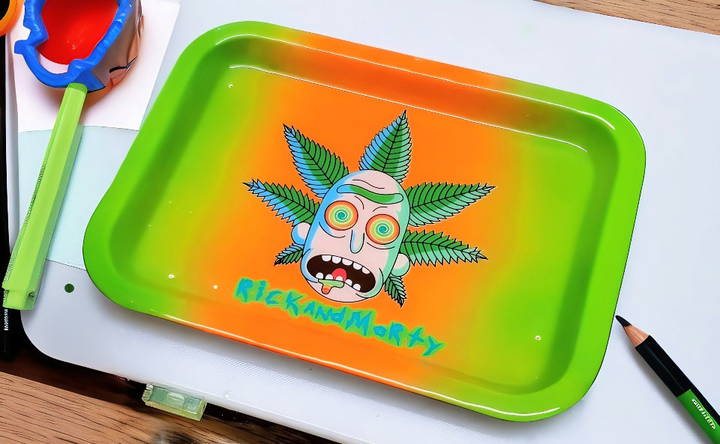
Making my own DIY rolling tray was one of the most practical and enjoyable projects I've done. I started with a basic tray, some paint, and a few personal decorations. The idea of making something functional yet personalized was exciting. It was a hands-on process that only took an afternoon, and I ended up with a tray that was both useful and stylish.
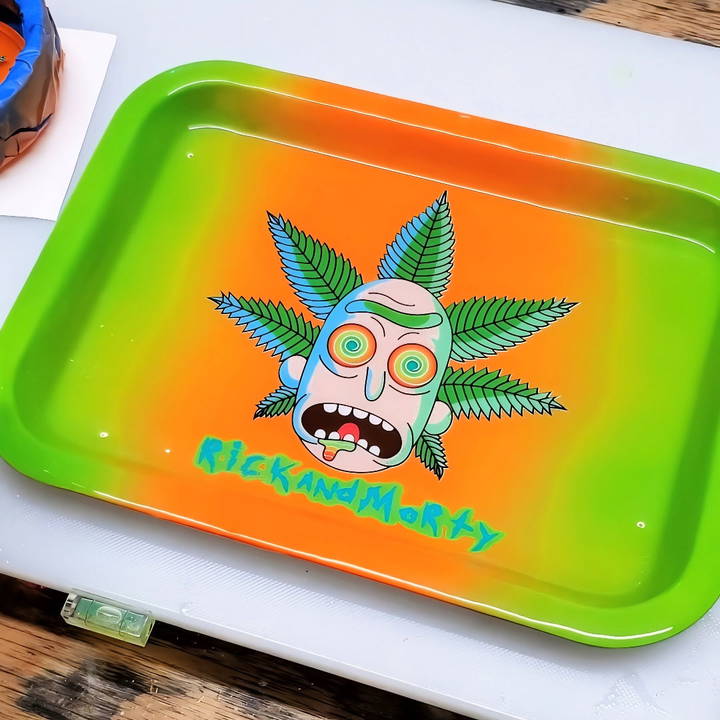
If you're wondering how to make a rolling tray, I'm here to help with this guide. All you need are a few basic materials and a bit of creativity. From choosing the right design to adding your finishing touches, this project is both simple and rewarding. I'm helping with this so you can make a rolling tray that suits your style and needs.
Materials You Need and Why
- Epoxy Resin: The main component for your tray, providing durability and a glossy finish.
- Rolling Tray Mold: Serves as the shape and size guide for your tray.
- Protective Gear: Essential for safety, including gloves and a mask, as resin chemicals can be harsh.
- Non-Stick Paper: Useful for sticker application without leaving residue.
- Stickers/Decals: For personalizing your tray design.
- Heat Gun: Aids in removing air bubbles and helps resin adhere better to the tray mold sides.
- Mixing Tools: For preparing and mixing the epoxy resin.
Step by Step Instructions
Learn how to make your own DIY rolling tray with our complete step-by-step instructions: from design prep to perfecting the sides and adding details.
Step 1: Preparing Your Design
Before diving into the resin, decide on your tray's design. Place your stickers on non-stick paper—it makes it easier to position them without leaving any residue on the tray. If you struggle with bubbles, apply your stickers at an angle and gently press down to eliminate any air caught underneath. This simple technique ensures a smooth, professional look that your customers or friends will admire.
Step 2: Mixing and Pouring the Resin
Safety first—ensure you're wearing your protective gear before handling resin. Mix the epoxy resin according to the instructions provided on the product. The key is to achieve a consistency that's easy to work with yet thick enough to adhere to the tray's sides. Pour the resin into your tray mold slowly, making sure to cover all areas evenly.
Step 3: Perfecting the Sides
One common issue I encountered when I first started was uneven sides inside the tray. Here's a technique that transformed my craft: After pouring, take a few extra minutes to push the resin up against the walls of the tray mold, repeating this process five or six times. Use a heat gun to heat the resin slightly. This thickens it, making it stick better to the walls and providing a more even coat.
Step 4: Loving the Details
Pay close attention to the tray's edges during application. Missing spots can lead to unsatisfactory results, requiring additional touch-ups that might not always blend seamlessly. Getting it right the first time ensures a clean, professional finish.
Customization Ideas for DIY Rolling Trays
Making a DIY rolling tray is not just about functionality; it's also an opportunity to express your personal style and creativity. Here are some customization ideas that can make your rolling tray uniquely yours:
- Choose Your Theme: Start by deciding on a theme that reflects your interests or aesthetic. It could be anything from a minimalist design to vibrant patterns or even inspired by your favorite artwork or cultural motifs.
- Paint and Color: Use non-toxic paint to add color to your tray. Whether you prefer a single, solid color or a blend of hues, painting your tray can transform its look entirely. For a more intricate design, consider using stencils or hand-painting details.
- Decoupage Technique: Decoupage involves gluing paper cutouts onto your tray and sealing them with a clear varnish. You can use magazine clippings, fabric, or even your own drawings to make a collage effect.
- Add Textures: Incorporate different textures by attaching materials like felt, leather, or cork. These not only add to the visual appeal but can also provide a better grip or cushioning for items placed on the tray.
- Engraving and Carving: If you have the tools and skills, engraving or carving designs into the wood can give your tray a sophisticated and custom look. Simple geometric patterns or more elaborate scenes can make your tray stand out.
- Functional Add-ons: Consider adding features that increase the tray's functionality. Magnetic strips can hold small metal tools in place, while built-in compartments can help organize items neatly.
- Eco-Friendly Touches: Use recycled materials or upcycled items to decorate your tray. This approach is not only environmentally friendly but also adds a story to your creation.
- Seal and Protect: Once you're happy with your design, apply a clear sealant to protect your artwork and make cleaning easier. This will help preserve the colors and materials you've added.
The key to a great DIY project is to have fun and let your creativity flow. Your rolling tray is a reflection of your personality, so feel free to experiment and make it your own.
Advanced Techniques for Crafting DIY Rolling Trays
When you're ready to take your DIY rolling tray to the next level, advanced techniques can add both beauty and complexity to your project. Here's how to incorporate some sophisticated methods into your tray design:
- Wood Burning for Detailing: Wood burning, or pyrography, allows you to make intricate designs with a heated pen. You can sketch your design lightly with a pencil and then trace over it with the wood-burning tool for a rustic, handcrafted look.
- Epoxy Resin Art: Epoxy resin can be used to make a glass-like finish or to encapsulate objects within your tray. Mix the resin with colors for a vibrant effect, or add glitter, pressed flowers, or even small tokens to personalize your tray.
- Inlay Work: Inlaying involves embedding different materials into the wood to form patterns or pictures. You can use contrasting wood, metal, or even stones. This requires precise cutting and fitting, so it's best suited for those with more experience in woodworking.
- Advanced Joinery: If your tray design includes multiple pieces of wood, consider using dovetail or box joints for added strength and aesthetic appeal. These joints are not only functional but also add a touch of craftsmanship to your tray.
- Laser Cutting and Engraving: If you have access to a laser cutter, you can use it to cut precise shapes or engrave detailed graphics onto your tray. This technology allows for incredible precision and complexity in designs.
- Interactive Elements: Add elements that enhance the user experience, like a built-in scale for those who require precision or LED lights for a modern touch. These features can make your tray stand out and add a functional aspect.
- Finishing Techniques: Explore different finishing techniques, such as French polishing or applying a shellac finish for a high-gloss, professional appearance. These methods require patience and practice but result in a stunning final product.
Practicing advanced techniques and using specialized tools is important. Always prioritize safety. These methods will make your DIY rolling tray functional and artistic.
Troubleshooting Common Issues
When crafting a DIY rolling tray, you might encounter a few hiccups along the way. Here's how to troubleshoot some common issues with simple, clear solutions:
- Warping Wood: If your wooden tray warps, it's often due to moisture. To fix this, place the tray under a heavy, flat object after lightly dampening the concave side. Allow it to dry slowly.
- Paint Peeling: Peeling paint can be due to poor adhesion. Sand the area lightly, clean it, and then reapply a primer before painting. Use paints formulated for wood for better results.
- Sticky Resin: If your resin is tacky, it may not have cured properly. Ensure you mix the resin and hardener in the correct ratio and allow it to cure in a warm, dust-free environment.
- Loose Handles or Components: Tighten any screws or joints. If they continue to loosen, apply a drop of wood glue to the screw threads or dowel joints before reassembling.
- Scratches on the Surface: Light scratches can be buffed out with fine-grit sandpaper. For deeper scratches, fill them with wood filler, sand smooth, and then touch them up with paint or sealant.
- Stains: Remove stains promptly. For water stains, gently rub with a mixture of non-abrasive toothpaste and baking soda. For tougher stains, use a wood-safe cleaner.
- Odors: If your tray acquires an odor, clean it with vinegar and water solution, then leave it to air dry. Avoid harsh chemicals that can damage the finish.
By addressing these common issues, you can keep your DIY rolling tray in perfect condition and enjoy its functionality and beauty for a long time.
FAQs About DIY Rolling Tray
Get answers to common questions about DIY rolling trays, including materials, techniques, and design tips for a personalized tray.
A DIY rolling tray is a customized platform you make yourself, typically used for organizing and rolling smoking materials. Making your own allows for personalization and can be a fun, creative project. It's also practical, as it helps keep your space tidy by catching any loose material during the rolling process.
Customization can be done by painting the tray with spray paint or hand-painting designs. Adding stickers, photos, or using resin to embed items like glitter or small objects are popular ways to personalize your tray. The key is to let your creativity guide you and choose embellishments that reflect your style.
Yes, safety is important, especially when working with materials like resin. Always work in a well-ventilated area and wear protective gloves and a mask to avoid inhaling fumes or getting materials on your skin. Be sure to follow all safety instructions for the materials you're using.
There are many online resources with step-by-step guides and ideas for making a rolling tray. Websites like Little Lovelies by Allison, Everything 420, and Fat Buddha Glass offer tutorials and inspiration to help you get started on your project.
Absolutely! You can repurpose almost any flat, shallow object as a base for your rolling tray. Common items include old picture frames, baking sheets, or even hardcover books. Just ensure the surface is smooth and easy to clean. For a unique touch, consider using vintage or thrifted trays for added character.
Final Thoughts
Wrapping up, crafting your own DIY rolling tray is not only fun but also gives you a custom piece you'll use daily. It's a practical way to add personal flair to your space, and with the right steps, you'll have a tray that's uniquely yours.


