Discover the joy of making your own DIY headboard with our guide on 30 cheap DIY headboard ideas and plans. Crafting a headboard yourself is not only a cost-effective way to refresh your bedroom but also allows for customizable options that reflect your personal style. Our step-by-step instructions ensure that the process is accessible and enjoyable, leading to a successful and rewarding outcome.
We dive into the essentials of making a Channel Tufted Headboard, covering everything from the materials needed to the final touches. Whether it's selecting the right fabric or attaching panels to the frame, our guide is designed to be informative, engaging, and most importantly, easy to follow. Stay with us as we explore innovative ideas and practical tips that will empower you to craft a stunning headboard that elevates your bedroom decor.

Why Make Your Own DIY Headboard?
Making your own DIY headboard is not only a fun and rewarding project, but it also offers numerous benefits. Here's why you should consider it:
- Cost-Effective: Store-bought headboards can be expensive. DIY options allow you to make a beautiful and functional piece at a fraction of the cost.
- Personalization: Crafting your own headboard means you can tailor it to your exact preferences in terms of style, color, and materials. Your bedroom will reflect your unique taste and personality.
- Versatility: Whether you want a minimalist design, a luxurious tufted headboard, or a rustic wooden look, DIY gives you the flexibility to bring any vision to life.
- Skill Building: Tackling a DIY headboard project helps you develop valuable skills such as woodworking, upholstering, and creative design. These skills can be applied to future home improvement projects.
- Sustainability: By choosing to DIY, you have the opportunity to repurpose materials or upcycle old furniture, reducing waste and contributing to a more sustainable lifestyle.
- Satisfaction: There's a special sense of accomplishment that comes with completing a DIY project. Seeing your handcrafted headboard in your bedroom provides a constant reminder of your creativity and hard work.
In summary, making your own headboard is a practical, enjoyable, and rewarding endeavor that can enhance your bedroom without breaking the bank. Plus, it offers an excellent opportunity to express your creativity and add a personal touch to your space.
How to Make a Channel Tufted Headboard
Making a luxurious channel tufted headboard can transform your bedroom into a cozy retreat without breaking the bank. This DIY project is customizable to your bed size and style preferences, and it's a great way to add a touch of sophistication to your space. Let's dive into the steps to make your own channel tufted headboard.
Materials You'll Need:
- Upholstery fabric (14 inches wide by 47 inches long for each panel)
- Foam strips (1 inch thick, cut to the size of your wooden planks)
- Batting (cut with an extra 2 inches on each side of the plank)
- Wooden planks (size according to bed width)
- Spray adhesive
- Staple gun (pneumatic recommended for ease)
- Screws and drill
- Fabric for the back of the headboard
Step 1: Prepare Your Fabric and Foam
Cut your fabric panels to size, keeping in mind the dimensions of your headboard. Next, cut your foam strips to match the size of your wooden planks. Use an X-Acto knife for precision cutting.
Step 2: Attach the Foam to the Planks
Place the foam strips onto the planks. Use spray adhesive to secure the foam in place, carefully aligning the edges to avoid any overlap.
Step 3: Add Batting
Cut your batting so it extends about two inches beyond the planks on each side. Wrap and staple the batting onto the planks, ensuring you leave no gaps for a smooth, even surface.
Step 4: Staple the Fabric
Center the fabric on the foam-covered plank. Start by stapling the fabric in the center of one side, then pull it tightly to the opposite side and staple in the middle again. Continue this process, alternating sides to prevent slanting or unevenness.
Step 5: Neaten the Edges
Trim any excess fabric at the ends of the planks to about one inch. Fold this over and staple to the inside end of the plank for a clean finish. Make sure the fabric is pulled tightly for neat edges.
Step 6: Build the Frame
Measure and cut wooden planks for the top, bottom, and sides to make a frame for the back of your headboard. This frame should fit just inside the back edge of your headboard. Assemble the frame using screws and attach it to the back of your upholstered panels.
Step 7: Attach Panels to Frame
Lay the panels face down in the order you'd like them to appear on the headboard. Attach each panel to the frame with screws, ensuring they are well compressed and secured.
Step 8: Cover the Back
Choose a fabric for the back of your headboard, ideally something durable. Cut it to size, staple it onto the back frame, folding about an inch and a half of the fabric in for neatness before stapling.
Finishing Touches
Once all the panels are attached and the back fabric is in place, your channel tufted headboard is ready. Mount it to your bed frame or simply place it between your bed and the wall for stability.
Video Tutorial
For a step-by-step video tutorial on making a channel tufted headboard, watch this helpful YouTube video.
It pairs wonderfully with this written guide, offering visual insights into the process for those who appreciate seeing the technique in action.
Making a channel tufted headboard yourself is not just a way to save money; it's an opportunity to customize your bedroom to your exact preferences. Follow these steps, and you'll have a stunning, luxurious headboard that matches perfectly with your personal style and comfort.
DIY Headboard Ideas and Plans FAQ
Making your own headboard can transform your bedroom without the hefty price tag. Here are some frequently asked questions to help guide your project to success.
What materials do I need to make a DIY headboard?
The materials vary based on the type of headboard you want to create, but common items include:
- Wood or plywood for the frame
- Foam padding
- Fabric or leather for upholstery
- Batting to smooth out the foam
- Staple gun and staples
- Screws and a drill for assembly
- Optional items like decorative nails or buttons for tufting
Can I make a headboard without woodworking skills?
Yes, many DIY headboard projects are designed with beginners in mind and don't require advanced woodworking skills. Projects that use simple materials like fabric, foam, and a basic wooden frame are a good starting point.
How can I attach my DIY headboard to the bed?
There are several methods to attach a DIY headboard to your bed, including:
- Mounting it directly to the wall behind the bed
- Attaching it to the bed frame with bolts or screws
- Freestanding between the wall and bed if it's heavy enough to be stable on its own
How do I choose the right size for my DIY headboard?
Measure the width of your bed to determine the ideal width for your headboard. Typically, the headboard should match or slightly exceed the width of your bed. The height can vary based on your preference and design style.
What is the easiest type of headboard to DIY?
A simple upholstered headboard is one of the easiest types to make. It requires minimal tools and materials, and you can customize it with your choice of fabric to match your bedroom decor.
How can I make my DIY headboard more comfortable?
To increase comfort, especially if you like to sit up in bed, add extra foam padding or consider a thicker, high-density foam. Layering batting over the foam before upholstering can also make a softer surface.
Can I repurpose materials for my headboard project?
Absolutely! Using reclaimed wood, old doors, or even repurposing an existing headboard frame can add character to your project and is a sustainable choice. Be creative and see what materials you can give a second life.
What if I make a mistake during my DIY headboard project?
Mistakes are part of the learning process in DIY projects. Many errors can be fixed by carefully removing staples or screws and readjusting. Remember, part of the charm of DIY is that it doesn't have to be perfect to be beautiful.
Remember, making a DIY headboard is not just about saving money; it's an opportunity to inject your personal style into your bedroom. With some creativity and effort, you can make a piece that's both functional and a reflection of your taste.
30 Cheap DIY Headboard Ideas and Plans
Discover 30 Cheap DIY Headboard Ideas and Plans to easily make your own unique headboard at home. Learn how to make a stylish headboard today!
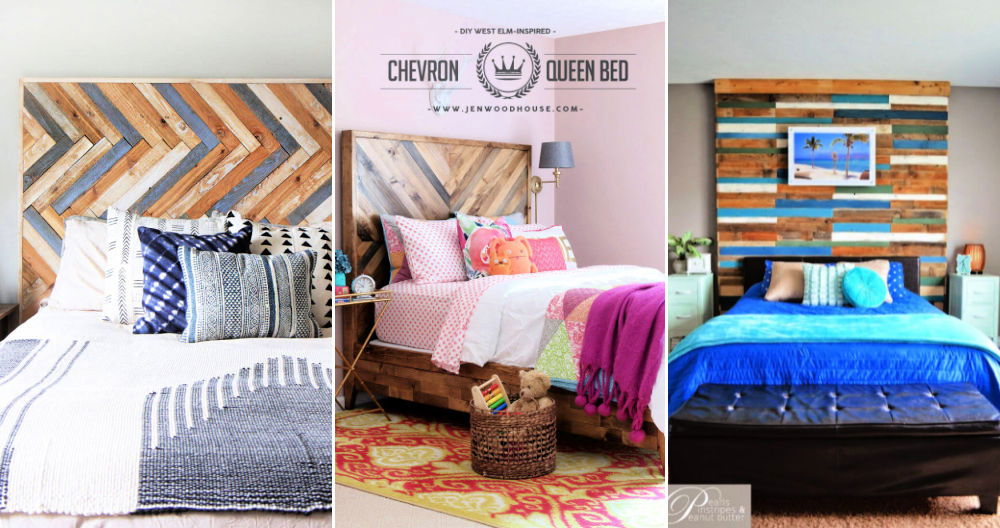
1. Mid-Century Modern Inspired DIY Wood Headboard
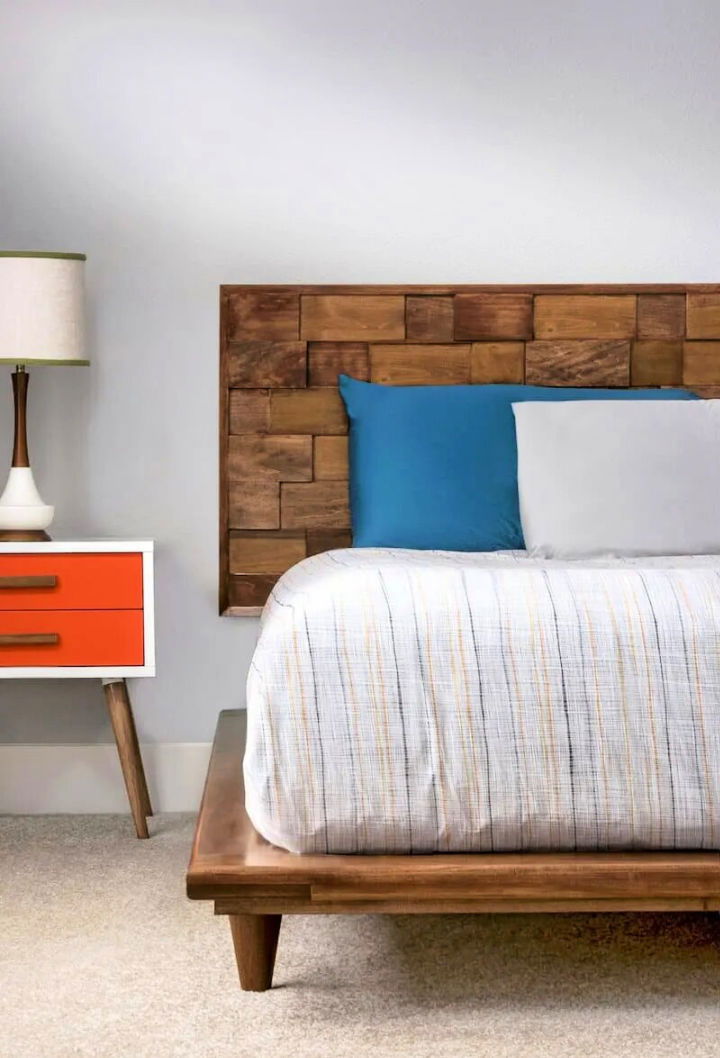
Discover how to make a stunning mid-century, modern-inspired wood headboard with this step-by-step tutorial from DIY Candy. Perfect for intermediate DIYers, this guide walks you through the process using essential woodworking tools such as a miter saw, sander, and drill.
You'll learn how to measure, cut, and assemble your very own king-sized headboard, which can be adjusted to fit any bed size. Not only does this project allow for a personalized touch to your bedroom decor, but it also promises a high-quality result at a fraction of the cost. Embrace the satisfaction of crafting a unique piece of furniture that's sure to impress.
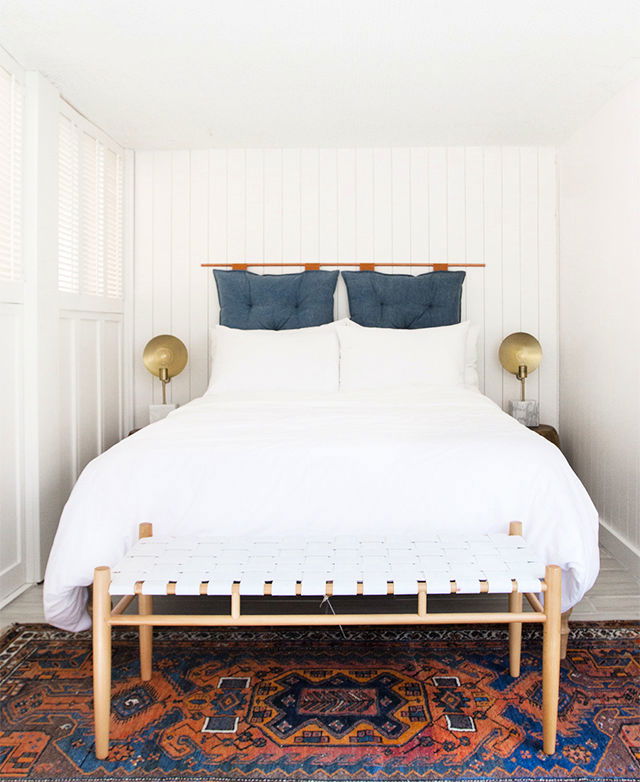
2. Making a Leather Upholstered Headboard
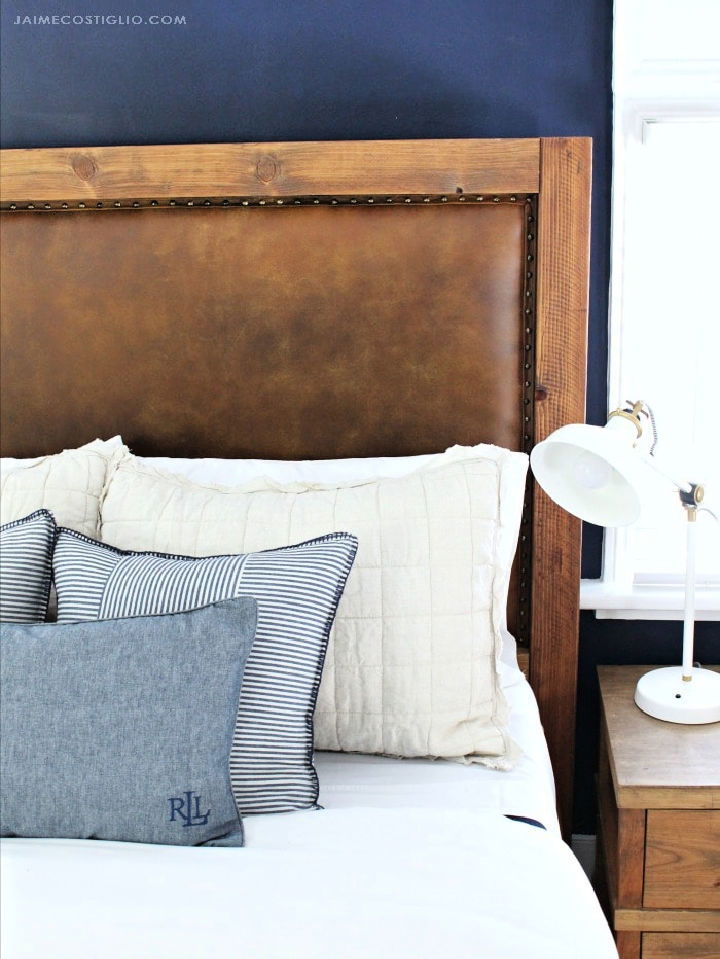
Making a leather upholstered headboard adds a touch of luxury and warmth to any bedroom, and with this straightforward tutorial from Jaime Costiglio, you can craft one yourself. In this guide, Jaime shares the steps for transforming a wood headboard into a leather-upholstered masterpiece, complete with brass nailhead details for an elegant finish.
From selecting quality Montana buckskin leather to attaching the trim and nailheads with precision, every aspect of the process is covered. Whether you're giving your own bedroom a makeover or crafting a special piece for a loved one, this tutorial will equip you with the knowledge to make a stunning and unique headboard that's sure to impress. Visit Jaime Costiglio's site for the full tutorial and additional tips to make your DIY project a success.
3. How to Make a Tufted Headboard
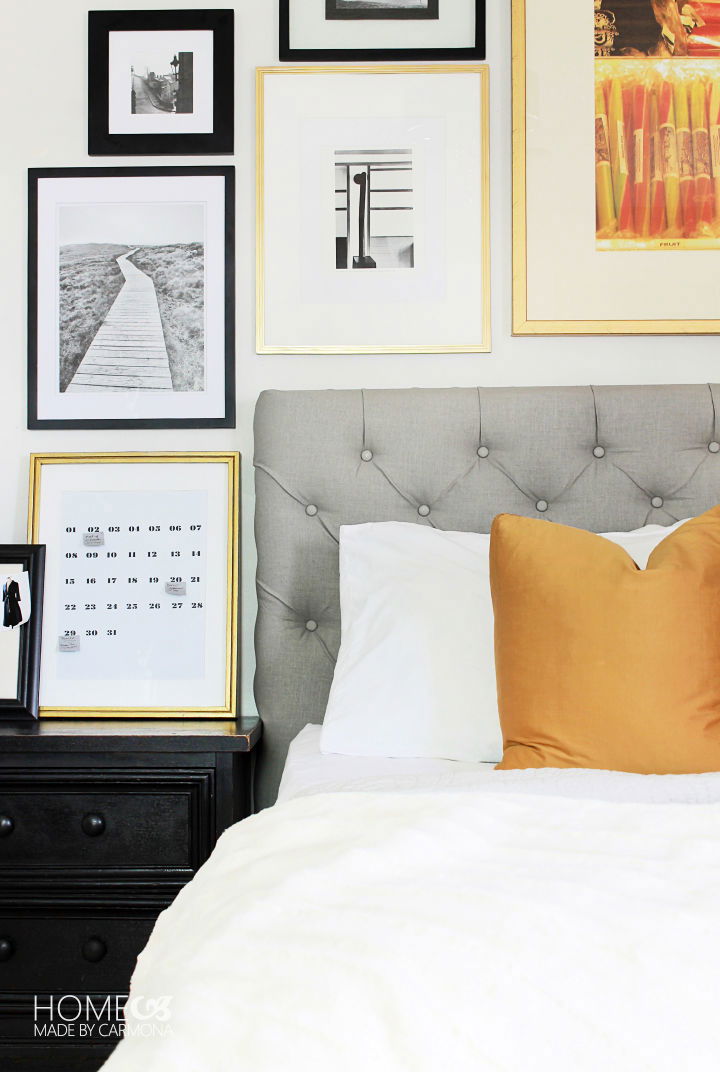
Building a DIY diamond tufted headboard is a budget-friendly and rewarding project that brings elegance to your bedroom without breaking the bank. Home made by carmona Provides an easy-to-follow tutorial that guides you through each step, from building a frame to the final tufting, ensuring success even for those new to DIY upholstery.
For under $50, you can repurpose materials, like an old headboard frame or egg crate foam mattress topper, and personalize with your choice of fabric and buttons. The process is detailed yet straightforward, from drilling holes for the tufting to securing the fabric for a professional finish. Dive into this craft project with confidence, and prepare to transform your space with a stunning headboard that reflects your style and craftsmanship.
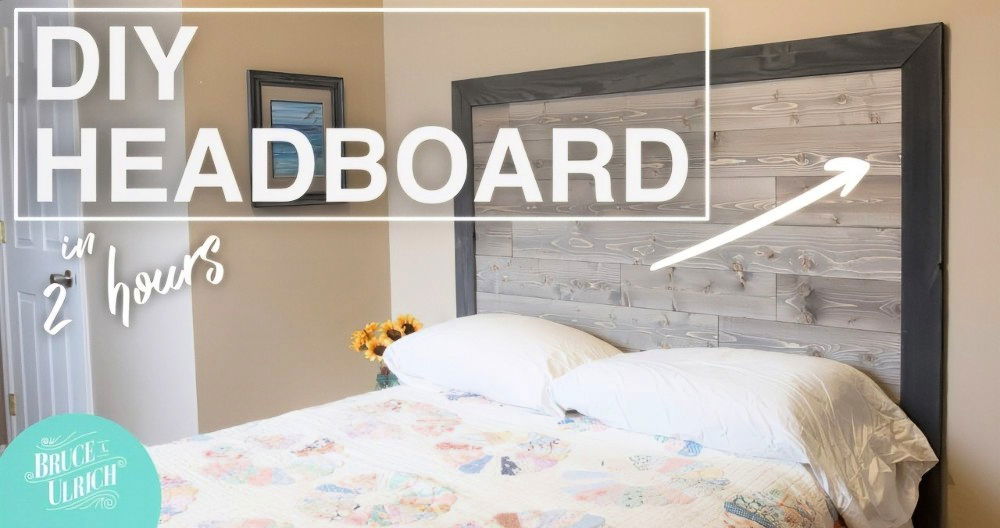
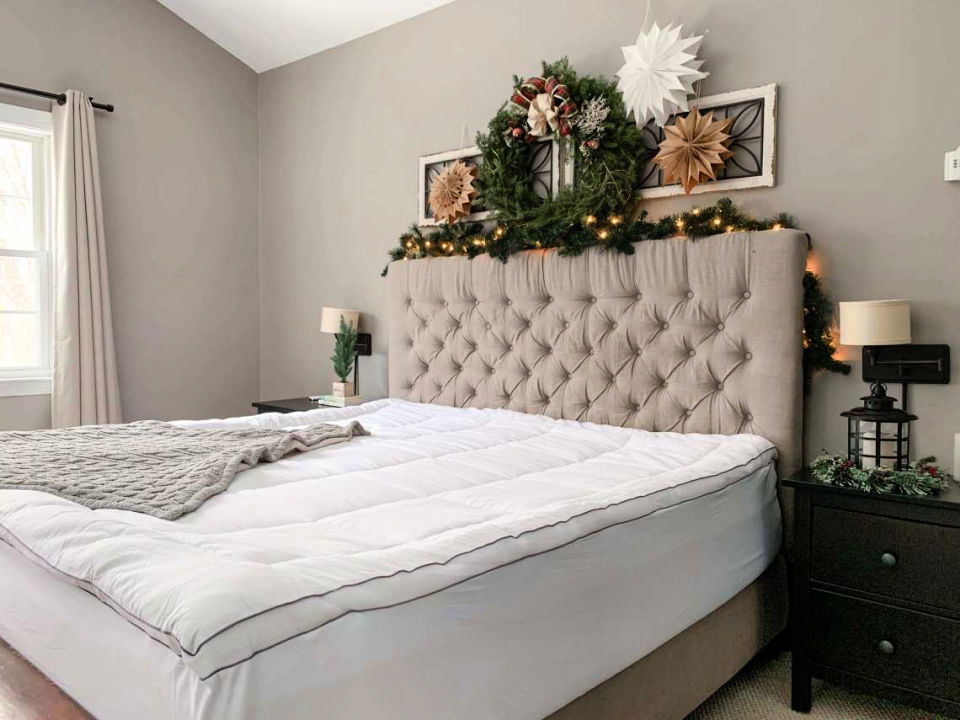
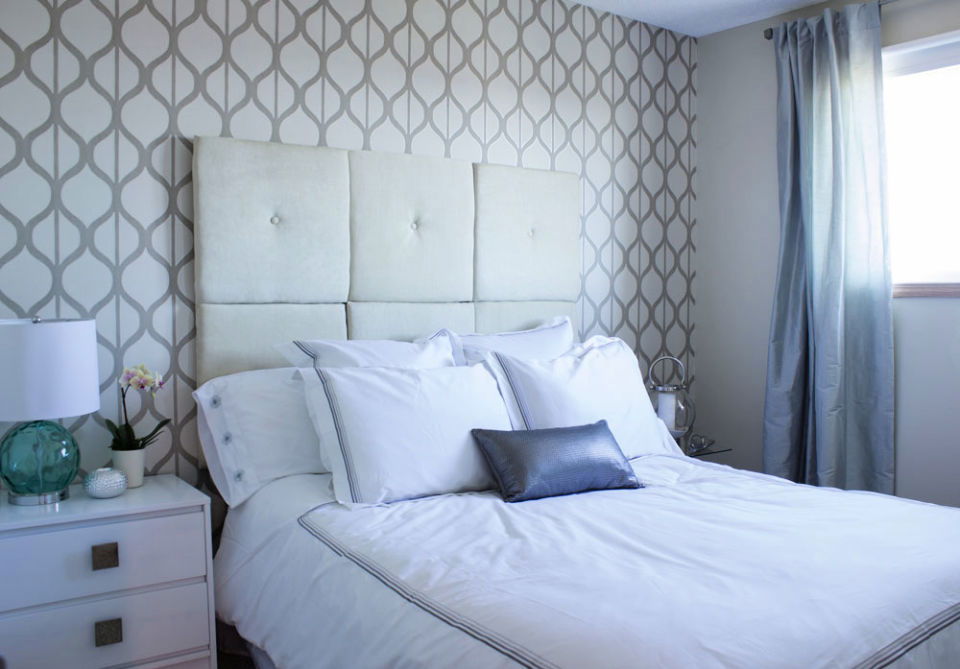
4. Build a Headboard for a King-Size Bed
Make a chic and personalized touch to your bedroom with an easy DIY headboard using decorative wall panels. Scratch and Stitch provides a simple guide to transforming your bed's backdrop in under an hour. With a few measurements, panels of your choice, and basic tools like a drill and level, you can elevate the look of your master suite.
This affordable project is not just about aesthetics; it enhances the room's ambiance and showcases your handiwork. No need for advanced skills—just a dash of creativity and the will to enhance your space. Get inspired and give your bed a stylish upgrade with this practical DIY headboard tutorial.
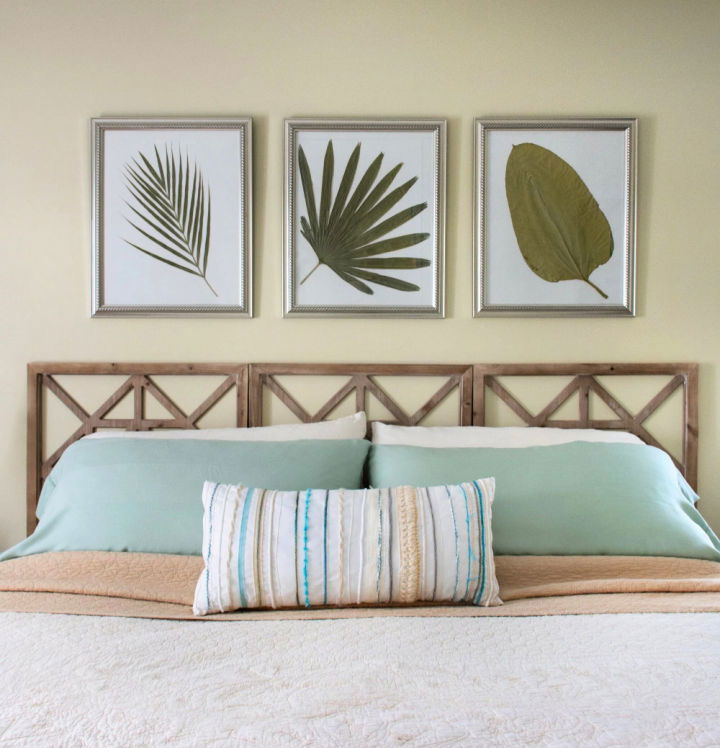
5. Rustic DIY Headboard Out of Shiplap
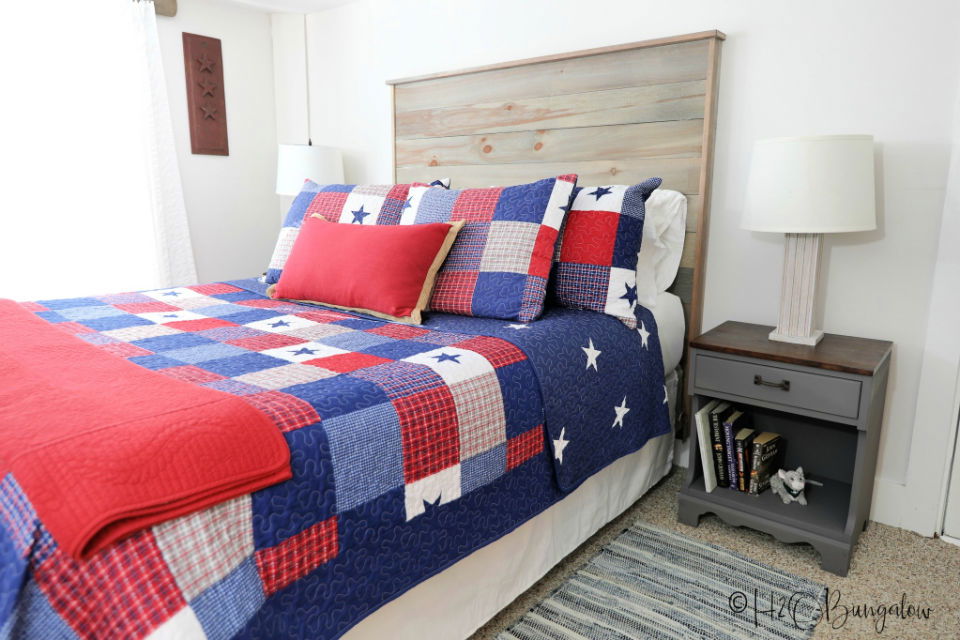
Build a charming, rustic vibe in your bedroom with a DIY headboard made from shiplap, as showcased on H2OBungalow. Wendi Wachtel guides you through the process with a clear tutorial and video, making it simple to craft this stylish piece. Even with minimal woodworking skills, you can achieve a modern rustic look for under $50.
Adjust the size easily to fit any bed, ensuring your new headboard fits perfectly in your space. The instructive content offers practical tips and a list of materials, ensuring you're equipped to bring this project to life. Dive into this engaging, budget-friendly project and give your room a fresh, personalized touch.
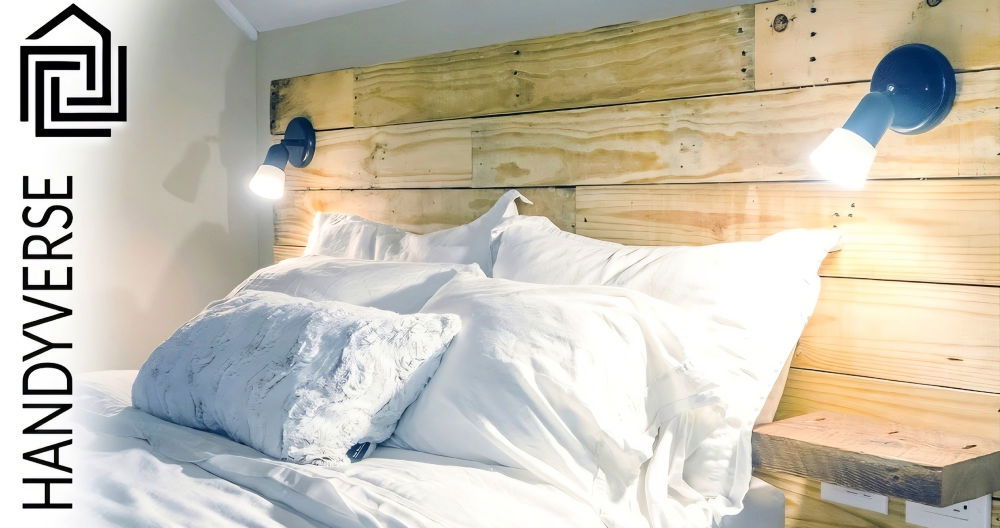
6. Make Your Own Headboard With Lights

Build a cozy and inviting atmosphere in your bedroom with a DIY light up 'good night' headboard from Shelterness. This charming project transforms the area around your bed into a luminous retreat, eliminating the need for a bedside lamp. To craft this eye-catching piece, gather alder boards, screws, wood for bracing, paint, and a light switch with a faceplate.
You'll also need white lights and an extension cord to bring your headboard to life. The construction process is straightforward: align and brace the boards, then follow the step-by-step tutorial for a personalized touch to your sleeping space. Not only does this project add a warm glow to your room, but it also serves as a statement piece that's sure to impress.
7. How to Make a Storage Headboard
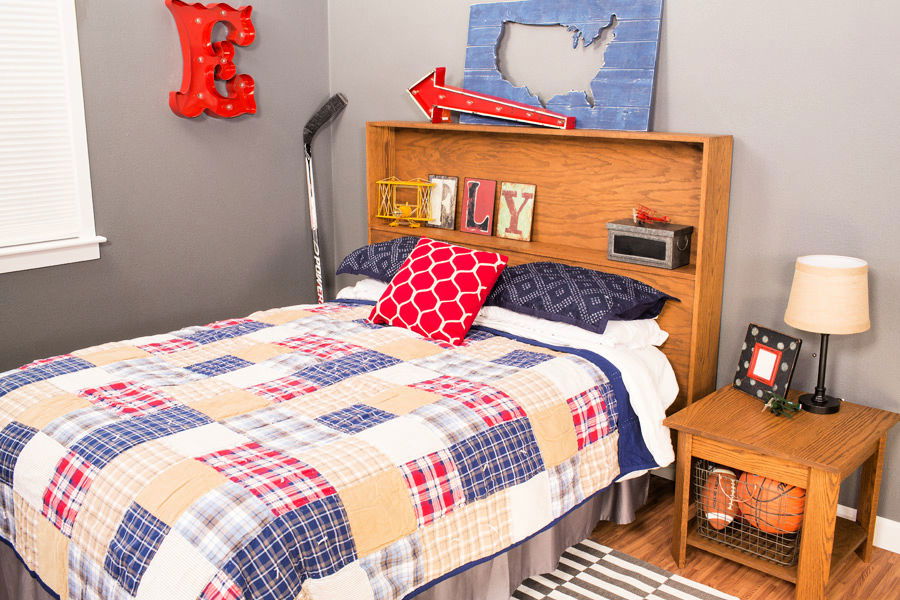
Construct a practical and stylish addition to your bedroom with the storage headboard from kreg tool. with a dual-shelf design, this headboard provides ample space for keeping essentials close by while you relax. The simple 7-part construction ensures an easy build process, suitable for those with basic tool knowledge.
Choose your preferred wood and finish to match your decor, be it traditional or modern. Follow the step-by-step guide for assembly, and finish with a stain or paint to suit your taste. Once complete, easily mount it to your bed frame and revel in your handcrafted storage solution.
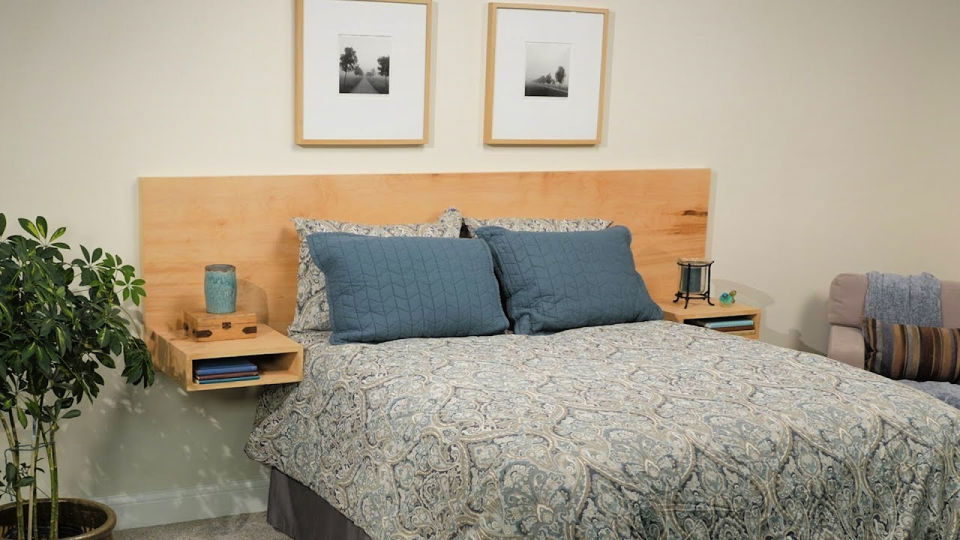
8. DIY Live Edge Wood Headboard
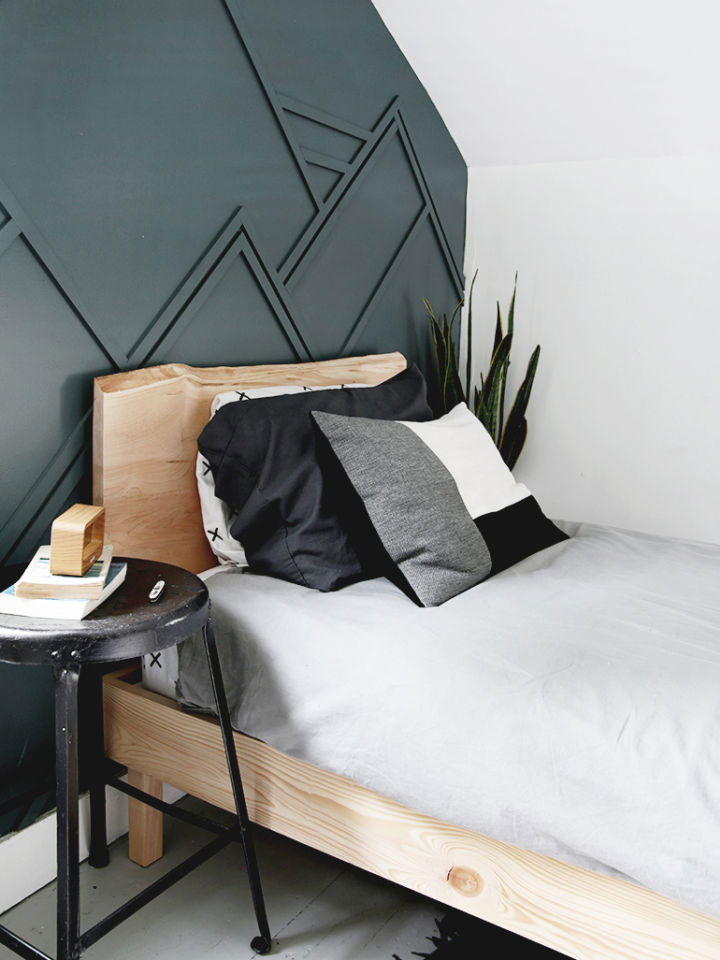
Building a DIY live edge wood bed adds a touch of rustic charm to your bedroom while offering the satisfaction of a personalized piece of furniture. The Merrythought provides a detailed guide to help you construct a modern bed frame with a stunning live edge headboard. With a materials list and step-by-step instructions, this guide is ideal for those looking to enhance their space with a unique and natural element.
It is both instructive and accessible, ensuring you can confidently build a bed that will be the centerpiece of your room. Sanding and finishing tips are included, ensuring a professional and lasting result. Get ready to transform your sleeping area with a beautiful live-edge wood bed that you can proudly say you built yourself.
9. How to Upholster a Headboard for Beginners
Making an upholstered headboard is a rewarding DIY project that can add a custom touch to your bedroom. HGTV's step-by-step guide takes you through the process, ensuring that even those new to home projects can confidently craft a beautiful headboard.
Starting with a simple plywood base, the tutorial covers everything from sizing, cutting the wood, framing, and upholstering with your chosen fabric. The instructions are clear, and the necessary materials are easily sourced, making it a manageable task for a weekend. With this guide, you'll elevate your space with a personal, stylish piece you've made with your own hands.
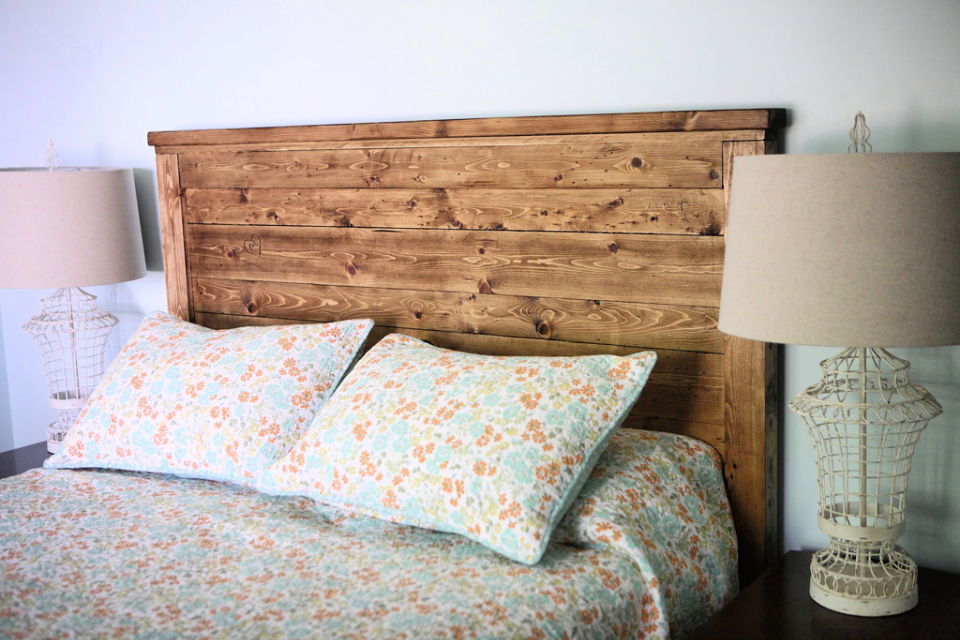
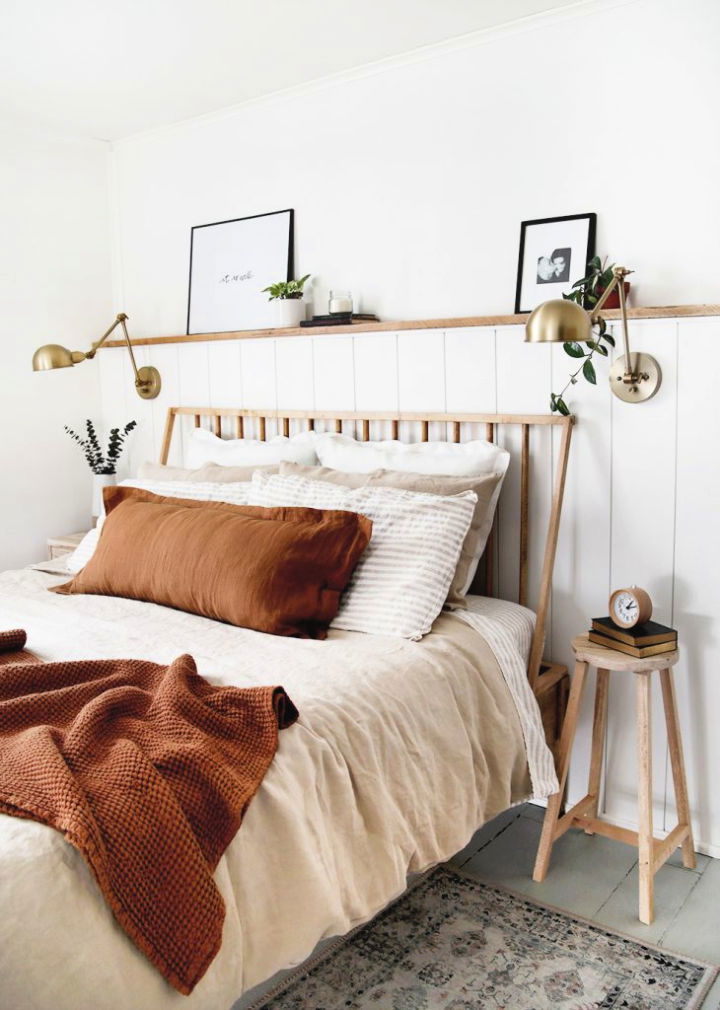
10. Fantastic DIY Wooden Headboard
Ready to add a touch of rustic charm to your bedroom? Andrea's Notebook offers a fantastic DIY guide for crafting a rustic headboard that's both stylish and achievable. With clear, step-by-step instructions, you can transform simple pine wood into a beautiful, custom headboard.
It's an easy project that requires minimal tools and no prior woodworking skills. You'll learn how to select wood, apply stain, and assemble your headboard with ease. Plus, you'll get insights on a comfortable Yogabed™ mattress to complete your cozy bedroom makeover. Get ready to make a stunning focal point for your sleep sanctuary that's sure to impress.
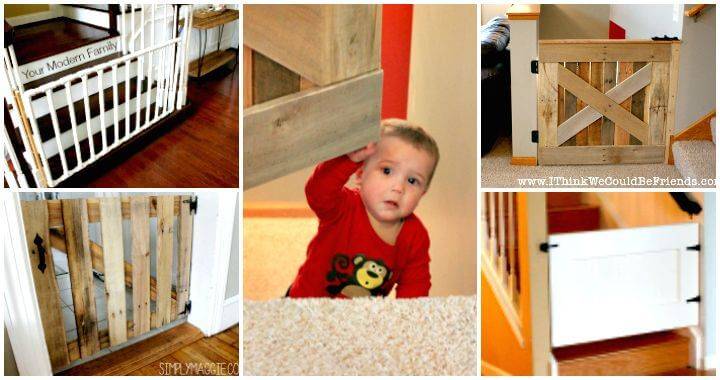
11. Build a Barn Door Headboard for $50

Making a farmhouse-style barn door headboard adds rustic charm to any bedroom, and Little Yellow Wheelbarrow has a fantastic guide to help you achieve this look for just $50. With straightforward instructions and a comprehensive list of materials and tools, you can transform planks of wood into a stylish headboard in a single weekend.
The project includes tips on cutting, assembling, and finishing the wood to get that coveted, weathered aesthetic. This engaging and helpful DIY tutorial is perfect for anyone looking to infuse their space with a touch of country flair without breaking the bank.
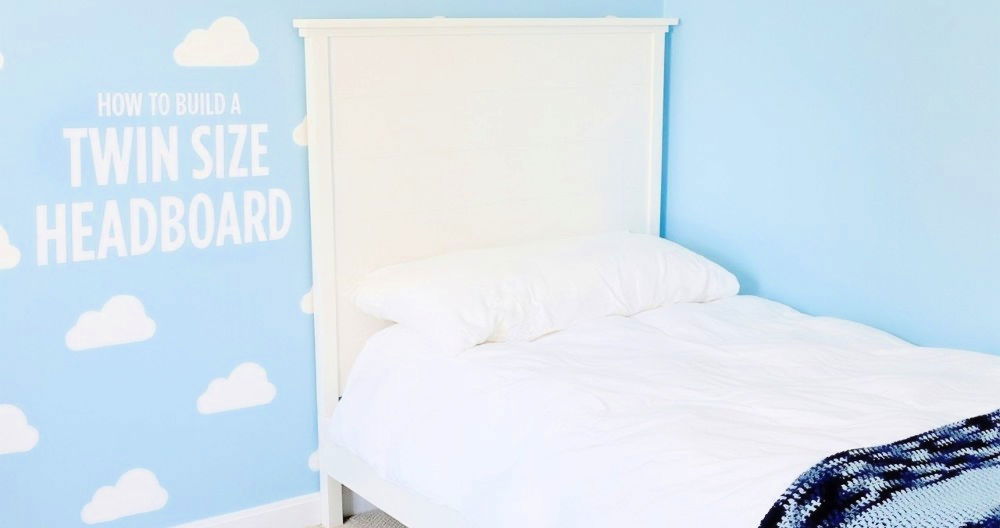
12. DIY Girls Twin Size Headboard
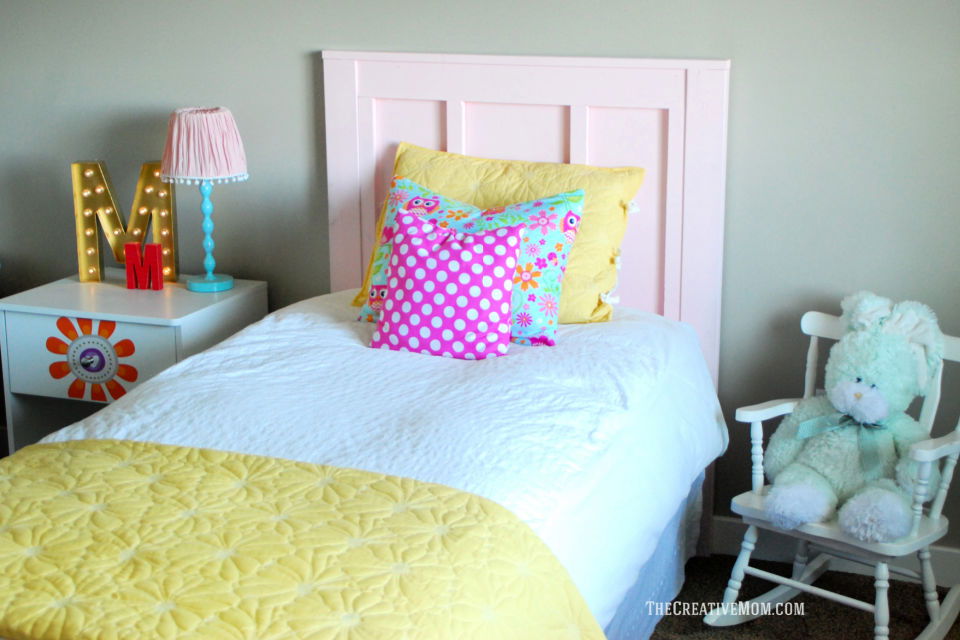
Transform your child's bedroom with a DIY twin headboard that's both charming and budget-friendly. The Creative Mom, Natalie Dalpias, shares her journey of making a lovely headboard that perfectly captures the essence of simplicity and sweetness. Using basic materials that cost around $20, Natalie's design is accessible to those who want to add a personal touch to their home without breaking the bank.
Her guide, detailed with full building plans, is available on BuildSomething.com and promises an easy-to-follow process for a rewarding DIY project. Embrace the satisfaction of crafting a customized headboard that elevates any room's décor, and get inspired by Natalie's other creative projects that cater to various DIY interests.
13. How to Build a Kid's Headboard
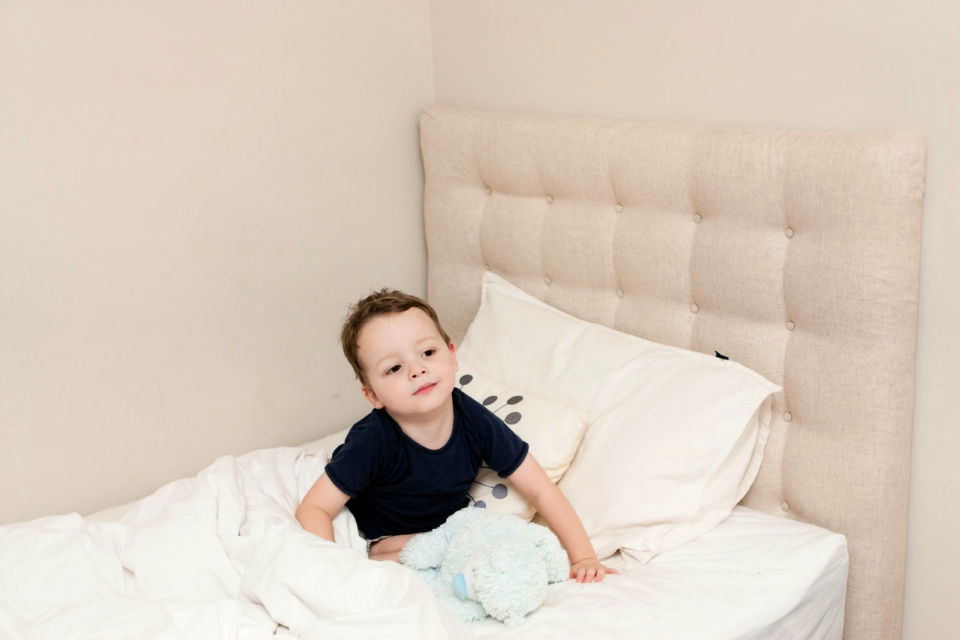
Transform your bedroom with a DIY headboard and bed makeover that's sure to impress. Max and Me provide an engaging and comprehensive guide on how to revamp an old bed, infusing new life into it with a chic, tufted headboard and a refreshed base.
With a detailed materials list, essential tools, and a step-by-step approach, even those new to DIY projects can confidently undertake this creative endeavor. Discover how to cover buttons for that luxurious tufted look and get tips on securing fabric to different surfaces. Perfect for adding a personalized touch to any bedroom, follow our instructions for a rewarding project that elevates your sleeping space.
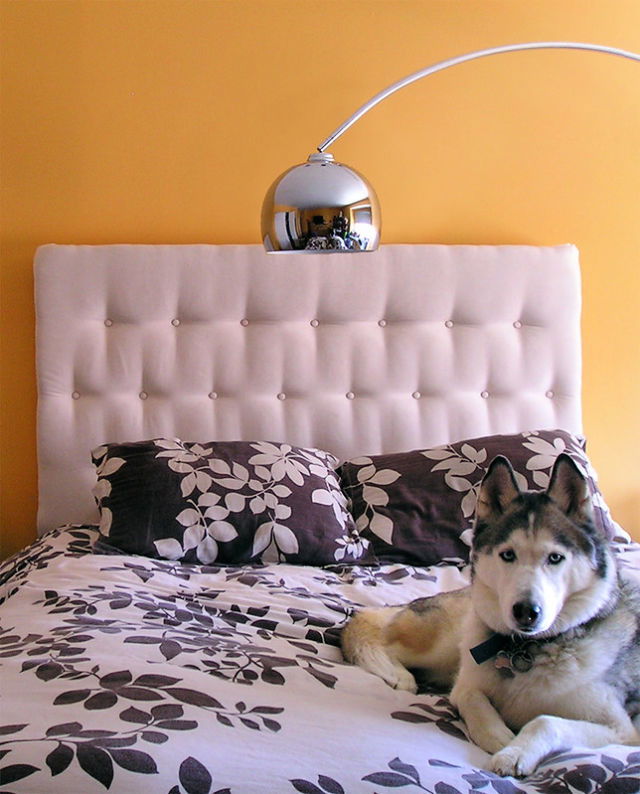
14. Simple DIY Tufted Headboard
Transform your bedroom into a cozy retreat with a DIY diamond tufted headboard. Making this elegant addition not only adds an upscale vibe to your space but also lets you personalize it to your taste. Our step-by-step guide outlines the materials needed, such as plywood, foam, and fabric, and walks you through the process from building the base to the final tufting details.
With a total cost of around $150, you can achieve a luxurious look that rivals those of high-end retailers. Get ready to enjoy the satisfaction of crafting your own stylish headboard while saving a significant amount on decor. Dive into this DIY project and give your bedroom the touch of comfort and sophistication it deserves. Rocky Canyon
15. Make a Vintage Shutter Head Board

Ready to add a dash of rustic charm to your bedroom with a DIY vintage shutter head board? Samantha elizabeth Shares a step-by-step guide on how to transform old shutters into a stunning headboard, complete with a shopping list and detailed instructions.
With the help of a few tools and some creativity, you can reclaim antique shutters for a unique and personalized touch to your space. Samantha's blog not only inspires but also provides practical tips to ensure your project is a success. Visit Samantha Elizabeth for a refreshing take on upcycling and to infuse your bedroom with a touch of vintage elegance.
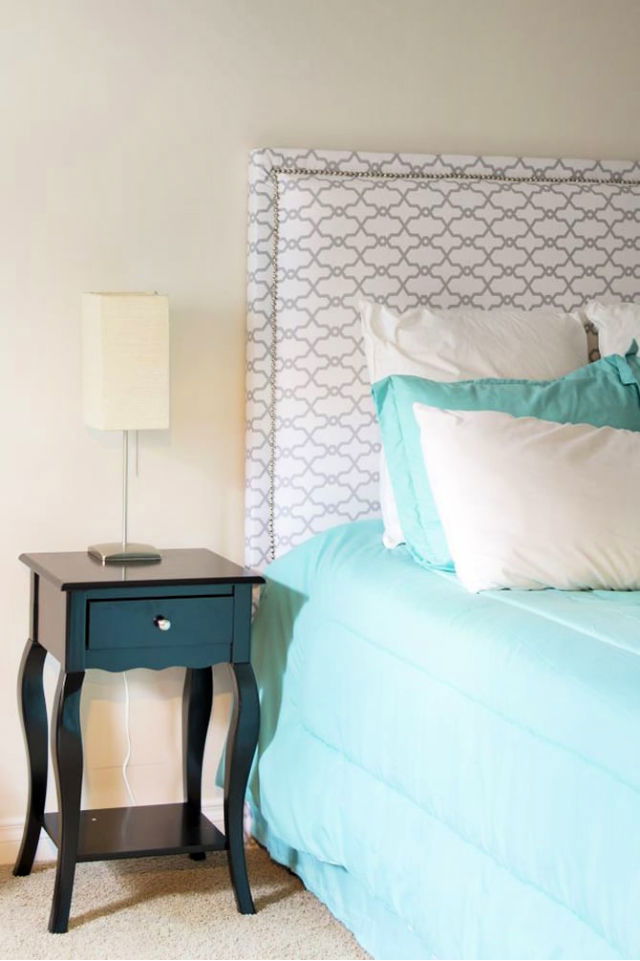
16. Wingback Headboard With Free Pattern
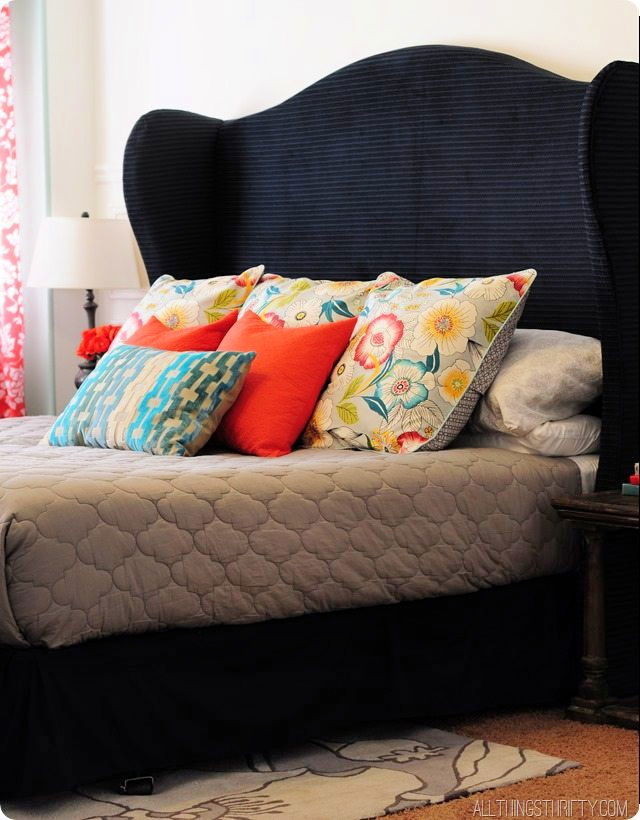
Ready to enhance your master bedroom with a DIY touch? All Things Thrifty offers a step-by-step tutorial to make a stunning wingback headboard, perfect for adding a sophisticated element to your space. This tutorial is ideal for crafters who enjoy a weekend project, as it outlines how to complete the headboard in less than 24 hours.
The guide includes a free pattern PDF and provides detailed instructions on cutting, sanding, assembling, and upholstering the headboard. It emphasizes the use of visuals to make the process clear and approachable. With practical tips and a helpful approach, you'll be able to make a headboard that's both stylish and personal.
17. Minimalist DIY Plywood Shelf Headboard
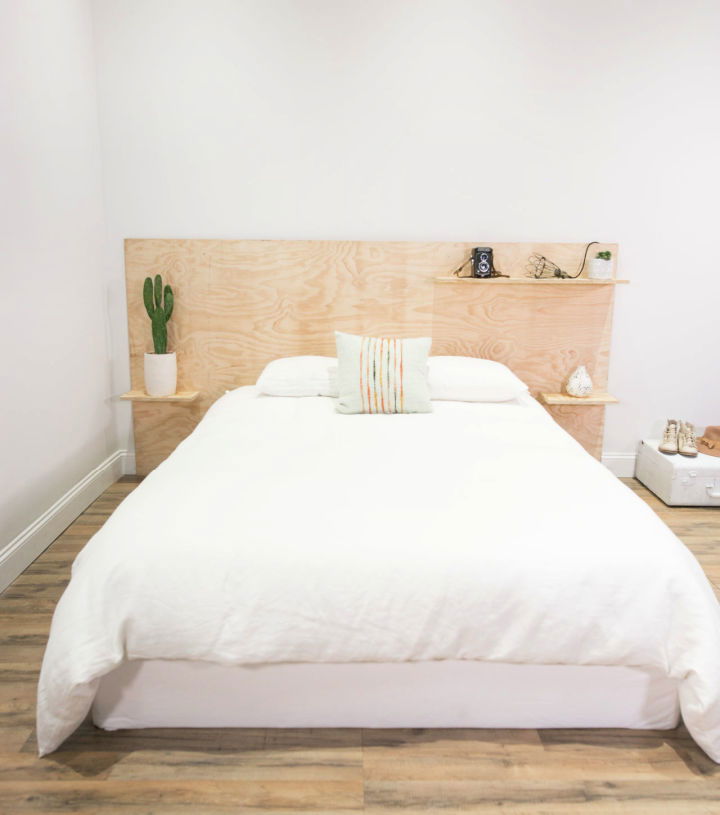
Make a chic and modern bedroom space with a DIY minimalist plywood shelf headboard courtesy of Mr. Kate. This project is perfect for adding a touch of organic, industrial charm without needing extensive DIY skills. With just a 4'x8' board, some structural wood screws, a power drill, and an optional power saw, you can measure and cut shelves to your desired size.
Install them with precision by drilling holes and securing them with screws for a functional and stylish addition to your room. Follow the easy-to-understand instructions to transform your bedroom with this unique and budget-friendly headboard design.
18. DIY Malcolm's Wood and Marble Headboard
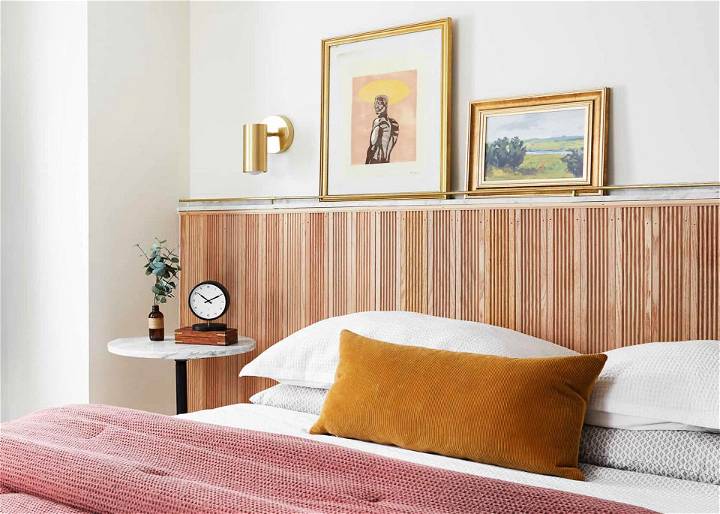
In malcolm's wood and Marble DIY headboard tutorial, emily henderson provides an insightful guide for crafting a timeless yet modern statement piece for your bedroom. With clear instructions, this tutorial takes you through making a fluted wood design with a chic marble shelf and elegant brass details.
Perfect for those who want to elevate their space with a touch of sophistication, the tutorial is practical and engaging, ensuring even DIY novices can achieve stunning results. Learn how to measure, cut, and assemble with confidence as you transform your bedroom into a bespoke retreat. Visit Emily Henderson for the full step-by-step process.
19. How to Make a Metal Headboard

Transform your master bedroom with a DIY wrought iron headboard that offers a high-end look without the steep price tag. Life at Cloverhill shares a simple and budget-friendly project, turning an old brass headboard into a chic, oil-rubbed bronze centerpiece.
A couple of light coats of Rustoleum Universal Metallic Paint do the trick, and some clever hacks with PVC pipe and zip ties securely attach the headboard to your bed frame, all while protecting your walls with felt furniture stickers. Dive into the detailed tutorial on Life at Cloverhill and elevate your bedroom's aesthetic with this creative DIY solution.
20. The Ultimate DIY Panel Headboard
Transform your bedroom with Simple Home | Simple Life's ultimate DIY headboard guide by kelly anderson. Dive into a treasure trove of inspiration and step-by-step instructions that cater to your creativity and practical skills. From reupholstering an existing headboard for an eco-friendly and budget-conscious refresh to constructing a bespoke corner headboard for a cozy daybed vibe, this guide has you covered.
Engage with the art of do-it-yourself projects to make a personalized and inviting space. Clear, detailed directions paired with helpful images ensure your headboard project is both enjoyable and successful. Get ready to elevate your home's style with this engaging, easy-to-follow guide.
21. Making a Foam Headboard
Make a tufted headboard and add a touch of elegance to your bedroom without breaking the bank. Remodelaholic's DIY guide offers a step-by-step approach, from gathering supplies like plywood, foam, and upholstery fabric, to assembling and finishing your custom headboard.
With practical tips, such as where to find discounted materials and how to effectively tuft, you'll be able to craft a luxurious and personalized focal point for your room. Dive into this DIY project and transform your space with a stylish, handmade headboard that looks professionally made.
22. DIY Wooden Plank Headboard
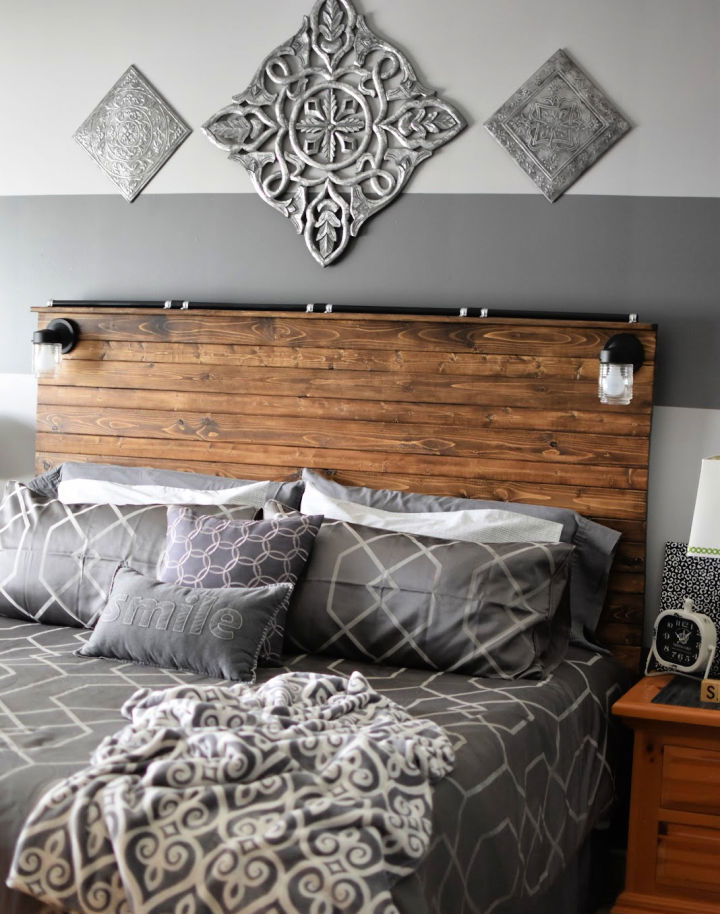
Looking to revamp your bedroom with a touch of personal craftsmanship? Itsy Bitsy Paper's guide on making a DIY Wooden Plank Headboard might just be your next favorite project. With detailed instructions on selecting wood, crafting pocket holes, and ensuring a flat structure with braces, you'll be well on your way to constructing a sturdy and stylish headboard.
Staining tips and the addition of an industrial flair with plastic pipes painted black add character to your creation. Hanging the headboard might require some patience and precision, but the satisfaction of mounting it perfectly is worth the effort. Plus, the finishing touch of rewired jelly jar lights gives a chic industrial look. Dive into this DIY adventure and give your bed a custom, cozy backdrop.
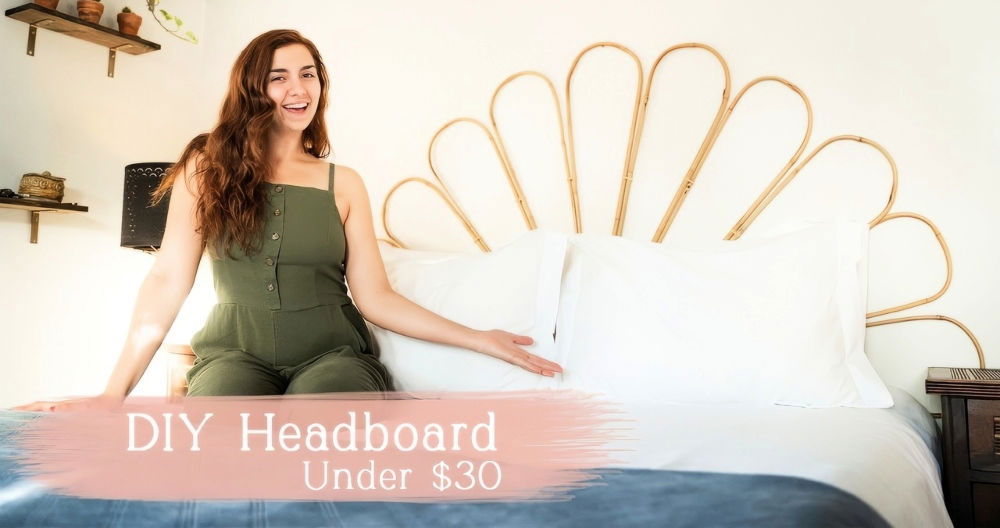
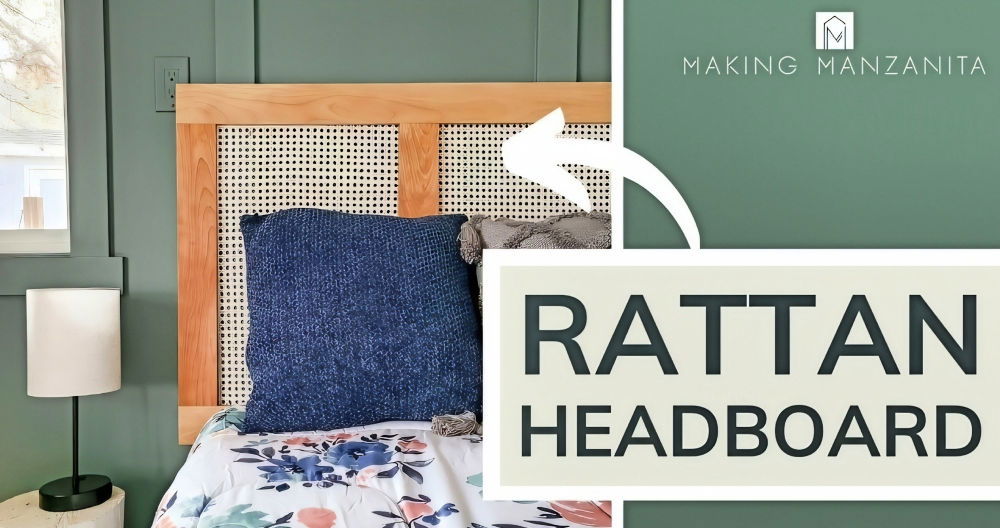
23. Make a Cane Headboard - IKEA Hack
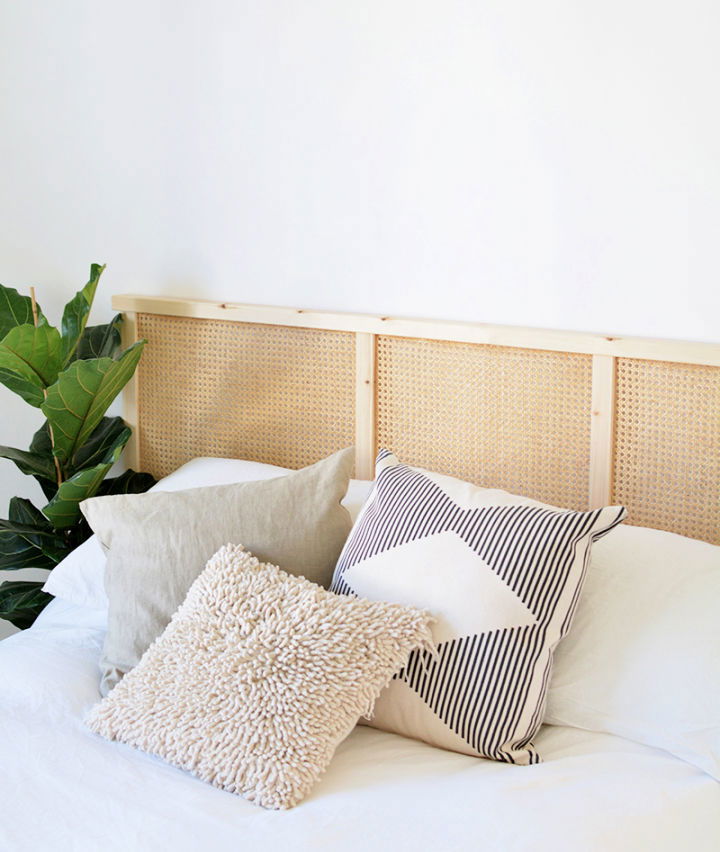
Transform your bedroom aesthetic with a chic DIY cane headboard, skillfully crafted through a simple IKEA hack. Embrace the boho vibes with rattan elements and make a focal point in your personal sanctuary. Our guide on Hunker offers a surprisingly easy tutorial that can be your weekend project highlight.
With just a few materials, including cane webbing, you can achieve a stylish headboard without the hefty price tag. Step into IKEA for the essentials and get ready to add a personal touch of elegance to your space with this creative and budget-friendly DIY endeavor. Burkatron
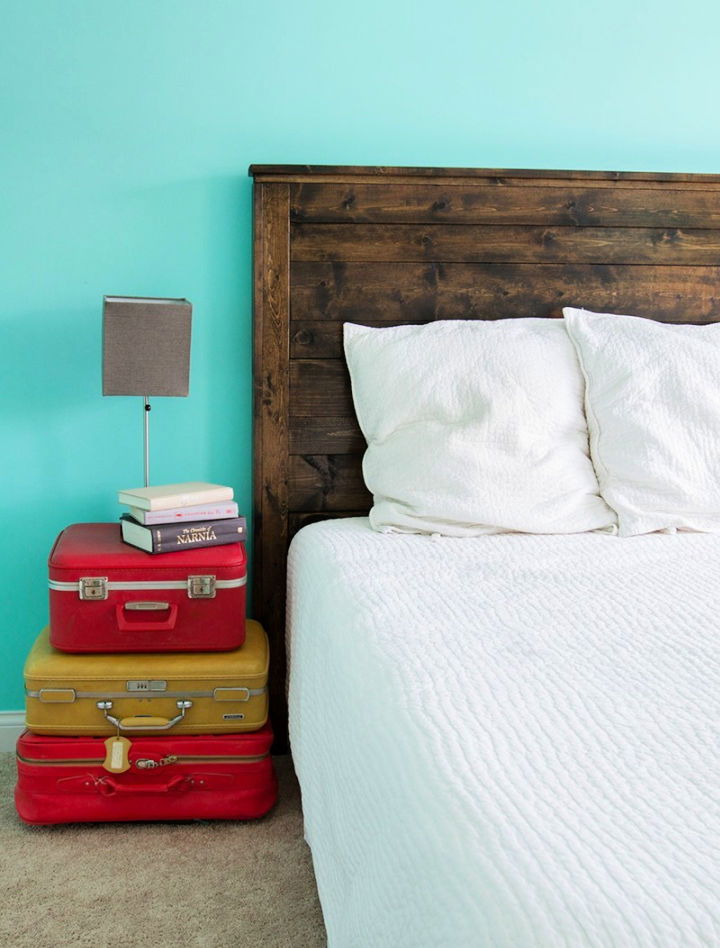
24. Reclaimed Wood Queen Size Headboard
Looking to add a rustic touch to your bedroom with a DIY approach? Ana-White.Com offers a straightforward plan for constructing a wooden headboard that suits any mattress size. With simple materials like pine boards or furring strips and basic tools such as a saw and nails, even those new to woodworking can complete this project.
The site provides a step-by-step guide, ensuring you can make a durable and attractive headboard on a budget—typically around $50. Dive into the tutorial, gather your materials, and spend a few hours crafting a headboard that'll transform your bedroom's ambiance. With careful sanding and your choice of finish, your handmade headboard will be the centerpiece of your room.
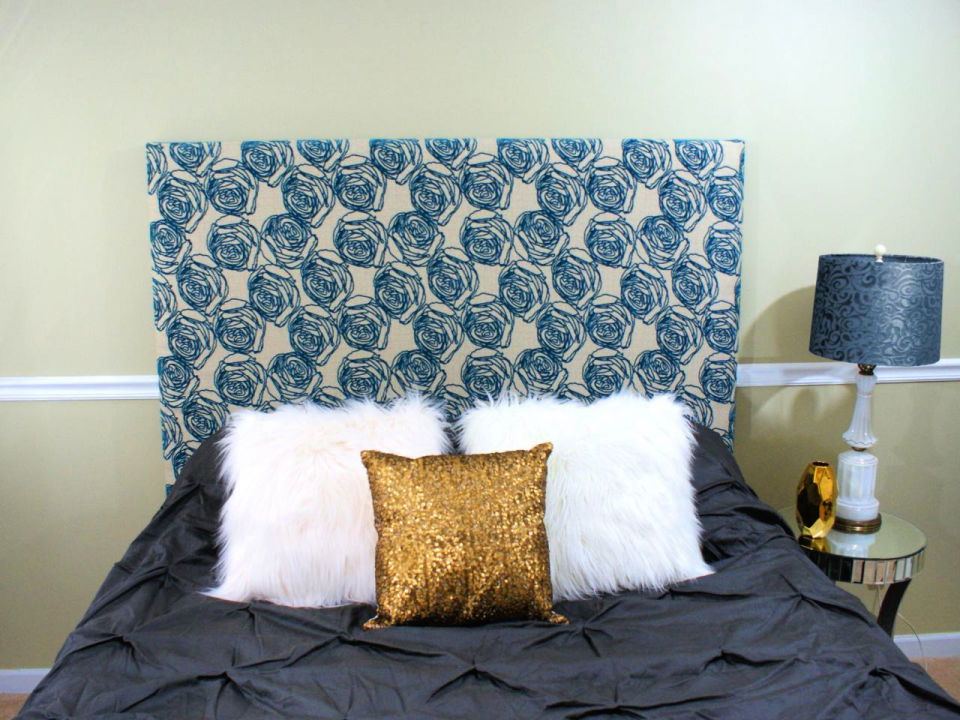
25. How to Make Padded Headboard
Transform your guest room with a touch of creativity and a dash of DIY flair by crafting a stunning fabric headboard, as demonstrated by Jennifer Meyering. This instructive guide walks you through each step, from selecting materials like plywood and fabric to assembling and attaching the headboard, ensuring a seamless and enjoyable experience.
Jennifer Meyering's guide not only adds a personalized statement piece to your space but also offers practical advice on achieving a professional-looking result. Get ready to elevate your guest room's aesthetic with this budget-friendly project that promises an impressive outcome.
26. DIY Mirrored Headboard
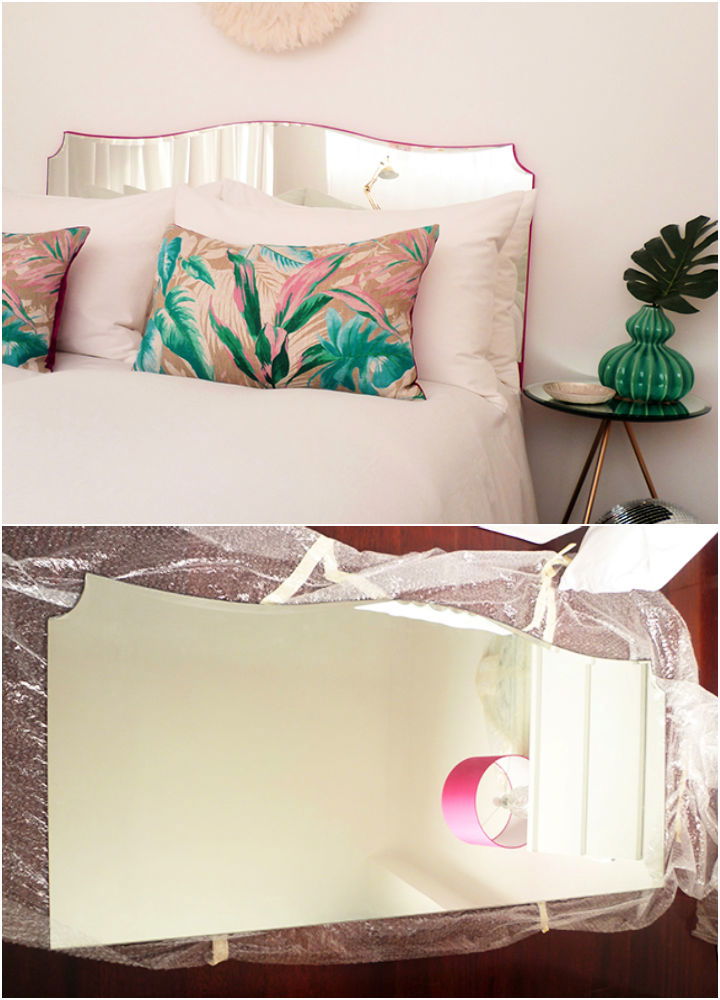
Transform your bedroom with a DIY mirror headboard project, as shared by Preciously me. nadia Provides an inspiring and thorough guide on how to make a stunning and cost-effective headboard using a second-hand mirror for a unique and personalized touch. Her step-by-step instructions include preparing a wooden base, attaching the mirror securely, and adding stylish details like bright velvet fabric.
The result is a bespoke headboard that elevates your room's elegance without breaking the bank. Perfect for those who enjoy hands-on decorating, this project proves that with a bit of creativity, you can make significant changes to your space. Visit Preciously Me for the complete guide and more crafty ideas.
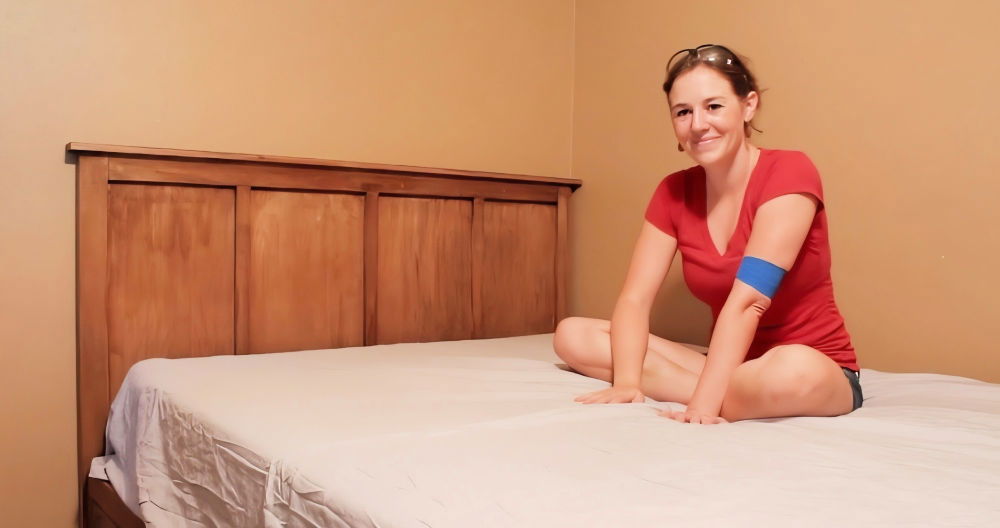
27. How to Build a Farmhouse Headboard
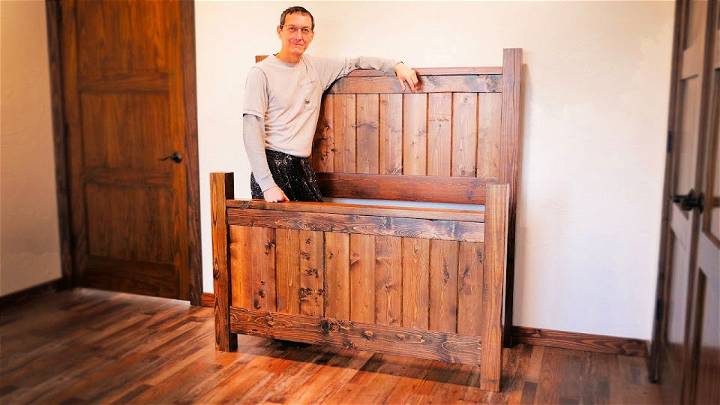
Elevate your bedroom's charm with a DIY farmhouse headboard, a project that combines rustic aesthetics with practical craftsmanship. With materials like 4x4 posts, 2x4 rails, and tongue and groove planks, this guide walks you through making a sturdy and stylish headboard designed for comfort and durability.
Ideal for pairing with a variety of bed frames, including those with under-bed storage, this headboard is customizable to fit any mattress size. Detailed instructions cover everything from cutting and assembling to sanding and staining, ensuring a polished look. Perfect for enhancing your sleeping space, this DIY headboard adds a personalized touch while offering a cozy backdrop for relaxation.
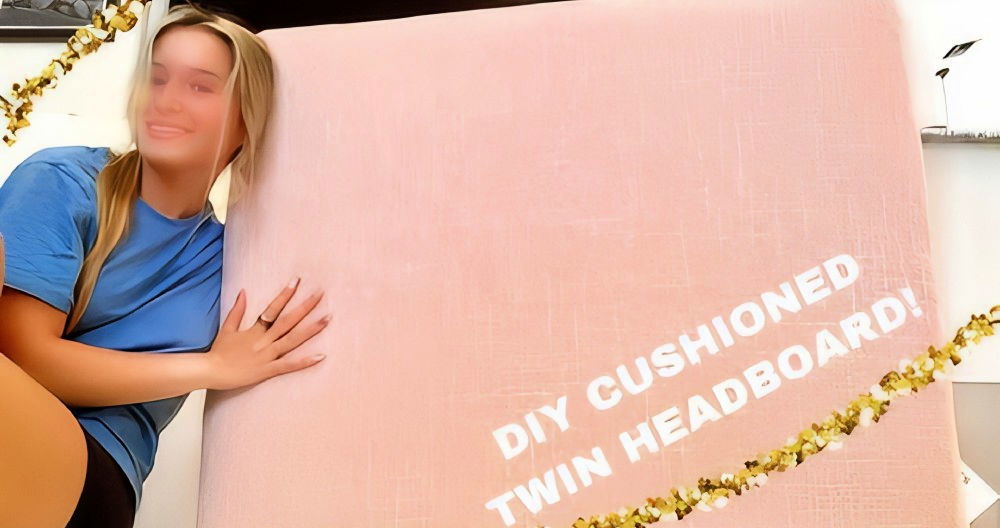
28. DIY Cushion Headboard
Transform your bedroom with a touch of DIY flair by following Sarah Sherman Samuel's guide to making a stylish headboard and revamping your space. Her blog details a clever use of floor cushions and copper pipes to craft a modern, chic headboard that's both eye-catching and functional. The step-by-step instructions are easy to follow, ensuring you can achieve a professional-looking result without breaking the bank.
Sarah's makeover doesn't stop there; she also shares a captivating before and after bedroom tour, showcasing how simple changes like paint, tile flooring, and minimalistic furniture can breathe new life into a previously dark and dated A-frame cabin guest room. Visit Sarah Sherman Samuel's site for all the inspiration you need to elevate your bedroom's aesthetic with practical and creative solutions.
29. DIY Wood Dowel Headboard
Transform your bedroom with a touch of modern simplicity by crafting a DIY wood dowel headboard. The merrythought Provides a comprehensive tutorial to help you make a sleek and sturdy headboard that effortlessly screws onto most bed frames.
Perfect for those with a penchant for woodworking, this guide empowers you to make a custom piece that blends contemporary design with classic appeal. With step-by-step instructions, a list of supplies, and expert tips on staining for the perfect finish, you'll be well on your way to refreshing your sleep space with a handcrafted focal point.
30. DIY Floating Headboard From One Sheet of Plywood
Elevate your bedroom's aesthetic with a DIY modern floating headboard crafted from a single sheet of plywood. This project demystifies woodworking, guiding you through cutting cleats and struts, to constructing sleek cubbies for added functionality. Begin by rough-cutting pieces, then seamlessly join them using tape before attaching them to the headboard frame.
Edge banding gives a polished look to raw edges, ensuring your creation rivals store-bought alternatives. Secure the cleat to your wall for a floating effect that transforms your space. This cost-effective, stylish headboard not only enhances room decor but also offers a touch of personalization and practical storage solutions.
How do you make a wood plank headboard?
This rustic headboard can be made from reclaimed wood or new lumber. Cut the boards to size and screw them together. Add some trim for a finishing touch, then paint or stain the headboard to your liking. This project can be completed on the weekend.
How do you make an upholstered headboard?
Upholstering a headboard is a great way to add color and pattern to your bedroom Start by cutting out the shape of your headboard from plywood. Then, use batting and fabric to upholster the headboard stapling the fabric in place. Finish by trimming away excess fabric and attaching the headboard to the wall.
How to make a headboard out of pallets?
This headboard has a rustic yet modern look. Start by disassembling a pallet and cutting the boards to size to make it. Then, screw the boards together and finish by sanding and staining the headboard to your liking.
How do you make a headboard with lights?
This headboard is perfect for reading in bed. To make it:
Start by cutting out the design of your headboard from plywood.
Use batting and fabric to upholster the headboard, stapling the fabric.
Add LED lights to the headboard, stapling the wires in place.
Finish by trimming away any excess fabric and attaching the headboard to the wall.
How do you make a tufted headboard?
A tufted headboard adds a touch of luxury to any bedroom. To make one:
Start by cutting out the shape of your headboard from plywood.
Use batting and fabric to upholster the headboard, stapling the fabric in place.
Add buttons to the headboard and tuft them in place.
Finish by trimming away any excess fabric and attaching the headboard to the wall.
How do you make a simple headboard?
You might be little surprised to find that it's easier than you think. With a little creativity and some basic supplies, you can make a stylish and unique headboard.
Here are some homemade headboard ideas to get you started:
- Use fabric to make a headboard that's both soft and stylish. You can use a quilt or even a large piece of fabric to make a one-of-a-kind headboard.
- Get creative with paint. You can use stencils or freehand designs to build a truly unique headboard.
- Incorporate lighting. Add some fairy lights or string lights to your headboard for a soft, romantic glow.
- Use wallpaper. Make a headboard that's both stylish and unique by using wallpaper. You can even use wall decals to make a truly one-of-a-kind headboard.
With a little creativity, you can easily make a DIY headboard that's both stylish and unique, So get little creative and start thinking about what you can do to make your own headboard today.
How do you make a good headboard?
No one answers that question, as the best way to make a headboard depends on your specific style and needs; however, we can give you some general tips on how to make an amazing headboard.
First, consider what kind of headboard look you're going for. Do you want something rustic and chic? Or maybe you're aiming for a more modern aesthetic. Once you have a general idea of the style you're going for, you can start narrowing down your options.
If you're looking for a rustic headboard, try using reclaimed wood or an antique door. For a more modern look, use metal or mirrored panels. You can also get creative with upholstery, using anything from velvet to leather.
Once you've decided on the materials you want to use, it's time to get creative with the design. If you're crafty, you can DIY your headboard from scratch. Otherwise, there are plenty of great DIY headboard ideas online or in-home decor magazines that you can use for inspiration.
Whatever way you decide to go, remember that the headboard is one of the most important pieces of furniture in the bedroom. It's what makes the space feel complete and pulled together, So take your time, be creative, and have fun!
How can I make my bed look good without a headboard?
This is a common question for people looking for a way to update their bedroom without spending a lot of money. Luckily, plenty of DIY headboard ideas can help you achieve the look you want without breaking the bank.
One of the simplest decorative ways to make your bed look great is to add a headboard. Modern headboards can be expensive, but you can save a lot of money if you DIY them. There are plenty of cheap DIY headboard ideas that will help you achieve the look you want without spending a lot of money.
If you want a more rustic headboard look, consider using reclaimed wood. You can find reclaimed wood at most hardware stores or online Once you have the wood, you can stain it or simply paint it to match your bedroom decor. Consider using metal or PVC pipes if you want a more modern look. You can find all these at most hardware stores as well.
If you want to add some personality to your headboard, consider adding some fabric. You can either sew or glue fabric to the headboard. Consider stapling the fabric to the headboard if you want a more permanent solution.
We've shared plenty of inexpensive DIY headboard ideas to help you achieve the look you want without spending a lot of money. With a little creativity and effort, you can have a great headboard that will make your bed look great.
Is it OK to not have a headboard?
We say no! Having a headboard is a great way to add a personal touch to your bedroom, But what if you don't want to spend the money on a new headboard? Or maybe you're just looking for little more unique than what you can find in stores?
Well, never fear! We've just got you covered with this list of clever DIY headboard ideas.
What is the purpose of a headboard on a bed?
A headboard can serve many purposes. It can be purely decorative, it can be functional, or it can be both. A headboard can add a unique style to a bedroom, and it can also help make the bed more comfortable to sleep in. If you are looking for a way to add a little extra something to your bedroom decor, then you may want to consider making your own headboard.
There are many different ways that you can make a headboard. You can use old pieces of furniture. You can repurpose other items or start from scratch with some new materials. No matter what step you take, there are sure to be some amazing DIY headboard ideas that are perfect for you.
To help you find the perfect headboard idea for your bedroom, we have collected a list of some of the cool DIY headboards around. These headboard ideas come from all different styles and levels of difficulty, so you will find something perfect for your own bedroom.
What is a free-standing headboard?
A free-standing headboard is a great way to add both style and function to your bedroom. Not only do they just look fantastic, but they can also be a great way to improve the comfort of your bed. Here are many headboard ideas to make your own free-standing headboard, and the best way will depend on your own personal style and preferences.
Can you get a free-standing headboard?
One of the simplest ways to make a free-standing headboard is to simply purchase one that is already made. You can find these at many different retailers, and they will usually come in a variety of different styles and colors if you want something that is truly unique. However, you may want to consider making your own headboard.
There are a number of different ways that you can make your own DIY headboard.
One popular option is to use old doors or windows as the base for your headboard. You can. You can simply leave them as-is for a more rustic look. Either repaint these items to match the rest of your bedroom decor.
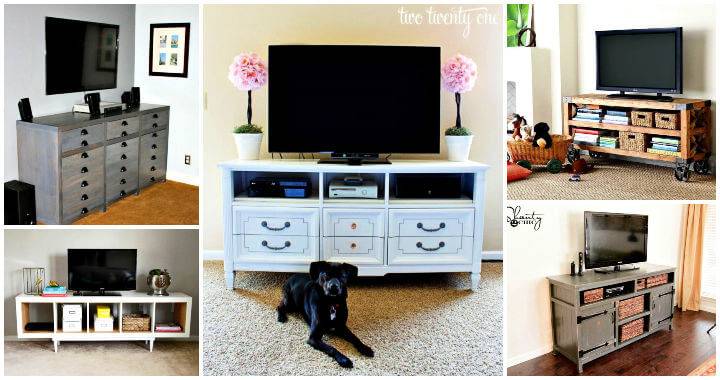
Another popular option for making a DIY headboard is to use old pieces of furniture. You can often find old dressers or nightstands at thrift stores or garage sales; Simply sand down the surface of these pieces and then paint or stain them to match the rest of your bedroom. Then, all you need to do is add a few cushions or pillows to the top of the dresser to make a comfortable and stylish headboard.
Creative and Unique DIY Headboard Ideas
If you are looking for something a bit more unique, you may want to consider making your own headboard out of cork tiles. Cork is a natural material that is both durable and attractive. You can find cork tiles at most home improvement stores, and they are relatively easy to install. Simply glue the tiles onto a piece of plywood or MDF and then cut them to fit the desired shape of your headboard. Once the tiles are in place, you can either leave them as-is or paint them to match the rest of your bedroom.
No matter what is the style of headboard you choose, be sure to measure the bed and the wall space before you begin. This will ensure that your headboard fits perfectly in its new home. Also, be sure to take into consideration the thickness of your mattress when choosing a headboard, as this can impact the decoration and overall look and feel of the headboard. With a little bit of planning and creativity, you can easily make a beautiful and unique DIY headboard that will transform your bedroom into a stylish and comfortable retreat.
Can I attach a headboard to any bed?
Most headboards can be attached to any bed frame with the help of some basic hardware, but it's always best to consult your bed's manufacturer first if you don't have a headboard or are looking for a unique option, our big list of DIY headboard ideas that can be adapted to almost any bed.
How do you convert a headboard to free-standing?
There are a few ways to make your headboard free-standing One way is to simply place it against the wall and secure it with large nails or screws. Another way is to build a frame around the headboard using wood or metal. You can also attach legs to the headboard, which will give it a more sturdy, free-standing appearance. Whichever method you choose, be sure to securely fasten the headboard so that it doesn't tip over or fall.
Can you put a bed in front of a window?
Yes, you can put a bed in front of a window. There are a few things to keep in mind when doing so.
- However, First, you'll want to make sure that the bed is not too close to the window. You don't want your bed to be blocking the natural light from coming in.
- Second, you'll want to make sure that the bed is not too close to the window so that you can still open and close the curtains or blinds.
- Third, you'll want to make sure that the bed is not too close to the window so that you can still reach the window in case of an emergency. Fourth, you'll want to make sure that the bed is not too close to the window so that you can still get out of bed easily.
- Lastly, you'll want to make sure that the bed is not too close to the window so that you can still have a view of the outside.
How do I keep my pillow from falling behind without a headboard?
If you're looking for a quick and easy solution to keep your pillow from falling behind your bed, consider making your own DIY headboard. With a little bit of creativity and some basic supplies, you can make a functional and stylish headboard.
Follow our list of cheap DIY headboard ideas that will help you keep your pillow in place.
What are beds without headboards called?
Unmade? Unkempt? Incomplete? No matter what you call them, they just don't look right Headboards serve many purposes; they provide a backrest for sitting up in bed reading or watching TV, and they help frame your bed and make it look more polished put-together. They can even add a bit of storage to your bedroom if you need it. Still, modern wood headboards can be expensive, and sometimes they just don't match the rest of your bedroom's style. That's where DIY headboards come in.
What is Bedboard?
A bed board is a piece of wood or other material placed at the head of a bed to support the pillows and mattress. Headboards are often used to make a focal point in the bedroom and can be crafted from a variety of materials, including wood, metal, upholstery, or even recycled materials.
How do you use a pillow as a headboard?
Looking for a unique and creative way to make your own headboard? Look no further than using a pillow! A pillow headboard is a great way to add some extra comfort and style to your bedroom. Plus, it's a relatively easy project that can be completed in just a few hours Here's how you can make your own pillow headboard:
- Start by finding a pillow that you like the look and feel of. You can use a regular bed pillow or opt for a decorative pillow that matches your bedroom decor.
- Measure the width of your bed and cut the pillowcase to fit. If you're using a decorative pillow, you may need to sew the edges to make a finished look.
- Place the pillowcase over the pillow and position it against the headboard of your bed Use push pins or small nails to secure the fabric in place.
- That's it! Your new pillow headboard is ready to use. Enjoy adding some extra comfort and style to your bedroom with this easy DIY project.
Should you put a headboard in front of a window?
Ideally, you should avoid placing a headboard in front of a window. This can block out natural light and make the room feel smaller. Instead, try to position the headboard against a wall or in a corner. If you absolutely must put the headboard in front of a window, be sure to leave some space between the window and the headboard so that natural light can still enter the room.
How do you secure a free-standing headboard to the wall?
You will need to use screws or nails to secure your headboard to the wall Use at least two screws or nails per foot, placed into studs whenever possible You can also use drywall anchors if necessary, predrill holes and use washers for the best results. Be sure to level your headboard before attaching it to the wall.
Do you have to attach the headboard to the bed frame?
Most headboards can be attached to a bed frame using screws or hooks, but some headboards are free-standing. You can also buy special headboard brackets that allow you to attach your headboard to the wall. If you're not sure how to attach your headboard, consult the instructions that came with it.
When attaching a headboard to a bed frame, it's important to use the correct type of screws or hooks. If you're not sure what type to use, consult the instructions that came with your headboard or bed frame; In general, you'll want to use screws rather than nails so that the headboard is more securely attached.
If you're attaching a headboard to the wall, you'll need to use special brackets. Headboard brackets are available at most hardware stores. Once you have the brackets, simply follow the instructions that come with them.
With a little bit of effort, you can easily attach a headboard to a bed frame or the wall. This will add both style and function to your bedroom.
How do you build a wall mounted headboard?
You will need:
- 1x4 lumber
- Construction adhesive
- Cordless drill
- 1-inch hole saw
- Paint or wood stain
- Polyurethane
Instructions:
- Cut the 1x4 lumber into four equal pieces using a miter saw. These will be your headboard uprights.
- Apply construction adhesive to the back of each upright and then position them on the wall to be evenly spaced. Use a level to make sure they're straight, and then let the adhesive set for at least an hour.
- Once the adhesive has been set, drill pilot holes through the uprights and into the wall. Then, use the 1-inch hole saw to cut holes in the uprights for your headboard buttons.
- Paint or stain the uprights as desired, and then apply a few coats of polyurethane to protect them. Let the polyurethane dry completely before proceeding to the next step.
- Cut foam board or upholstery batting to fit the back of the headboard, and then staple it in place.
- Finally, cut your fabric to size and staple it to the back of the headboard. Be sure to pull it taut so that there are no wrinkles or bumps.
That's it! You've now built a wall mounted headboard that is both stylish and functional.
If you're not up for the challenge of building your own headboard, you can always buy one that's already made. But where's the fun in that? DIY headboards are much more unique and personal, and they'll definitely make a statement in your bedroom. So go ahead and give a homemade headboard a try! You might just surprise yourself with how easy it is to build a headboard.
Bed with No Headboard Ideas
Want to update your bedroom without the headboard? A bed without a headboard can still look polished and put together. Plus, it can be a budget-friendly option if you're looking to save money on your bedroom makeover.
Here are 10 unique bed with no headboard ideas:
1. Hang a tapestry, scarf, or piece of fabric behind your bed as a headboard alternative.
2. Attach curtain rods to the wall and drape fabric or curtains from them.
3. Prop up a large mirror or piece of artwork against the wall behind your bed.
4. Install shelving above your bed and use it to display books, plants, or other objects.
5. Lean a ladder against the wall and drape a blanket or quilt over the rungs.
6. Hang string lights or fairy lights around or above your bed for a magical look.
7. Place a row of mirrors behind your bed for a glamorous headboard alternative.
8. Stack a few cinder blocks on top of each other and drape a piece of fabric or moss over them.
9. Install sconces on either side of your bed for a modern headboard look.
10. Get creative with wall decals and apply them directly to the wall behind your bed.
How to decorate a headboard?
One way to decorate a headboard is to add fabric. You can sew or glue fabric to the headboard. This can add color and pattern to the headboard. Another way to decorate a headboard is to add the trim. You can glue or sew trim around the edges of the headboard. This will add interest and detail to the headboard. You can also paint a headboard. So, you can use a brush or spray paint to add color to the headboard. You can also add stencils or decals to the headboard for added interest.
Conclusion
In conclusion, our exploration of 30 cheap DIY headboard ideas and plans has equipped you with the inspiration and guidance needed to transform your bedroom on a budget. With a focus on creativity, simplicity, and customization, these ideas cater to various tastes and skill levels. Remember, making your own headboard not only adds a personal touch to your space but also showcases your DIY prowess. We hope our tips and tutorials inspire you to embark on your headboard-making project with confidence and excitement. Keep experimenting and enjoy the process of turning your vision into reality.
Related DIY Ideas to Try: