I'm excited to share my experience with making a DIY flamethrower. This project taught me a lot. I started by gathering materials from my garage. It felt like a fun challenge! Safety was my number one priority, so I made sure to wear protective gear. I took my time and followed each step carefully. I wanted to create something cool but also safe.

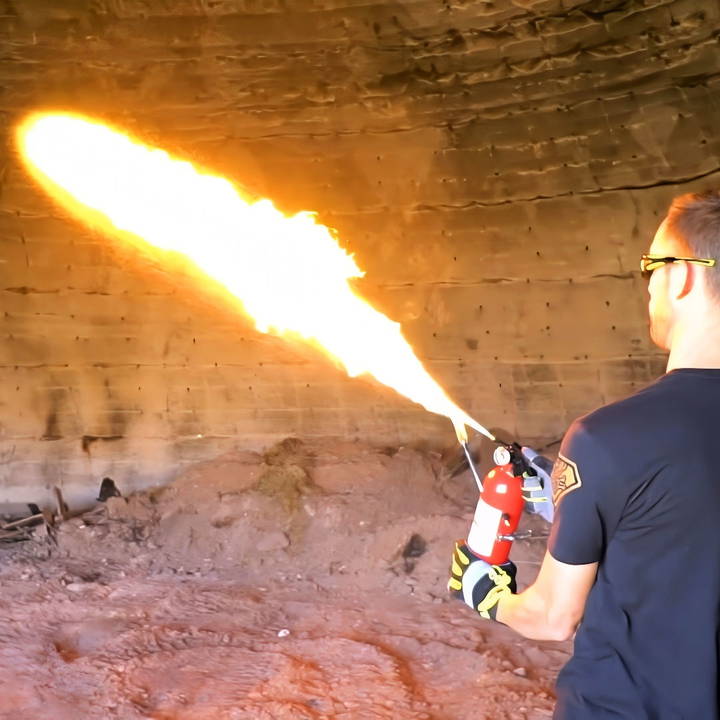
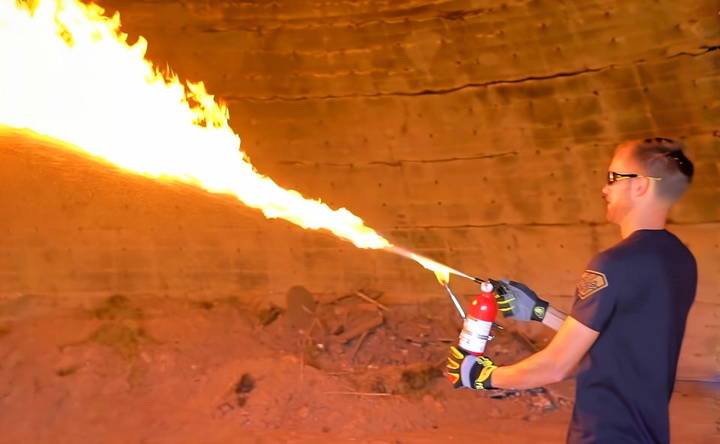
Once I finished the project, I felt a mix of pride and caution. Watching the flames shoot out was exhilarating! I remembered to show it to only a few friends who understood the risks. We had a great time testing it, but I always warned them to be careful. It's important to know how to handle such tools responsibly.
So, if you are looking to create something memorable and exciting, why not try this? I'm here to help you get started!
Materials Needed
- Fire Extinguisher: We're repurposing this because of its robust design capable of handling pressurized contents. Plus, the irony.
- Schrader Valve: Essential for pressurizing the extinguisher with air.
- Hose Clamp: To secure components together.
- 1/4 Inch Brass Hose Adapter: This narrows the spray for more precision.
- Wind-Resistant Barbecue Lighter: Our ignition source.
- Lamp Oil and Lighter Fluid: The fuels I chose to experiment with, both offering different consistencies and burn rates.
- Other Tools: These include a drill, nails, a hacksaw, and a vice – each necessary for the modification of the fire extinguisher.
Step by Step Instructions
Learn how to make a DIY flamethrower safely. Follow step-by-step instructions, from preparing the fire extinguisher to fuel testing. Safety precautions included.
Empting and Preparing the Fire Extinguisher
Initially, I had to ensure the extinguisher was fully depleted and clean. Spraying out the remaining content in an open, well-ventilated space and catching it in a bag was a somewhat cumbersome but necessary first step. Unscrewing the top and thoroughly washing the inside removed all traces of the chemical powder, preparing it for its new, fiery life.
Installing the Schrader Valve
Drilling a half-inch hole in the extinguisher for the Schrader valve was the trickiest part. I made an indentation with a nail for the drill to catch on, ensuring accuracy. Inserting the valve provided a means to pressurize our flamethrower with air.
Testing the Pressure
It was crucial to check the extinguisher could hold pressure after the modifications. Filling it halfway with water and pressurizing it proved successful. The ejection was powerful and controlled – exactly what I hoped for.
Modifying the Nozzle
To focus the flamethrower's spray, I opted for narrowing the nozzle with a 1/4 inch brass hose adapter. This required tapping threads into the metal nozzle of the extinguisher and securing the adapter. Testing again with water showed a promisingly concentrated stream.
Attaching the Ignition Source
Securing the wind-resistant barbecue lighter to the side of the extinguisher came next. Utilizing the hose clamp and some electrical tape for temporary positioning, I managed to align the lighter's flame with the path of the spray. This setup was relatively straightforward but crucial for what came next.
The Fuel Test
Choosing lamp oil and lighter fluid as my fuels mirrored the original project's experimentations. Both offered differing combustion properties which I was eager to test. Filling the extinguisher with each, re-pressurizing, and igniting presented mixed results. The lighter fluid provided a spectacular flame, while the lamp oil was a tad reluctant to ignite, likely due to its heavier consistency.
A Wick for Consistent Ignition
Given the initial inconsistency with the ignition source, I employed a lamp wick housed in a shortened, flattened piece of copper tubing. This consistently lit wick offered a more reliable source of ignition for the expelled fuel, significantly improving the performance of my flamethrower.
Safety Precautions
Throughout this project, safety was paramount. I conducted all testing in a controlled environment, wore protective gear, and had fire extinguishing means close at hand. It's crucial to stress the importance of undertaking such a project with the utmost respect for its inherent risks.
The final product was a highly effective mini flamethrower that, while not as powerful as some commercial options, was immensely satisfying to build and operate. The lighter fluid, with its lower viscosity and higher volatility, proved to be the superior fuel, offering impressive flames that truly captivated the adventurous spirit in me.
Testing and Troubleshooting
When you’ve assembled your DIY flamethrower, it’s crucial to test it to ensure it works correctly and safely. Here’s a straightforward guide to help you through this process.
Initial Safety Checks
Before igniting your flamethrower, perform these safety checks:
- Ensure all connections are tight and secure.
- Check for any fuel leaks by applying soapy water to connections and looking for bubbles.
- Confirm that the fuel tank is properly attached and the valve is functioning.
Testing the Flamethrower
Find a safe, open area away from flammable materials for testing. Follow these steps:
- Prepare the Area: Clear the space of debris and have a fire extinguisher nearby.
- Safety Gear: Wear protective clothing, gloves, and eye protection.
- Fuel Flow: Open the fuel valve slightly to start the fuel flow. Listen for any unusual sounds.
- Ignition: Use the ignition mechanism to light the flamethrower. It should ignite with a steady flame.
- Flame Adjustment: Adjust the fuel flow to control the flame size.
Troubleshooting Common Issues
If you encounter problems, here are some tips:
- No Ignition: Check the igniter for issues. Ensure the fuel is reaching the nozzle.
- Weak Flame: Increase the fuel flow or check for clogs in the nozzle.
- Inconsistent Flame: Ensure the fuel tank is not near empty and that there are no air leaks.
Final Checks
After testing, turn off the fuel supply and let the flamethrower cool down. Inspect it for any signs of damage or wear.
If you’re ever in doubt about the safety or functionality of your flamethrower, seek advice from a professional. Safety is paramount, and it’s better to be cautious than to take unnecessary risks.

Maintenance and Storage
Proper maintenance and storage of your DIY flamethrower are essential for ensuring its longevity and safety. Here’s a guide to help you keep your flamethrower in top condition.
Regular Maintenance
Regular maintenance tips for your equipment: steps to follow after each use and monthly checks to ensure optimal performance and longevity.
After Each Use:
- Let the device cool down completely.
- Wipe off any residue or debris from the nozzle and body.
- Check for any signs of wear or damage.
Monthly Checks:
- Inspect hoses and connections for cracks or leaks.
- Test the ignition system to ensure it’s working correctly.
- Verify that the fuel flow is consistent and adjust if necessary.
Long-Term Storage
If you plan to store your flamethrower for an extended period:
- Empty the fuel tank and clean the interior to prevent corrosion.
- Store the flamethrower in a dry, cool place away from direct sunlight.
- Cover it to protect from dust and moisture.
Safety Reminders
- Always handle the flamethrower with care, even during maintenance.
- Never store a loaded flamethrower.
- Keep the storage area locked and out of reach of unauthorized users, especially children.
Follow these maintenance guidelines to keep your flamethrower safe and reliable.
FAQs About DIY Flamethrower
Discover essential FAQs about DIY flamethrowers, including safety tips, legalities, and building guides. Get informed before you dive in!
A DIY flamethrower is a homemade device designed to project a long, controllable stream of fire. These are often made from materials like CO2 tanks, pressure washer hoses, and propane torches.
Always wear protective clothing, including gloves and goggles. Ensure the flamethrower is well-maintained and stored safely. Be aware of your surroundings and never point the flamethrower at any person, animal, or flammable structure.
Yes, the legality of constructing and using a flamethrower varies by location. It’s essential to check local laws and regulations before attempting to build or use one. In some places, flamethrowers may be entirely prohibited or require special permits.
While flamethrowers can be used for tasks like controlled agricultural burns or melting ice, using a homemade flamethrower for such purposes is not recommended due to the high risk of injury and legal complications. It’s best to use professional equipment designed for these tasks.
Using a DIY flamethrower comes with significant risks, including the potential for severe burns, fires, property damage, and even death. Improper handling or malfunctioning equipment can lead to unpredictable and dangerous outcomes. It’s also possible to face legal repercussions if the device is used irresponsibly or illegally.
Lessons Learned
In the end, making a DIY flamethrower can be thrilling. Just remember to stay safe and learn as you go. Your safety and the safety of others should always come first. Let's approach this project with fun and care!


