DIY wallpaper can be a fantastic way to personalize your living space. It's a cost-effective alternative to store-bought options and allows you to get creative with your home decor. With a bit of time and some materials, DIY wallpaper can be customized to fit any theme or color scheme. You can choose from a variety of techniques, like stencil designs, fabric wall coverings, or even using paper.
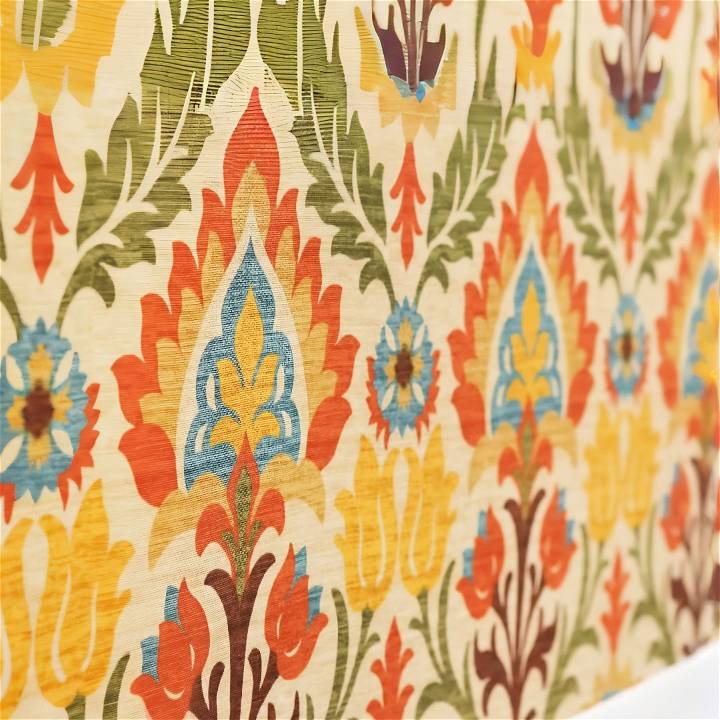
Choosing the right wallpaper technique depends on your style and the room's purpose. Paper wallpaper can add a textured look, while fabric provides a soft, elegant feel. Stencils allow for intricate patterns, offering a custom touch. No matter your choice, the key is to ensure that your wallpaper complements your interior design and is durable.
Ready to transform your space? Explore the next section to find detailed instructions and tips on making your perfect DIY wallpaper project.
Materials Needed and Their Purpose
- Drapery or Quilting Weight Cotton Fabric: I chose Waverly Santa Maria Adobe fabric for its vibrant design. The choice of fabric is crucial as it's the centerpiece of your project.
- Paint Tray & Roller: For evenly applying liquid starch on the wall and fabric.
- Liquid Starch: Acts as the adhesive for the fabric without damaging the wall.
- Scissors or Rotary Cutter and Mat: Ensures precision cuts for a perfect fit.
- Utility Knife: This is used to trim excess fabric neatly.
- Thumb Tacks or Tape: Temporarily secures fabric in place before application.
- Preparation Tools: Cleaning supplies for the wall and covers for electrical outlets.
Step by Step Instructions
Follow our step by step instructions on DIY wallpaper: preparation, cutting, application, and final touches for a flawless finish.
Preparation: Setting the Stage
Firstly, I prepared the wall. It’s crucial because any dirt or texture can affect adhesion. I cleaned it thoroughly and removed the electrical covers. Then, I pre-washed my fabric to prevent any dye bleed and to ensure any manufacturer's finish was removed, facilitating better starch adhesion.
Cutting the Fabric: The First Cut
After preparing the materials, I faced the intimidating task of cutting the fabric. I cut off the selvages for a neat edge and measured the first piece, leaving several extra inches to account for alignment and trimming. It's wise to cut one piece at a time to match the pattern precisely as you go.
Application: Where Magic Happens
Tacking the first piece on the wall, I felt my excitement building. This initial piece was critical to ensuring a straight line of pattern across the wall. Then, pouring liquid starch into the paint tray, I rolled it onto the wall and pressed the fabric onto it. Smooth application is key here to avoid bubbles.
With one person holding the fabric, I smoothed it as the other applied starch on top, saturating it evenly. The fabric felt like a part of the wall, a thrilling moment! When positioning the next piece, slightly overlapping ensured no wall peeked through, making a seamless look.
Final Touches: Precision and Patience
Once dry, using a utility knife to trim the excess was a test of patience but crucial for a professional finish. Aligning it around moldings or baseboards required a steady hand. A touch-up with starch on the edges ensured every part adhered well.
For electrical outlets, I marked and cut out the required spaces carefully, reinstating the covers afterward. This part needs caution to ensure safety and avoid damage.
The Big Reveal: A Transformed Space
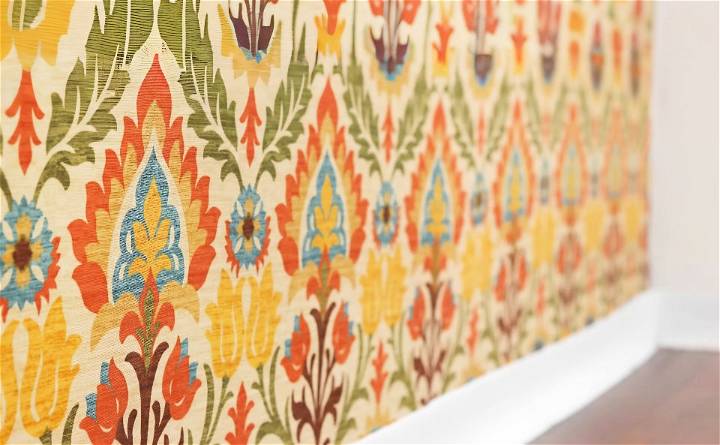
Stepping back, I admired the striking feature wall that remarkably transformed the room. It was more than decor; it was a statement of creativity and personalization in a space I call home.
Removal: Looking Ahead
Knowing I could easily remove the fabric by applying warm water and peeling it off gave me peace of mind about changing designs in the future. This aspect is particularly appealing to renters or design enthusiasts who love updating their space.
Wallpaper Removal Techniques
Removing wallpaper can be a daunting task, but with the right approach, it can be done efficiently and effectively. Here’s a comprehensive guide to removing wallpaper using simple, plain language:
Prepare the Room
Before you start, clear the room of furniture or cover it with drop cloths. This will protect your belongings from debris and moisture. Also, turn off the electricity in the room for safety.
Score the Wallpaper
Use a scoring tool to make small holes in the wallpaper. This allows the removal solution to penetrate and loosen the adhesive.
Apply a Removal Solution
You can use a commercial wallpaper remover or a homemade solution of warm water and vinegar. Apply generously with a sponge or spray bottle.
Let It Soak
Allow the solution to soak into the wallpaper for several minutes. This helps to dissolve the adhesive.
Peel and Scrape
Start peeling the wallpaper from the edges. Use a putty knife or scraper to remove stubborn areas gently. Be careful not to damage the wall underneath.
Clean the Walls
Once all the wallpaper is removed, clean the walls with soap and water to remove any residue. Let the walls dry completely before applying new wallpaper or paint.
Tips for Tough Wallpaper
For wallpapers that are difficult to remove, consider using a steamer. Steamers can help soften the adhesive, making the wallpaper easier to peel off.
By following these steps, you can remove old wallpaper and prepare your walls for a fresh new look. Take your time and be gentle to avoid damaging the walls.
Troubleshooting Common Issues
When it comes to DIY wallpaper projects, it’s not uncommon to run into a few hiccups along the way. Here’s a helpful guide to troubleshooting some of the most common issues you might encounter:
Bubbles and Wrinkles
After applying wallpaper, you might notice bubbles or wrinkles. Don’t worry; often, they can be smoothed out. Use a wallpaper brush or a plastic smoother to push the air bubbles towards the edges gently. If wrinkles persist, carefully peel back the paper and reapply it smoothly.
Misaligned Patterns
If your wallpaper has a pattern, it’s crucial to align it correctly. Should you find a mismatch, peel back the section and reposition it. Remember to check the alignment as you go along to avoid having to redo larger sections.
Adhesive Issues
Sometimes, the wallpaper doesn’t stick well. This could be due to the type of adhesive or the wall surface. Make sure you’re using the right adhesive for your wallpaper type. If the wall is too smooth, consider lightly sanding it for better adhesion.
Edges Peeling
If the edges of your wallpaper start to peel, it could be due to not enough adhesive or a drafty room. Apply additional adhesive to the edges and smooth them down. You can also use a seam roller for a tighter seal.
Stains or Marks
Accidents happen, and you might get stains or marks on your wallpaper. For washable wallpapers, use a damp sponge with mild soap to clean the area. For non-washable types, try an art gum eraser to remove marks gently.
Color Fading
Over time, wallpaper may fade, especially if exposed to direct sunlight. To prevent this, use curtains or blinds during peak sunlight hours. If fading occurs, consider it an opportunity to refresh your room with new wallpaper!
Handling these common issues ensures your DIY wallpaper project brings pride to your home. Patience and attention to detail are key to a beautiful, lasting result.
Maintenance and Upkeep
Keeping your wallpaper in top condition is key to ensuring it continues to brighten up your room for years to come. Here’s a straightforward guide to maintaining and caring for your wallpaper:
Regular Dusting
Dust can accumulate on the wallpaper, making it look dull. Use a soft brush or a microfiber cloth to dust your walls gently every few weeks.
Spot Cleaning
For occasional spills or marks, spot-clean your wallpaper using a damp cloth. If your wallpaper is washable, you can use a bit of mild soap. Always test a small, inconspicuous area first.
Avoid Sun Damage
Prolonged exposure to sunlight can cause colors to fade. Use curtains or blinds to protect your wallpaper from direct sunlight, especially during peak hours.
Dealing with Peeling
If you notice the edges of your wallpaper starting to peel, you can reattach them using wallpaper paste. Apply a small amount to the back of the peeling section and smooth it down.
Keep Away from Humidity
High humidity can damage the wallpaper. Ensure good ventilation in rooms like bathrooms and kitchens, or choose specially designed wallpapers for these areas.
Repairing Tears
If your wallpaper gets torn, you can repair it by pasting a small patch over the tear. Use a matching piece of wallpaper to ensure it blends in seamlessly.
By following these simple maintenance tips, you can keep your wallpaper looking fresh and vibrant. Regular care will not only enhance the appearance of your walls but also extend the life of your wallpaper.
FAQs About DIY Wallpaper
Explore common faqs about DIY wallpaper, from installation tips to materials, ensuring your home project is a success. Discover expert advice here!
Installing wallpaper can be a moderate challenge, but it’s definitely doable with patience and careful work. It’s important to work in sections and remember that wallpaper adhesive gives you some time to reposition the paper if needed.
Yes, you can make a custom design by using a patterned paint roller to apply a design onto heavyweight shelf liner paper. This allows you to choose any color or style you want for your wallpaper.
Before applying wallpaper, ensure the wall is clean, dry, and smooth. Any holes or rough spots should be filled and sanded. Remove any old wallpaper and loose paint, and apply a primer if the wall is very absorbent or if you’re using a dark-colored wallpaper.
The longevity of DIY wallpaper depends on the materials used and the conditions of the room. Generally, if applied correctly and maintained, it can last as long as store-bought wallpaper. However, temporary wallpapers or those in high-moisture areas may have a shorter lifespan.
Removing DIY wallpaper is similar to removing store-bought wallpaper. Here’s a simple process:
Loosen the edges: Start by gently pulling at the edges or seams of the wallpaper. If it’s a temporary wallpaper, it should peel off easily.
Use a solution: For more permanent wallpaper, mix warm water with a few drops of dish soap or a wallpaper removal solution. Apply this with a sponge to the wallpaper to help dissolve the adhesive.
Scrape gently: Use a plastic putty knife to scrape the wallpaper off. Be careful not to damage the wall underneath.
Clean the wall: Once all the paper is removed, wipe down the walls with a clean sponge and water to remove any residue.
Conclusion
In conclusion, easy DIY wallpaper is an excellent weekend project for refreshing any room. With minimal tools and a bit of creativity, you can transform your space quickly and affordably. Explore various designs and have fun personalizing your home with this DIY wallpaper. Enjoy giving your room a brand-new look this weekend!


