Building a DIY toy box can be a fun and rewarding project. I remember when I first decided to build a toy box for my nephew. I wasn't sure where to start, but I found some free plans online. With some basic tools and materials, I was able to build a functional and sturdy toy box that he loves.
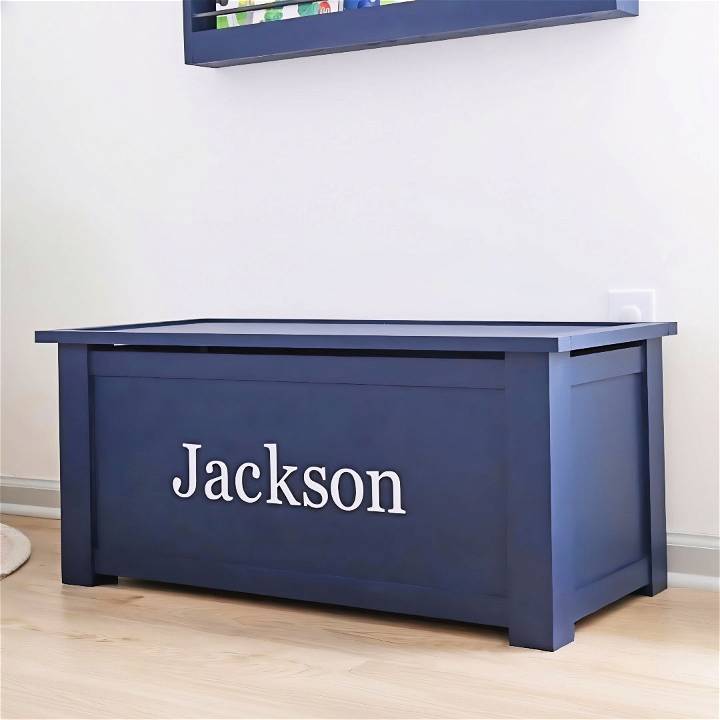
The process was surprisingly straightforward. I followed step-by-step instructions, which made it easy to follow along. I learned how to measure, cut, and assemble the pieces with care. By the end of it, not only did I have a beautiful toy box, but I also gained new skills.
I encourage you to try these toy box plans and experience the same satisfaction.
Materials Needed and Why
- Pre-sanded, Formaldehyde-Free Half-Inch Thick Plywood: We chose this for the frame because it's durable and safe for children's furniture.
- 3x3 Boards for Legs: These sturdy legs ensure durability and add a sophisticated look to the toy box.
- 1x2 Boards: For framing and providing structure to the plywood.
- Regular Hinges and a Safety Hinge: The safety hinge is crucial as it prevents the lid from slamming shut on tiny fingers.
- Kreg Jig: For drilling pocket holes to join the boards seamlessly.
- Screws, Wood Glue, and Paint: Essential for assembling and finishing the toy box.
Step by Step Instructions
Learn how to build a DIY toy box with our step-by-step instructions. Perfect for organizing toys and adding a personal touch to your child's playroom.
Initial Cuts and Preparations
The journey began with us heading to the local home improvement store to get our plywood cut to size. We followed Angela Marie Made's precise cut list, which streamlined the process. With a circular saw, miter saw, and a table saw in our home workshop, we cut the 3x3 and 1x2 boards to build the structural frames and legs of the toy box.
Drilling and Building Pocket Holes
Using a Kreg Jig, we drilled pocket holes in the plywood pieces destined to become the sides, front, and back of the chest. This step was crucial for making strong joints.
Assembling Frame Parts
This step required a fair amount of concentration and teamwork. We assembled the side frames first, ensuring that the plywood edges were flush with the 1x2 boards, using wood glue and screws for attachment. We mirrored this process for the front and back frames, adding an extra 1x2 slat for bottom support.
Crafting the Lid
The lid assembly mirrored the frame creation, with the addition of 1x2 boards along all sides. This provided a lip, offering a more finished look and ensuring a snug fit over the box itself.
Bringing It All Together
We were cautious to ensure the front, back, and side frames were perfectly aligned with the legs before bringing them together. A quarter-inch inset and a half-inch top gap were crucial for aesthetic alignment and functional lid operation.
Final Touches: Painting and Safety Measures
Choosing a child-friendly, durable paint was essential. We opted for a subtle, calming hue that matched our son's bedroom theme. After painting, we focused on the critical step of installing the safety hinge to protect little hands from harm.
The Joy of Completion
Setting the bottom board, attaching the lid with our chosen hinges, and observing our son's delighted reaction to his new toy box were incredibly rewarding moments. Not only did we build a functional storage solution, but we also crafted a family treasure that promotes organization and responsibility.
Customization Ideas for Your DIY Toy Box
Building a toy box that's both functional and fun is a great way to add a personal touch to your child's play area. Here are some ideas to customize your DIY toy box that are simple, safe, and sure to spark joy:
- Choose a Theme: Think about what your child loves. Is it dinosaurs, space, or perhaps a favorite fairy tale? Picking a theme can guide your choice of colors, shapes, and decorations. For example, a space-themed toy box could be painted dark blue with glow-in-the-dark stars and a rocket ship.
- Involve Your Child: Including your child in the customization process makes it more meaningful. They can help choose colors, paint, or even decide where stickers should go. It's a wonderful opportunity for them to express their creativity and feel proud of their contribution.
- Use Stencils: Stencils are a fantastic way to add professional-looking designs without needing advanced artistic skills. You can buy them or make your own. Secure the stencil to the toy box and use a sponge or brush to apply paint for a crisp design.
- Add Interactive Elements: Consider adding elements that are not only decorative but also interactive. For instance, a chalkboard paint section where they can draw, or a magnetic board to play with letter and number magnets.
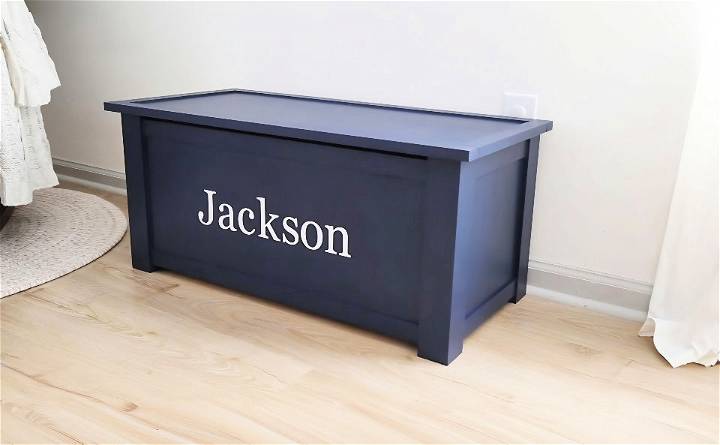
- Personalize with Their Name: Adding your child's name to the toy box can make it feel extra special. You can paint it on, use adhesive letters, or even carve it if you're comfortable with woodworking.
- Safety First: Ensure all materials used are child-safe and non-toxic. All edges should be smooth, and the lid should have a soft-close mechanism to protect little fingers.
- Changeable Decorations: Use Velcro to attach decorations that can be changed as your child's interests evolve. This way, the toy box can grow with them, and they won't outgrow the design too quickly.
The goal is to build a toy box that's not only a storage solution but also a source of inspiration and imagination for your child. Keep it simple, safe, and, most importantly, fun!
Upcycling and Repurposing for Your DIY Toy Box
Upcycling and repurposing materials for your DIY toy box is not only eco-friendly but also adds a unique story to your creation. Here's how you can turn old items into a treasure chest of fun for your kids:
- Start with What You Have: Look around your home for furniture that's no longer in use, like an old cabinet, drawer, or even a suitcase. These items can be transformed into a toy box with a bit of creativity.
- Preparation is Key: Clean the item thoroughly and sand any rough edges to make it safe for children. If you're using wood, apply a primer before painting to ensure the paint adheres well.
- Choose Child-Safe Paint: When selecting paint, make sure it's non-toxic and suitable for furniture. Bright colors or chalkboard paint can turn an old piece into a playful and practical toy box.
- Add Some Cushion: If the top of your repurposed item is flat, consider adding a cushion to make it a cozy reading spot. Use foam padding and fabric that complements the room's decor.
- Get Creative with Handles: Replace old handles with fun, colorful ones, or even make your own from rope or fabric for a soft touch that's easy for little hands to grasp.
- Personal Touches: Decorate with stencils and stickers, or let your child add their own artwork. This personalization makes the toy box feel special and one-of-a-kind.
- Safety First: Ensure the toy box has a safe mechanism to stay open and doesn't slam shut. Soft-close hinges or a lid support are essential to protect little fingers.
- Make It Mobile: Adding casters to the bottom of the toy box can make it easy to move around, which is especially handy for cleaning or rearranging the room.
By following these steps, you'll build a toy box that's not just a place to store toys but a piece of furniture with its own history and character.
FAQs About DIY Toy Box
Get answers to common questions about DIY toy boxes, from materials to designs, and build a perfect storage solution for children's toys!
To ensure safety:
Use soft close hinges to prevent the lid from slamming shut
Sand all edges and corners to make them smooth
Avoid using toxic paints or finishes
Ensure the toy box is sturdy and won’t tip over
Regularly inspect for any loose screws or damage.
Yes, you can customize your toy box by:
Painting it in your child's favorite color
Adding decals or stencils for a personal touch
Incorporating a theme, like a pirate chest or a car
Using different types of wood for a unique look
Adding functional elements like wheels or dividers.
Yes, there are many beginner-friendly plans available that provide step-by-step instructions. These plans often require minimal tools and offer clear guidance on measurements and assembly. You can find plans that range from simple boxes to more elaborate designs with additional features like benches or chalkboards.
To maximize storage space:
Consider adding shelves or dividers inside the toy box for better organization
Use stackable bins or drawers for small toys or art supplies
Build a double-decker toy box with a lift-out tray for more storage options
Opt for a toy box with a built-in bookshelf on the side for books and games.
For a creative touch:
Use chalkboard paint on one side for a fun, drawable surface
Apply magnetic paint or attach a sheet of metal for a play area with magnets
Build a themed toy box like a treasure chest or a vehicle with appropriate painting and accessories
Add personalized name letters or engrave designs to make it unique to your child.
Conclusion
Building your own DIY toy box might seem difficult at first, but with these free plans, it's very manageable. You will get a sense of pride and accomplishment once you complete it. I'm confident that these plans will help you build something special. So, gather your tools and get started on building a toy box that will be loved for years to come.


