Making a DIY softbox can transform your photography, offering a professional touch to your images. This simple tool helps diffuse light, reducing harsh shadows and enhancing colors. Making your own softbox is cost-effective and easy. With a few materials and some guidance, you can craft a softbox that meets your unique needs. Let's break down the steps to help you understand how to make a softbox that elevates your photos.

Once you learn how to make a softbox, you'll appreciate the difference it can make in your photography setup. A well-constructed softbox ensures beautifully balanced lighting for portraits or product shots. In the following sections, we will provide a detailed guide to help you along the way. Get ready to enhance your photography skills with this handy tool!
Planning: The Blueprint of Success
The planning phase is critical because it lays the groundwork for your DIY softbox. It's essential to consider the size and limitations of your light source. I measured mine meticulously, ensuring the softbox wouldn't be too large to handle or too small to be effective. By measuring from the light bulb to the tilting part of the stand (around 10 centimeters), I decided on a base size of 20x20 centimeters for my softbox.
Gathering Materials: Why Each Is Needed
Discover why each material is essential in 'gathering materials: why each is needed.' learn about the tools required for efficient gathering.
Materials:
- Cardboard: It's the skeleton of your softbox. Lightweight yet sturdy enough to hold the shape.
- Aluminum Foil: Acts as a reflector inside the softbox, maximizing the light's brightness and effectiveness.
- Duct Tape: Provides durability and holds everything together securely.
- Double-Sided Tape & Glue Stick: Useful for attaching foil and decorative paper.
- Diffuser Material: I used a thin white fabric, but parchment paper works too. It softens the light, eliminating harsh shadows.
- Black Paper (Optional): Gives a professional appearance to the outside of your softbox.
Tools:
- Craft Knife and Scissors: For cutting materials precisely.
- Ruler and Pencil: Essential for accurate measurements.
- Cutting Mat: Protects your work surface.
Step by Step Instructions
Learn how to make a DIY softbox with our detailed step-by-step instructions, from cutting and preparing the pieces to assembly and final touches.
Cutting and Preparing the Pieces
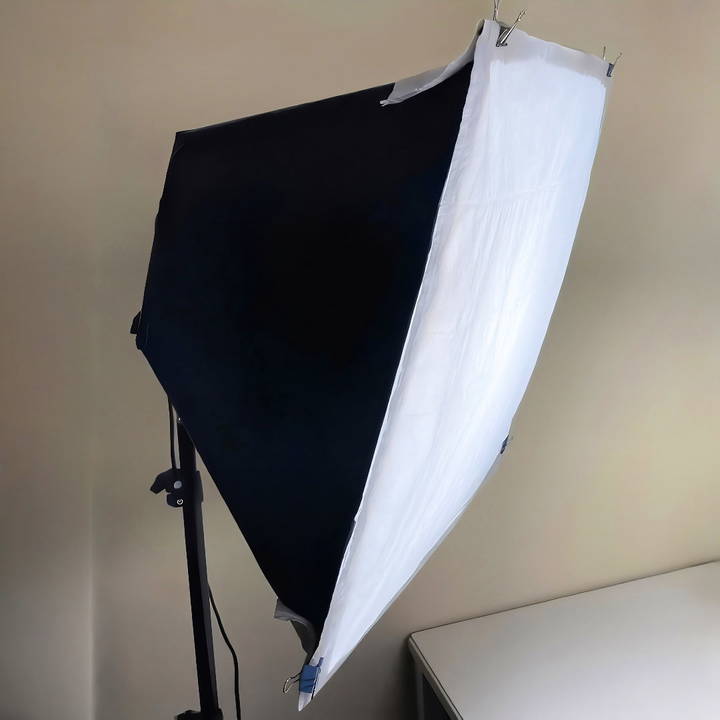
With careful measurements in mind, I cut out a 20x20 cm square for the base and four trapezoids for the sides, ensuring they would form a perfect tapering shape. Then, I made a hole in the center of the base for the light holder, using the holder itself as a guide for the perfect fit.
Wrapping and Covering
I wrapped the inner sides of the cardboard pieces with foil, shiny side facing in, to act as a reflector. For aesthetic purposes, I covered the outer sides with black paper using double-sided tape and reinforced the edges with duct tape for added strength.
Assembly
Joining the pieces was surprisingly straightforward. I connected the panels using duct tape at the edges, ensuring they were aligned. Attaching the base was a bit tricky, but with patience, it aligned perfectly with the panels, forming a secure structure.
Final Touches: The Rim and Diffuser
Making a rim allowed me to easily attach and change the diffuser. I cut and taped L-shaped cardboard pieces around the softbox's opening, which could comfortably hold the fabric diffuser. This removable feature was invaluable for adjusting the light's softness.
Illumination & Extra Security
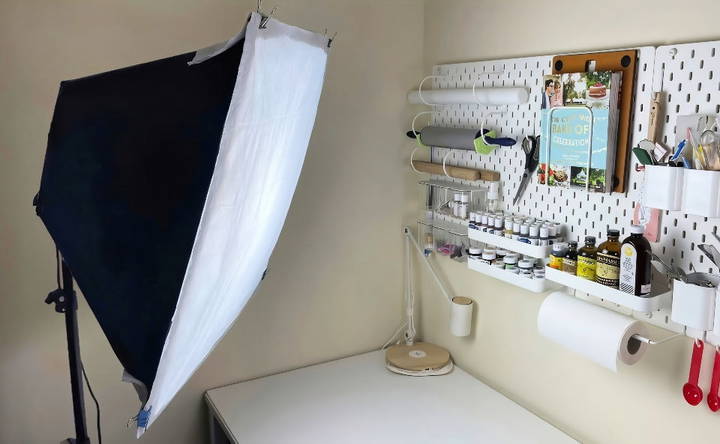
With the structure assembled, I inserted the light holder and secured it with duct tape for a temporary fix. The moment of truth came when I switched on the light, and it worked marvelously. The diffused light was soft, evenly spread, and perfect for filming.
However, for added security and flexibility, I sewed velcro strips onto pieces of sturdy cloth (denim) and attached them to each corner of the softbox and the light stand. This not only provided extra stability but also made the softbox easily detachable.
Customization Tips for Your DIY Softbox
Making a DIY softbox gives you the flexibility to tailor it to your specific photography needs. Here are some tips to customize your softbox for optimal use:
- Choose the Right Size: The size of your softbox should match the type of photography you're doing. For portraits, a larger softbox will make a softer light, while for product photography, a smaller one might be more appropriate.
- Select the Material: Different materials can affect the quality of light. Muslin and ripstop nylon are great for diffusing light, whereas reflective materials like aluminum foil can increase light intensity.
- Adjustable Light Intensity: Incorporate a way to adjust the brightness of your light source. This could be as simple as adding layers of diffusion material or using a dimmable LED bulb.
- Color Temperature Control: Use gels to alter the color temperature of your light. This can help you match the light from your softbox with other light sources or make a specific mood.
- Shape Matters: While square or rectangular softboxes are common, consider experimenting with different shapes like octagonal or strip boxes to see how they change the light quality and shadow.
- Portability: If you need to use your softbox on location, design it to be collapsible. Use lightweight materials and a foldable frame for easy transport.
- Mounting Options: Ensure your softbox has a secure mounting system compatible with your light stand or tripod. This might involve some DIY rigging or adapting existing hardware.
Customize your DIY softbox to fit your photography style. Aim to make a softbox for the lighting effects you want, and experiment as needed.

Advanced Modifications for Your DIY Softbox
Enhancing your DIY softbox with advanced modifications can significantly improve its functionality and adaptability. Here's how you can take your softbox to the next level:
- Variable Diffusion Control: Implement a system that allows you to adjust the level of diffusion. This could be a sliding panel or removable layers that let you control the softness of the light.
- Internal Baffles: Add internal baffles to your softbox to direct the light more precisely. These can be made from white cardstock or fabric and positioned to prevent light spill and improve contrast.
- Speed Ring Adapter: For those using flash heads, make a custom speed ring adapter. This will enable you to mount different types of flashes and strobes securely to your softbox.
- Grids and Egg Crates: Attach grids or egg crates to narrow the light spread. This modification is particularly useful for building dramatic lighting or highlighting specific areas in your photography.
- Remote Control: Integrate a remote control system to adjust the light without having to manually change settings on the softbox. This is especially handy when the softbox is placed out of reach.
- Cooling System: If you're using continuous lighting, consider adding a cooling system to prevent overheating. Small computer fans can be incorporated into the design to maintain optimal temperature.
- Collapsible Design: Upgrade your softbox to a collapsible design for easy storage and transport. Use flexible materials like wireframes that can be folded down without damage.
- Multifunctional Use: Design your softbox to be multifunctional. It can double as a reflector or a backdrop for small product photography with minor adjustments.
Implement these mods to get a custom softbox with pro-level control. Prioritize safety and test thoroughly to improve your photography without new issues.
Safety Precautions
When building a DIY softbox, safety is paramount. Here are key precautions to ensure your project is safe and secure:
- Electrical Safety: Always use components rated for the voltage and current you're working with. If you're unsure, consult with an electrician.
- Heat Management: Choose light bulbs that generate minimal heat, such as LEDs, to reduce fire risk. Ensure there's enough airflow around the bulb.
- Material Selection: Use non-flammable materials for the softbox's outer layer. Avoid materials that melt easily or emit toxic fumes when heated.
- Secure Assembly: Make sure all parts of your softbox are securely assembled. Loose parts can lead to accidents or equipment damage.
- Testing: Before using your softbox for extended periods, test it to ensure it's working correctly and safely.
- Fire Extinguisher: Keep a fire extinguisher nearby when testing or using your softbox, just in case of an emergency.
- Supervision: Never leave your softbox unattended while it's on. Always turn it off when not in use.
By following these safety precautions, you can enjoy the benefits of your DIY softbox without unnecessary risks.
FAQs About DIY Softbox
Discover answers to your FAQs about DIY softbox lighting solutions. Learn how to make cost-effective and efficient softbox lights for photography.
A DIY softbox is a homemade version of a professional softbox, which is used to diffuse light and create a soft, even illumination on the subject. It’s a cost-effective solution for photographers looking to enhance their lighting setup without spending a lot on professional gear.
Most continuous light sources like LED panels or bulbs can be used, as long as they don’t get too hot. Avoid using lights that generate a lot of heat, as this could pose a fire hazard with the cardboard and other materials.
Yes, always ensure that your light source does not run hot to the touch. Using a hot light source can create a fire hazard when combined with materials like cardboard and tape. Also, make sure your softbox is stable and won’t tip over easily.
To adjust the light intensity, you can:
Move the softbox closer to or further from the subject.
Use a dimmable light source and adjust accordingly.
Layer more diffusion material to soften the light if it's too harsh.
Add or remove reflective material inside the softbox to increase or decrease the light bounce.
The size of your DIY softbox depends on your needs:
For portrait photography, a larger softbox (around 24x36 inches) will make a softer light.
For product photography, a smaller softbox (around 12x12 inches) may be sufficient.
Remember, the larger the softbox, the softer the light will be, but it will also be more cumbersome to handle.
Reflecting on the Journey
In conclusion, making a DIY softbox is a rewarding project that can significantly improve your photography. With just a few materials and some simple steps, you can master how to make a softbox that enhances your lighting setup. This handy tool will help you achieve stunning results in your photos. Start building your softbox today and enjoy the difference it makes in capturing beautiful images!


