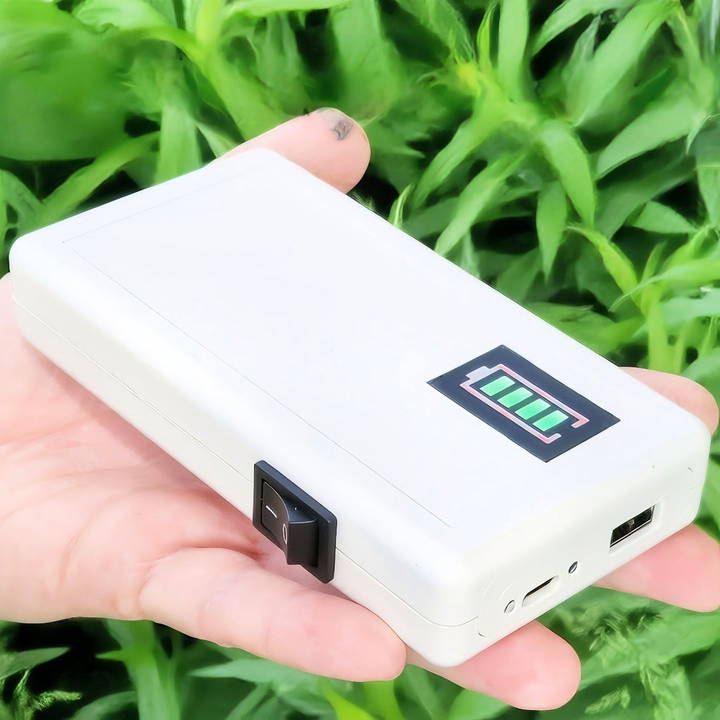
To build a fast-charging power bank, I wanted something more compact and efficient than my old, bulky version that required a special charger. I set out to build a new one that uses USB Type-C input and consists of affordable components that are readily available. Below, I'll guide you step-by-step through how I built a simple, fast-charging DIY power bank and share my insights along the way. Let's get started!
Choosing the Right Components
Selecting the right components is essential for building a reliable power bank. Here are the materials I used:
USB Boost Converter with Fast Charging Protocols
The core component of this project is a USB boost converter that supports fast-charging protocols. This converter has a low voltage input, which makes it compatible with one or more lithium-ion cells connected in parallel. It's an efficient module that can boost the voltage to the desired output level, such as 5V or 12V, for charging devices.
- Personal Insight: I chose this particular module because it can handle a variety of voltages and allows for a versatile power bank design. I found that its average efficiency is around 80%, which is quite decent for most charging needs.
Fast Charging Trigger Module
To activate the fast charging feature, I used a fast charging trigger module. This module can be set to trigger a specific voltage output (e.g., 12V) from the boost converter, allowing for rapid charging of devices.
- Why It's Important: The trigger module is vital because it communicates with the device being charged, enabling the fast charging mode. Without it, you'd be stuck with standard charging speeds.
Lithium-Ion Cells
For the battery pack, I opted for three HG2 lithium-ion cells. These cells have a nominal capacity of 3,000 mAh each, but in my tests, they consistently provided over 3,100 mAh, which was impressive for their price.
- Pro Tip: It's crucial to use high-quality lithium-ion cells that have been tested for their real capacity and performance. Cheaper cells may not perform as advertised, and you don't want your power bank failing when you need it most.
Charging Module
To quickly recharge the battery pack, I chose a charging module that can handle up to 2.8A. It comes in two versions—one without a heatsink for lower currents and one with a heatsink for up to 3.6A.
- My Choice: I went with the 2.8A version because it generates less heat, which is ideal for a compact power bank setup. Heat can be a big issue in enclosed spaces, so this decision was about balancing charging speed with safety.
Protection Circuit Board
A protection circuit board is essential for safeguarding against over-discharge and over-current scenarios. This component ensures the battery doesn't get damaged if the voltage drops too low or if there's an unexpected surge in current.
- Safety First: In my testing, the protection board effectively disconnected the load when the battery voltage dropped to 2.49V, which is below the recommended level for most lithium-ion cells. This feature extends the lifespan of the batteries by preventing them from deep discharge.
Step by Step Instructions
Learn how to build a DIY charging power bank with our step-by-step instructions, from assembling the battery pack to testing and final performance checks.
Assembling the Battery Pack
To make a robust and safe battery pack, I assembled a 1S3P (one series, three parallel) configuration using three HG2 lithium-ion cells. Here's how I did it:
Step 1: Preparing the Cells
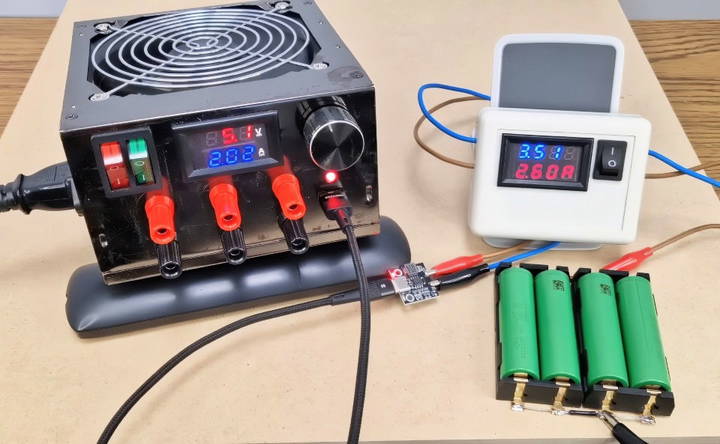
First, I charged and discharged the lithium-ion cells using a reliable charger to test their real capacities. Once I confirmed their performance, I began the assembly.
Step 2: Spot Welding Nickel Strips
I used 0.12 x 8 mm nickel strips and my DIY spot welder to connect the cells in parallel. Spot welding is the safest and most effective method for connecting cells, especially when dealing with high currents.
- Tip: If you don't have a spot welder, you can buy cells with nickel strips pre-attached and solder them carefully. However, make sure to use minimal heat to avoid damaging the cells.
Step 3: Adding Insulation
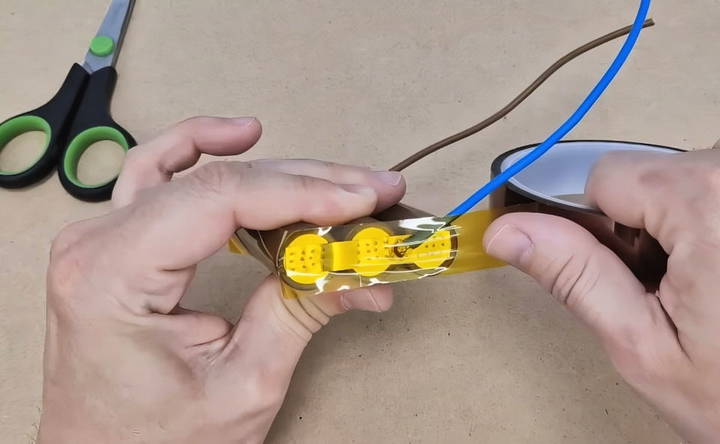
After spot welding, I insulated the cells with Kapton tape to prevent short circuits and enhance safety. Proper insulation is crucial when dealing with lithium-ion cells to prevent any accidental contact or shorts.
Step 4: Integrating the Protection Board
I soldered the protection board to the battery pack, ensuring it was placed after the fuse to safeguard the cells from over-current or over-discharge scenarios.
- Insight: Adding a fuse is an extra safety step. I used a 10A fuse on the positive terminal to protect against potential short circuits. The fuse, along with the protection board, provides a double layer of safety.
Building the Power Bank Case
Once the internal components were ready, it was time to build a case to house everything. Here's how I went about it:
Step 1: Choosing the Right Case
I selected a compact plastic case that could fit all the components snugly. Space is a crucial consideration because a smaller case reduces the chances of components shifting around and getting damaged.
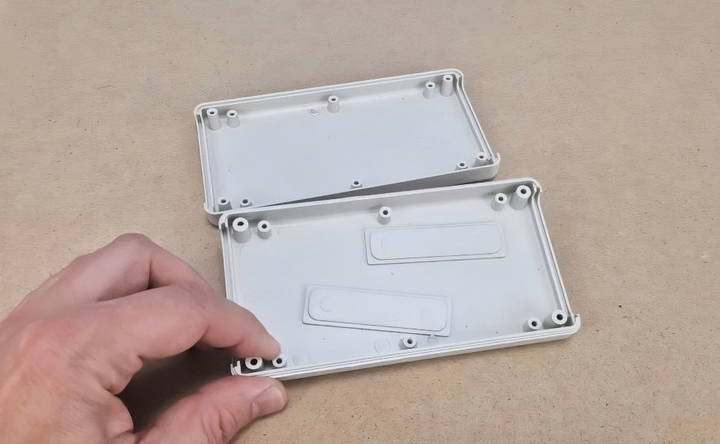
Step 2: Modifying the Case
I wore safety goggles and used a rotary tool to cut the necessary openings in the case for the USB ports, switches, and LEDs. A bow cutter helped smooth out the edges for a clean finish.
- Safety Note: Always wear protective gear when cutting or drilling plastic cases. Small shards can be sharp and dangerous.
Step 3: Mounting the Components
I initially planned to use M3 stand-off screws to secure the components, but the holes were too small. Instead, I made simple spacers from 4mm plywood and used double-sided tape and small screws to secure the components in place.
- Insight: Securing components firmly is vital for durability. Loose components can lead to short circuits or malfunction due to vibrations or accidental drops.
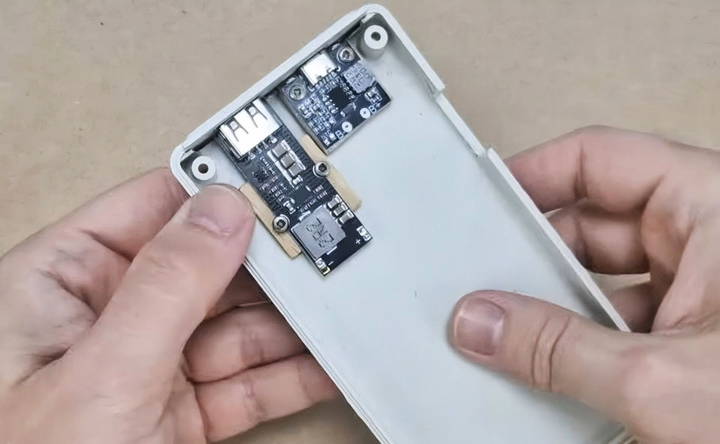
Step 4: Soldering and Final Assembly
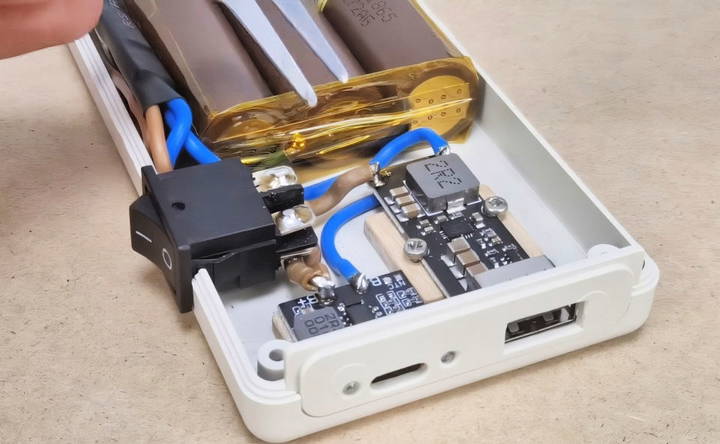
I used thick 2.5 square mm wires to handle high currents and an ugly but effective rocker switch that could manage up to 10 amps. This may not be the most aesthetically pleasing solution, but it gets the job done.
- Experience: Make sure to use a powerful soldering iron for thick wires. A weak iron might not provide enough heat for proper soldering, which can lead to unreliable connections.
Step 5: Adding Heat Sinks and Testing
While some modules don't require heat sinks, I added them to be safe, especially since the components are enclosed in a tight space. After assembling everything, I conducted several tests to ensure all parts functioned correctly.
- Lesson Learned: Don't skip thorough testing. It's tempting to rush to the finish line, but a little patience and testing will save you from future headaches.
Testing the Power Bank
After closing the case, I conducted a series of real-world tests to ensure the power bank performs well under different scenarios:
Test 1: Charging Various Devices
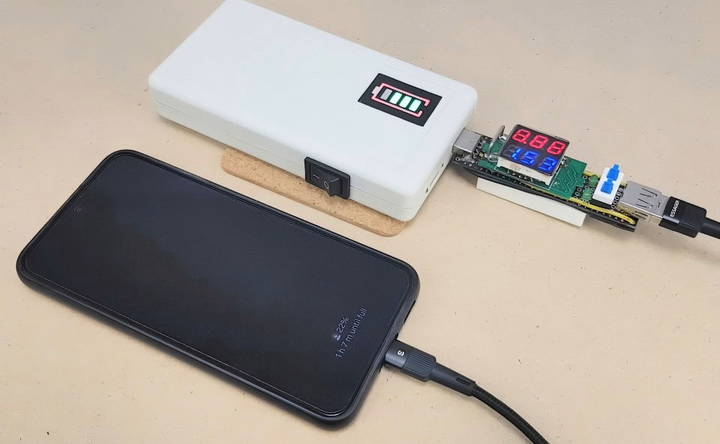
I tested the power bank with different devices, including a Samsung S22 smartphone. The voltage quickly adjusted to almost 9V and charged the phone in just over an hour.
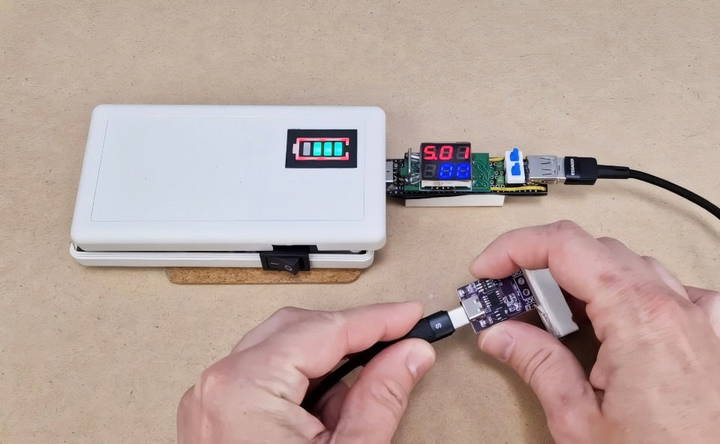
Test 2: Checking Heat and Efficiency
The boost converter did get warm, especially when outputting 9V or 12V, but it wasn't dangerously hot. Adding a heat sink to the charging module proved beneficial, as it remained only slightly warm during the charging process.
- Observation: Heat management is a critical aspect of power bank design, especially for fast charging. Using quality components and adding heat sinks where possible will enhance the longevity and safety of your DIY power bank.
Test 3: Overall Performance and Portability
The new power bank is smaller and more portable than my old version. It fits easily in a pocket and can charge my phone two and a half times on a single charge.
- Final Thoughts: While I'm happy with the performance, I'm still on the lookout for a smaller, more aesthetically pleasing switch that can handle 10 amps. If you have any suggestions, feel free to share!
Advanced Customizations
Learn advanced customizations, adding features, upgrading components, custom design, and safety enhancements to elevate your experience.
Adding Features
- LED Indicators: Adding LED indicators to your powerbank can help you monitor the battery level. You can use a simple LED circuit connected to the battery to show different levels of charge. For example, a green LED for full charge, yellow for medium, and red for low.
- Solar Panels: Integrating solar panels can make your powerbank more eco-friendly. Small, portable solar panels can be attached to the powerbank's casing. This allows you to charge the powerbank using sunlight, which is especially useful for outdoor activities.
- Wireless Charging: To add wireless charging, you need a wireless charging module. This module can be connected to the powerbank's battery. Ensure the module is compatible with your device's wireless charging standards (like Qi). This feature allows you to charge devices without cables.
Upgrading Components
- Higher Capacity Batteries: If you need more power, consider upgrading to higher capacity batteries. Look for batteries with higher milliampere-hour (mAh) ratings. Ensure they fit within the powerbank's casing and are compatible with the existing circuitry.
- Fast Charging Circuits: Upgrade to fast charging circuits to reduce charging time. These circuits can handle higher currents and voltages, allowing your devices to charge faster. Ensure the components are compatible with your powerbank's battery and your devices.
- Durable Casings: Consider using more durable materials for the powerbank casing. Materials like aluminum or high-quality plastic can protect the internal components better. This is especially important if you plan to use the powerbank in rugged conditions.
Custom Design
- Personalized Casings: You can customize the powerbank's appearance by designing your own casing. Use 3D printing to build unique designs or add personal touches like your name or favorite colors. This makes your powerbank stand out and reflects your personal style.
- Modular Design: Make a modular powerbank that allows you to swap out components easily. For example, you can design it so that the battery, charging circuit, and casing can be replaced or upgraded independently. This makes maintenance and upgrades simpler.
Safety Enhancements
- Overcharge Protection: Adding overcharge protection circuits can prevent the battery from being damaged by excessive charging. These circuits automatically stop charging when the battery is full, extending its lifespan.
- Temperature Sensors: Integrate temperature sensors to monitor the battery's temperature. If the battery gets too hot, the sensor can trigger a cooling mechanism or shut down the powerbank to prevent damage.
Enhance your DIY power bank's functionality, durability, and safety with these advanced customizations, adding a personal touch and better performance.
Common Issues and Troubleshooting
Find common issues and troubleshooting tips, identify problems quickly, find effective solutions, and learn preventive measures for seamless operations.
Identifying Problems
- Powerbank Not Charging: If your power bank isn't charging, check the charging cable and adapter. Ensure they are working properly by testing them with another device. Also, inspect the power bank's charging port for any debris or damage.
- Powerbank Not Charging Devices: If your power bank isn't charging your devices, verify that the power bank itself is charged. Try using a different cable or port on the power bank. Ensure the device you're trying to charge is compatible with the power bank's output.
- Overheating: If your power bank gets too hot, it could be due to overcharging or a faulty battery. Avoid using the power bank while it's charging. If overheating persists, stop using it and consult a professional.
- Short Battery Life: If your power bank's battery life is shorter than expected, it might be due to a degraded battery. Check if the power bank is old or has been used extensively. Consider replacing the battery if it's no longer holding a charge well.
Solutions
- Cleaning the Charging Port: Use a small brush or compressed air to clean the charging port. This can remove any dust or debris that might be causing connection issues.
- Replacing the Cable: Sometimes, the issue lies with the charging cable. Try using a new or different cable to see if that resolves the problem.
- Resetting the Powerbank: Some powerbanks have a reset button or a specific reset procedure. Check the user manual for instructions on how to reset your power bank.
- Battery Replacement: If the battery is degraded, you might need to replace it. Ensure you use a compatible battery and follow safety guidelines during the replacement process.
- Firmware Update: Some advanced powerbanks come with firmware that can be updated. Check the manufacturer's website for any available updates that might fix bugs or improve performance.
Preventive Measures
- Avoid Overcharging: To prevent overcharging, unplug the power bank once it's fully charged. Some power banks have built-in overcharge protection, but it's still a good practice to monitor charging.
- Use Quality Accessories: Always use high-quality cables and adapters. Cheap or counterfeit accessories can damage your power bank and reduce its lifespan.
- Store Properly: Store your power bank in a cool, dry place. Avoid exposing it to extreme temperatures, which can damage the battery.
- Regular Maintenance: Periodically check your power bank for any signs of wear and tear. Clean the ports and inspect the battery for any swelling or leaks.
Regular upkeep and correct use will keep your DIY power bank reliable and long-lasting. Address common issues and follow troubleshooting tips to maintain efficiency.
FAQs About DIY Charging Powerbanks
Discover essential FAQs about DIY charging powerbanks. Learn about assembly, components, and safety tips to build your own portable charger.
Yes, you can customize your DIY powerbank in several ways:
Capacity: Use more or fewer batteries to adjust the capacity.
Output ports: Add multiple USB ports to charge several devices at once.
Design: Choose an enclosure that suits your style and needs.
The time it takes to build a DIY powerbank can vary based on your experience and the complexity of the design. For a basic powerbank, it might take a few hours, including gathering materials, soldering components, and assembling the enclosure. More complex designs with additional features like multiple output ports or fast charging capabilities could take longer.
Building a DIY powerbank offers several benefits:
Customization: Tailor the powerbank to your specific needs, such as capacity and number of ports.
Cost-effective: Often cheaper than buying a high-capacity commercial powerbank.
Learning experience: Gain valuable knowledge about electronics and battery management.
Satisfaction: Enjoy the accomplishment of making a functional device.
Yes, you can use recycled batteries, but there are important considerations:
Condition: Ensure the batteries are in good condition and have not been damaged.
Capacity: Test the capacity of each battery to ensure they are still viable.
Safety: Use a battery protection circuit to prevent overcharging and short circuits.
To make your DIY powerbank more environmentally friendly, consider the following tips:
Use recycled materials: Opt for recycled or repurposed batteries and components where possible.
Energy-efficient components: Choose components that are energy-efficient to reduce overall power consumption.
Proper disposal: Dispose of any electronic waste responsibly by taking it to a certified e-waste recycling facility.
Solar charging: Incorporate a solar charging module to harness renewable energy for charging your powerbank.
Conclusion
Building a DIY fast-charging power bank is not only a rewarding project but also a practical one. With the right components, attention to detail, and a bit of patience, you can build a reliable power bank tailored to your needs. Whether for daily use or travel, this compact and efficient power bank has become my go-to, and I'm excited to retire my old, heavy one. Happy building, and stay safe with your DIY projects!


