Making a DIY pedalboard for your guitar can greatly enhance your ability to manage effects and sound quality. Building a homemade pedalboard is not only cost-effective but also allows you to customize it to your specific needs. With simple materials and tools, you can craft a reliable DIY pedal board that keeps your pedals organized and easily accessible during your practice sessions or performances.

In the next section, we will guide you step-by-step through the process of making your own DIY pedalboard. We'll cover everything from gathering the materials to the final assembly. This guide is detailed and easy to follow, ensuring you get the best results without unnecessary complications.
Why a Custom Pedalboard?
As a guitarist, I found myself constantly tweaking my setup, looking for that perfect sound. However, the limitations of commercial pedalboards left me yearning for a more personalized solution – something that could house my growing collection of pedals in a way that not only looked great but was highly functional too. That's where the idea to build my own custom pedalboard came from.
Materials: What You Need and Why
- Wood: I opted for rough cut lumber for its natural beauty and durability. You need a sturdy base and frame for your pedalboard to withstand the rigors of use.
- Plywood (Half Inch): For the top of the pedalboard, where the pedals sit. It's lightweight yet strong enough to support the pedals.
- Table Saw & Jointer: Essential for cutting the wood to size and ensuring all sides are smooth and even.
- Tapering Jig: To cut the sides of the pedalboard at an angle, providing a sleek, ergonomic design.
- Router & Roundover Bit: To soften the edges of the wood, making it sleeker and safer to handle.
- Box Joints or Similar Joinery Tools: For assembling the frame. Box joints offer a strong, attractive joinery method.
- Sandpaper (Various Grits): For smoothing the wood before and after applying the finish.
- Danish Oil & Polyurethane: To protect and enhance the wood's natural beauty.
- Pedalboard Accessories (from West Coast Pedalboard or Similar): Including power supplies, wiring harnesses, and pedal attachments.
- Miscellaneous Tools: Such as clamps, drill, jigsaw, and Forstner bits.
Step by Step Instructions
Learn how to build a pedalboard with our step-by-step instructions, from preparing wood to final assembly. Perfect guide for DIY enthusiasts and musicians.
Step One: Preparing the Wood
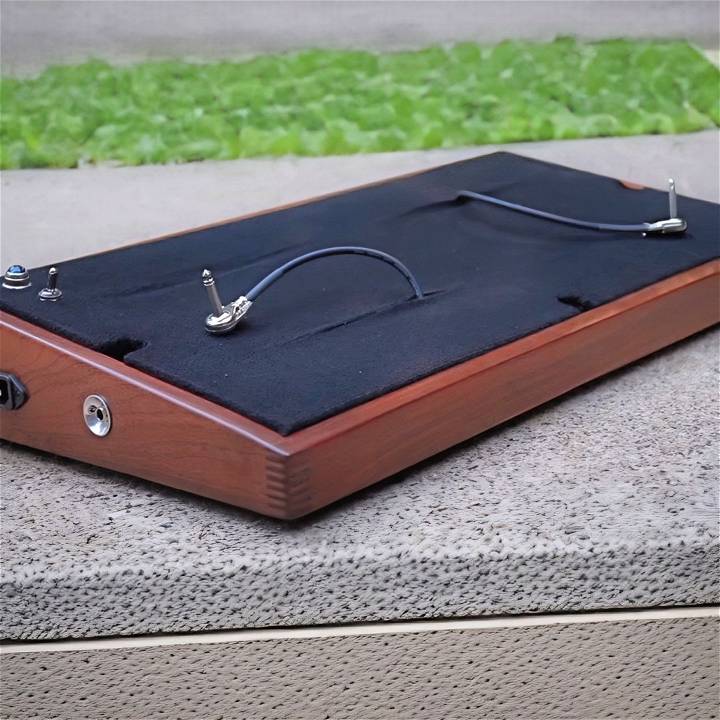
After watching a few tutorials and absorbing as much guidance as I could, I started by cutting my lumber to rough size. The first real challenge came with milling the wood. I wanted my pedalboard to have a gentle slope, so I marked the ends for the back and front height, then used my tapering jig to cut the wood accordingly. This step was crucial in achieving a professional look and ergonomic functionality.
Step Two: Assembling the Frame
I was set on having strong, visually appealing joints, so I opted for box joints. While this required making a reliable jig and a lot of practice cuts, the result was worth every effort. I glued and clamped the frame, wiping away any excess glue to prevent messes after drying.
Step Three: The Pedalboard Top
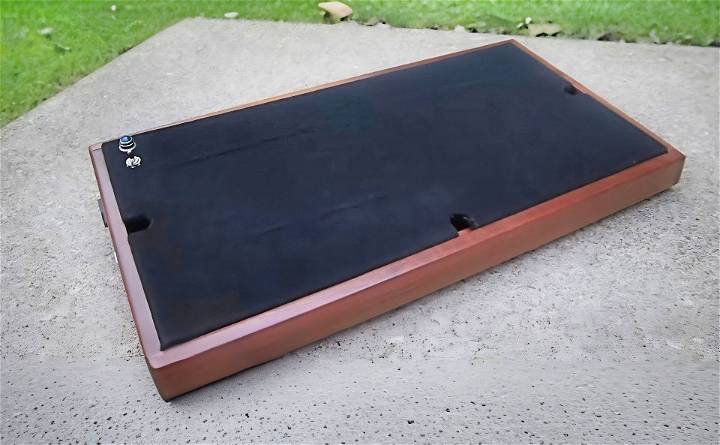
Cutting the top from half-inch plywood was straightforward. I traced the outline of the assembled frame and used a circular saw to cut it. To ensure the pedal platform matched the slope of the frame, I mirrored the frame's angle with my table saw for one edge of the plywood top.
Step Four: Finishing Touches
Before final assembly, I used a router to round the edges of the pedalboard, enhancing its aesthetics and safety. I filled any imperfections with a paste made from sawdust and glue, then sanded the entire frame up to 600 grit for a smooth finish. After applying Danish oil and polyurethane, the wood's grain popped beautifully.
Step Five: Installing the Electronics
This part felt daunting at first, but using pre-assembled wiring harnesses and following the detailed instructions provided with my parts made it manageable. I drilled holes for the input, output, and power supply connections, meticulously ensuring that their placements were meticulously planned for easy access and efficiency.
Step Six: The Final Assembly
Reattaching the top with hinges allowed for easy access to the wiring underneath. I installed rubber feet on the bottom for stability and added a couple of magnets to keep the top securely closed.
Customization Ideas for Your DIY Pedalboard
Building a DIY pedalboard is not just about functionality; it’s also an opportunity to express your personal style and make your setup stand out. Here are some customization ideas that can help you personalize your pedalboard while keeping it practical and user-friendly.
Choose a Theme
Start by deciding on a theme that reflects your musical identity or aesthetic preferences. Whether it’s a vintage look, a futuristic design, or something that resonates with your favorite music genre, having a theme will guide your customization choices.
Color Schemes and Finishes
Select colors that match your theme. You can paint the board or use colored tapes to outline sections. Consider different finishes as well, such as matte, gloss, or textured coatings, to add a unique touch.
Decorative Elements
Add decorative elements like stickers, decals, or custom artwork. These can be band logos, album art, or any graphics that inspire you. If you’re artistically inclined, hand-paint designs or patterns onto the board.
LED Lighting
Install LED strips under the board or around the edges for a cool effect, especially useful in low-light environments. Choose from static lights or ones that change color and can be programmed to sync with your music.
Custom Knobs and Switches
Replace standard pedal knobs and switches with custom ones. There are many styles available, from vintage-looking knobs to glow-in-the-dark switches, which can enhance both the look and the feel of your pedals.
Velcro and Hook & Loop Tapes
Use colored Velcro or hook & loop tapes to secure your pedals. They come in various colors and can be a subtle way to add personality to your board while keeping everything in place.
Cable Sleeves
Organize your cables with sleeves or wraps that match your board’s color scheme. This not only looks tidy but also protects your cables from wear and tear.
Personalized Nameplate
Build a personalized nameplate with your name, band name, or any text that represents you. This can be attached to the front or side of the pedalboard.
Modular Sections
Consider building your pedalboard with modular sections that can be rearranged or swapped out. This allows for flexibility and the ability to update your setup easily as your needs change.
Balance personal expression and functionality for a great pedalboard. Make it look good and practical for performances. Keep it simple, focus on what’s important, and enjoy the process!

Cable Management Techniques
Good cable management is crucial for a DIY pedalboard. It ensures that your setup is not only tidy but also reliable during use. Here are some techniques to help you manage your cables effectively:
Use the Right Length of Cables
Avoid excess cable length, which can make a mess and increase the risk of signal loss or interference. Measure the distance between your pedals and use cables that are just long enough to connect them without much slack.
Choose Quality Cables
Invest in high-quality cables that are durable and provide good signal transmission. This can prevent noise issues and ensure that your pedals sound their best.
Label Your Cables
Use colored tape or labels to mark your cables. This makes it easy to identify which cable goes where, especially when you’re setting up or troubleshooting your pedalboard.
Employ Cable Ties and Clips
Secure your cables to the pedalboard with ties or clips. This keeps them in place and prevents them from tangling or getting damaged.
Route Cables Neatly
Plan the route of each cable so that it runs along the edges of the pedalboard or underneath it. This makes a cleaner look and reduces the chance of stepping on cables during a performance.
Use Patch Bays or Junction Boxes
Consider using a patch bay or junction box to minimize the number of cables running to and from your pedalboard. This can simplify connections and make your setup more portable.
Regular Maintenance
Check your cables regularly for signs of wear and tear. Replace any that are damaged to maintain the integrity of your signal chain.
Using these cable management tricks, your pedalboard will be functional, reliable, and visually appealing.
Power Supply Solutions
When building a DIY pedalboard, ensuring a stable and reliable power supply is key to performance and sound quality. Here’s a comprehensive guide to power supply solutions that will keep your pedals running smoothly.
Understanding Power Requirements
First, determine the voltage and current needs of your pedals. Most pedals require 9V, but some may need 12V, 18V, or even 24V. The current draw, measured in milliamps (mA), varies per pedal. Sum up the current requirements of all your pedals to find the total current needed.
Choosing the Right Power Supply
Select a power supply that meets or exceeds the total current requirement of your pedals. It should also offer the correct voltages for your setup. Look for isolated outputs to prevent ground loops and noise.
Integrated Power
An integrated power solution, where the power supply is built into the pedalboard, can offer convenience and a clean setup. You’ll need an AC inlet, like an IEC or Edison style, and a power strip or distribution block to connect all your pedals.
Battery Power
For a portable option, consider using a rechargeable battery pack. This can eliminate noise from poor wiring and gives you the freedom to set up anywhere without needing a power outlet.
DIY Options
If you’re handy with tools, you can make your own power supply using a drill battery and a voltage converter to step down the voltage to the required level. This is a cost-effective solution that also provides portability.
Daisy Chain vs. Isolated Power
A daisy chain can power multiple pedals from a single power supply output, but it may introduce noise. Isolated power supplies have separate outputs for each pedal, which can reduce noise and provide cleaner power.
Future-Proofing
Consider a power supply that offers more outputs and current capacity than you currently need. This allows for adding more pedals without needing a new power supply.
Maintenance
Regularly check your power supply and cables for any signs of wear or damage. A well-maintained power supply is essential for the reliability of your pedalboard.
Following these guidelines ensures an effective and customized power supply for your DIY pedalboard. A good power supply is the foundation of a great setup.
Maintenance and Troubleshooting
Keeping your DIY pedalboard in top shape is essential for ensuring it performs reliably at every gig. Here’s a straightforward guide to maintaining your pedalboard and troubleshooting common issues.
Regular Cleaning
Dust and dirt can accumulate on your pedalboard and cause problems with connections and pedal function. Use a soft brush or cloth to gently clean the surface of your pedals and the board regularly.
Check Connections
Loose cables can lead to signal loss or unexpected noise. Periodically check all input and output jacks on your pedals and tighten them if necessary. Also, make sure that all patch cables are fully inserted and secure.
Inspect Power Supplies
A faulty power supply can cause a range of issues from noise to pedal failure. Inspect your power cables and adapters for any signs of damage. If you use batteries, check them often and replace them before they run out.
Test Pedals Individually
If you’re experiencing issues, test each pedal individually to isolate the problem. This can help you determine whether it’s a single pedal causing the issue or something more systemic.
Update Firmware
For digital pedals, manufacturers may release firmware updates that fix bugs or improve performance. Check the manufacturer’s website for updates and follow their instructions to install.
Troubleshoot Noise
Noise can come from various sources. Use isolated power supplies to reduce the chance of ground loops. If the noise persists, try rearranging your pedals or using higher-quality cables.
Address Signal Loss
If your signal is weak or cutting out, check for damaged cables or solder joints. Also, consider whether you have too many pedals in your chain, as each one can reduce the signal strength.
Keep Spare Parts
Having spare cables, power adapters, and even a backup pedal or two can save you from unexpected issues during a performance.
Keep your DIY pedalboard in top shape with regular maintenance and troubleshooting. This ensures it's always ready and extends its lifespan while preventing performance issues.
FAQs About DIY Pedalboard
Explore the most common faqs about DIY pedalboard design, setup, and best practices to enhance your guitar experience.
A DIY pedalboard is a custom-built platform where you can organize and connect your guitar effect pedals. Building one allows you to tailor the size, shape, and features to your specific needs, often resulting in a more organized and efficient setup than pre-made options.
Consider the number of pedals you have, the space you need between them, and whether you plan to expand your collection. Measure the combined width of your pedals and add extra space for cabling and foot access. Remember, it’s better to have a little extra room than not enough.
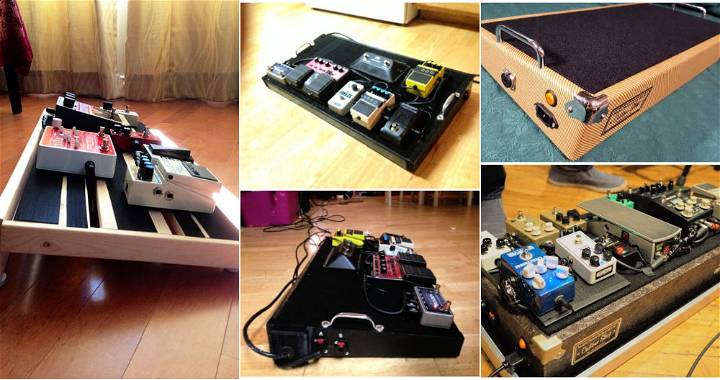
Yes! There are many simple designs that require minimal tools. For example, you can repurpose an old skateboard or use pre-cut wood and attach pedals with zip ties or Velcro. There are also pedalboard kits available that include all the necessary parts and instructions.
Most pedals run on 9V power, so you’ll need a power supply that can accommodate the number of pedals you have. You can choose a daisy chain for a budget-friendly option or an isolated power supply for more reliable power with less noise interference.
Organizing your pedals on the pedalboard involves considering the signal flow and the type of music you play. Start with your tuner and wah pedals, followed by any compressors. Next, add distortion and overdrive pedals, then modulation effects like chorus and flanger. Finally, place delay and reverb pedals at the end of the chain. This setup ensures a clean signal and reduces noise interference. Use patch cables to connect the pedals and arrange them so you can easily access each one during a performance.
Reflections
Wrapping up, making a DIY pedalboard for your guitar can be a rewarding experience. Not only does a DIY pedal board save you money, but it also allows you to customize the setup exactly to your needs. Take the time to plan and execute your design, and you'll enjoy a personalized and efficient pedalboard that enhances your playing.


