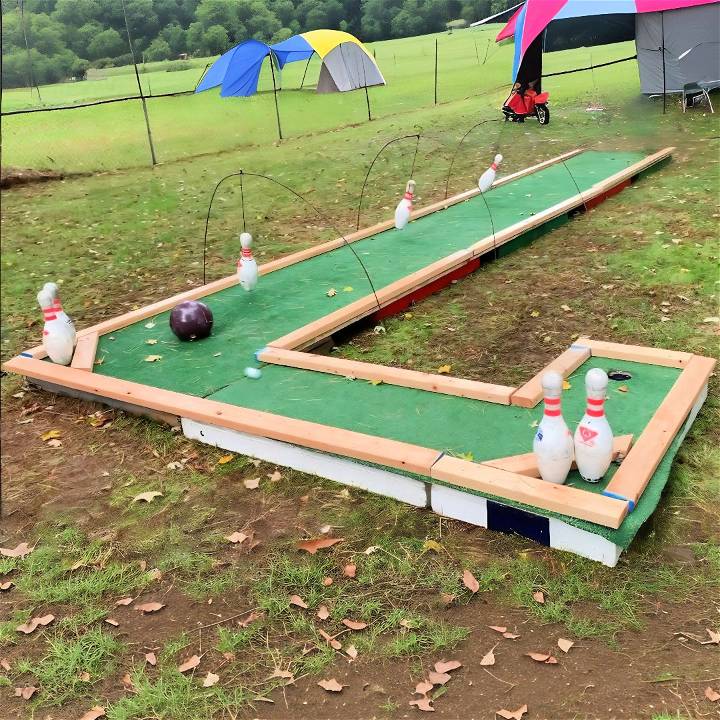
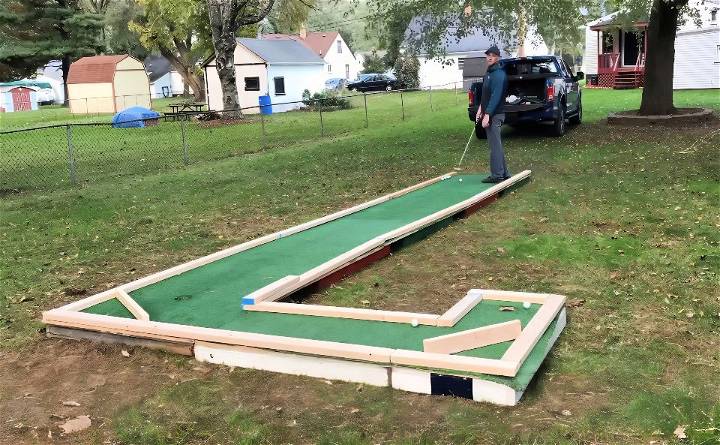
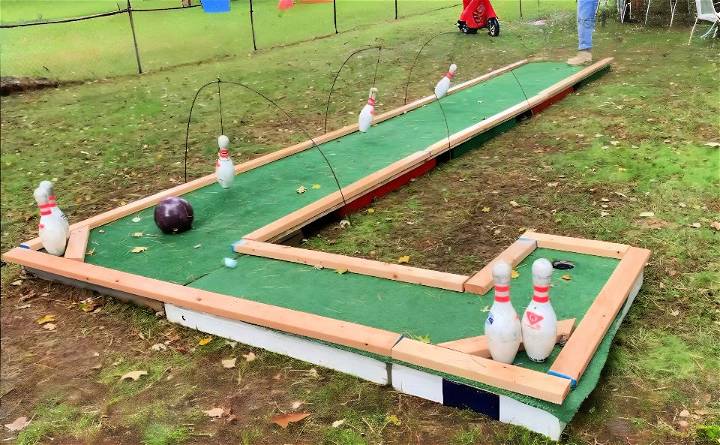
Making a DIY mini golf course at home is a fun and engaging way to spend your free time. This project not only offers entertainment but also allows you to use your creativity. You don't need special skills or expensive materials. With some basic supplies like cardboard, glue, and paint, you can start building your own mini golf course in no time.
Building a homemade DIY mini golf course involves a few simple steps. First, design your course layout with various obstacles that add fun challenges. Next, gather your materials and start assembling the pieces. Ensure the course is stable and safe for everyone to enjoy. Once complete, invite your family and friends to test out the course and enjoy a mini-golf game.

Learn how to make a DIY mini golf course with our easy step-by-step guide. Perfect for family fun and home entertainment.
Materials Needed
Before we dive into the construction, let's gather everything you need. Here are the materials and why they're important:
- PVC Pipes: These will serve as the walls and barriers for your course.
- Carpet or Artificial Grass: Provides a smooth, low-friction surface for the golf balls.
- Golf Balls: Essential for playing the game.
- Putters: For hitting the balls.
- Plastic Cups: To act as the holes.
- Saw: To cut the PVC pipes to the desired lengths.
- Duct Tape: To secure the PVC pipes together.
- Sandpaper: To smooth out any rough edges on the pipes.
- Markers or Paint: For customization and decoration.
Each of these materials plays a crucial role in building a mini golf course that's both functional and fun.
Step by Step Instructions
Build your own mini golf course with our step-by-step guide. From planning to testing, make a fun DIY project for friends and family!
Step 1: Planning Your Course
First, you'll want to plan out your course. I found that sketching a rough design helped me visualize the setup. Decide where each hole will go, and plan how challenging you want the course to be. You can design straight shots, gentle curves, or even complex zig-zags.
- Pro Tip: Keep in mind the space you have available. A typical backyard can fit around six to nine holes comfortably.
Step 2: Cutting the PVC Pipes
Next, cut your PVC pipes to form the boundaries of each hole. I used a basic hand saw for this task. If you're not comfortable with a saw, you can get pre-cut lengths at a hardware store.
- Important! Always measure twice and cut once. This will save you from wasting materials.
Step 3: Assembling the Course
Lay out the cut PVC pipes according to your design. Use duct tape to secure the corners and joints. This makes the walls that will guide the golf balls toward the cups.
Step 4: Placing the Carpet or Artificial Grass
Roll out your carpet or artificial grass over the area where you want each hole. Cut the material to fit within the PVC pipe boundaries. This will give you a smooth surface to play on.
- Additional Touch: Use double-sided tape to secure the carpet or grass to the ground. This prevents it from slipping while you're playing.
Step 5: Setting Up the Holes
Place a plastic cup at the end of each hole. These will act as the targets for your golf balls. Make sure they're firmly seated on the ground. I found that a little bit of tape helped keep them in place.
- Personal Experience: I experimented with different cup sizes and found that standard drinking cups worked best for my course.
Step 6: Customizing Your Course
Now for the fun part—customizing your course! Use markers or paint to decorate the PVC pipes and carpet. Add obstacles like small ramps, bridges, or tunnels for added challenge.
Creativity Counts: The more creative you get, the more fun your course will be. I drew some fun designs on the pipes and even added a mini windmill as an obstacle.
Step 7: Testing Your Course
Before inviting everyone over, test out your course to ensure everything works correctly. This is your opportunity to make any necessary adjustments.
- Key Takeaway: Make sure the carpet is smooth and that the PVC pipes are securely fastened to avoid disrupting gameplay.
Step 8: Inviting Friends and Family Over
Now it's time to enjoy the fruits of your labor. Invite your friends and family over for a fun round of backyard mini golf.
Special Tip: Consider setting up a small leaderboard and keeping score to add a little competitive spirit to your game.
Maintenance Tips
- Clean Regularly: Keep your golf course clean to ensure a smooth playing surface.
- Check for Wear and Tear: Regularly inspect the PVC joints and carpet for any signs of damage.
- Store Materials: If you're not using the course frequently, you can disassemble the PVC pipes and store them to prolong their life.
Custom Obstacle Ideas
Making obstacles for your mini golf course is where you can let your imagination run wild and add a personal touch to the game. Here are some ideas for custom obstacles that are fun, challenging, and easy to make:
- The Classic Windmill: A timeless favorite, the windmill obstacle requires players to time their shot perfectly to avoid the rotating blades. You can build a simple windmill from cardboard or wood and use a small motor to make it turn.
- The Loop-de-Loop: For a bit of a thrill, include a loop-de-loop made from a bent PVC pipe or a flexible garden hose. It's a test of speed and precision, as the ball needs enough momentum to complete the loop without flying off course.
- The Maze: Construct a maze using bricks, stones, or wooden blocks. The ball must navigate through the twists and turns, providing a strategic challenge to players.
- The Jump: Add a small ramp to make a jump obstacle. Players will need to hit the ball hard enough to clear the gap but not too hard that it goes out of bounds.
- The Tunnel: Use a section of drainpipe or a cardboard box to make a tunnel. The mystery of where the ball will emerge adds excitement to the game.
- The Water Hazard: Incorporate a water feature by digging a shallow pit and lining it with plastic. Fill it with water, and if the ball lands in it, a penalty stroke is added.
- The Sand Trap: A sandbox can serve as a sand trap. It's harder to get the ball out of the sand, making it a tricky obstacle to navigate.
- The Bumpers: Place rubber or foam bumpers in strategic locations. They will bounce the ball in unexpected directions, adding an element of surprise.
Variety and creativity make a great mini golf course. Combine different ideas and make your own obstacles.

Technology Integration
In the world of mini golf, technology has become a game-changer, enhancing the player's experience with innovative features. Here's how you can integrate the latest tech into your mini golf course:
- Interactive Course Design: Incorporate sensors and LED lighting into your course design. These can react to the ball's movement, making a dynamic play environment. Imagine a tunnel that lights up or plays a sound when a ball rolls through it.
- Cloud-Based Technology: Use cloud-based systems to remember players' past games. This allows for a personalized experience each time they play, as the system recalls their previous scores and preferences.
- Real-Time Scoring: Say goodbye to pencil and paper. Install a system that tracks the ball and provides instant feedback on players' performance. Screens at each hole can display scores and offer tips for improvement.
- Customization and Personalization: Give each player a unique golf ball synced to their profile. This ball can track their strokes, completed holes, and even award bonus points for hitting specific targets.
- Virtual and Augmented Reality: For indoor courses, consider adding virtual or augmented reality elements. This can transform the physical space into an interactive gaming experience, blending the real with the digital.
- Digital Connectivity: Implement apps for booking and score tracking. These apps can provide weather updates and allow players to book tee times easily, making the game more accessible.
Integrate these technologies to enhance fun and streamline your mini golf course. Embrace tech and see your course thrive!

FAQs About DIY Mini Golf Course
Discover answers to common questions about making a DIY mini golf course. Find tips, materials, and step-by-step guides for your backyard project!
Start by measuring your available space to determine the number of holes you can fit. Sketch a rough layout on paper, considering pathways between holes. You can also decide on a theme, like pirates or jungle, to add extra fun.
Yes, incorporating elements of nature can enhance your course. Use old tree stumps, branches, or even a small pond as natural obstacles. This not only adds challenges but also creates an eco-friendly environment.
Get creative with recycled materials like old tires, wine bottles, or metal pipes to make unique obstacles. You can also build platforms or use a treehouse as a starting point for a hole to add verticality to your course.
If you choose synthetic turf, maintenance is low; just keep it clean and free of debris. For natural grass, regular mowing, watering, and weeding are necessary. Portable courses are the easiest to maintain, as they can be packed away when not in use.
To make your mini golf course enjoyable for everyone, consider varying the difficulty of the holes. Include simple, straight paths for younger players and more complex designs with curves and obstacles for adults. Adding interactive elements like movable parts or themed decorations can also enhance the fun factor. Remember to keep safety in mind, ensuring all elements are securely installed and pathways are clear.
Conclusion
Wrapping up, making your own DIY mini golf course is a fantastic project. It combines fun, creativity, and quality time with loved ones. By following the steps in this article on how to make a DIY mini golf course, you can easily set up an entertaining activity in your backyard. Embrace your imagination, gather your materials, and start building your homemade DIY mini golf course today!


