Making a DIY house number sign is a fantastic way to enhance your home's curb appeal while adding a personal touch. With a few materials and some creativity, you can craft a unique and eye-catching house number sign that stands out. This project not only shows off your style but also makes it easier for guests and delivery drivers to find your home.
In the next section, we'll guide you through the process of making your own DIY address sign. We'll cover everything from selecting the right materials to the final touches.
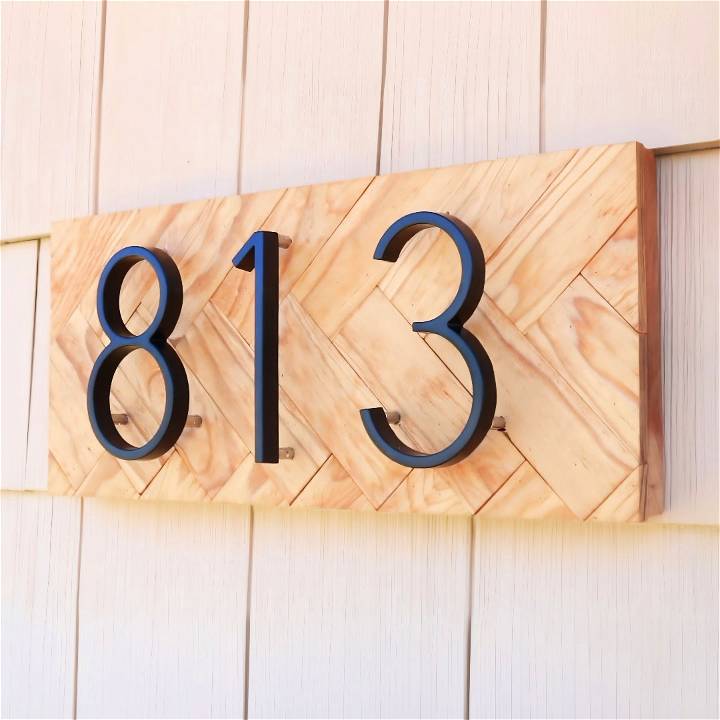
Build an attractive DIY house number sign with our step-by-step guide. Perfect for enhancing curb appeal and adding a personal touch to your home.
Materials You'll Need
Before diving into the process, let's gather all the materials you'll need:
- 1 by 8 Board: This forms the base of your sign. A sturdy, weather-resistant wood is ideal.
- 1 by 2 Boards: These build the herringbone pattern. Again, choose high-quality wood.
- Saw (Miter Saw Preferred): Necessary for cutting precise pieces.
- Sandpaper: Used to smooth the wood before staining.
- Wood Stain and Sealant: To weatherproof and beautify the wood.
- Sponge Brush or Paintbrush: For applying stain and sealant.
- Speed Square and Straightedge: Important for accurate measurements and angles.
- Wood Glue: To secure the pieces in place.
- Pin Nailer or Brad Nailer: For attaching the herringbone pieces.
- Picture Hanging Hooks: To hang your finished sign.
Each material is essential for achieving a professional and long-lasting result. Skipping on any could compromise the durability and aesthetics of your sign.
Step by Step Instructions
Learn how to make a stunning DIY house number sign with step-by-step instructions. Prepare, sand, assemble, finish, and hang your custom sign easily!
Step 1: Prepare the Base Board
First, you'll want to cut the end of your 1 by 8 board to square it up. This ensures a precise and polished final look.
- Measure and Cut: My sign features three numbers, so I made it 16 inches long. Adjust the length based on the number of digits in your address. Use your saw to make the cut.
- Prepare the Herringbone Pieces: Take your 1 by 2 boards and cut them into 5-inch pieces. These will be used to form the herringbone pattern. Using a stop block here helps ensure all pieces are identical.
- Tip: You should get about 30 pieces from both boards. It might feel like cutting a thousand but stick with it!
Step 2: Sand and Stain the Wood
Sanding is crucial for a smooth finish. Sand down both the large base piece and every single 5-inch piece.
- Sand: Use sandpaper to smooth out any rough edges. Yes, every single piece! It might seem tedious, but it's totally worth it.
- Stain and Seal: Once everything is sanded, weatherproof all the pieces. Pour your finish into a small container for easy access. Use a sponge brush or a paintbrush to coat every side and nook of each piece. This step is key to ensuring your sign can withstand the elements.
- Pro Tip: Don't rush the staining process. Let each piece fully dry before proceeding.
Step 3: Layout and Assemble the Herringbone Pattern
Now comes the fun part – crafting your design.
- Find the Center: Use a straightedge to mark the center of your baseboard. This will help you align everything symmetrically.
- Mark Angles: Use a speed square to build a 45-degree angle at the left edge of the board. The first two pieces are critical, so make sure they're perfectly aligned.
- Place the Pieces: Line up your 5-inch cut pieces according to the template. The first two pieces set the tone for the rest of the pattern, so take your time here.
- Glue and Nail: Once happy with the layout, start gluing and nailing the pieces to the board. Use a pin nailer for a cleaner look, but a brad nailer works too.
- Note: Don't stress too much about perfect alignment. Wood glue and nails will keep everything in place.
Step 4: Finishing Touches
After the main pattern is complete, you'll likely have some overhangs and gaps to deal with.
- Trim the Excess: Use your miter saw to trim off any excess pieces hanging over the edges. Be patient here to avoid cutting too much.
- Fill Gaps: Follow the design and fill in any remaining gaps with smaller pieces. Glue and nail these down as well.
- Final Weatherproofing: Apply weatherproofing sealant to the exposed edges of the wood to ensure complete protection.
Step 5: Add the Address Numbers and Hang
The last step is to add your house number and hang the sign.
- Attach Numbers: Follow the mounting instructions for the address numbers you purchased to attach them securely to the sign.
- Add Hooks: Apply picture-hanging hooks to the back of your sign to make it easy to hang.
- Mount on Your House: Find the perfect spot on the front of your house and hang your sign proudly.
- Tip: Ensure it's at a visible height and angle for best curb appeal.
Design Customization Ideas
When it comes to making a DIY house number sign, the design is key to ensuring it reflects your personal style and complements your home. Here are some ideas to inspire your creativity:
- Choose a Theme: Start by deciding on a theme that resonates with your personal taste. Whether it's modern minimalism, classic elegance, or rustic charm, your theme will guide your design choices.
- Color Coordination: Select colors that match or contrast nicely with your home's exterior. For a harmonious look, use shades from the same color family as your house paint. For a bold statement, choose contrasting colors that stand out.
- Material Matters: Consider the durability and aesthetics of different materials. Wood offers a traditional feel and can be painted or stained. Metal, such as wrought iron or brushed steel, provides a sleek, modern look. Acrylics can be fun for a contemporary design and are weather-resistant.
- Font and Size: The font style of your numbers can significantly impact the sign's look. Opt for clean, readable fonts for a modern home, or go for cursive or decorative fonts for a more classic or whimsical vibe. Ensure the size is large enough to be seen from the street.
- Embellishments: Add decorative elements like borders, motifs, or images that reflect your interests or the home's character—for example, floral patterns for a cottage-style home or geometric shapes for a modern abode.
- Lighting: To make your house number visible at night, consider installing backlighting or spotlighting. Solar-powered lights are an eco-friendly option.
- DIY Techniques: Use stencils for precise shapes and numbers or freehand for a more personal touch. Mosaic tiles can add color and texture, while repurposed materials like driftwood or vintage metal pieces can give your sign a unique twist.
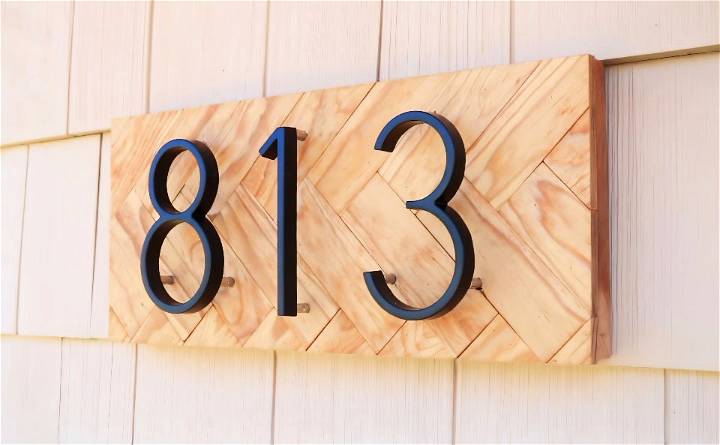
Build a functional house number sign that reflects your personality and welcomes visitors. Keep it simple, enjoy the process, and express yourself!
Troubleshooting Common Issues
When crafting a DIY house number sign, you might encounter a few hiccups along the way. Here's how to solve some of the most common issues:
Paint Problems:
- Bleeding: If paint bleeds under your stencil, use less paint on your brush or sponge and ensure the stencil is firmly adhered to the surface.
- Peeling: To prevent peeling, apply a primer before painting, especially on non-porous surfaces like metal or plastic.
Material Mishaps:
- Wood Splitting: When screwing into wood, pre-drill holes to avoid splitting. Choose screws appropriate for the wood's thickness.
- Metal Bending: If working with thin metal, support it from behind when hammering or drilling to prevent warping.
Adhesive Issues:
- Not Sticking: Make sure surfaces are clean and dry before applying adhesive. For heavier signs, use a construction-grade adhesive.
- Too Permanent: For a less permanent option, use removable mounting strips or hooks.
Visibility Concerns:
- Too Small: If numbers are too small to see from the road, increase their size or add a contrasting background to make them stand out.
- Blocked: Regularly trim any foliage that may grow to obstruct the view of your sign.
Weather Woes:
- Fading: Use UV-resistant paint or a clear UV-resistant sealant over your painted sign to combat sun fading.
- Moisture Damage: Ensure all materials are suitable for outdoor use and consider a weather-resistant coating.
Anticipate issues and address them to build a durable, attractive DIY house number sign. Patience and detail are key.
FAQs About DIY House Number Sign
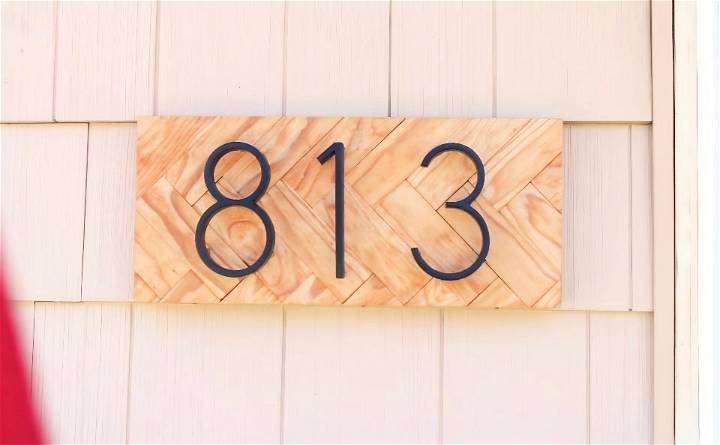
Discover everything about DIY house number signs with our comprehensive faqs, from materials to installation tips.
To make your house number sign stand out in the dark, consider using reflective paint or numbers that glow in the dark. This will enhance visibility and ensure your house can be easily found after sunset.
You can add personality to your house number sign by using unconventional materials like mosaic tiles, pebbles, or even glass beads. For a more natural look, integrate your house number into a flowerpot or planter.
For a damage-free option, use hanging strips or hooks designed for outdoor use. These solutions allow you to mount your sign securely without leaving marks or holes in your wall.
To protect your sign from the elements, apply a weather-resistant sealant or consider using materials specifically suited for outdoor use. Regular maintenance, such as cleaning and reapplying sealant, can also extend the life of your sign.
Yes, you can avoid drilling into brick by using no-hole clips or brick clips. These clips can securely attach to the brick, allowing you to hang your sign without permanent alterations to your home's exterior.
Conclusion
Wrapping up, making a DIY house number sign can significantly enhance your home's curb appeal. Whether you opt for a classic or modern design, this project is a fantastic way to add a personal touch to your home's exterior. These DIY address signs not only help visitors find your home easily but also add a unique charm. Start your next project today, and enjoy the satisfaction of crafting something remarkable for your home.


