Starting my DIY dollar tree jewelry organizer project was a great way to get organized without breaking the bank. I went to my local Dollar Tree, grabbed a few small containers, a tray, and some adhesive hooks. Putting it all together was easy and quick. Not only did I save money, but I also ended up with an organizer that perfectly fits my jewelry collection and keeps everything neat and accessible.
If you're looking to make a Dollar Tree jewelry box, I recommend using small trays or containers that match your style. It's all about customizing it to fit your needs and space. I found this project both practical and enjoyable, and I'm helping with this so you can make an organizer that's functional, affordable, and uniquely yours.
Materials Needed and Why
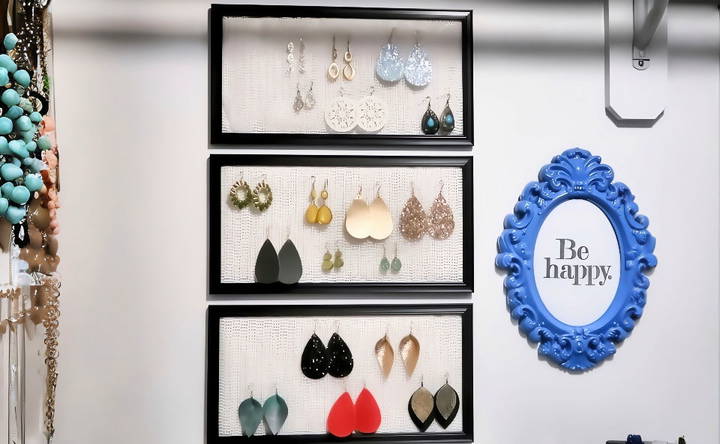
- Shelf Liner with Holes: Ideal for making an earring organizer because it's easy to hang earrings on.
- Frames: They provide the structure for the earring organizer and add aesthetic appeal.
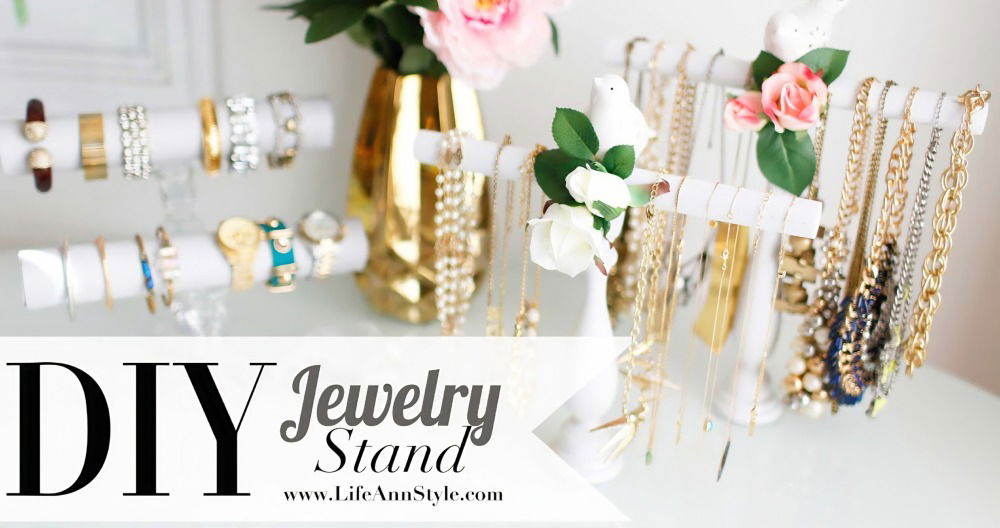
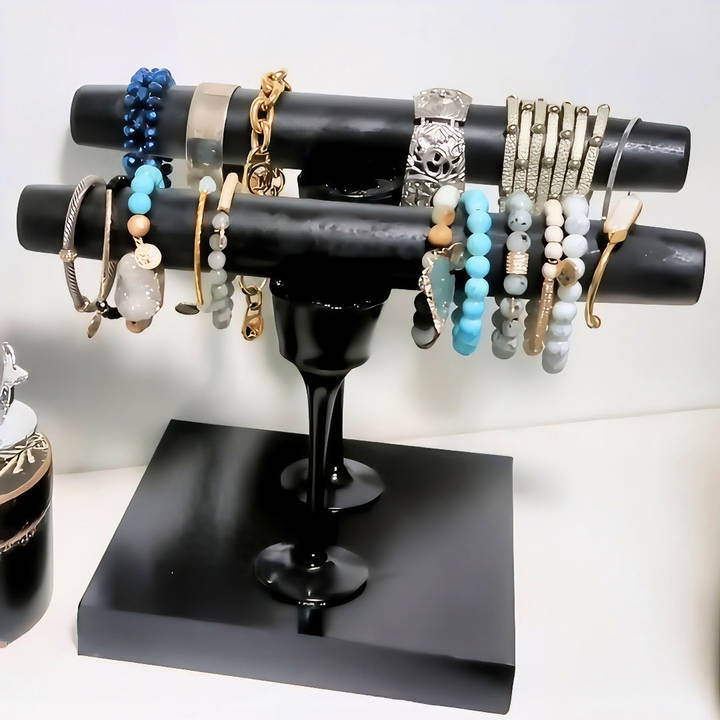
- Plaque Frame and Glass Containers: These materials are turned into a bracelet organizer, offering both functionality and a chic display.
- Rolling Pins: Used as rods for the bracelet organizer, perfectly sized to hold various bracelet types.
- Foam Board and Stuffing: Provide structure and volume inside the glass containers to support the rolling pins securely.
- E6000 Glue: A strong adhesive essential for ensuring the assembled pieces stay firmly together.
- Spray Paint: To give everything a unified, elegant look.
Step by Step Instructions
Learn how to make a DIY dollar tree jewelry organizer with easy step-by-step instructions for making earring and bracelet organizers and assembling the tray.
Making the Earring Organizer
- Disassemble the Frame: This involves removing the glass and backing, setting aside the main frame.
- Cut and Insert Shelf Liner: Measure and cut the shelf liner, ensuring it slightly overhangs the frame for flexibility. Insert it into the frame, secure with the backing, and remove the protective glass.
- Wall Attachment: Use command strips for easy mounting on the wall, making sure it's secure.
Crafting the Bracelet Organizer
- Preparation: Fill glass containers with stuffing and cover them with cutout foam board circles using E6000 for a solid base.
- Assembly: Paint the assemblies if desired. Glue the rolling pins atop the glass containers, forming a T-shape structure typical of a bracelet stand. Ensure everything is dry and sturdy before proceeding.
- Final Touches: Spray paint the entire structure for a uniform finish.
Assembling the Tray
- Layering: Start with the larger plate, add E6000 to the candle stand's bottom, and center it on the plate. Repeat with the second candle stand and the smaller plate on top.
- The Bowl: Finish by attaching the bowl on top with more glue. This not only adds levels to the tray but also variety to what it can hold.
Personal Touches and Additional Tips
- Personalization: I painted my frames to match my bedroom decor, adding a more personal touch to the project.
- Practicality: For the earring organizer, I realized placing it near my dressing mirror made accessorizing much quicker.
- Flexibility: The tray was a perfect catch-all for my rings and smaller items. I recommend placing it where you'll most likely remove your jewelry, like near the bed or in the bathroom.
Customization Ideas for Your DIY Dollar Tree Jewelry Organizer
Making a jewelry organizer that reflects your personal style and meets your storage needs can be both fun and rewarding. Here are some customization ideas to help you make a one-of-a-kind piece:
- Choose Your Color Scheme: Pick colors that match your room's decor, or go for contrasting shades to make your organizer stand out. You can paint the frames, trays, or holders with acrylic paint, which is affordable and easy to use.
- Add Decorative Elements: Personalize your organizer with embellishments like stickers, washi tape, or decorative paper. This is a great way to add a unique touch without spending much.
- Use Fabric or Paper Linings: Line the trays or drawers with fabric or decorative paper to protect your jewelry and add a pop of color. Choose materials that are easy to clean and replace.
- Incorporate Different Textures: Mix materials like metal, wood, and fabric to make visual interest and texture. For example, you could use burlap for a rustic look or velvet for a touch of luxury.
- Adjust the Size and Shape: Tailor the size and shape of your organizer to fit your space and the amount of jewelry you have. You can make multiple small organizers for different types of jewelry or one large one to hold everything.
- Add Lighting: If you're feeling adventurous, incorporate small LED lights to make your jewelry sparkle and to find items easily.
- Make Sections for Different Jewelry Types: Designate areas for necklaces, earrings, bracelets, and rings. This will help keep your jewelry organized and tangle-free.
- Include a Mirror: Attach a small mirror to your organizer. It's practical for trying on jewelry and adds a decorative element.
The key to a successful DIY project is to make it your own. Don't be afraid to experiment with different ideas until you find what works best for you.
Advanced Techniques for Your DIY Dollar Tree Jewelry Organizer
For those who are ready to take their DIY skills to the next level, here are some advanced techniques to enhance your Dollar Tree jewelry organizer:
- Modular Design: Make a modular system that allows you to add or remove sections as your jewelry collection grows. Use connectors like hooks and clasps to join different parts together, making your organizer expandable and versatile.
- Hidden Compartments: Incorporate hidden compartments into your organizer for valuable items. This can be achieved by making false bottoms in drawers or secret panels that blend in with the design.
- Rotating Mechanism: Add a rotating base to your organizer for easy access to all sides. This is particularly useful for organizers who hold a lot of items and can be made using a lazy Susan turntable.
- Magnetic Holders: Use magnetic strips to hold metal jewelry like earrings and bracelets. This not only keeps your jewelry in place but also turns it into a display piece.
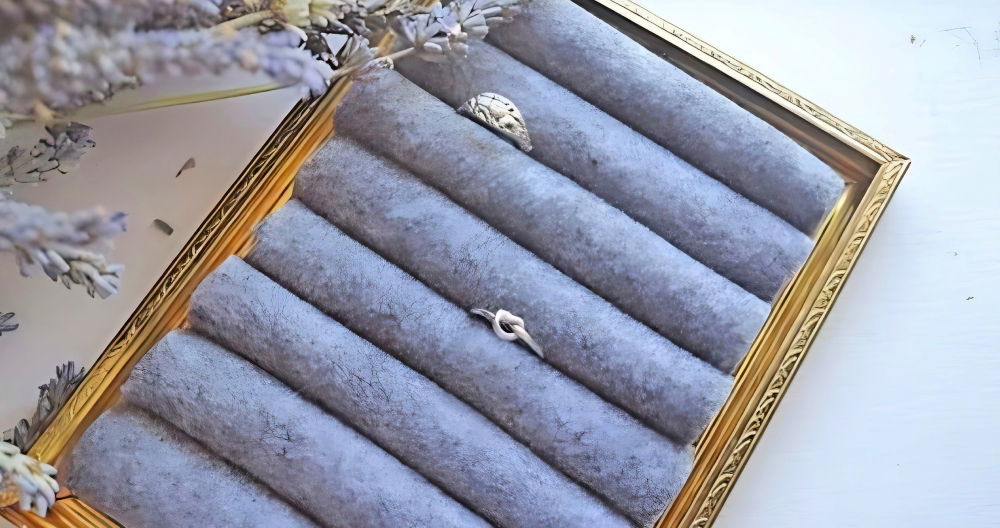
- Velvet Lining: Line drawers or trays with velvet to give your organizer a luxurious feel and to protect delicate jewelry from scratches.
- Carving and Woodworking: If you're skilled in woodworking, consider carving intricate designs into the wooden parts of your organizer or building custom wooden compartments.
- Electronics Integration: For a tech-savvy touch, integrate electronic components such as LED lights that turn on when a drawer is opened or small digital screens that display the time and date.
- Personalized Engravings: Use engraving tools to etch names, initials, or patterns onto the organizer. This adds a personal touch and can also make for a great gift.
- Adjustable Dividers: Install adjustable dividers in drawers to customize compartment sizes according to the jewelry you're storing.
Use these advanced techniques to craft a functional and eye-catching jewelry organizer. Prioritize safety with tools and materials, and enjoy bringing your creative vision to life.
Troubleshooting Tips for Your DIY Dollar Tree Jewelry Organizer
When crafting your DIY jewelry organizer, you might encounter a few hiccups along the way. Here are some troubleshooting tips to help you overcome common challenges:
Paint Not Adhering to Surface
- Solution: Ensure the surface is clean and dry before painting. Use a primer designed for the material you're working with, whether it's plastic, metal, or wood.
Drawers or Compartments Not Fitting Properly
- Solution: Measure twice, cut once. Double-check your measurements before cutting any materials. If you've already cut and there's a misfit, use sandpaper to gently adjust the edges.
Decorative Elements Peeling Off
- Solution: Use the right adhesive for the material. Hot glue works well for heavier items, while clear craft glue is better for paper or fabric.
Organizer is Unstable or Wobbly
- Solution: Balance is key. Make sure your base is sturdy and even. Add weight to the bottom or use double-sided tape to secure it to a surface.
Difficulty Hanging Organizer on Wall
- Solution: Use appropriate mounting hardware for the weight of your organizer. Drywall anchors or command strips can be helpful for heavier pieces.
Jewelry Tangles or Doesn't Fit
- Solution: Customize compartment sizes to fit your jewelry. Use rods for bracelets and necklaces, and smaller sections for rings and earrings.
Organizer Looks Cluttered
- Solution: Less is more. Don't overcrowd your organizer. Instead, display a selection of your favorite pieces and store the rest elsewhere.
Anticipate issues and know solutions to make a functional jewelry organizer.
FAQs About DIY Dollar Tree Jewelry Organizer
Discover frequently asked questions about the DIY dollar tree jewelry organizer. Get tips, tricks, and creative ideas for your perfect budget-friendly organizer.
An earring organizer can be made by using a picture frame and shelf liner from Dollar Tree. Simply remove the glass from the frame, replace it with the shelf liner, and secure it in place. This creates a perfect grid for hanging earrings.
Yes, you can create a wall organizer for necklaces, bracelets, and other accessories using a wire basket and picture hooks. Attach the hooks to your wall and hang the basket to store your jewelry in a way that saves space and is easily accessible.
For a budget-friendly solution, consider using foam rollers and a picture frame to create a ring and earring organizer. Cut the foam rollers to fit inside the frame, and then insert your rings and earrings into the foam. This keeps them organized and easy to find.
To give your jewelry organizer a stylish and unique look, use paint, washi tape, and other decorative materials available at Dollar Tree. For example, you can paint zip ties silver to blend in with a jewelry tower or use a decorative gift bag as a liner for a vanity catch-all. Get creative and personalize your organizer to match your style.
To make a jewelry stand for bracelets and watches, you can use a paper towel holder and napkin rings from Dollar Tree. Stack and glue the napkin rings along the height of the paper towel holder to make tiers. This stand will allow you to display and organize your bracelets and watches elegantly and within easy reach.
Conclusion
Wrapping up, making a DIY dollar tree jewelry organizer is a simple way to organize your jewelry without spending a lot. With just a few items and some creativity, you can make a custom piece that keeps your jewelry tidy and easy to find. You'll love the result!


