Solving a Rubik's Cube can seem like an overwhelming challenge, especially when you're staring at a jumble of colors that just don't seem to align. I remember feeling the same way when I first picked up a cube, turning it aimlessly without any idea of where to start. But with some persistence and a structured approach, I gradually learned how to solve it. In this guide, I will share my personal step-by-step journey to mastering the Rubik's Cube, so you can learn from my experience and solve it confidently too.
Getting Started: Understanding the Basics
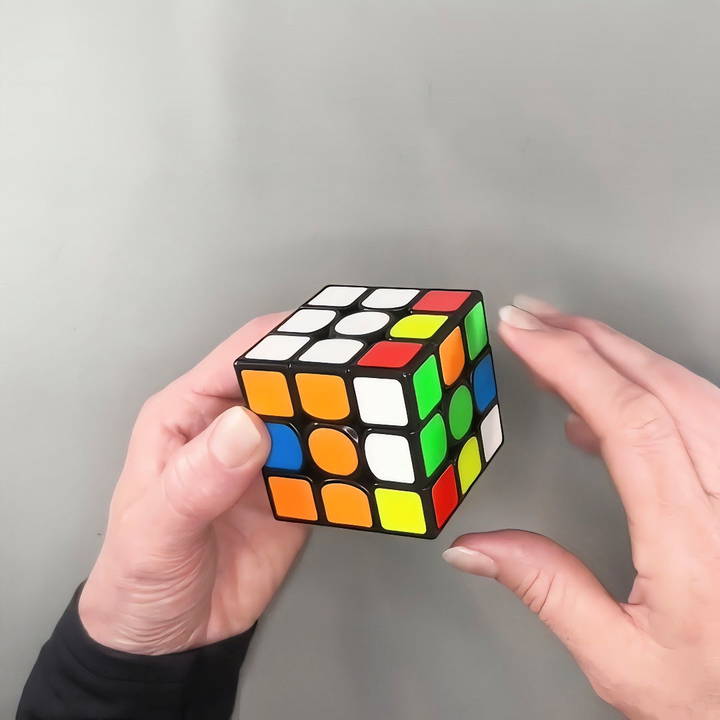
Before diving into the solution, it's important to familiarize yourself with the cube's structure. A standard Rubik's Cube has six faces, each with a different color. The center pieces are fixed and indicate the color that each face will be when solved. The other pieces move around, and they come in two types: edges (with two colors) and corners (with three colors).
When I first started, the hardest part was wrapping my head around how moving one piece affects the rest of the cube. This understanding is crucial because each turn you make has an impact on the entire cube. The key to solving the Rubik's Cube lies in recognizing patterns and sequences that allow you to manipulate the cube without disrupting what you've already completed.
Step by Step Instructions
Master solving the Rubik's cube with our step-by-step guide. From the first layer cross to the final corner permutation, learn all the essential tips and tricks.
Step 1: Solving the First Layer Cross
The first step in solving the Rubik's Cube is creating a cross on the first layer. This might sound complicated, but breaking it down into smaller tasks makes it manageable. I started with the white face as my first layer, but you can choose any color. Here's how I did it:
- Find the White Center Piece: Keep the white centerpiece on the top face of the cube. This piece doesn't move, so it serves as a guide.
- Locate Edge Pieces with White: Look for the white edge pieces (pieces with two colors, one of which is white) and figure out their current positions.
- Match Edge Pieces with Center Colors: Turn the layers so that each white edge piece is aligned with the corresponding center color on the side faces.
- Move Edge Pieces into Place: Use a series of simple turns to position each white edge piece around the white center, creating a cross. The goal is to align not just the white color but also the adjacent center colors on the sides.
At first, I struggled with this step because aligning the edges without disturbing the cross felt like a puzzle in itself. But with practice, I got the hang of it. Remember, patience and observation are key here.
Step 2: Solving the First Layer Corners
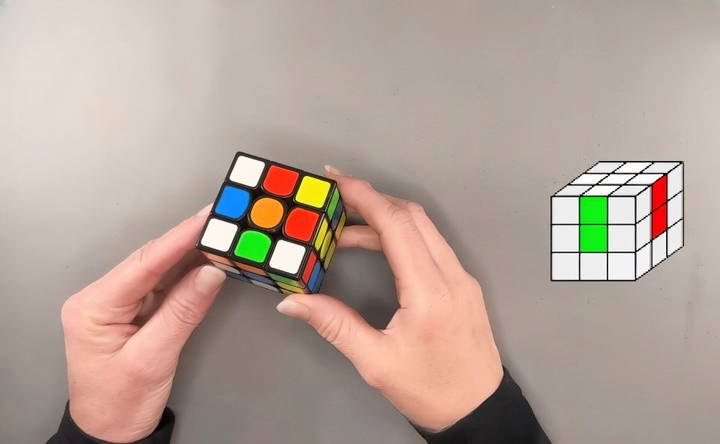
After solving the cross, the next step is to fill in the white corners to complete the first layer. This involves positioning the corner pieces that have white and two other colors.
- Identify the Corner Piece: Start with any corner piece that has white in it. For example, if you have a corner piece that is white, red, and green, find where this corner should be placed between the white, red, and green center pieces.
- Position the Corner Piece: Turn the bottom layer (the one opposite the white face) to bring the corner directly below its intended position.
- Insert the Corner Without Disturbing the Cross: Follow a set of moves (known as the Right-Hand Rule) to insert the corner piece into its correct spot without messing up the cross you've created. This involves rotating the right face up, moving the top face to the left, bringing the right face down, and then adjusting the top face back.
I found this part to be quite fun because you start to see the first layer of the cube come together. The key here is to repeat the process for each corner, carefully matching them with their respective center colors.
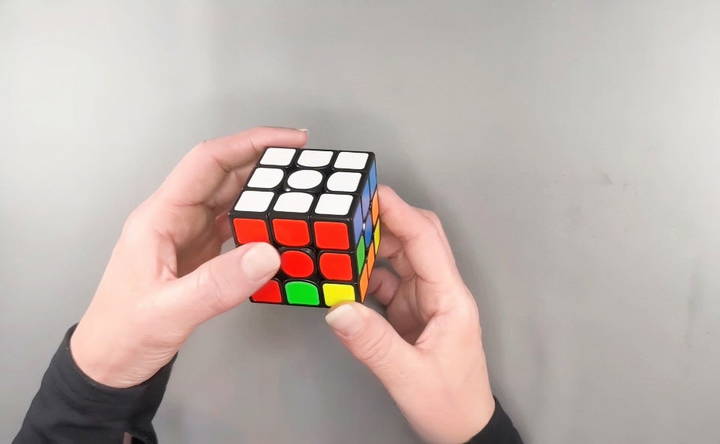
Step 3: Completing the Second Layer
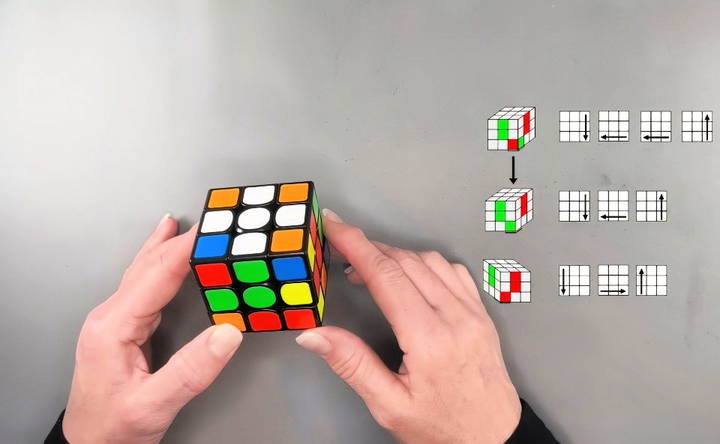
The next challenge is solving the middle layer edges. These are the edge pieces that do not contain the color yellow (assuming yellow is on the opposite side of white).
- Locate the Edge Pieces: Look at the bottom layer to find edge pieces without yellow. For example, if you find an edge piece that is red and blue, you'll want to place it between the red and blue center pieces.
- Align and Position the Edge: Turn the bottom layer until the edge piece forms a T-shape with the corresponding center color. If the color to be matched is on the right, follow the right-hand algorithm to slot it in place. If it's on the left, use the left-hand algorithm.
- Repeat for Each Edge: Continue this process for all four edges in the second layer.
For me, this was where I started to see a real pattern and rhythm. It felt like I was unlocking levels of a game as I placed each edge piece correctly.
Step 4: Solving the Third Layer Cross
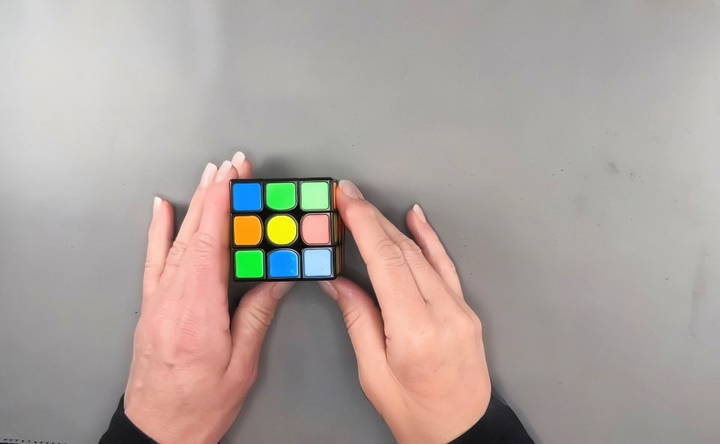
Now that the first two layers are complete, the final steps focus on solving the third layer. This begins with creating a cross on the top layer.
- Identify the Pattern on the Top Layer: The top layer will have four edge pieces that may form a dot (no edges in place), an L-shape, a line, or already a cross. Follow a specific set of moves (commonly referred to as the "F R U R' U' F' sequence") to get from the dot to the L, the L to the line, and the line to the cross.
- Align the Cross with Center Colors: Once the cross is formed, the next task is to align these pieces with their corresponding center pieces on the sides.
When I first got to this stage, I often got frustrated because one wrong turn could mean starting over. But the more I practiced, the more intuitive the moves became.
Step 5: Permutating the Third Layer Corners
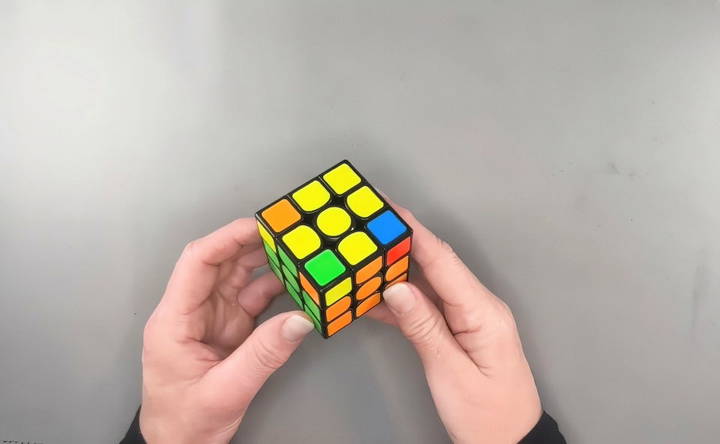
With the cross completed, the final step involves positioning the last four corners correctly.
- Find a Correctly Placed Corner: Look for a corner that is in the correct position (even if it's not oriented correctly). Hold the cube so this corner is in the front-right position.
- Cycle the Remaining Corners: Use a sequence of moves to cycle the other three corners around until all corners are in the correct position.
- Orient the Corners: The last move is to orient the corners so that all the yellow faces are on top. This involves a repetitive set of turns that will rotate each corner one at a time without disturbing the others.
This part of the process took me the longest to master. The sequences needed here felt less intuitive than the earlier steps, but once I understood the logic behind them, it became easier.
Tips and Tricks for Success
- Practice the Algorithms: Repetition is key. The more you practice each sequence of moves, the more natural they will become.
- Stay Calm and Patient: It's easy to get frustrated when things don't go as planned. Remember, each mistake is a learning opportunity.
- Use Visual Aids: Watching videos or using guides with clear visuals helped me understand where I was going wrong.
- Take Breaks: If you feel stuck, take a break. I found that stepping away and coming back with fresh eyes often helped me see the solution.
Advanced Techniques
Once you've mastered the basics of solving the Rubik's Cube, you might want to explore advanced techniques to improve your solving time and efficiency. Here are some popular methods and tips to take your skills to the next level.
CFOP Method
The CFOP method, also known as the Fridrich Method, is one of the most popular advanced techniques. It stands for Cross, F2L (First Two Layers), OLL (Orientation of the Last Layer), and PLL (Permutation of the Last Layer).
- Cross: Solve the cross on one face, usually the white face. This step is similar to the beginner method but focuses on efficiency.
- F2L (First Two Layers): Solve the first two layers simultaneously by pairing up corner and edge pieces. This step reduces the number of moves needed.
- OLL (Orientation of the Last Layer): Orient all the pieces of the last layer so that the top face is a single color. There are 57 different OLL algorithms, but you can start with the most common ones.
- PLL (Permutation of the Last Layer): Permute the pieces of the last layer to complete the cube. There are 21 PLL algorithms to learn.
Roux Method
The Roux Method is another advanced technique that focuses on block building and fewer moves. It consists of four main steps:
- First Block: Build a 1x2x3 block on one side of the cube.
- Second Block: Build a 1x2x3 block on the opposite side.
- CMLL (Corners of the Last Layer): Solve the corners of the last layer while preserving the blocks.
- LSE (Last Six Edges): Solve the remaining six edges to complete the cube.
ZZ Method
The ZZ Method is known for its efficiency and fewer rotations. It involves three main steps:
- EOLine: Orient all edges while forming a line on the bottom layer.
- F2L (First Two Layers): Solve the first two layers using block-building techniques.
- LL (Last Layer): Solve the last layer using OLL and PLL algorithms.
Tips for Improvement
- Practice Regularly: Consistent practice is key to mastering advanced techniques. Set aside time each day to practice.
- Learn Algorithms Gradually: Don't try to learn all algorithms at once. Start with the most common ones and gradually add more to your repertoire.
- Use a Timer: Track your solving times to monitor your progress and identify areas for improvement.
- Join a Community: Engage with other cubers online or in local clubs. Sharing tips and learning from others can accelerate your progress.
By incorporating these advanced techniques into your practice, you'll be able to solve the Rubik's Cube more efficiently and impressively.
Common Mistakes and How to Avoid Them
Solving the Rubik's Cube can be challenging, especially for beginners. Here are some common mistakes people make and tips on how to avoid them.
1. Not Understanding the Basics
- Mistake: Jumping into solving the cube without understanding the basic moves and notation.
- Solution: Take time to learn the basic moves (U, D, L, R, F, B) and the notation. This will make following algorithms much easier.
2. Incorrect Cross Formation
- Mistake: Forming the cross on the first layer incorrectly, which can complicate later steps.
- Solution: Ensure that the cross pieces not only match the center piece of the first layer but also align with the center pieces of the adjacent sides.
3. Ignoring Edge Orientation
- Mistake: Not paying attention to the orientation of the edge pieces, leading to confusion in later stages.
- Solution: Always check the orientation of the edge pieces as you solve the first two layers. This will save time and reduce errors.
4. Misplacing Corner Pieces
- Mistake: Placing corner pieces in the wrong position or orientation.
- Solution: Make sure each corner piece is in the correct position relative to the center pieces. Use algorithms to correctly orient and place them.
5. Overlooking Parity Errors
- Mistake: Encountering parity errors (especially in larger cubes) and not knowing how to fix them.
- Solution: Learn specific algorithms to handle parity errors. Practice these algorithms so you can quickly resolve these issues when they arise.
6. Rushing Through Algorithms
- Mistake: Trying to execute algorithms too quickly, leading to mistakes.
- Solution: Slow down and focus on accuracy. Speed will come with practice. Ensure you understand each step of the algorithm before moving on.
7. Not Practicing Regularly
- Mistake: Inconsistent practice, which leads to forgetting algorithms and techniques.
- Solution: Practice regularly, even if it's just for a few minutes each day. Consistency is key to improving your skills.
8. Skipping Advanced Techniques
- Mistake: Sticking to beginner methods and not progressing to advanced techniques.
- Solution: Once you're comfortable with the basic method, start learning advanced techniques like CFOP or Roux. This will improve your solving time and efficiency.
9. Ignoring Online Resources
- Mistake: Not utilizing online resources like tutorials, forums, and simulators.
- Solution: Take advantage of the wealth of online resources available. Watch video tutorials, join forums, and use simulators to practice and learn new techniques.
10. Lack of Patience
- Mistake: Getting frustrated and giving up too easily.
- Solution: Be patient with yourself. Solving the Rubik's Cube takes time and practice. Celebrate small victories and keep pushing forward.
By being aware of these common mistakes and knowing how to avoid them, you'll find the process of solving the Rubik's Cube much smoother and more enjoyable.
FAQs About How To Solve a Rubik's Cube
Discover all the FAQs about how to solve a Rubik's cube. Get step-by-step tips and master techniques. Quick, easy guide answers!
Twisted corners occur when one or more corners of the Rubik’s Cube are rotated in place, making the cube unsolvable with standard algorithms. To identify a twisted corner, look for a corner piece where the colors don't align with the adjacent center colors, even when the rest of the cube seems correct. Fix this by carefully rotating the corner to match the adjacent centers.
To solve the Rubik’s Cube in fewer moves, like 20 or less, you need to learn advanced methods such as CFOP (Cross, F2L, OLL, PLL) or the Roux method. These methods involve fewer moves and more intuitive steps but require practice and memorization of algorithms. Start with mastering the beginner’s method to understand the cube's mechanics, then gradually learn these advanced techniques.
If you don't get a yellow cross after following the steps for the third layer, check each move carefully. Ensure that you perform the "F R U R' U' F'" sequence correctly and in order. If the pattern still doesn’t form, there may be a twisted edge piece or a mistake in previous steps that needs correction.
Three yellow edge pieces after completing the second layer suggest that there is a parity error or that an earlier step was performed incorrectly. Ensure that you have placed all second-layer edge pieces correctly without any misplaced or twisted edges. Revisit the previous steps to confirm proper positioning.
If you end up with three disoriented corners in the final step, repeat the corner orientation sequence until each corner piece is correctly aligned. Start with any corner that needs adjustment and apply the corner rotation algorithm (commonly "R' D' R D") repeatedly until it aligns. Repeat for each remaining corner.
To avoid twisted corners, keep a consistent orientation of the cube throughout the solve and carefully follow each algorithm step. Make sure not to accidentally rotate or force a corner piece into place incorrectly. Tightening the cube’s tension can also help reduce the risk of twisting corners during manipulation.
If the diagrams or video instructions don't match, it could be due to a different starting orientation or a mistake in an earlier step. Check that the cube's orientation matches the tutorial's setup and verify each move. If the issue persists, consult other tutorials or guides for alternate methods to correct the state.
It is normal for the cube to look scrambled during step 5b when orienting one corner. This step temporarily misaligns other parts of the cube but will resolve correctly if you keep the same side facing you and repeat the sequence for each corner. Stay patient and trust the process; the cube will realign correctly once all corners are oriented.
Final Thoughts
Solving a Rubik's Cube is not just about memorizing algorithms; it's about understanding the logic behind the moves. When I first started, I saw it as an impossible challenge. But with persistence, I learned that solving the cube is a mix of strategy, problem-solving, and a bit of muscle memory. Each layer you complete builds your confidence and takes you one step closer to the satisfying moment when all colors align perfectly.
It's not about speed at first but about understanding. Start slow, learn the patterns, and soon enough, you'll be solving the cube with ease and maybe even moving on to more advanced solving techniques.


