Bathroom tiles falling off the wall or floor can be a frustrating and potentially costly problem. Fortunately, with the right approach and a bit of know-how, you can both prevent this issue from occurring in the first place and repair it effectively when it does happen. Here, I’ll share practical steps and tips based on my experience and research on how to tackle tile falls in your bathroom, covering both prevention and repair techniques.
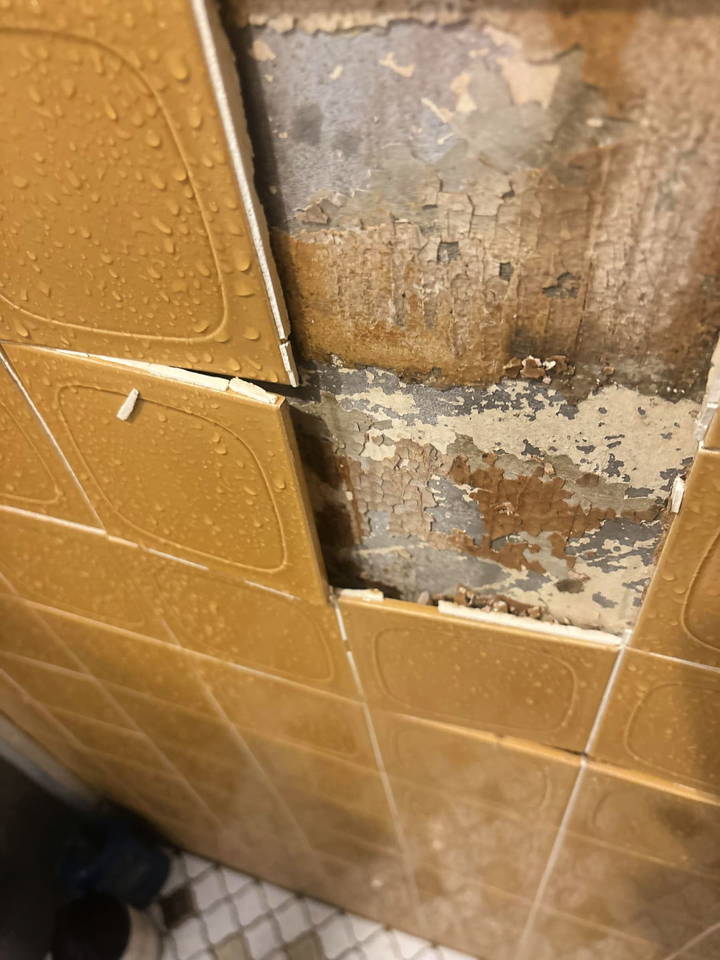
Why Do Bathroom Tiles Fall Off?
Understanding why bathroom tiles fall off is the first step to preventing it. There are several common reasons:
1. Poor Installation Practices
Improper installation is a major cause of tiles falling off walls. This can happen if the adhesive isn’t applied properly, if the surface isn’t prepared correctly, or if the grout is not sealed well.
Examples of Poor Installation:
- Unprimed Surfaces: If the plaster underneath the tiles isn’t properly primed, the tiles won’t adhere properly. Priming helps create a waterproof layer that secures the tile in place.
- Incorrect Adhesive Application: Using the wrong adhesive or not applying it evenly can result in poor bonding. A water-resistant adhesive is crucial in bathrooms.
- Premature Grouting: Grouting tiles before the adhesive has fully set can cause the tiles to loosen. Ideally, wait at least 24 hours after applying adhesive before grouting.
2. Water Damage and Moisture Issues
Water exposure is inevitable in bathrooms, and over time, water can seep behind improperly sealed tiles. This moisture weakens the adhesive, causing tiles to detach. Waterproofing behind tiles is essential for longevity.
Key Moisture-Related Issues:
- Lack of Waterproof Membrane: A waterproof membrane behind the tile is vital to prevent water from damaging the wall or floor structure.
- Incorrect Grout and Sealant: Using non-waterproof grout or failing to seal it properly allows moisture to penetrate, leading to mold growth and loosening tiles.
3. Uneven Wall or Floor Surfaces
Tiles adhere best to flat, smooth surfaces. Any humps, dips, or imperfections can compromise adhesion, causing tiles to crack or fall off over time.
4. Temperature Fluctuations
Hot showers and baths can cause thermal expansion and contraction, weakening tile adhesion. Over time, this can lead to the tiles coming loose.
Preventing Tiles from Falling Off
Prevention is always better than repair. Here are some steps to ensure your tiles remain securely in place:
1. Proper Surface Preparation
Ensure the surface is smooth, clean, and primed before tiling. Use a suitable primer based on the type of wall or floor to create a strong bond.
2. Choose the Right Materials
- Adhesive: Select a water-resistant adhesive that is appropriate for the type of tile and the environment (e.g., wet areas).
- Grout: Use high-quality, waterproof grout to prevent water infiltration.
- Sealant: Apply a high-quality sealant to grout lines to prevent water from seeping through.
3. Correct Installation Techniques
- Follow the manufacturer’s guidelines for adhesive and grout application.
- Allow sufficient drying and curing time for both adhesive and grout. Generally, adhesive should set for at least 24 hours before grouting.
4. Install Waterproof Membrane
If you’re tiling a shower or another high-moisture area, always install a waterproof membrane behind the tiles. This is a crucial step to protect against water damage.
5. Regular Maintenance and Inspection
Regularly check for signs of loose tiles, cracks in grout, or mold growth. Addressing these early can prevent larger problems.
Repairing Falling Bathroom Tiles
If tiles have already fallen off, or if you suspect they might, here’s a step-by-step guide to fixing them:
Step 1: Remove the Damaged Tiles and Clean the Area
Carefully remove the loose or damaged tiles without harming adjacent ones. Clean the wall or floor to remove old adhesive, dirt, or debris. This ensures a good bond when the new tile is installed.
Step 2: Repair the Wall or Floor Surface
Before installing a new tile, make sure the surface is flat and damage-free. If the underlying surface is compromised, you may need to repair or replace it. In some cases, this could involve installing new backer boards or repairing drywall.
Step 3: Choose and Apply the Correct Adhesive
Select a tile adhesive appropriate for bathroom use. Water-based mastic adhesives are popular for their durability and water resistance. Apply a thin, even layer to the back of the tile and press it firmly against the wall or floor.
Step 4: Grout the Tile Properly
Allow the adhesive to set completely, which typically takes about 24 hours. Then, apply grout between the tiles. There are two types of grout:
- Unsanded Grout: Best for narrow seams (⅛ inch or less).
- Sanded Grout: Suitable for wider seams.
Mix the grout to a paste-like consistency, apply evenly, and press it into the seams with a grout float. Wipe away excess grout with a damp sponge.
Step 5: Seal the Grout
Once the grout has dried (usually another 24 hours), apply a grout sealant. This step is critical in a bathroom setting to keep moisture out and prevent mold growth. Use a sealant with antifungal properties for added protection.
Step 6: Allow the Grout to Cure
Leave the tile untouched for at least 24 hours to ensure the grout sets properly. This curing time is essential to maintain the integrity of the installation.
When to Consider Professional Help
While a DIY approach can be effective for small repairs, there are situations where hiring a professional is the best option:
- Extensive Water Damage: If water damage is significant, you might need to replace underlying structures like drywall or studs, which requires professional expertise.
- Structural Issues: If the wall or floor is not level, or if there are significant structural problems, a professional can ensure proper leveling and reinforcement.
- Complete Renovations: For larger renovation projects, a professional can save you time and money in the long run by ensuring the job is done right the first time.
Tips for a Successful Tile Repair
- Use High-Quality Materials: Don’t skimp on the quality of adhesive, grout, or sealant. These are critical for long-term durability.
- Take Your Time: Allow each layer (adhesive, grout, sealant) to set properly before moving on to the next step.
- Prepare Properly: Ensure surfaces are clean, dry, and level before starting.
- Consult Experts: If in doubt, consult a tile professional or contractor for advice specific to your situation.
Conclusion
Preventing and repairing falling bathroom tiles is all about preparation, choosing the right materials, and using correct techniques. Whether you are tackling a small repair or considering a major renovation, understanding the underlying causes and best practices will help ensure a successful, long-lasting result. Keep your bathroom beautiful and functional by following these guidelines, and don’t hesitate to seek professional help if needed.
FAQ: Bathroom Tile Maintenance and Repair
To further enhance your understanding of bathroom tile maintenance and repair, this FAQ section provides additional details, troubleshooting tips, and alternative methods based on common concerns and scenarios.
What Should I Do If My Tiles Keep Falling Off Repeatedly?
If your tiles keep falling off even after repair, it's essential to reassess the underlying causes. Persistent tile failures could be due to issues such as water damage, incorrect adhesive, or an unstable surface. Here’s what you can do:
- Check for Moisture: Ensure there is no moisture seeping behind the tiles. This might require removing a few tiles to inspect for water damage or mold. If mold is present, use an appropriate mold remediation product.
- Evaluate the Surface: Ensure the wall or floor surface is even and sturdy. If the surface is not flat or has deteriorated, consider replacing it with a suitable backer board like cement board or waterproof membrane.
- Use Proper Adhesive and Grout: Make sure you are using the correct water-resistant adhesive and grout for your bathroom environment.
Can I Fix a Small Area Without Replacing All the Tiles?
Yes, you can repair a small area without retiling the entire bathroom, but it requires careful attention:
- Match the Existing Tiles: If you have spare tiles from the original installation, use them. If not, try to find matching tiles that are similar in size, color, and texture.
- Use the Right Tools: Carefully remove the damaged tile area with a chisel and hammer, avoiding damage to surrounding tiles. Clean the surface before applying adhesive and replacing tiles.
- Ensure Proper Curing Time: Follow proper curing times for adhesives and grouts to avoid future issues.
What Are Some Alternative Waterproofing Methods?
Beyond using traditional cement boards and waterproof membranes, there are newer, more efficient products:
- Schluter Systems (KERDI Board): This is a popular alternative that combines a waterproof membrane with a lightweight backer board. It’s easy to cut and install and reduces the overall installation time.
- Laticrete Hydro Ban Board: This is another modern option that offers pre-waterproofed panels, reducing the need for additional layers. It’s particularly useful for DIYers looking for simpler, less messy installation.
How Do I Handle Mold Behind Tiles?
Mold behind tiles is a serious issue that must be addressed to prevent health problems and further damage:
- Wear Protective Gear: Use gloves, a mask, and safety goggles to protect yourself from mold exposure.
- Remove Affected Materials: Take out all tiles and backer board that have mold. Clean the area thoroughly with a mold-killing solution. If the mold damage is extensive, consult a professional.
- Replace with Mold-Resistant Materials: Use mold-resistant drywall or backer boards such as cement board and seal all joints properly to prevent future mold growth.
Is It Possible to Reuse Fallen Tiles?
Reusing fallen tiles is possible but not always advisable, depending on the situation:
- Assess the Condition: Check if the tile is cracked, chipped, or damaged. If it’s intact, you can reuse it.
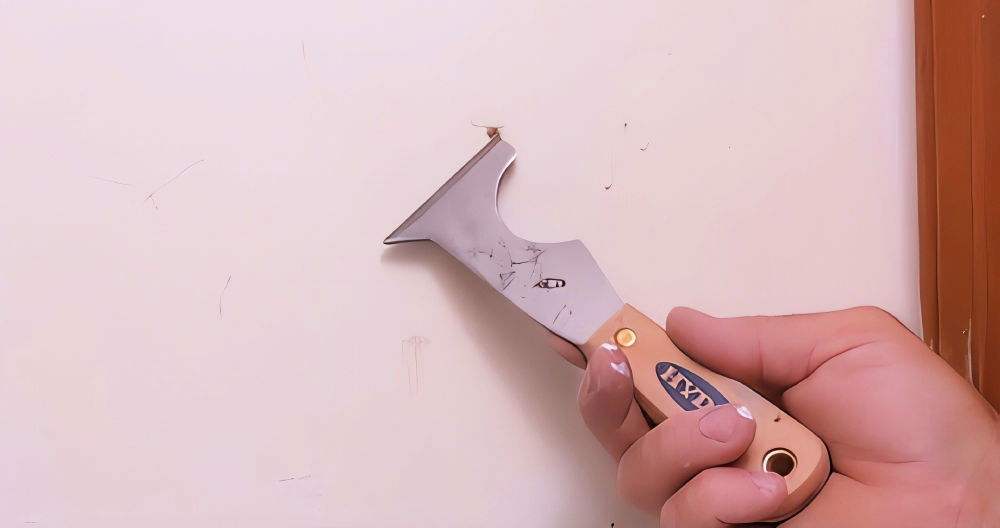
- Clean Off Old Adhesive: Carefully remove any old adhesive or grout from the back of the tile using a putty knife or chisel. Ensure it’s completely clean to get a proper bond when reapplying.
- Consider Matching Issues: Reused tiles might not match perfectly with the rest of the wall or floor due to wear and tear or color fading over time.
What Should I Do if I Notice Cracking in the Grout?
Cracking in grout usually indicates movement or instability behind the tiles:
- Check for Structural Issues: Ensure the wall or floor is stable and not shifting. Cracks can appear if there is movement or settling in the building structure.
- Remove and Re-grout: Remove the old, cracked grout carefully with a grout removal tool. Re-grout with a high-quality, flexible grout that can accommodate minor shifts and is suitable for wet areas.
- Seal the Grout: After re-grouting, apply a good sealant to protect against moisture and further cracking.
Can I Use Peel and Stick Tiles in a Bathroom?
Peel and stick tiles can be a quick fix but aren’t always the best long-term solution for high-moisture areas:
- Ensure Proper Overlap and Sealing: For peel and stick tiles to work in a bathroom, they must overlap correctly and be sealed well to prevent water from seeping through.
- Consider Moisture Levels: High humidity and direct water exposure (like in showers) may cause the adhesive to weaken over time. These tiles are more suited for backsplashes or low-moisture areas.
- Understand Maintenance Needs: Peel and stick tiles may need to be replaced more frequently than traditional tiles, which can be a consideration if you prefer a low-maintenance option.
How Long Should I Wait Before Using the Shower After Re-Tiling?
After re-tiling or re-grouting, it’s crucial to allow sufficient time for everything to set and cure properly:
- Adhesive Setting Time: Wait at least 24 hours after applying adhesive before grouting.
- Grout Curing Time: After grouting, wait another 24 to 48 hours before exposing the area to water.
- Sealing: If you’ve applied a grout sealant, follow the product instructions for curing times, usually an additional 24 hours.
What Are Some Common Mistakes to Avoid When Tiling a Bathroom?
Avoiding common mistakes can save time and money in the long run:
- Rushing the Process: Allow adequate time for each step, from surface preparation to sealing.
- Not Waterproofing Properly: Always use a waterproof membrane or backer board in wet areas to prevent water damage.
- Ignoring Manufacturer Instructions: Follow the specific instructions provided with adhesives, grouts, and sealants for the best results.
- Skipping Primer: For wall tiles, priming the plaster underneath can make a significant difference in adhesion and longevity.


