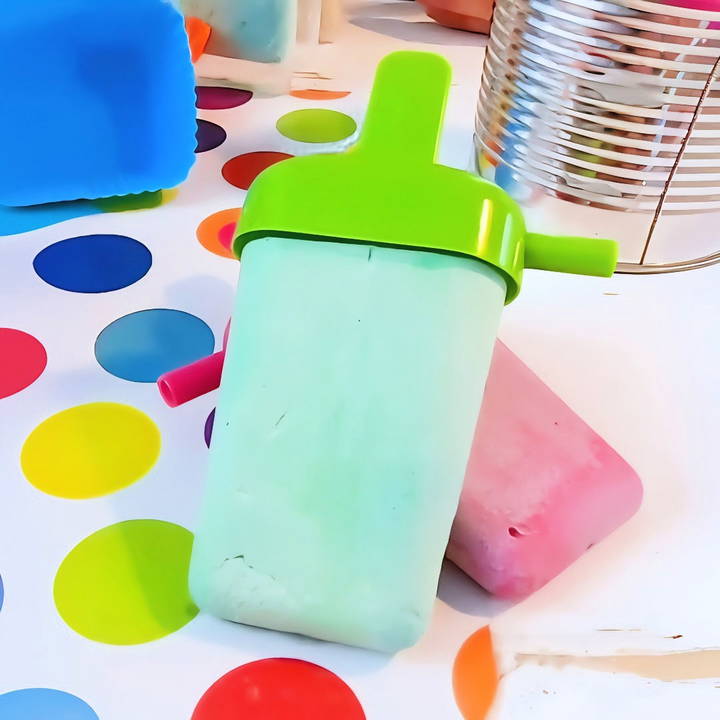
Making DIY sidewalk chalk paint at home was a fun project I tried with my kids. I wanted a simple, non-toxic way for them to enjoy making colorful art outside. The best part is, the recipe only uses basic ingredients I already had in the kitchen. In no time, we mixed up a batch of vibrant paint and turned our driveway into a bright canvas.
I love how easy it is to make this paint, and it cleans up just as easily with water. With just a few steps, you'll be able to make a fun activity for your kids or yourself. I'm sharing this to help you get started quickly so you can enjoy making art with DIY sidewalk chalk paint at home.
This recipe is simple, fun, and perfect for any outdoor activity. You'll love how easy it is to make!
Why Make Your Own Sidewalk Chalk?
Before diving into the nitty-gritty of the process, you might wonder why you should bother making your own sidewalk chalk. Here are a few reasons:
- Cost-Effective: Store-bought chalk can add up in cost, especially as kids tend to use them up quickly. Making it at home is cheaper.
- Customizable: You can make any color you desire, mixing and matching shades for unique artistic expressions.
- Educational: This is not just an arts and crafts activity but also a little science experiment. It's great to teach kids about mixing compounds and colors.
Materials You'll Need
Let's take a look at the materials required. I'll explain why each is important for the process:
- Plaster Powder: This is the primary ingredient that gives chalk its solid form. If you don't have plaster powder, don't worry—there's an alternative using eggshells and flour (I'll explain later).
- Water: Needed to mix with the plaster powder and turn it into a paste.
- Food Coloring: This is what makes your chalk colorful. You can choose any colors you wish, making each piece of chalk distinct and vibrant.
Alternative Ingredients
- Eggshells and Flour: If plaster powder isn't readily available, you can use a mixture of finely ground eggshells and plain white flour. Mix one part eggshell powder with two parts flour.
These substitutes allow you to recycle waste into something useful and creative.
Step by Step Instructions
Make colorful fun with our easy DIY sidewalk chalk paint guide! Follow step-by-step instructions to make your own chalk paint at home.
Step 1: Mix Your Plaster Powder and Water
The first step is all about making your base mix. Here's what you need to do:
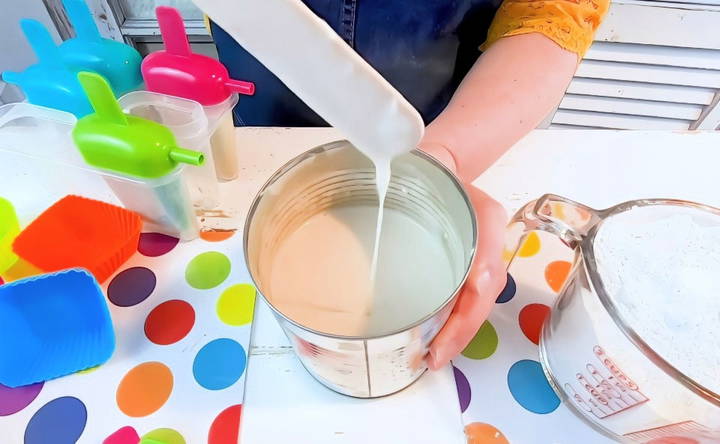
- Measure Your Ingredients: Start with 2 cups of plaster powder and 1 cup of water. This proportion ensures the mix is liquid enough to pour but will harden nicely.
- Combine the Ingredients: Pour the water into the plaster powder slowly while stirring. The aim is to avoid lumps, making a smooth, soupy consistency. Remember, plaster hardens over time, so use a disposable container for mixing as it might not clean well afterward.
Step 2: Add Color
Now, it's time to get colorful!
- Divide the Mixture: Pour the liquid mixture into several smaller cups—preferably paper or plastic that won't be missed if stained.
- Mix in Your Colors: Add a few drops of food coloring into each cup. Stir well until you get the desired shade. The more drops you add, the richer the color will be.
Step 3: Prepare Your Molds
Choosing the right molds is crucial for ensuring your chalk takes the right shape and can be used easily.
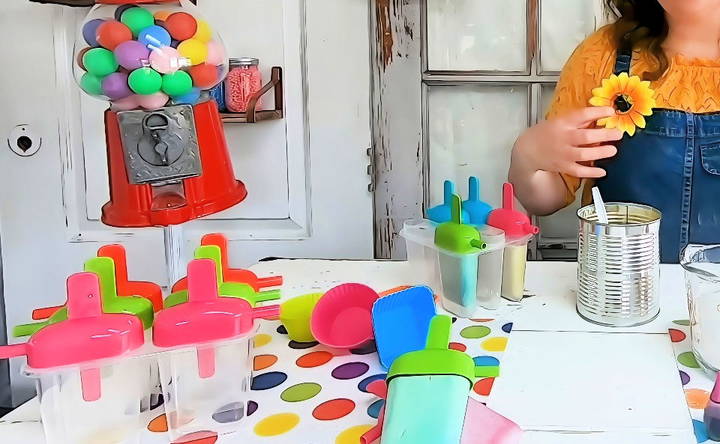
- Select Molds: You can use popsicle molds, silicone cupcake liners, or even old egg cartons.
- Use Non-Stick Spray: If your molds are not silicone, spray them with a non-stick coating. This step makes it easier to remove the chalk once it hardens.
Step 4: Pouring into Molds
This step involves filling up the molds with your mixture.
- Gently Pour: Carefully pour your colored plaster mixture into the prepared molds. Don't overfill—the mixture should sit just below the top.
- Smooth the Surface: Use a small stick or the back of a spoon to gently level the tops, ensuring an even shape.
Step 5: Allow to Dry
Patience is key!
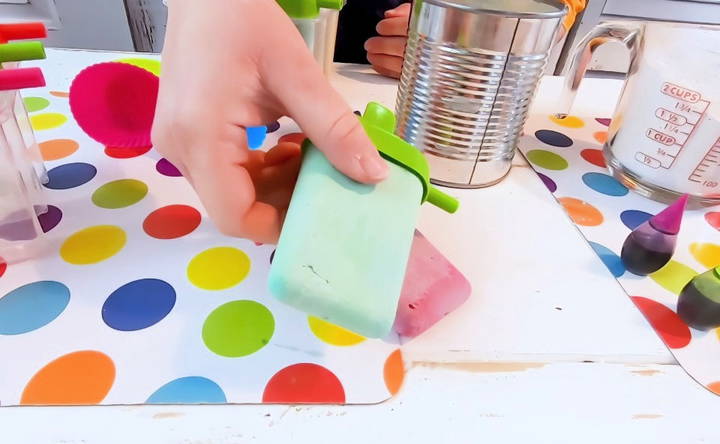
- Set Aside to Dry: Let your molds sit undisturbed for about 24 hours. This drying period is necessary for the chalk to be fully set.
- Test Hardness: After 24 hours, check one piece. If it feels solid to the touch and pops out of the mold easily, you know it's ready.
Step 6: Use and Enjoy!
Now comes the fun part!
- Removal from Molds: Carefully pop each piece of chalk out. If you've used non-stick spray, this should be straightforward.
- Make Art Outdoors: Find a clean section of sidewalk or driveway and let your creativity run wild. This is where the kids—big and small—can enjoy their handiwork.
Extra Tips for the Perfect DIY Sidewalk Chalk
- Experiment with Colors: Mixing different colors of food coloring can give you new shades.
- Storage: Store in a dry place. Moisture could cause the chalk to disintegrate or smear more than usual.
- Additives for Fun: Consider adding a bit of glitter to your mixes for some sparkle.
Get Creative: Upgrades & Variations
Spice up your sidewalk chalk paint with creative upgrades and fun variations. Discover how to make your pathways pop with vibrant, unique designs!
Spice Up Your Sidewalk Chalk Paint
Sidewalk chalk is fun on its own, but there's a whole world of creative upgrades waiting to be discovered. Try these easy variations to take your chalk art to the next level:
- Glow-in-the-Dark Magic: Add a special glow powder to your chalk paint mix for nighttime fun! Draw glowing stars, constellations, or friendly monsters that come alive after dark.
- Shimmer & Shine: Mix in some fine glitter to make sparkly chalk paint that catches the sunlight beautifully. Perfect for fairy wings, princess castles, or rainbow trails.
- Scented Masterpieces: Add a few drops of essential oil (like lavender, peppermint, or citrus) to your chalk paint for a fragrant art experience. Remember to use oils safe for skin contact, especially for young children.
- Weatherproof Your Art: Mix a bit of cornstarch or white glue into your chalk paint recipe to make it last longer, even if it rains lightly. Don't worry, it will still wash away easily with water when you're ready for a new creation.
- Stencil Fun: Cut out shapes from cardboard or use store-bought stencils to make detailed designs with ease. Try letters, numbers, animals, or even your own unique creations!
- Puffy Chalk Paint: Add a generous dollop of shaving cream to your chalk paint for a fluffy, 3D effect. This works great for clouds, puffy letters, or even animal fur!
Test new variations on a small sidewalk area first. With creativity, you'll make unique chalk art masterpieces!
Chalk Paint Problems? We've Got Solutions!
Even the best DIY projects can hit a snag. Don't worry if you run into these common chalk paint issues – we're here to help you troubleshoot:
1. Chalk Paint Won't Dry:
- Too Much Water: Did you add a bit too much water? Let the mixture sit uncovered for a while to allow some of the water to evaporate.
- Humid Weather: If it's particularly humid, drying time might be slower. Try setting your chalk paint in a sunny spot to speed things up.
2. Chalk Paint Too Runny:
- Easy Fix: Gradually add more cornstarch or flour, a tablespoon at a time, until you reach the desired consistency. Remember to mix well between additions!
3. Chalk Art Fades Quickly:
- Seal It In: Once your masterpiece is dry, lightly spray it with a clear acrylic sealant to help protect it from the elements.
- Choose the Right Spot: Avoid drawing in areas that receive direct sunlight or heavy foot traffic for longer-lasting chalk art.
4. Chalk Paint Stains Clothes or Skin:
- Act Fast: If you get chalk paint on your clothes, rinse the stain with cold water immediately. Avoid rubbing, as this can set the stain.
- Gentle Soap: For stubborn stains, gently wash the area with mild soap and water.
- Protect Yourself: Wear old clothes or an apron while making and using chalk paint.
5. Chalk Paint Won't Come Off the Sidewalk:
- Scrub-a-Dub-Dub: If your chalk art is lingering longer than you'd like, use a stiff brush and some warm, soapy water to scrub it away.
Remember:
- Patience is Key: Sometimes chalk paint just needs a little extra time to dry or set.
- Experiment and Learn: Don't be afraid to try different techniques and solutions to find what works best for you.
- Have Fun! Chalk art is all about creativity and enjoyment. Don't let a little troubleshooting get in the way of your artistic expression!
FAQs About DIY Sidewalk Chalk Paint
Discover answers to the FAQs about DIY sidewalk chalk paint to enhance your creative projects. Tips, recipes, and safety info inside!
Absolutely! Regular sidewalk chalk works great, but you can also experiment with dustless chalk or even leftover bits of art chalk. Just make sure to crush or grate them into a fine powder before adding them to the paint mixture.
No cornstarch? No problem! You can substitute it with an equal amount of flour or arrowroot powder. These alternatives will work just as well to thicken your paint and make vibrant colors.
If you're worried about staining, add a teaspoon of dish soap to your chalk paint mixture. This will help the paint wash away easily with water and a little scrubbing.
Yes, you can! Store any leftover chalk paint in an airtight container in the refrigerator for up to a week. Give it a good stir before using it again, as the cornstarch may settle.
If your chalk paint is too thick, simply add a little bit of water at a time, stirring well until you reach the desired consistency. Remember, it's easier to add more water than to thicken it up again!
While primarily designed for sidewalks, you can also use this chalk paint on driveways, patios, or even large rocks. Just be sure to test it on a small, inconspicuous area first to ensure it doesn't stain.
Wrapping It Up
And there you have it! A simple, enjoyable project that results in hours of outdoor fun. Whether you're making this for some quiet personal time or as a family bonding activity, DIY sidewalk chalk paint is one of those crafts where the process is as rewarding as the product. Plus, it aligns perfectly with environmentally friendly practices and allows for endless creativity.
During those moments of crafting, my kids and I felt a genuine connection not only with each other but also with the art we brought onto our sidewalks. It turned our ordinary driveway into our little creative canvas and inspired plenty of smiles all around. Remember, life is about finding those colorful moments, and sometimes, they start with just a bit of plaster, water, and color. So, roll up your sleeves, gather those simple ingredients, and get chalking!


