Building a DIY sawhorse was my recent weekend project. I had some leftover wood in the garage, and I decided to put it to good use. I wanted to make something functional, simple, and sturdy. With a basic plan in mind, I gathered my tools and began measuring the wood pieces. The experience was quite fulfilling and taught me many valuable lessons.
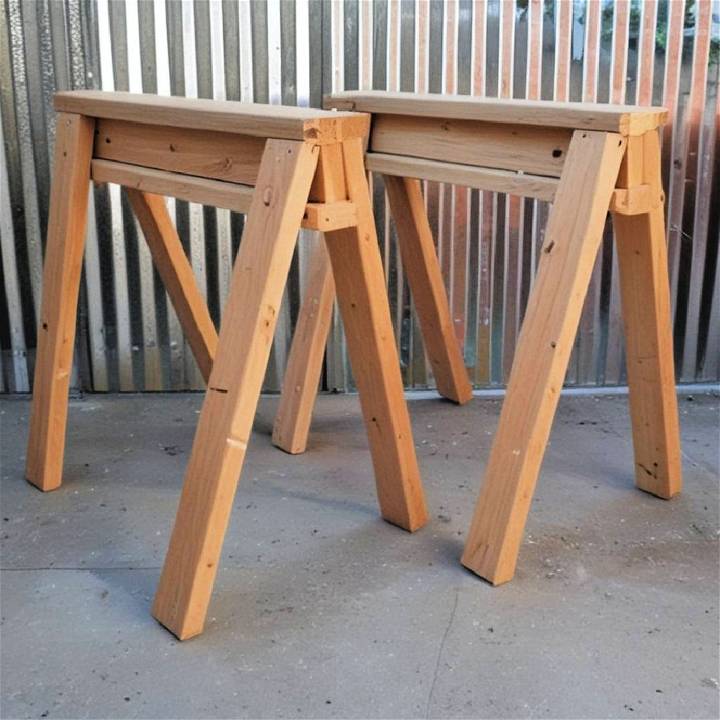
By the end of the day, I had a solid and dependable sawhorse. It wasn't as hard as I thought it would be, and I felt incredibly proud of what I had built with my own hands. The process was simple and enjoyable.
I hope that sharing my experience will motivate you to try this project, too. These tips are easy to follow and will surely help you succeed.
Gathering the Essentials
Before diving in, I made sure to have the right tools and materials. The beauty of this project is its simplicity - requiring only a few handheld power tools and materials that are readily available at any hardware store. Here's what I gathered:
- Two-by-four lumber: For the structure. It's crucial to choose kiln-dried (KD) wood as it's less likely to warp over time compared to green lumber.
- One-by-two lumber: For the cross braces and leg braces to enhance stability.
- Plywood (half an inch thick): For the shelf, add utility and additional support.
- Circular saw: For cutting the lumber to size. A miter saw would work too, but a circular saw is more versatile for those with limited tools.
- Pocket hole jig: To build strong joints without complicated techniques.
- Drill and impact driver: To drill pocket holes and secure the screws.
- Speed square, measuring tape, and pencil: For accurate measurements and cuts.
- Hinges and screws: To assemble the folding mechanism and ensure durability.
Understanding the purpose behind each material enlightened me on the potential of simple resources when combined with innovative design.
Step by Step Instructions
Learn how to build a DIY sawhorse with our easy, step-by-step instructions. Perfect for any woodworking project. Start building today!
Cutting the Pieces to Size
The first step was cutting the two-by-fours for the legs. Setting my circular saw to a 22.5-degree angle for beveled cuts, I ensured the legs would splay outwards, making a stable base. Accurate cuts were paramount, as uneven legs could result in a wobbly sawhorse.
Assembling the Frame
The magic truly began when connecting the legs using hinges. This allowed them to fold neatly beneath the sawhorse when not in use. I snipped off a little wedge on one end of each leg so that when hinged, they could fold flat - a critical detail for compact storage.
Adding Cross Braces and Leg Braces
For additional stability, I attached cross braces between the legs using pocket screws. This not only made the sawhorses sturdier but taught me the value of angling braces for optimal support. The leg braces, cut from one-by-two lumber, were attached with lag screws, allowing the sawhorse to bear substantial weight without buckling.
The Work Surface
Affixing the two-by-four top was straightforward but highlighted the importance of alignment. Ensuring it was centered and secured with screws prevented any wobble, turning these folding sawhorses into reliable fixtures in my workspace.
Installation of the Shelf
The half-inch plywood shelf not only utilized the space within the sawhorse frame for storage but also contributed to the overall rigidity. This added element transformed the sawhorses from mere supports into multifunctional workstations.
Insights and Reflections
Throughout this project, patience and precision were my constant companions. Taking the time to choose the right lumber and diligently measuring and cutting each piece paid off in the form of stable, durable sawhorses that fold away neatly. It was a reminder that with the right approach, even someone with a modest tool collection and minimal woodworking experience can accomplish rewarding projects.
Customization Ideas for Your DIY Sawhorse
When it comes to DIY projects, personalization is key. A sawhorse can be more than just a tool; it can be a reflection of your needs and creativity. Here are some customization ideas to make your sawhorse uniquely yours:
Adjustable Height
- Why Adjust? Different tasks require different working heights. An adjustable sawhorse can save you from back pain and make your work more efficient.
- How to Customize: Install telescoping legs with locking pins. Use metal brackets that allow you to move the legs to pre-drilled holes for various heights.
Foldable Design
- Why Foldable? Space is precious. A foldable sawhorse can be stored away easily when not in use.
- How to Customize: Add hinges to the legs so they can collapse inward. Use a locking mechanism to secure the legs when folded.
Built-in Storage
- Why Storage? Tools and materials can clutter your workspace. Having storage in your sawhorse can keep things organized.
- How to Customize: Attach tool hooks or magnetic strips to hold tools. Include a shelf or drawer under the top beam for materials.
Surface Protection
- Why Protect? The top of your sawhorse will face wear and tear. Protecting it can extend its life.
- How to Customize: Cover the top with a replaceable piece of hardwood or metal. Apply a non-slip surface to keep materials in place.
Mobility
- Why Mobile? Sometimes, you need to move your work area quickly.
- How to Customize: Fix heavy-duty casters to the legs. Ensure there's a lock on the wheels to keep the sawhorse stationary when in use.
Personal Touches
- Why Personalize? Your sawhorse is part of your craft. Make it feel like it's truly yours.
- How to Customize: Paint it in your favorite color or add a unique design. Burn or carve your initials or a logo into the wood.
By incorporating these ideas, you'll not only have a sawhorse that meets your specific needs but also one that stands out in your workshop.
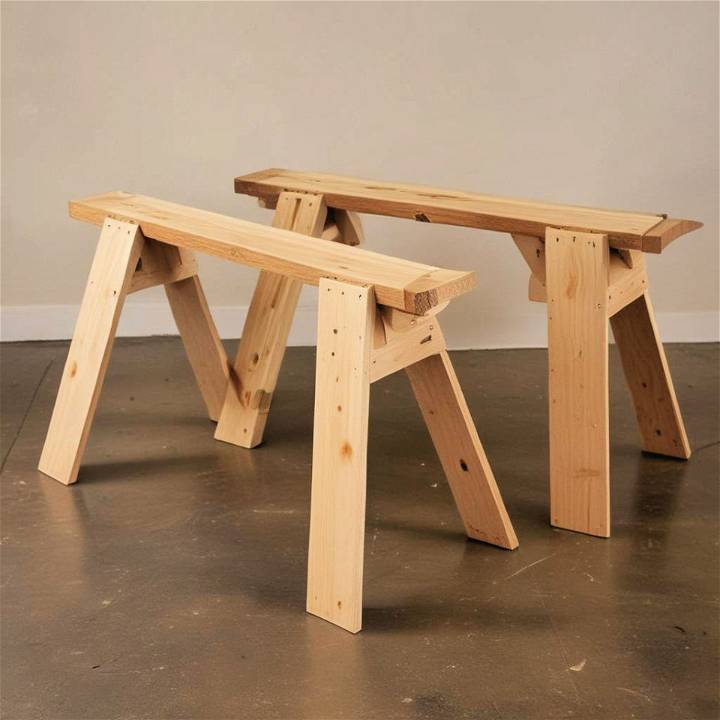
Advanced Techniques for Building a DIY Sawhorse
Building a sawhorse can be a straightforward task, but for those looking to challenge their skills and build a more sophisticated product, advanced techniques can be employed. Here's how you can elevate your DIY sawhorse:
Utilizing Strong Joinery
- Why Use Advanced Joinery? Strong joints will ensure your sawhorse can withstand heavy use and last longer.
- How to Implement: Consider dovetail joints or mortise-and-tenon connections for added strength and stability. Use wood glue and clamps to secure joints while they dry for a solid build.
Incorporating Adjustable Angles
- Why Adjustable Angles? Adjustable angles allow your sawhorse to support materials at various inclines, making cutting and measuring more versatile.
- How to Implement: Add a hinge mechanism at the top beam to adjust the angle of the supporting surface. Use wing nuts and bolts to lock the angle in place.
Adding a Vise or Clamp System
- Why Add a Vise? A vise or clamp system can hold materials steady, making your sawhorse a multi-functional workbench.
- How to Implement: Install a bench vise on one end of the sawhorse. Integrate pipe clamps into the design for securing large or irregularly shaped objects.
Building a Modular System
- Why Go Modular? A modular sawhorse can be easily customized and reconfigured for different projects.
- How to Implement: Design the sawhorse so that it can be dismantled and reassembled in different configurations. Use interchangeable parts like removable shelves or extension arms.
Enhancing Durability with Finishes
- Why Apply Finishes? Finishes protect the wood from moisture, wear, and tear, extending the life of your sawhorse.
- How to Implement: Apply a sealant or varnish to the wood to protect against the elements. For a workshop sawhorse, consider a hard-wearing polyurethane finish for extra durability.
Using these advanced techniques improves your sawhorse's functionality and enhances your craftsmanship.
Troubleshooting Common Issues
When building a DIY sawhorse, you might encounter a few hiccups along the way. Here's a helpful guide to troubleshooting common issues, ensuring your project stays on track:
Issue: Wobbly Sawhorse
- Cause: Uneven legs or an uneven surface can make your sawhorse unstable.
- Solution: Check that all legs are cut to the same length and angles. Use a level to ensure the top beam is horizontal. If the ground is uneven, adjust the legs or move to a stable surface.
Issue: Weak Joints
- Cause: Joints may not be properly secured, leading to a lack of stability.
- Solution: Reinforce joints with wood glue before screwing them together. Use clamps to hold joints in place as they dry.
Issue: Difficulty in Folding
- Cause: The folding mechanism may be too tight or not aligned correctly.
- Solution: Lubricate hinges with WD-40 or a similar product. Ensure hinges are properly aligned, and screws are not overtightened.
Issue: Wood Splitting
- Cause: Using screws that are too large or drilling without pilot holes can split the wood.
- Solution: Pre-drill pilot holes to prevent splitting. Use the correct size screws for the thickness of the wood.
Issue: Sawhorse is Too Heavy
- Cause: Overbuilding with excessively thick wood or additional features can make the sawhorse difficult to move.
- Solution: Use lighter materials like pine or incorporate a foldable design for easy transport.
Issue: Surface Damage
- Cause: Frequent use can lead to cuts and damage on the sawhorse's top surface.
- Solution: Attach a replaceable piece of plywood or hardboard as a sacrificial layer. Regularly inspect and replace the top layer when it becomes too worn.
Fixing these issues ensures your sawhorse is sturdy and functional. Patience and detail are key for DIY success. Don't rush; take your time. Your sawhorse will serve many future projects.
FAQs About DIY Sawhorse
Get clear answers in our faqs about DIY sawhorse, including materials, construction tips, and safety guidelines. Ideal for your next project!
A sawhorse is a sturdy frame that supports wood for sawing. Building your own sawhorse can be cost-effective and allows you to customize it to your specific needs. It’s a simple project that can improve efficiency and safety in your DIY tasks.
Stability comes from a solid design and proper assembly. Use half-lap joints for the legs and ensure all parts are securely fastened. Adding cross braces can also enhance stability.
Yes, you can adjust the height and width of your sawhorse to suit your needs. Simply modify the lengths of the legs and the top beam accordingly during the cutting phase.
Always wear safety glasses and a dust mask when cutting wood. Ensure the sawhorse is on a stable surface and that the wood you're cutting is securely clamped down. Regularly inspect your sawhorse for any damage or loose parts.
To make your sawhorse portable, consider building a foldable design. Use continuous hinges to attach the legs, allowing them to fold flat against the top beam. This makes it easier to transport and store your sawhorse when not in use.
Conclusion:
Wrapping up, understanding DIY sawhorse construction can significantly enhance your woodworking projects. With our beginner's guide, you now have the essentials to build a reliable and sturdy sawhorse. This project is a practical step to refine your skills and build useful tools for future DIY endeavors.


