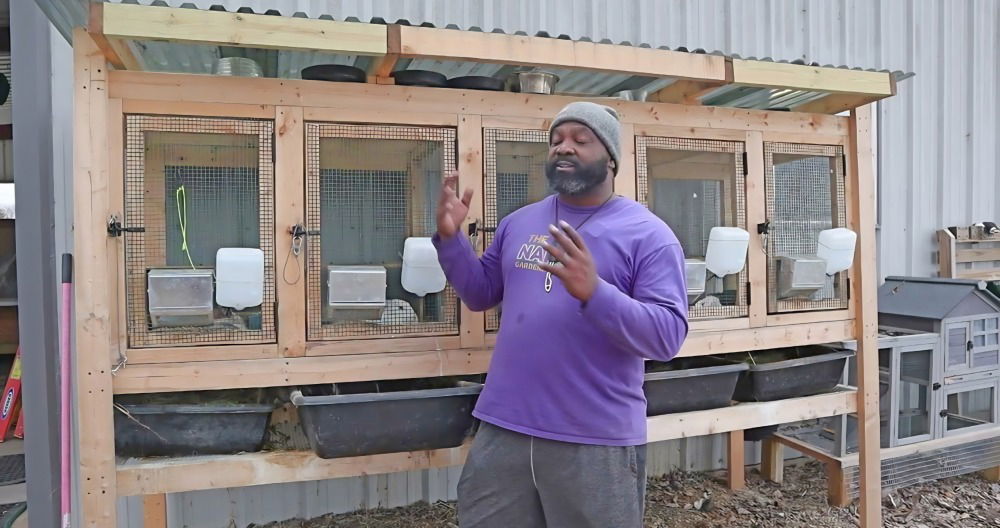
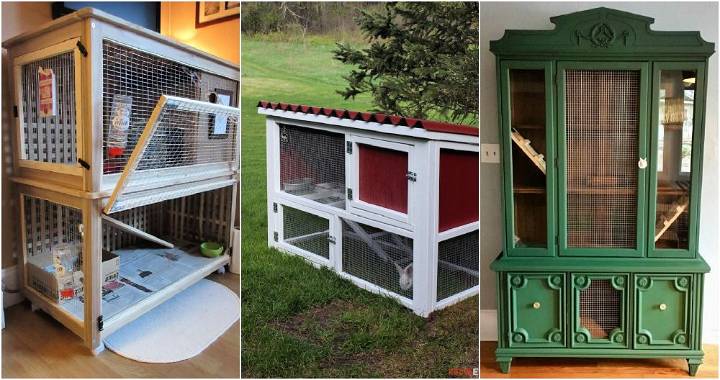
Starting a new hobby with animals opened a whole new world for me. Building my own DIY quail hutch was both a challenge and a rewarding experience. With basic tools and some wooden pallets, I began crafting a home for my quails. This project taught me a lot about simple construction and how small steps lead to big accomplishments.
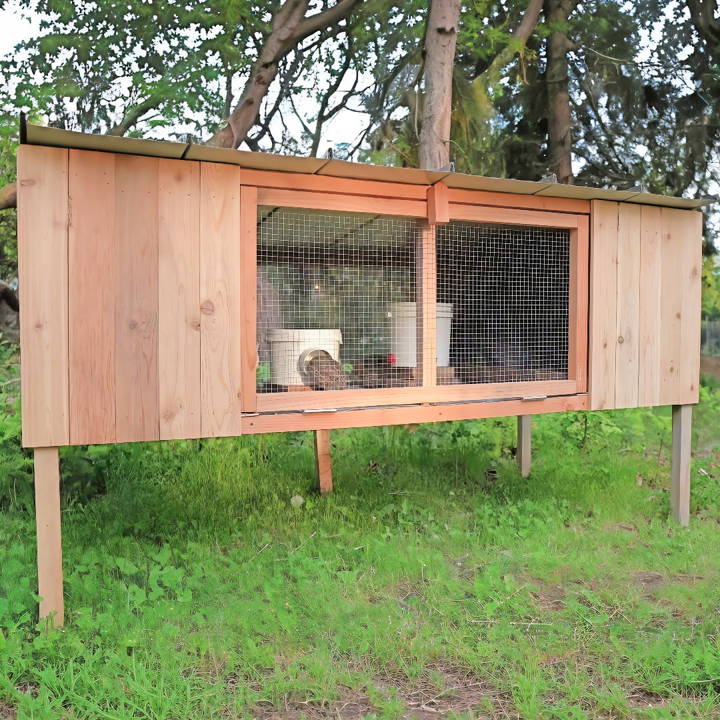
Seeing my quails happily exploring their backyard coop brought immense joy. The effort put into my homemade DIY quail cage paid off remarkably well. I'm excited to share this guide, hoping it'll bring you similar satisfaction.
Building your own quail hutch is more manageable than it seems, and you can do it, too. Let my experience motivate you to start your own project.
Materials Needed:
- Two by Two Lumber: I had these leftover from a previous project. Their lightweight yet sturdy nature makes them perfect for a quail coop frame.
- Quarter Inch Plywood: Used for the floor. It's light and cost-effective, ideal since quails are small and lightweight.
- Quarter Inch Mesh: Crucial for ventilation and cleanliness, allowing droppings to fall through.
- Cedar Offcuts: These were repurposed from an old fence for the sides of the coop, adding a rustic charm.
- Hardware Mesh and Heavy Duty Hinges: For securing the doors.
- Scrap Roofing Material: Salvaged pieces used to build a waterproof roof.
Step by Step Instructions
Learn how to build your own DIY quail hutch with our step-by-step instructions. Perfect for beginners and quail enthusiasts!
Framing the Main Walls
Using two by twos, I framed out the main walls. Due to the light nature of quails, these materials were perfect for keeping the coop lightweight and easy to move if necessary.
Flooring Installation
The quarter-inch plywood was cut to fit the bottom of the framed walls, followed by laying down the quarter-inch mesh on top. This mesh is vital for two reasons: it provides excellent ventilation, and it allows droppings to fall to the ground, keeping the coop cleaner.
Adding Support and Rigidity
I added a couple of supporting beams across the floor's center for extra strength, ensuring it could hold the weight of the quails without sagging.
Side and Front Walls
Using cedar offcuts, my partner and I measured, cut, and nailed each piece to the frame. Each board was cut at a specific length, with the top angled for the roof's slope. This step was tedious but crucial for the aesthetic and functional design of the coop.
Door Construction
For the main door, two by twos were used to build a frame, then covered with hardware mesh for security. Heavy duty hinges ensured that the door would remain functional and secure.
Roofing
The final step involved covering the coop with salvaged roofing material. Cutting the metal to size, I secured each piece with roofing screws designed to prevent leaks, ensuring our quails stayed dry regardless of the weather.
Cost-Saving Tips
- Reuse and Repurpose: The bulk of my savings came from using materials I already had. Before buying anything new, see what can be repurposed.
- Plan and Measure Twice: Mistakes can be costly, especially with materials like plywood or mesh. Accurate measurements and a clear plan can prevent wastage.
- Look for Deals or Freebies: Sites like Craigslist or Facebook Marketplace are gold mines for free or cheap building materials.
The Result
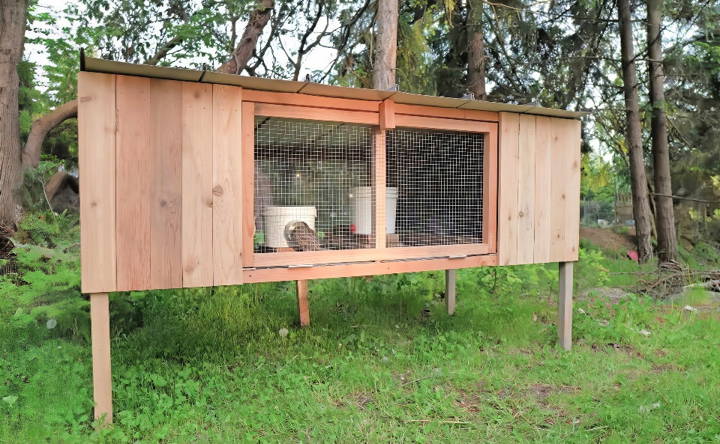
After a couple of days of work, our quail coop was ready, coming in under $100. It was a rewarding project, providing a safe and comfortable home for our quails. They adjusted quickly, enjoying their new environment, complete with branches and logs for enrichment.
Customization Ideas for Your DIY Quail Coop
Building a quail coop that meets your specific needs can be a rewarding project. Here are some customization ideas to consider:
Size and Shape
- Adjust the Size: Tailor the coop size based on the number of quails you plan to keep. A general rule is 1 square foot per bird.
- Shape It Up: Depending on your backyard space, you can opt for a rectangular, square, or even a circular coop design.
Roofing Options
- Choose Durable Materials: Use materials like corrugated metal or shingles for long-lasting protection.
- Add a Skylight: Consider a transparent section for natural light, which can be beneficial for the quails' health.
Flooring
- Easy-to-Clean Surface: Use vinyl or linoleum flooring for easy cleaning.
- Natural Ground: If you prefer a natural floor, ensure it's predator-proof with a wire mesh underneath.
Walls and Insulation
- Insulate for Weather: Use foam or fiberglass insulation to protect your quails from extreme temperatures.
- Ventilation: Ensure there are enough vents for air circulation but with protective mesh to keep predators out.
Nesting and Laying Areas
- Comfortable Nesting Boxes: Provide soft, hay-lined nesting boxes for egg-laying.
- Egg Collection: Design the coop so that you can easily access eggs without disturbing the birds.
Feeding System
- Automated Feeders: Install automatic feeders to save time and maintain a consistent feeding schedule.
- Watering Solutions: Use nipple waterers to provide clean water and reduce spillage.
Safety Features
- Secure Locking Mechanisms: Install locks that are easy for you but challenging for predators.
- Predator Deterrents: Consider motion-activated lights or noise-makers to scare away potential threats.
Aesthetics
- Paint and Decorations: Choose non-toxic paint to brighten up the coop and make it a focal point in your garden.
- Landscaping: Plant shrubs or flowers around the coop for a pleasant environment.
Consider these ideas to build a quail coop that's functional and a pleasant outdoor addition.
Quail Care Information
Caring for quails requires understanding their needs and behaviors. Here's a guide to help you ensure your quails are healthy and happy:
Understanding Quail Behavior
- Social Creatures: Quails are social birds and thrive in groups, so consider keeping multiple quails together.
- Active and Curious: Provide space for exercise and exploration to keep them engaged.
Housing Your Quails
- Safe and Secure: Ensure the coop is predator-proof with sturdy construction and fine mesh.
- Clean Environment: Regularly clean the coop to prevent disease and keep quails comfortable.
Feeding Your Quails
- Balanced Diet: Feed them a mix of quail feed, grains, vegetables, and occasional insects for protein.
- Fresh Water: Always have clean water available, and check it daily to ensure it's not frozen or dirty.
Health and Wellness
- Regular Check-ups: Observe your quails daily for any signs of illness or distress.
- Veterinary Care: Have a vet who is experienced with birds to call if you notice any health issues.
Breeding and Egg Care
- Breeding Season: Be aware of breeding seasons and provide extra nesting materials during this time.
- Egg Handling: Handle eggs with care and collect them regularly to encourage more laying.
Seasonal Considerations
- Weather Protection: Provide adequate shade in summer and insulation in winter to protect against extreme temperatures.
- Adapting to Seasons: Adjust food and water availability according to the season's needs.
Follow these guidelines to build a nurturing environment for quails. The key to good quail care is observation and adapting to their needs. Keep learning and stay attentive to their top shape.
FAQs About DIY Quail Coop Plans
Explore faqs about DIY quail coop plans for top tips on design, materials, and maintenance to ensure a safe and healthy habitat for your quails.
Quails require at least 1 square foot of space per bird to prevent overcrowding and promote health. The coop's ceiling should be either lower than 18 inches or higher than 6 feet to prevent injury during flight. Feeder troughs should provide about half an inch of access space per quail.
A well-designed quail coop should have ample floor space, protection from predators, proper insulation, adequate ventilation, and lighting. It should also include a sand bath for the quails and an efficient system for waste removal. The coop must be robust and ergonomic to promote the well-being of the quails and ease of maintenance.
Yes, you can build a quail coop that is suitable for all seasons by ensuring it is winterized and has proper insulation. Consider adding a solar-lit feature for warmth and light during the shorter days of winter. The coop should also have a wide roof to protect from rain and provide shade during the summer.
To make your quail coop predator-proof, cover the lower portion of the walls with chicken wire or hardware cloth. Ensure that all doors and access points are securely latched. You can also consider elevating the coop off the ground to deter predators and adding a predator-proof outdoor run with secure fencing.
Proper ventilation is crucial for maintaining a healthy environment inside your quail coop. To ensure good airflow, include vents or windows near the top of the coop to allow warm air to escape. Make sure these openings are covered with hardware cloth to keep predators out. Additionally, consider adjustable vents that can be opened or closed depending on the weather conditions to maintain an optimal climate inside the coop.
Conclusion:
Building your own DIY quail hutch will give you happiness and satisfaction. My guide will show you exactly how to get started and help at every step.


